Lab:Install and configure a (nested) vSphere SDDC
In this lab I am working with the following software and versions:
| Software | Version | Filename |
|---|---|---|
| VMware vCenter Server Appliance | 7.00U3G | VMware-VCSA-all-7.0.3-20150588.iso |
| VMware ESXi Server | 7.00U3F | VMware-VMvisor-Installer-7.0U3f-20036589.x86_64.iso |
- Deploy a vCenter server
- Deploy 6 x ESXi hosts
- 3 x Compute hosts
- 3 x Edge hosts
- The vSphere environment has one Workload cluster and one Edge cluster that need to be configured.
- Prepare the full cluster for Compute with DRS and HA.
- Prepare another full cluster for Edge with DRS and HA.
- Create a VDS and Port Groups
- Add the ESXi hosts to the vSphere Clusters
- Configure VSAN
One of the prerequisites when you are installing NSX is a working SDDC based on vSphere.
There are different designs available when it comes to the deployment of your vSphere Infrastructure]. Compute, Storage, and vSphere Infrastructure
In this section I will tell you how to deploy/configure a vCenter Server with some ESXi hosts so that you can use this environment as a starting point to Install and configure NSX.
As I am doing a nested deployment and one can loose track on what is happening where I have created the figure below for better understanding.
Figure 1:
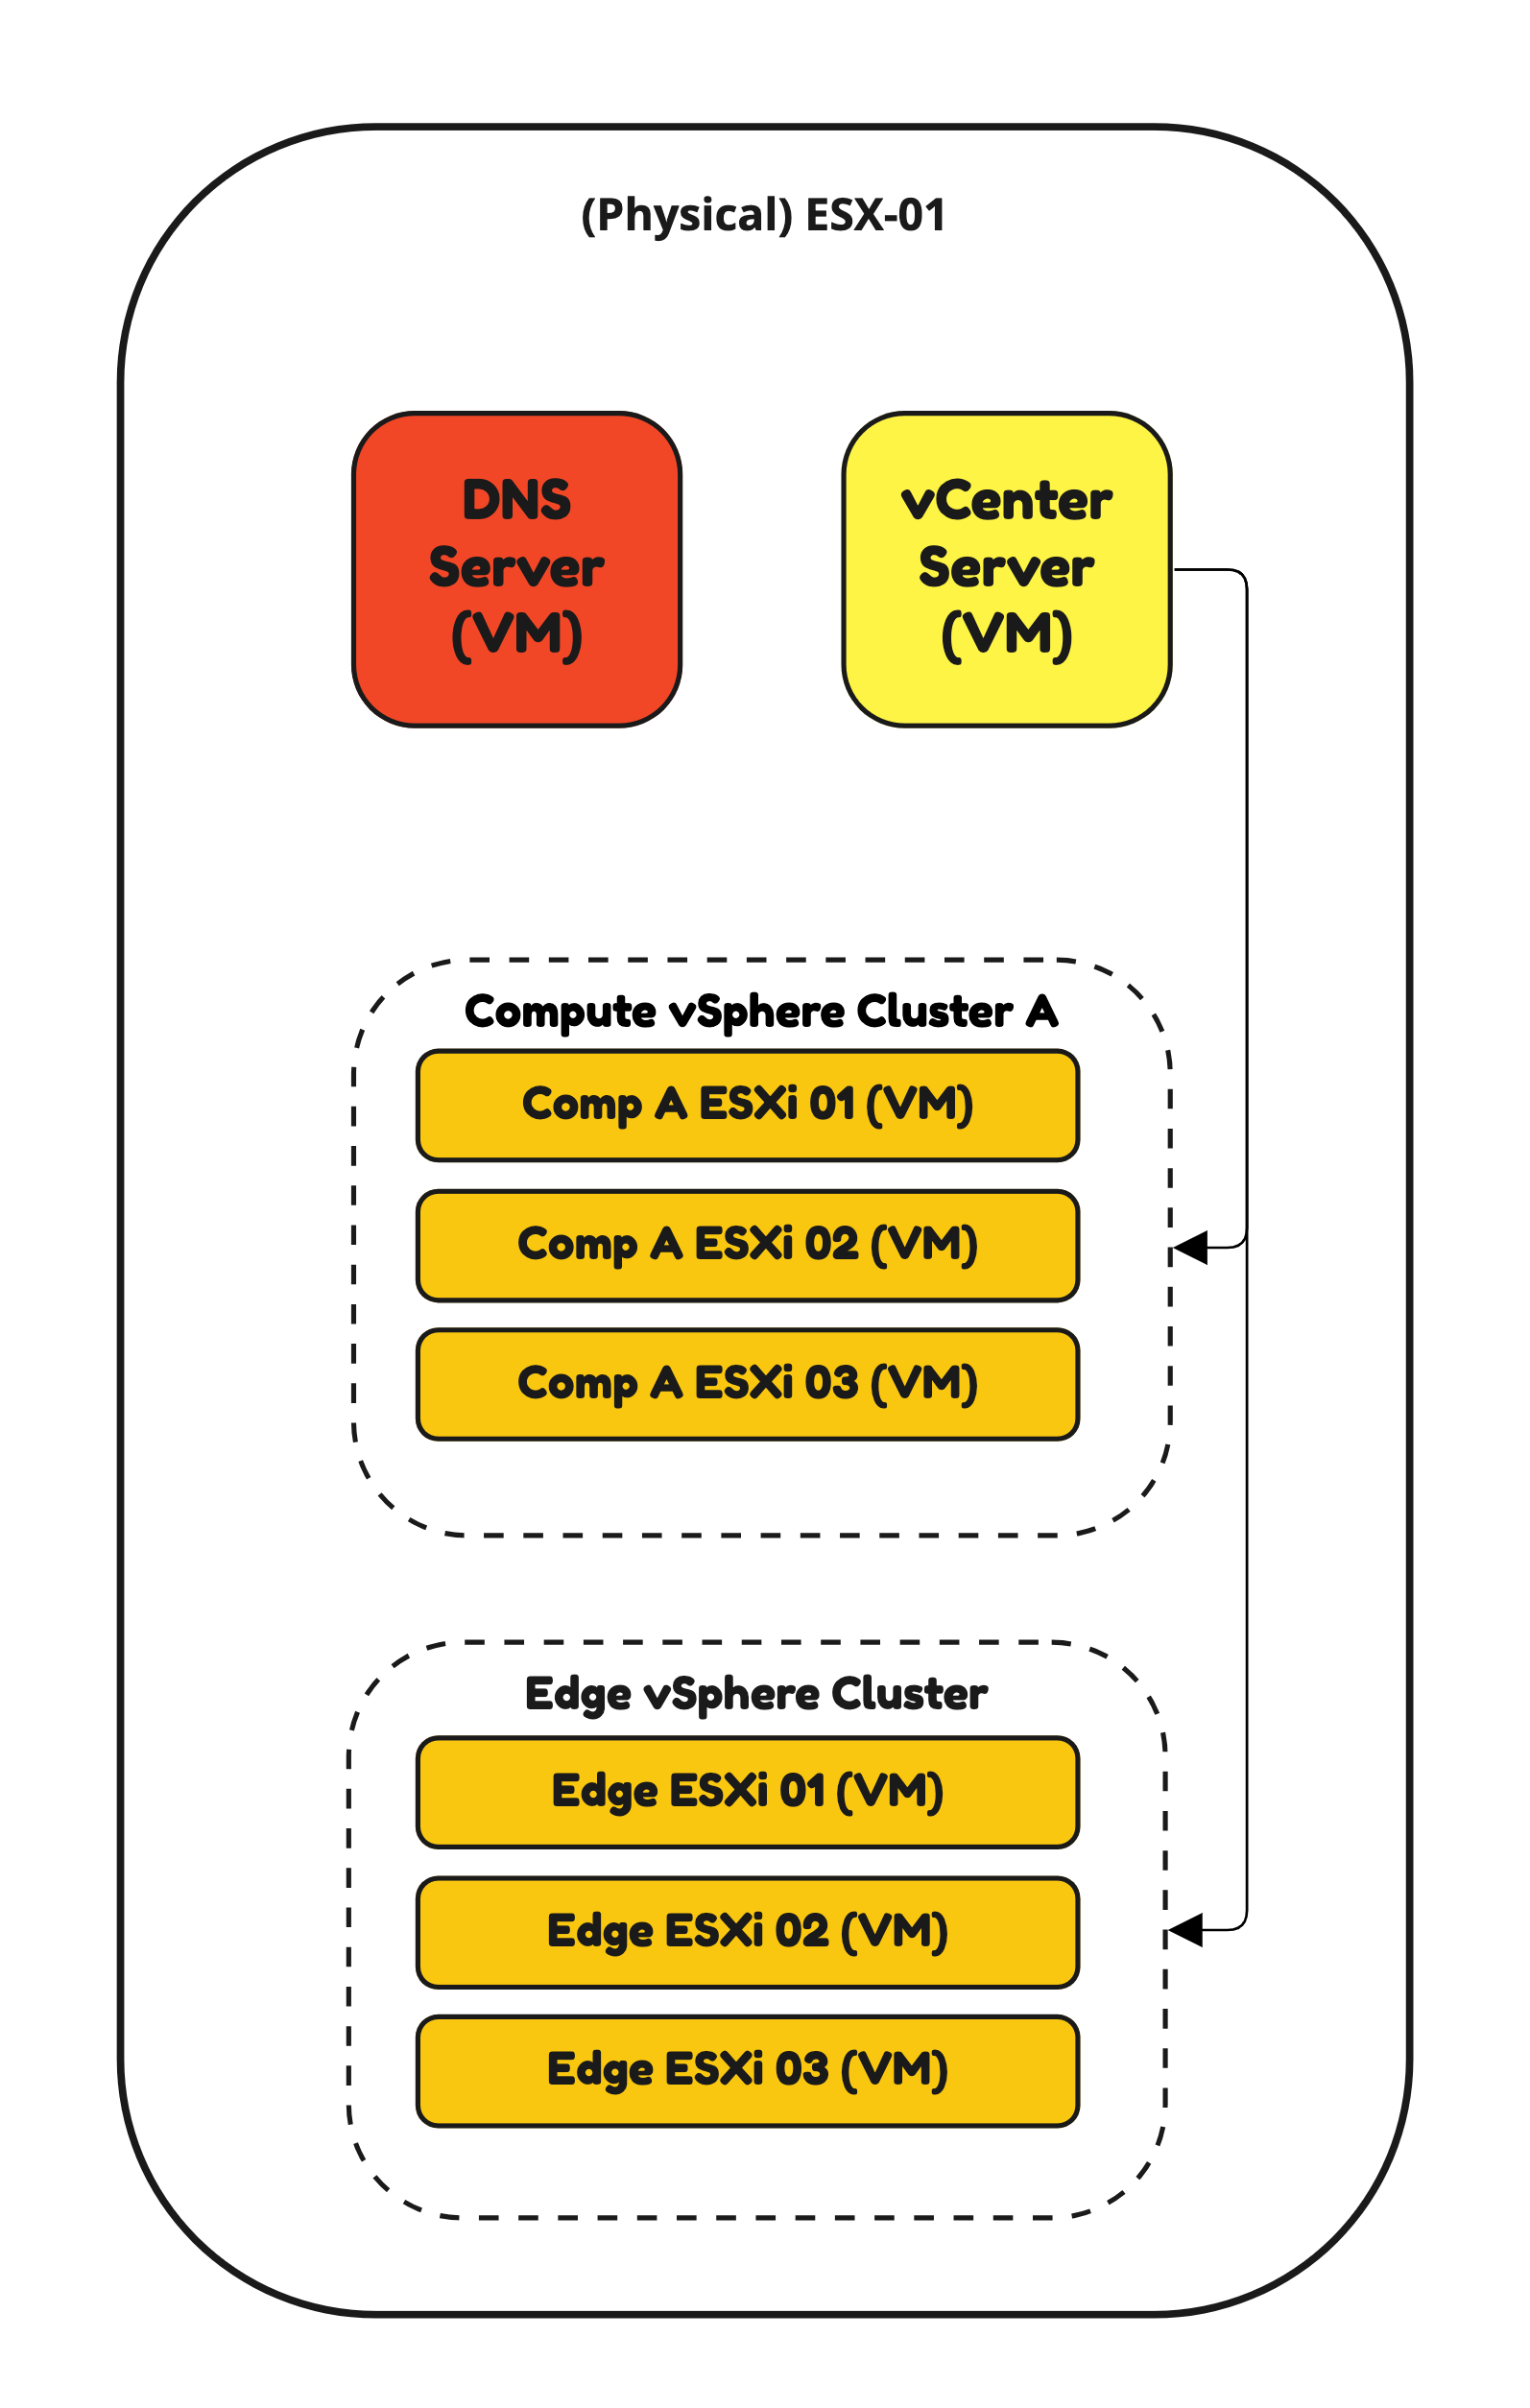
⚠️ In this article I am building the nested lab as per Figure 1.
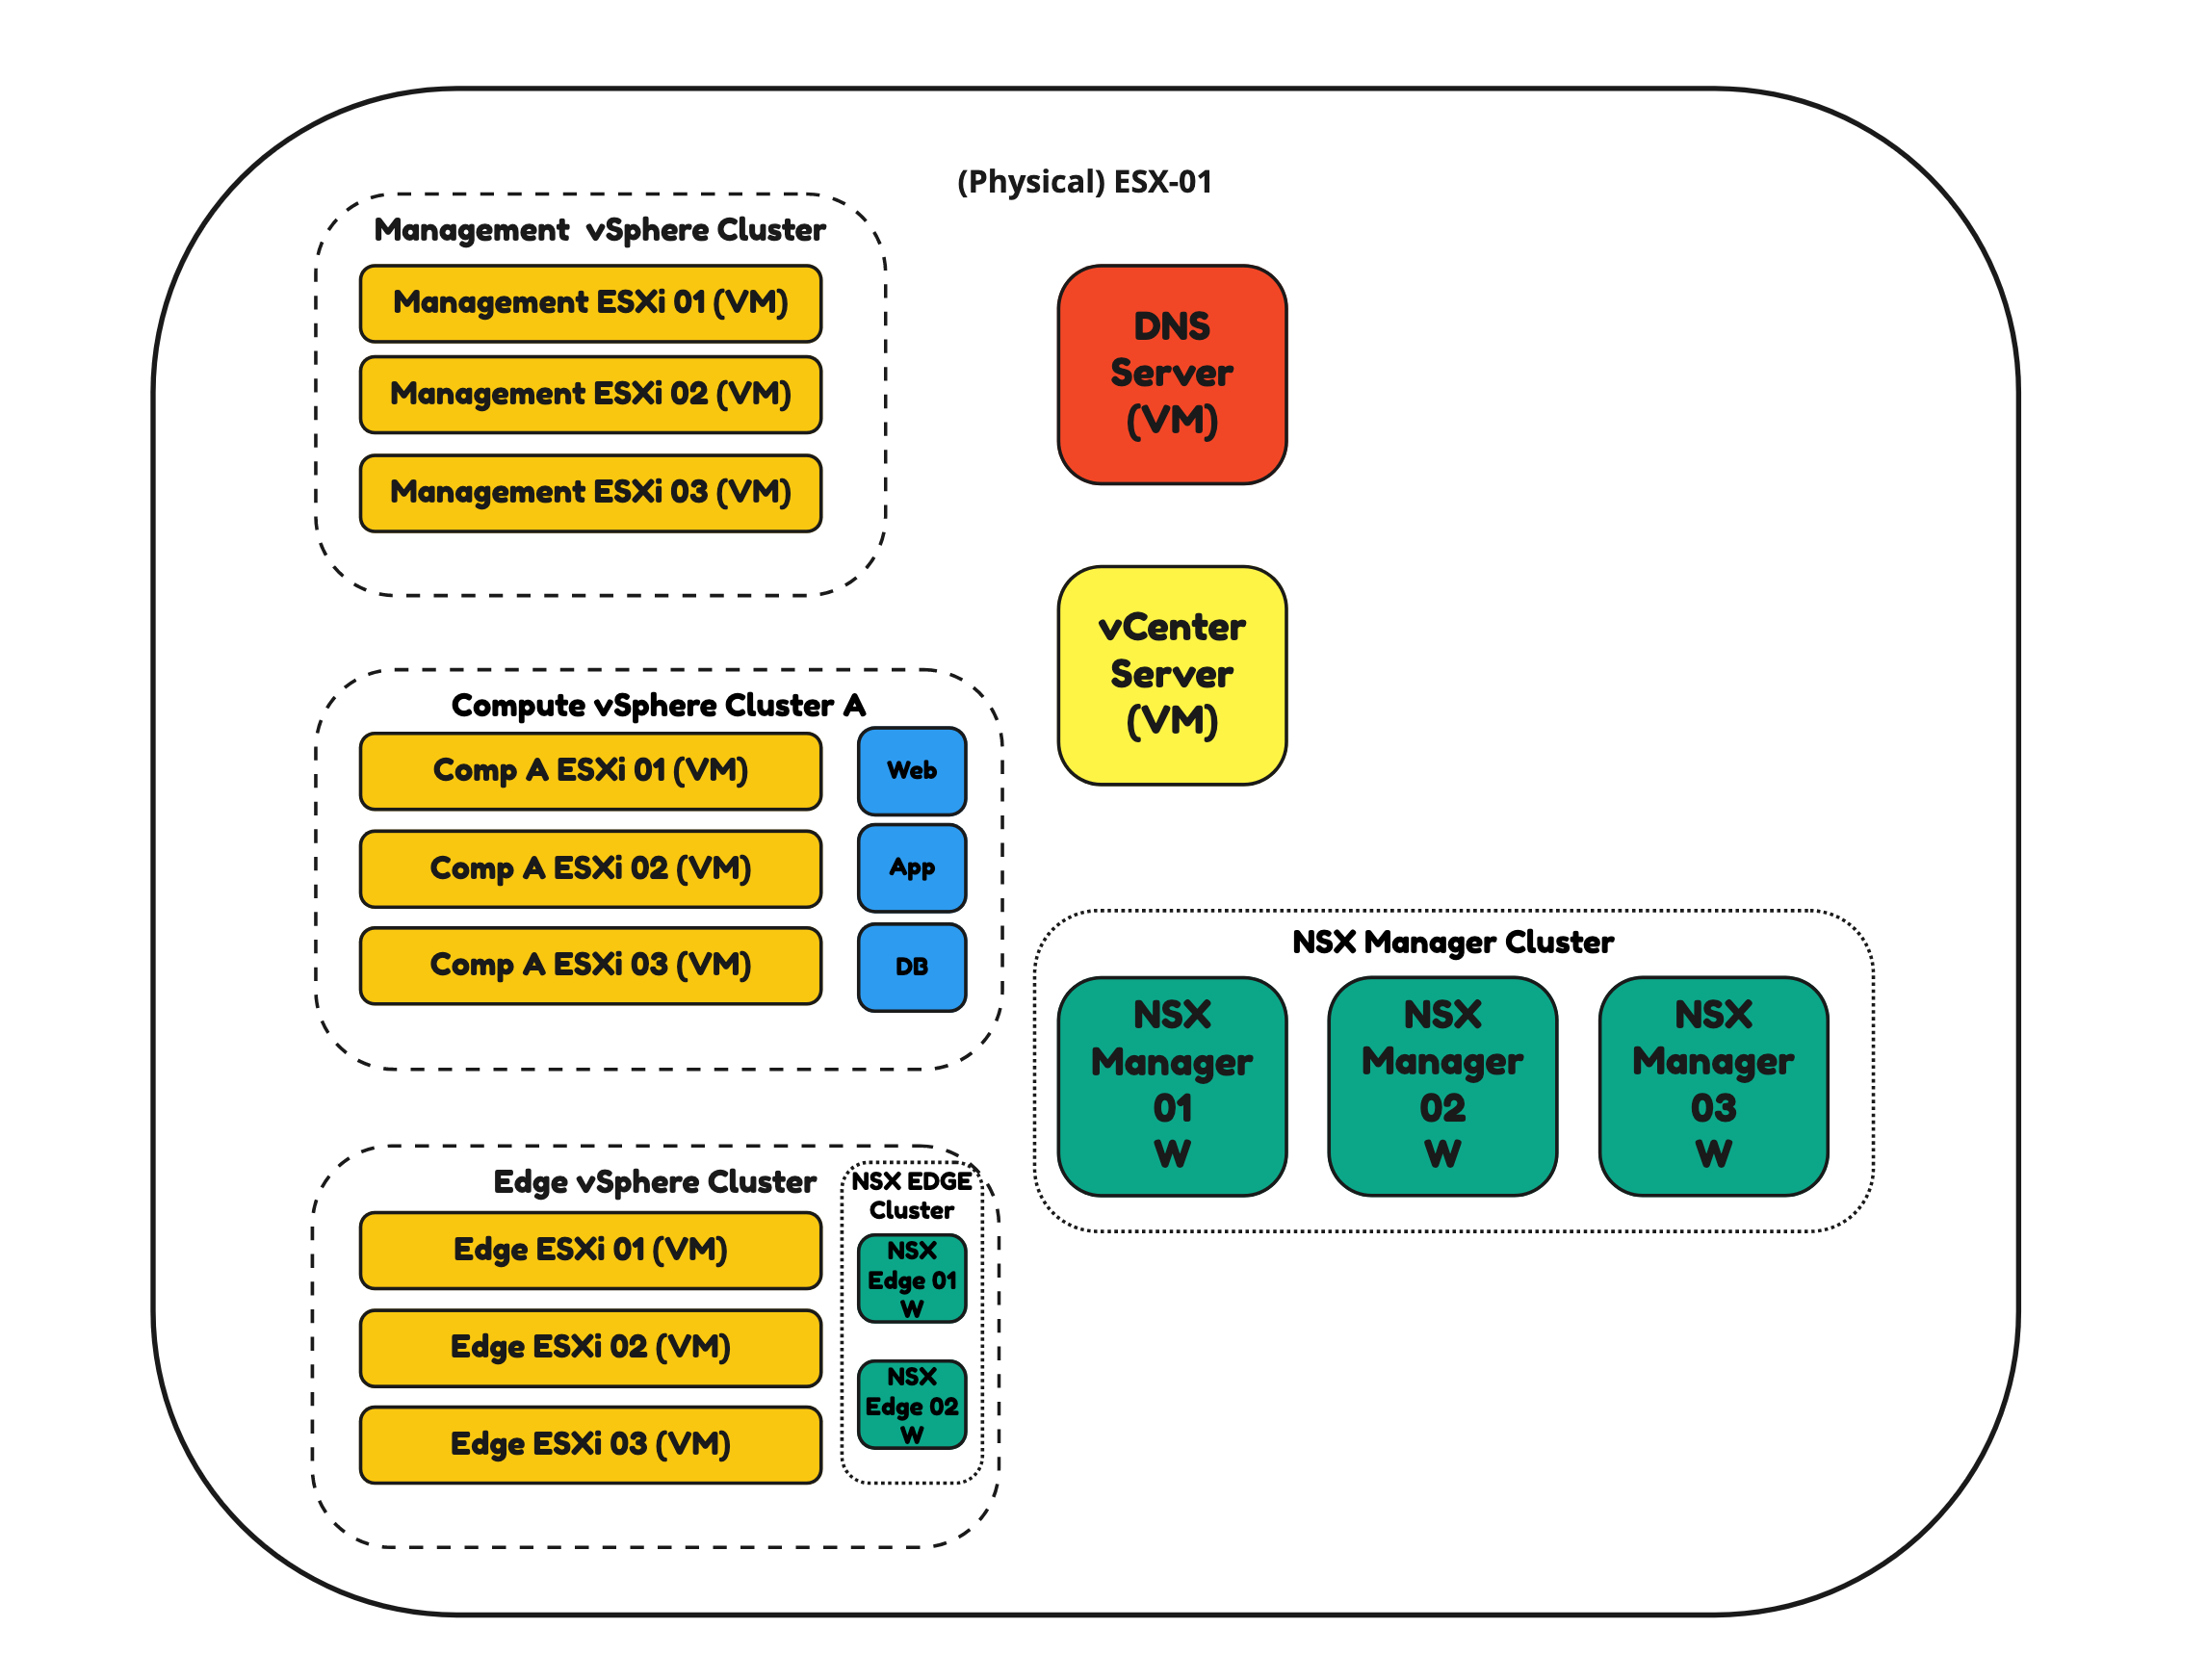
When I add NSX later in this nested setup Figure 2 would look something like this:
Figure 2:
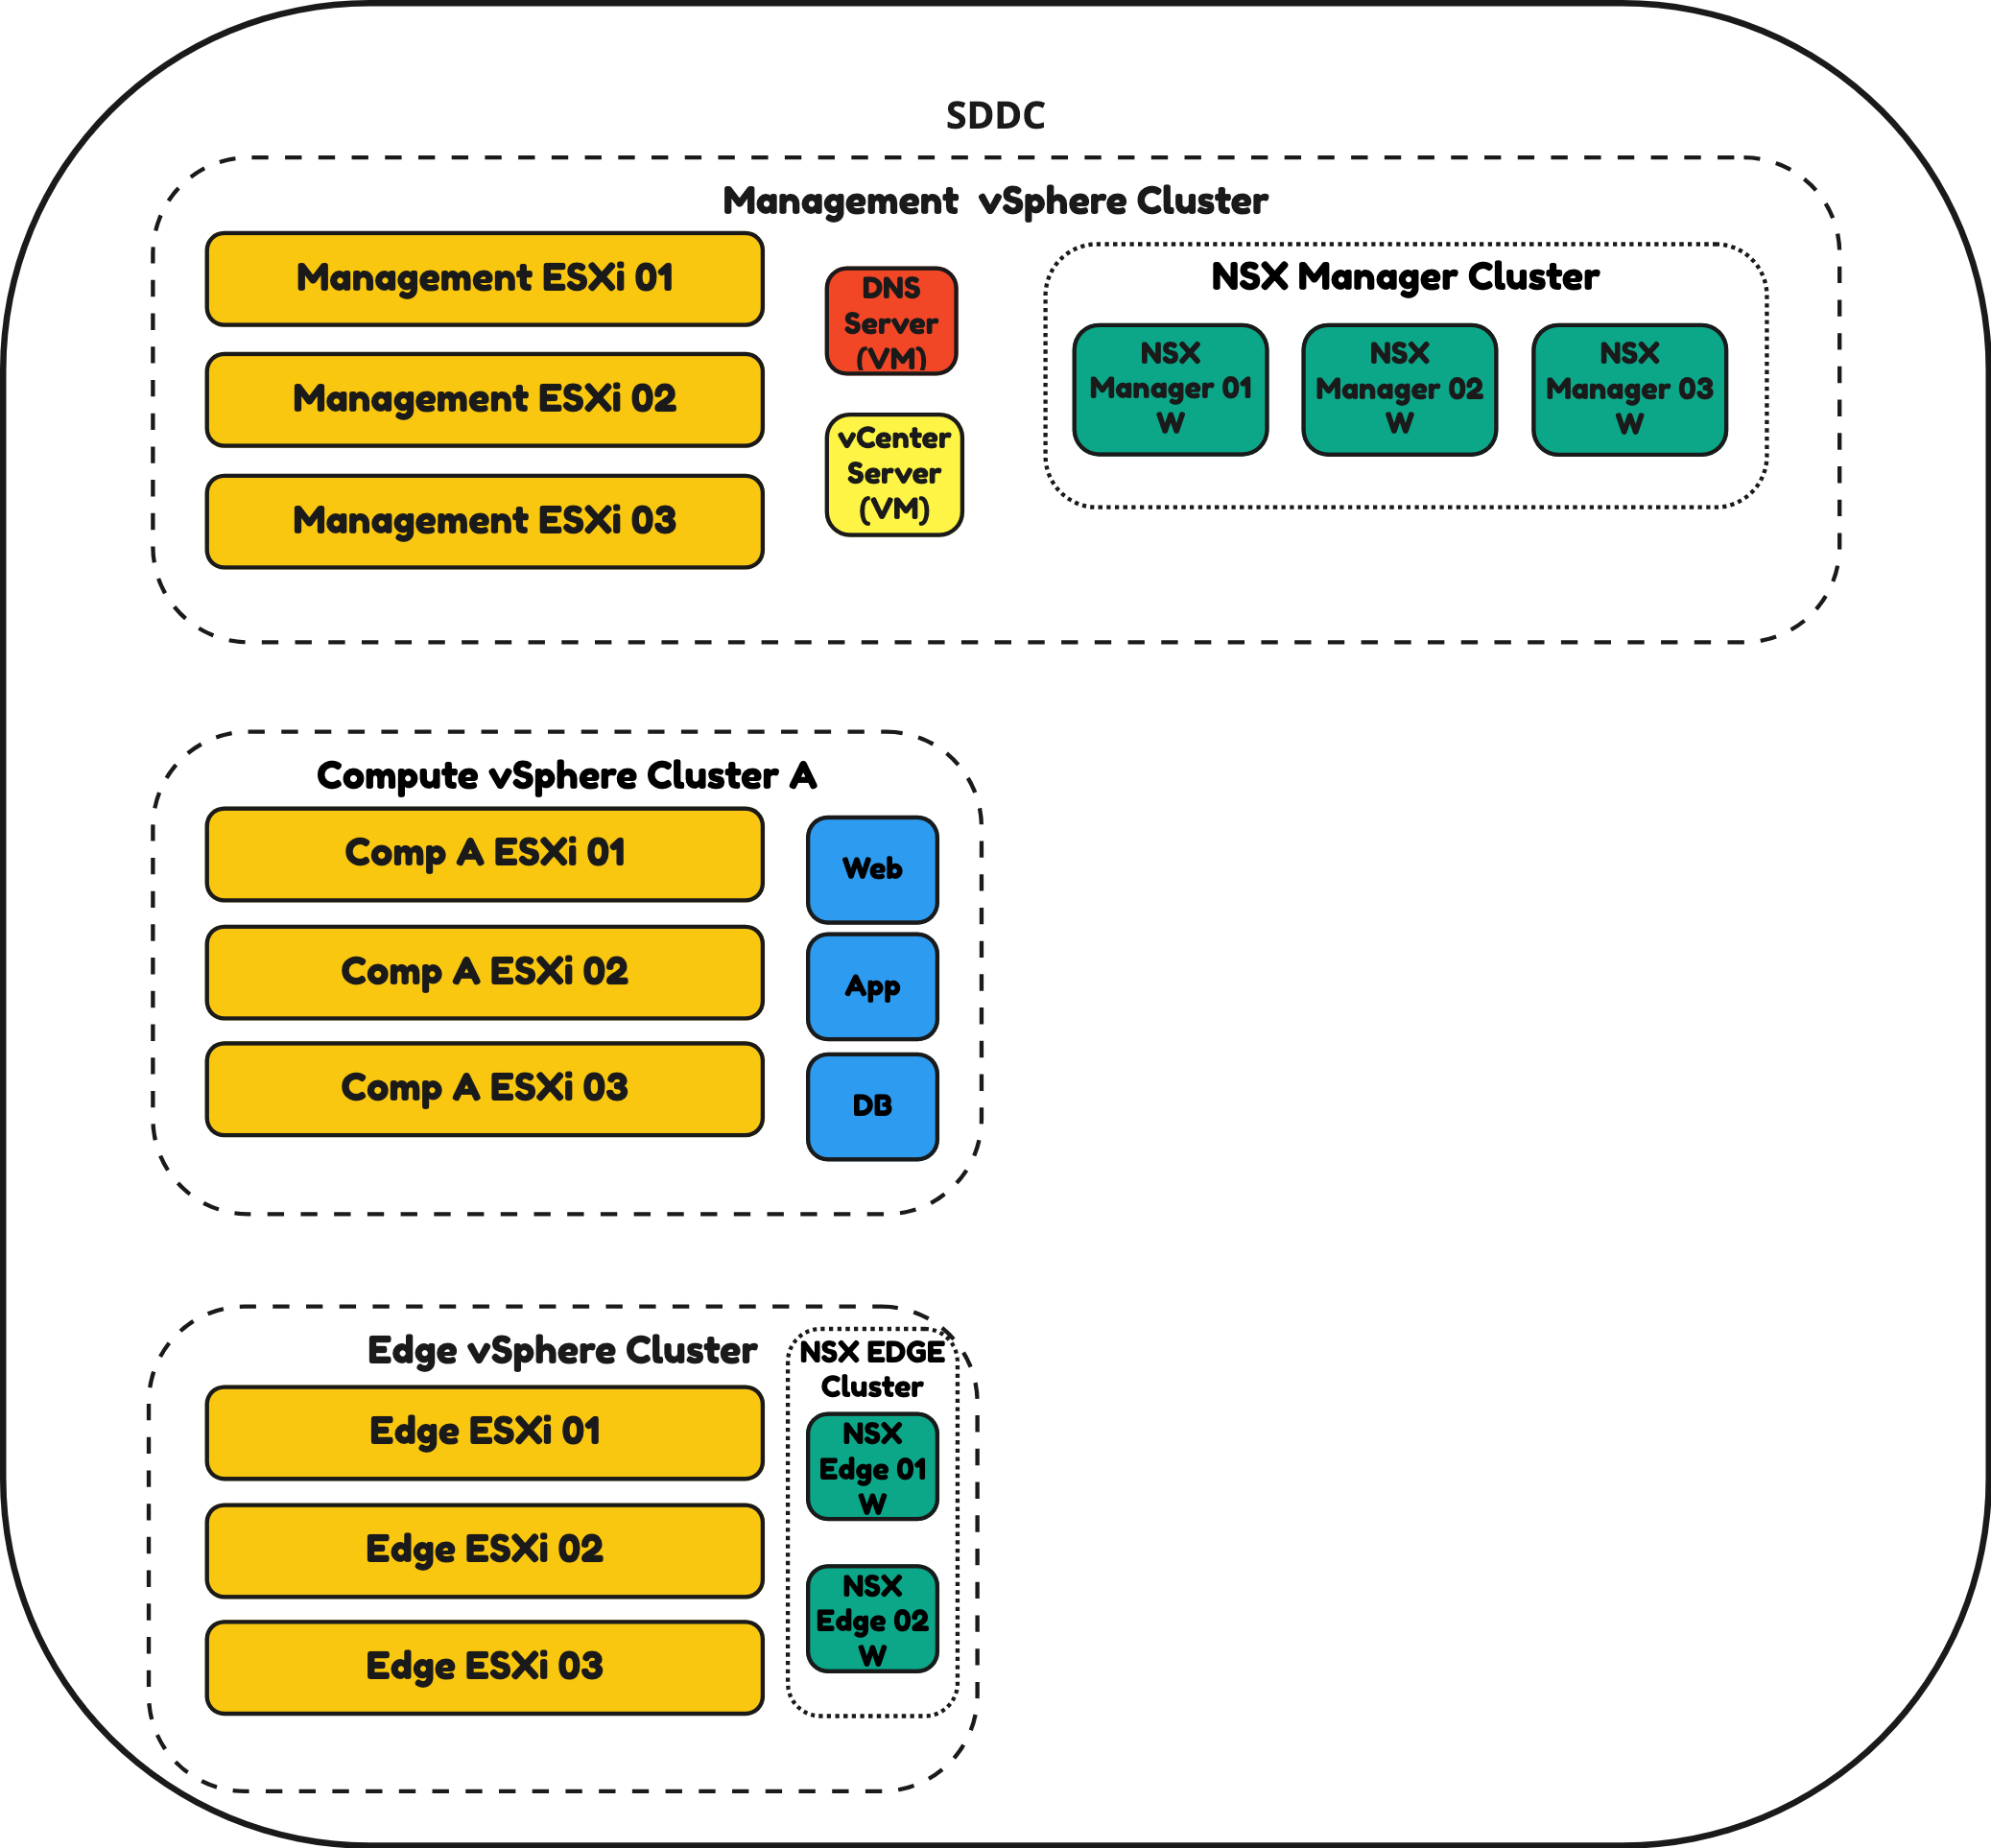
When I would deploy this in a non-nested environment Figure 3 would look like this:
Figure 3:
The Steps
When you have DNS working, the next step is to deploy your vSphere infrastructure. Lab:Install and configure a DNS Server using BIND
- STEP 1: Deploy a vCenter Server (Appliance)
- STEP 2: Configure vCenter Server
- STEP 3: Deploy the ESXi
- STEP 4: Add the ESXi Servers to a vSphere Cluster and configure VSAN
- STEP 5: Install the Licences for the vCenter Server, ESXi Servers and VSAN
STEP 1» Deploy a vCenter Server 〈Appliance〉
The vCenter Server is deployed on another vSphere environment (nested) and this requires a different installation approach using two stages. You will need to deploy the vCenter Server using the .ova file. The .ova file can be retrieved from the vCenter Server ISO file that you can download from the VMware website.
⚠️ There are multiple ways to deploy a vCenter Server, for example using the VCSA deploy tool with the JSON file as input. This method will not be used in this article.
STAGE 1 Deployment
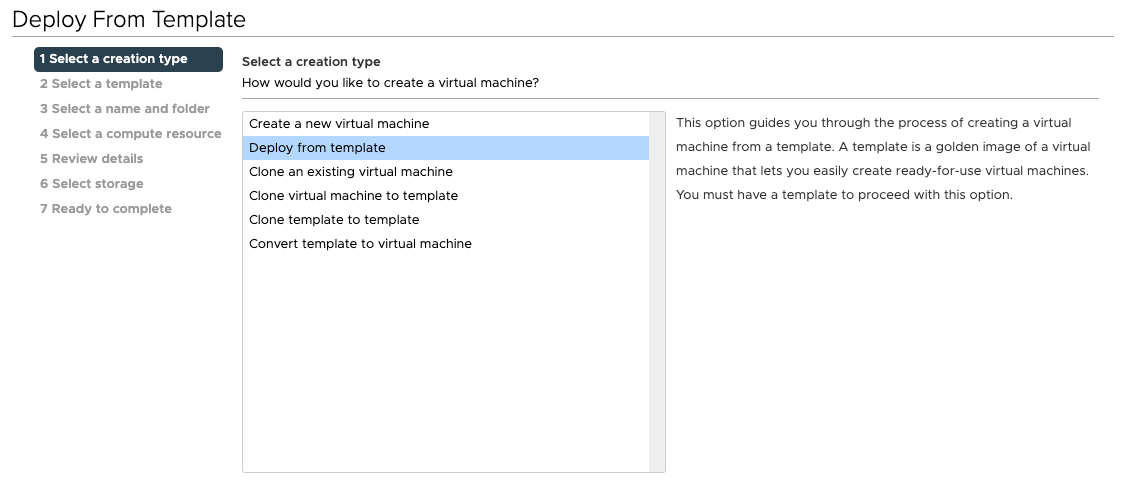
Create a new Virtual Machine:
Select: Deploy from template:
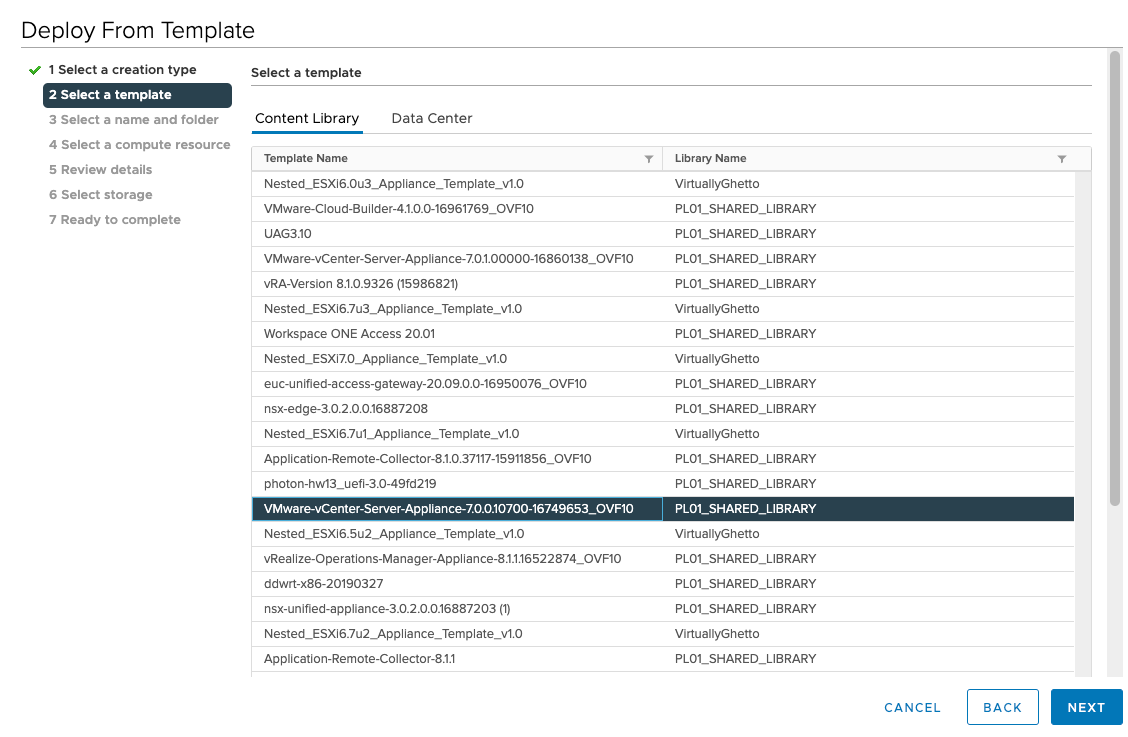
Choose the OVA/OVF Template you want to deploy from:
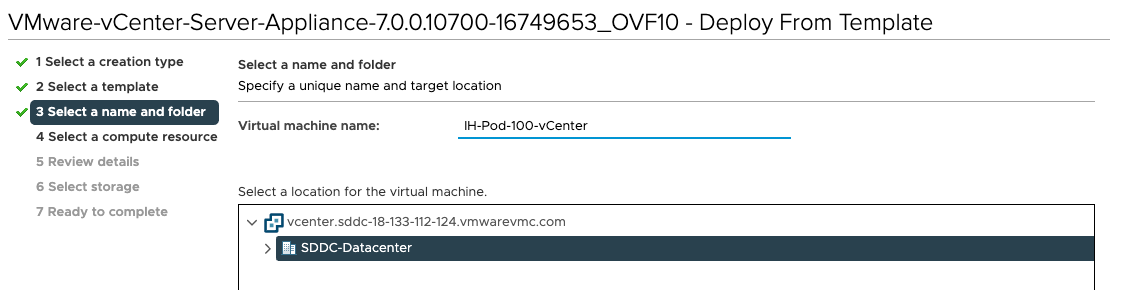
Provide a Virtual Machine name:
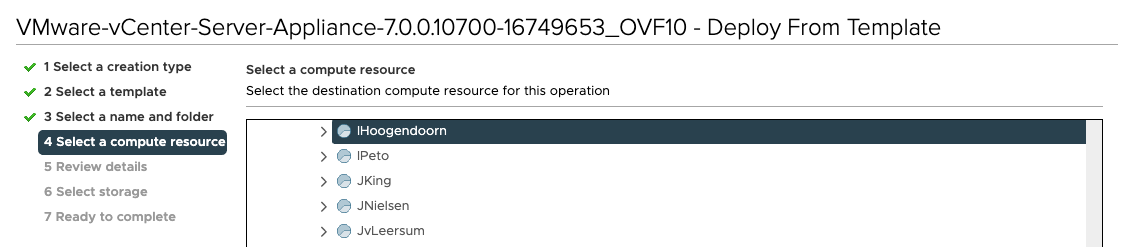
Select the correct Resource Pool (the one with your name on it):
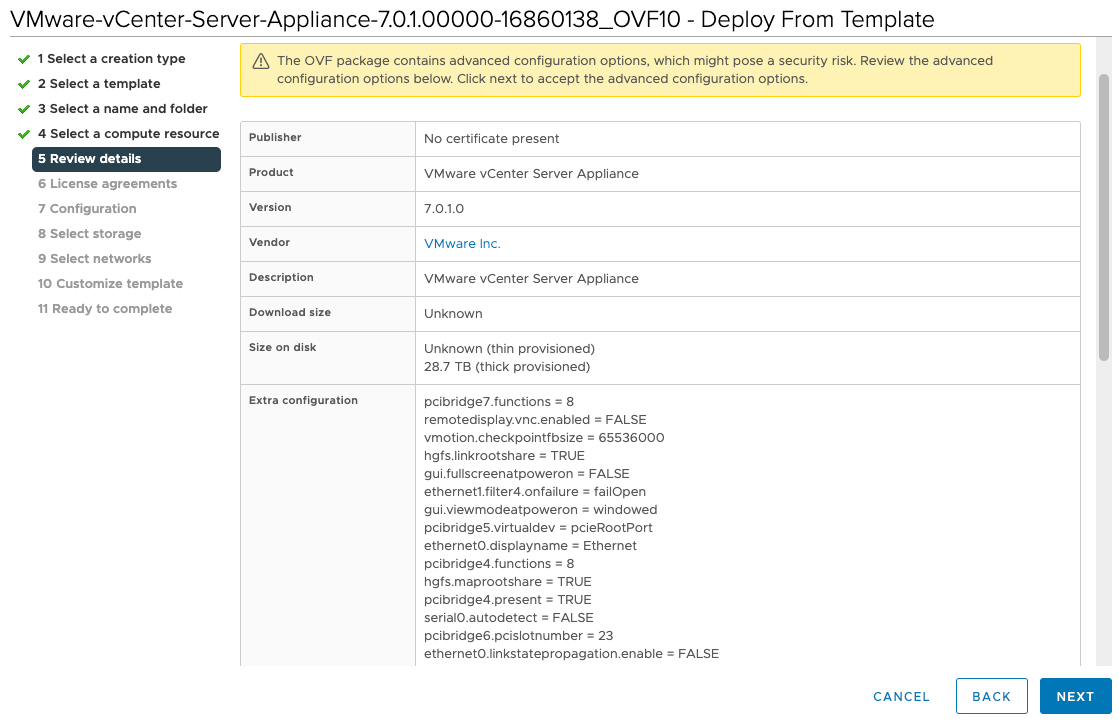
Review the details:
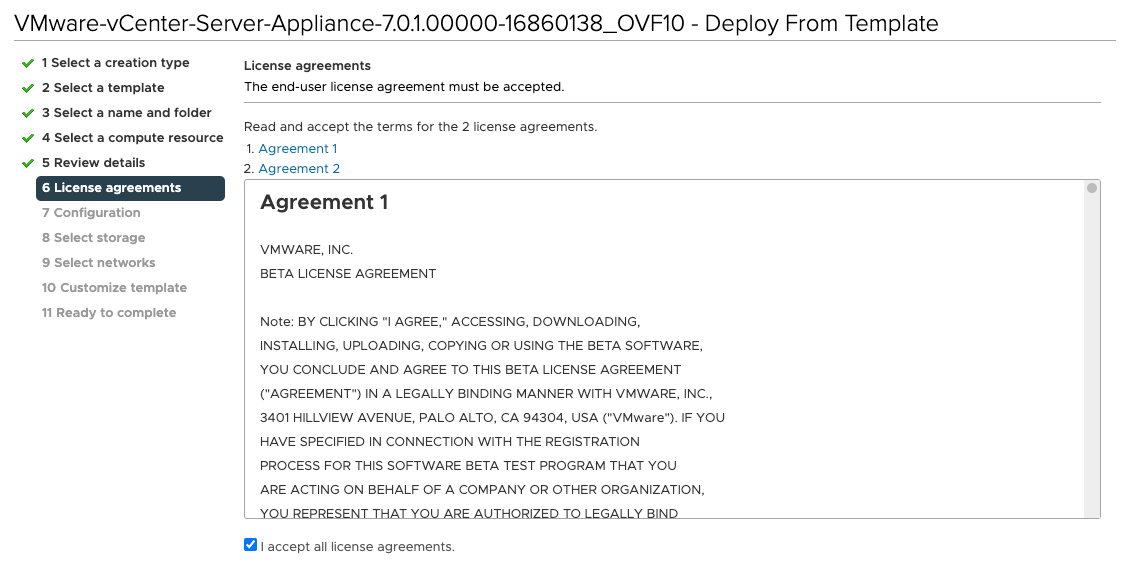
Accept the licence agreement:
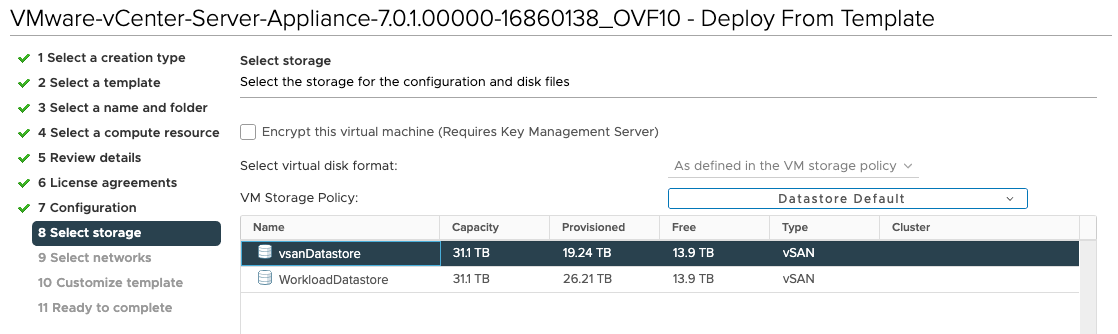
Select the Storage:
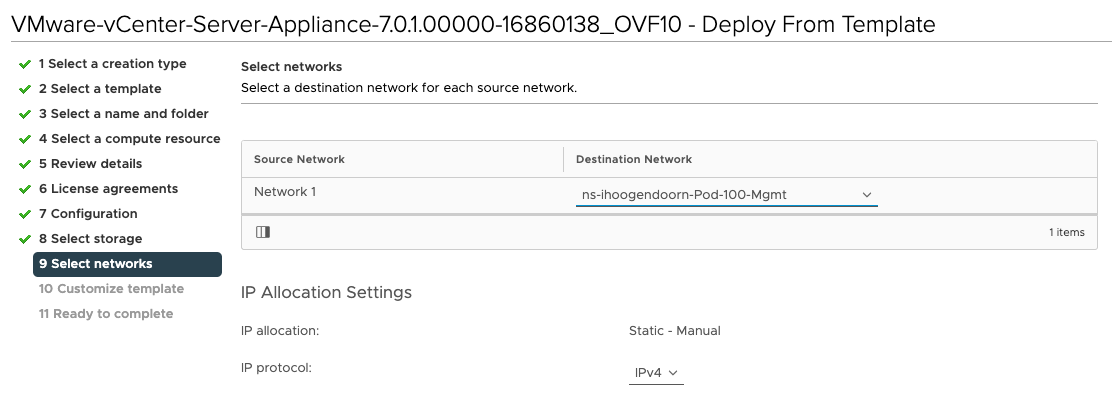
Select the destination network:
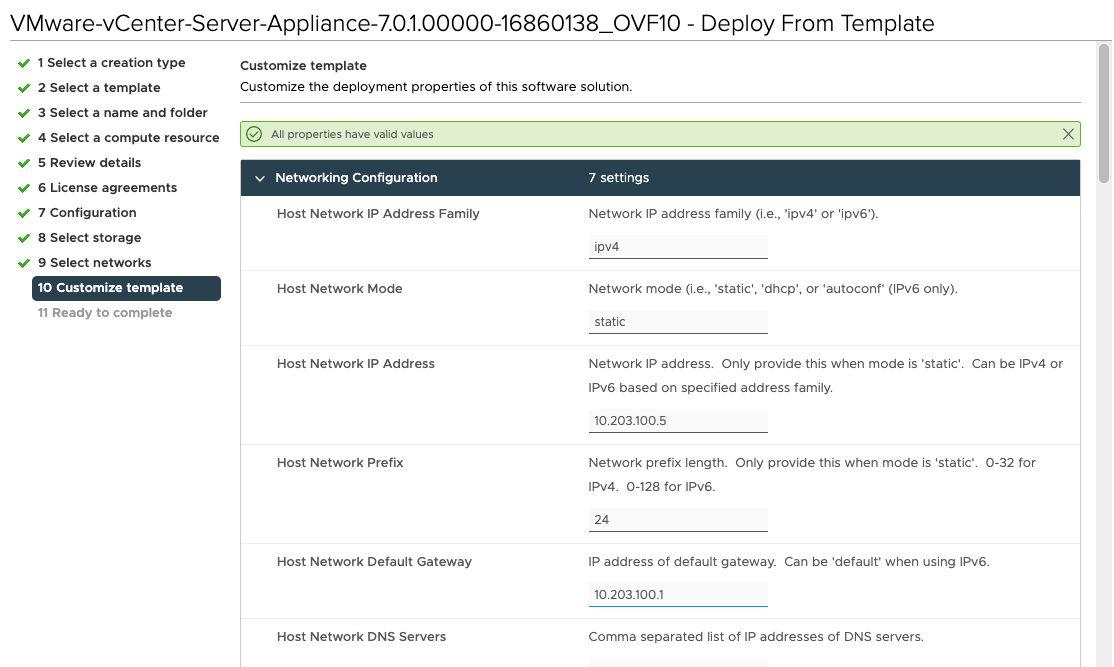
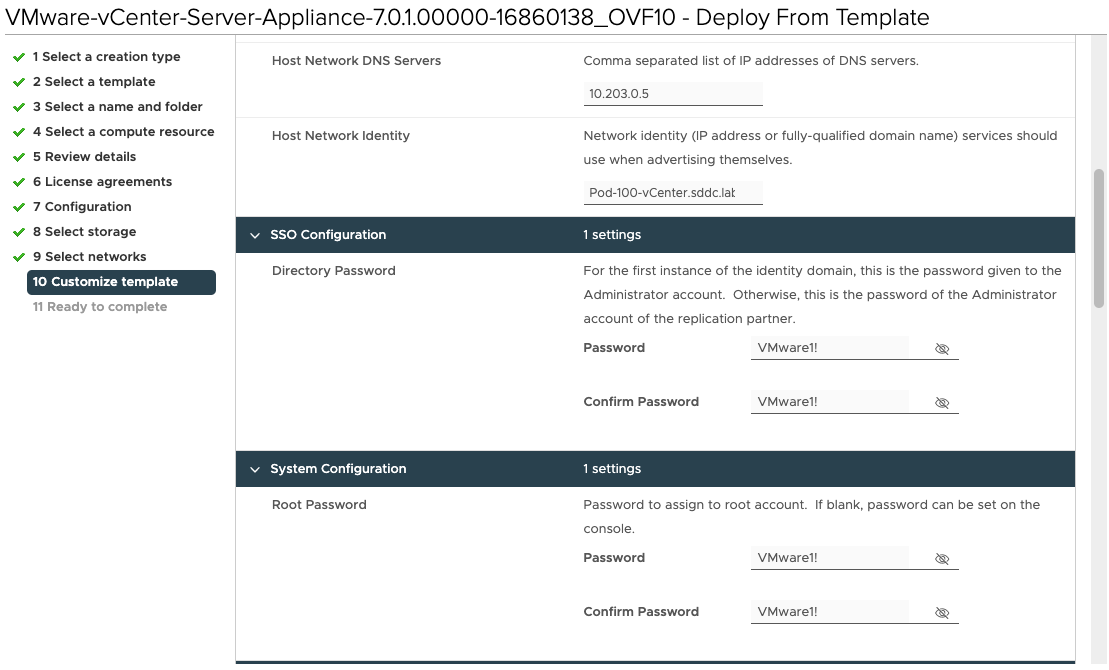
Specify the template specific properties like passwords, IP address, DNS, default gateway settings, etc.:
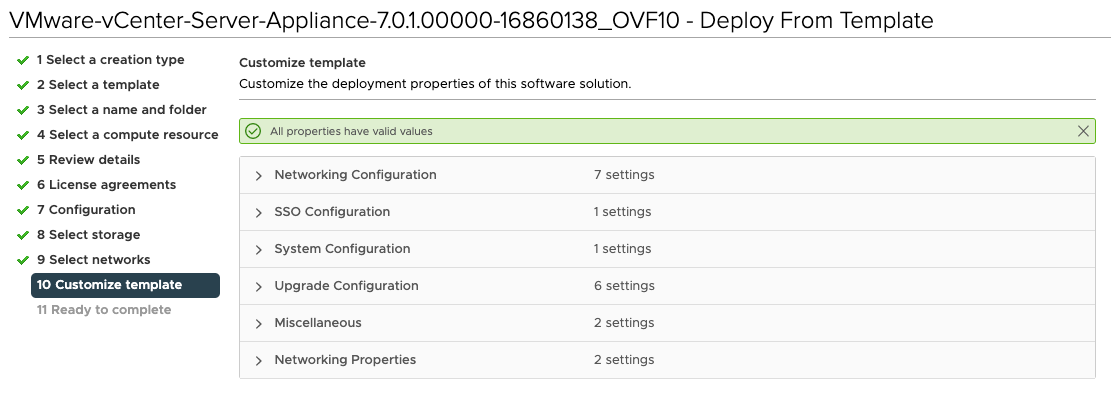
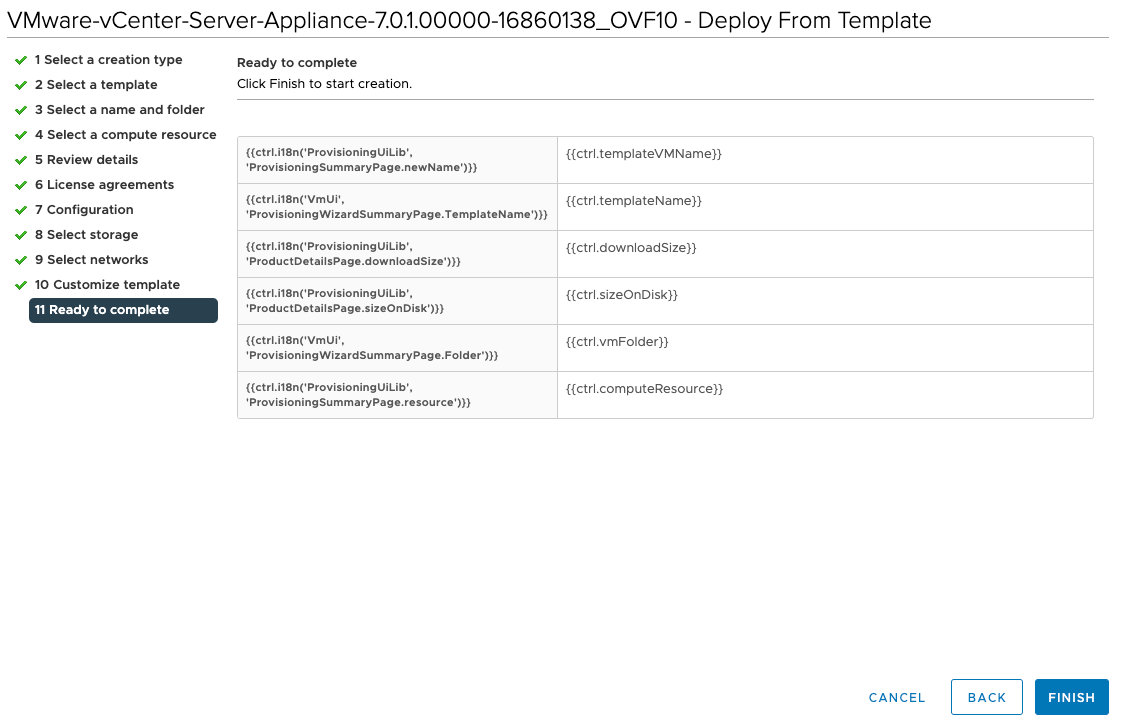
Review the Summary before you start the actual deploy:
Power on the Virtual Machine:
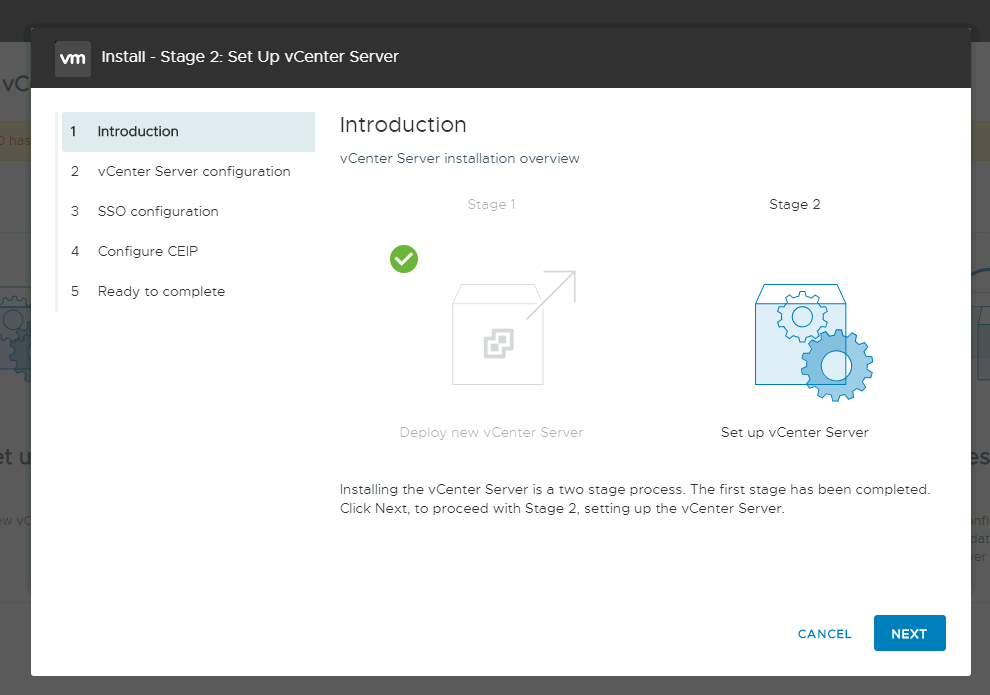
STAGE 2 Deployment
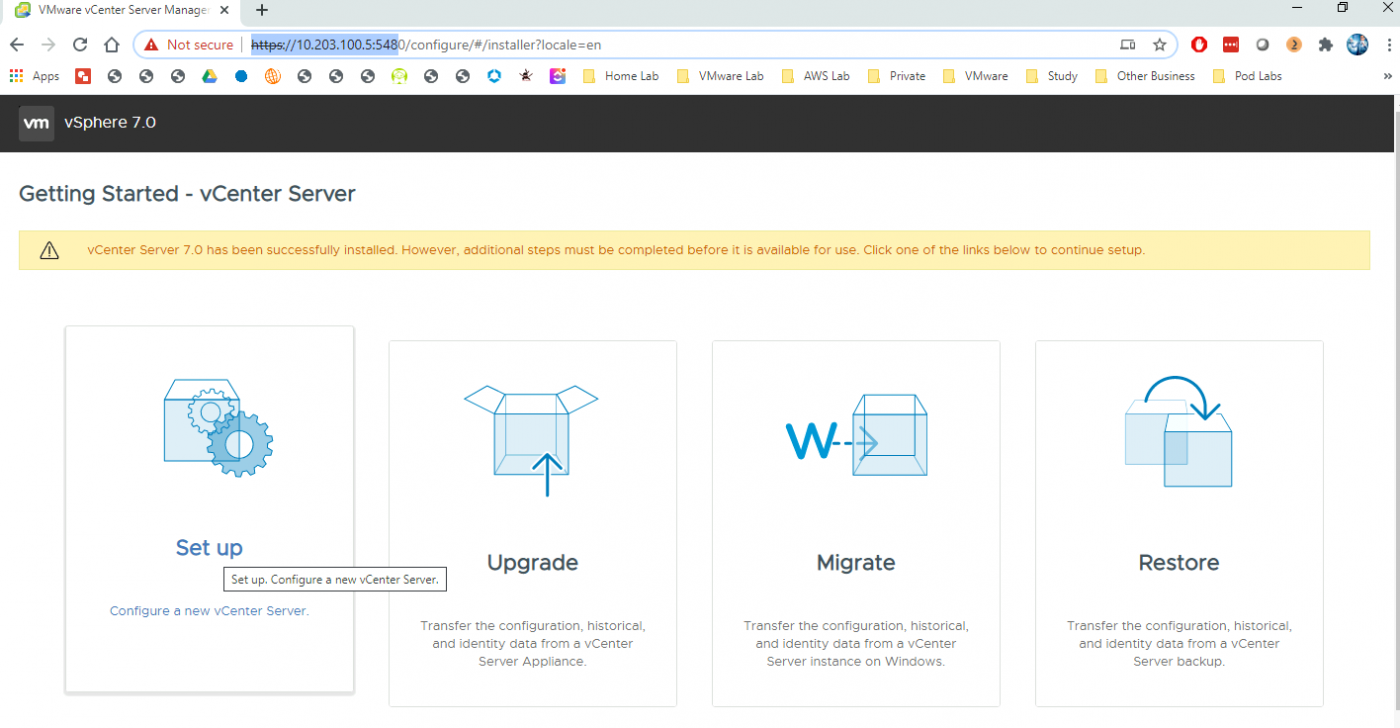
When you powered on the Virtual machine, you have only completed the STAGE 1 vCenter Server deployment, and we still need to complete the STAGE 2 deployment.
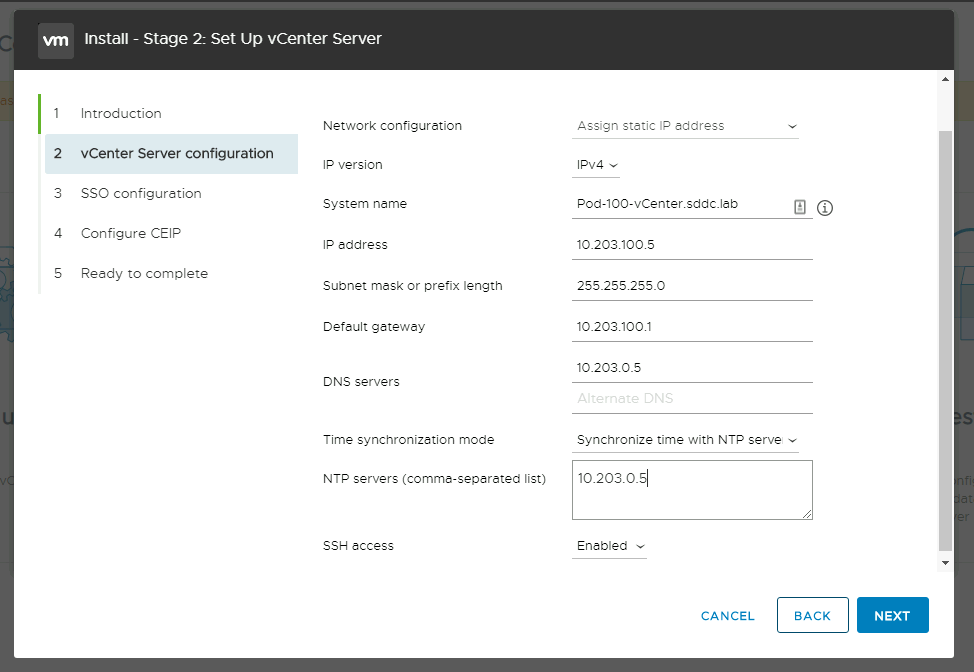
To do this, you need to browse from the Stepstone to https://10.203.100.5:5480 (the vCenter Server Management IP address) Log in to the vCenter Server to complete the STAGE 2 deployment.
Click next:
Verify all the parameters, and select to synchronise your NTP with a selected NTP server.
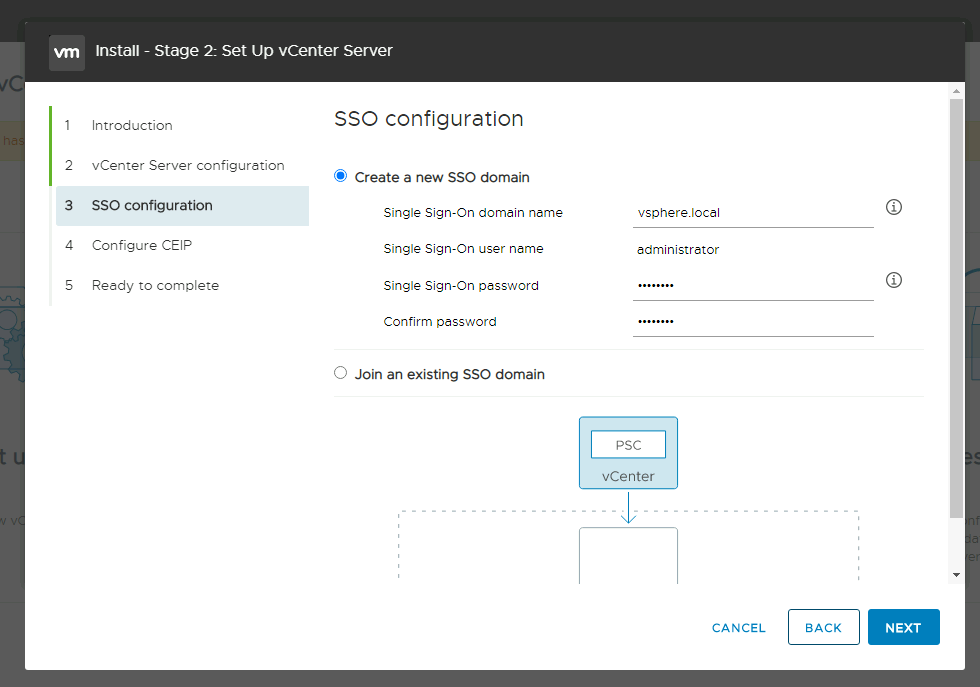
Specify the SSO configuration details:
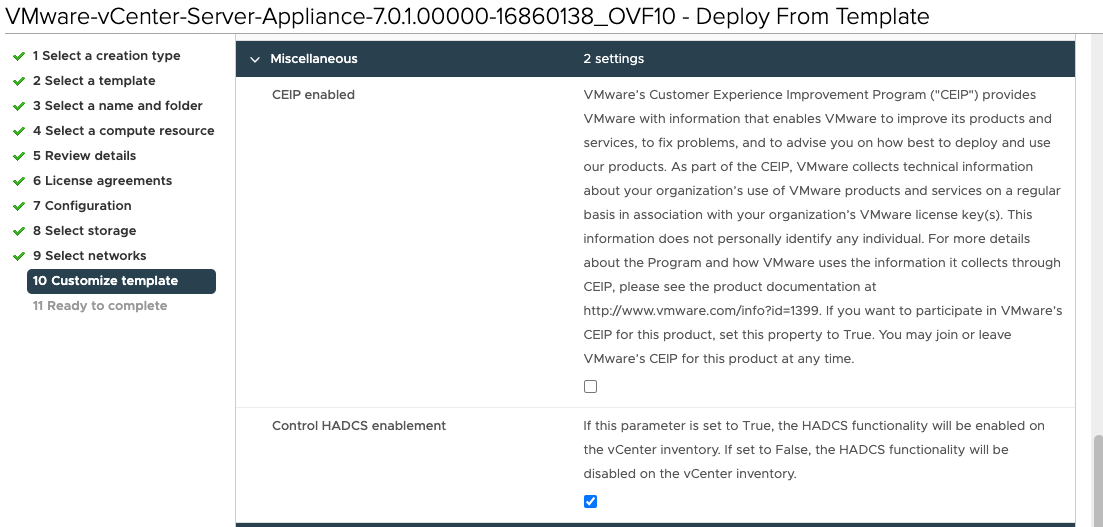
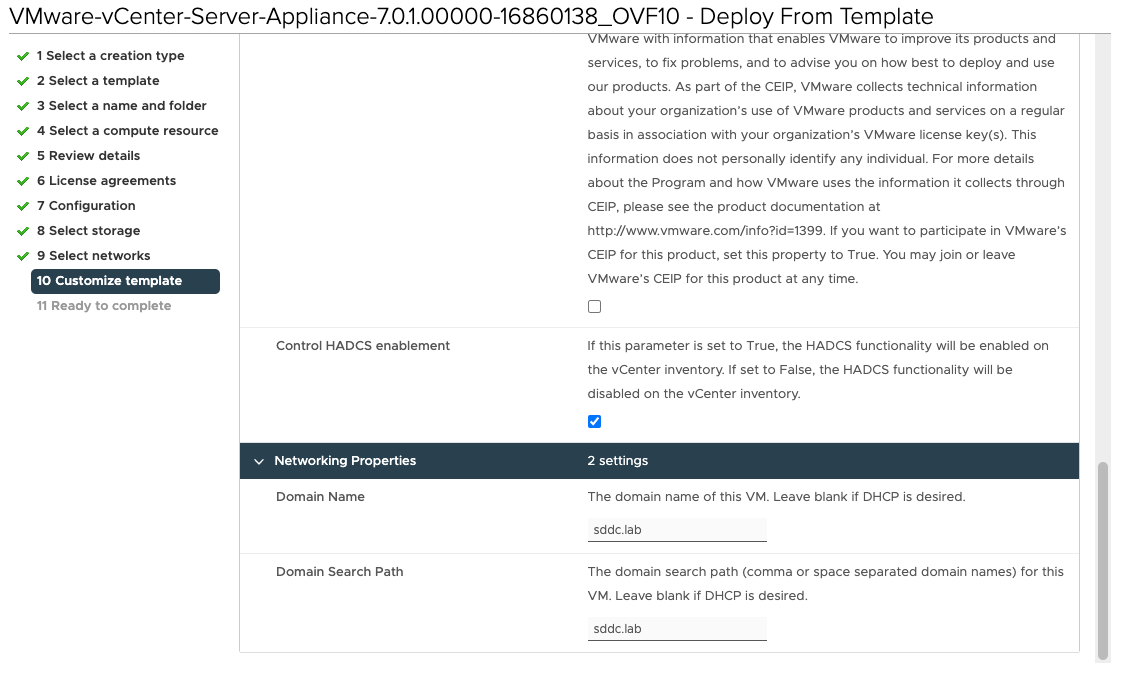
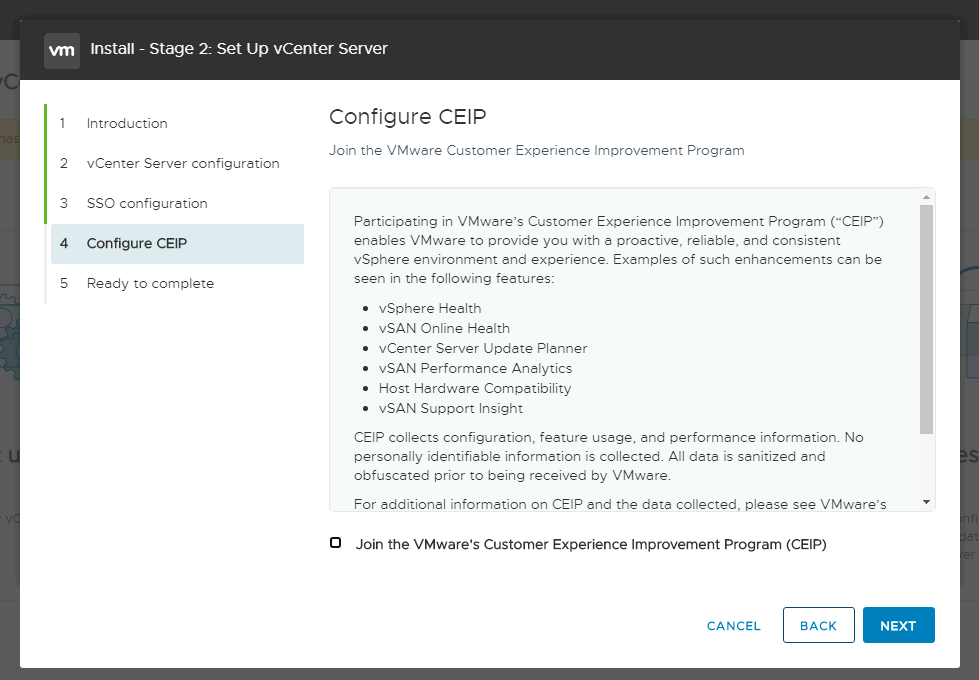
Configure CEIP (or not):
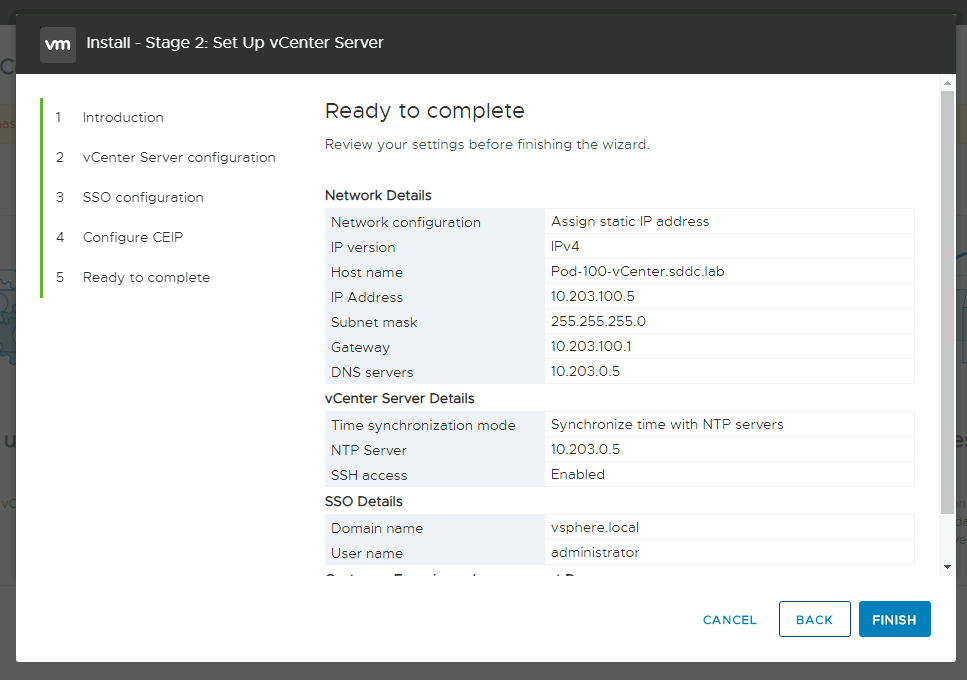
Review the final STAGE 2 configuration details and click finish to start the STAGE 2 deployment:
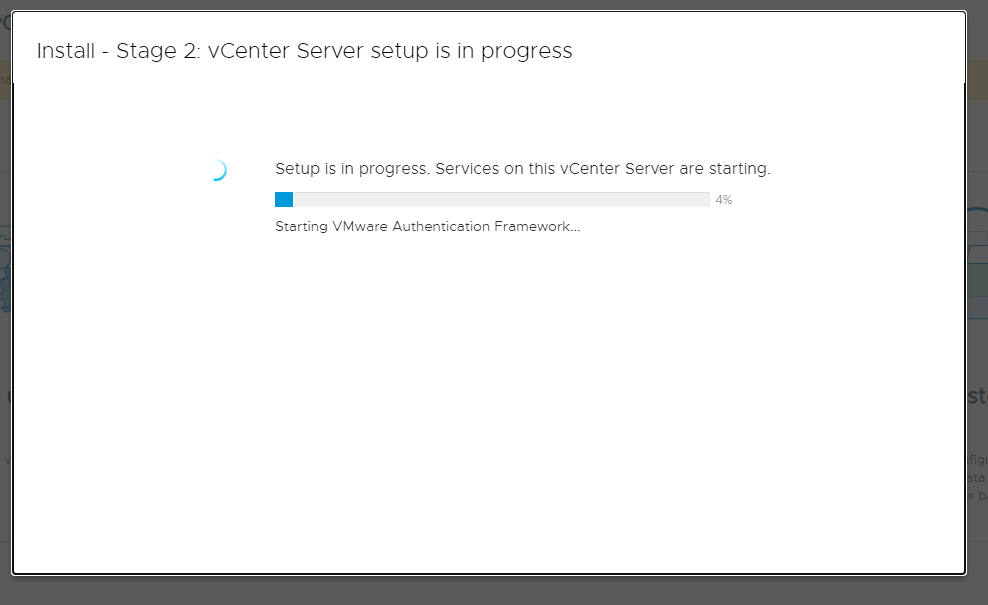
Watch the progress screen until it finishes.
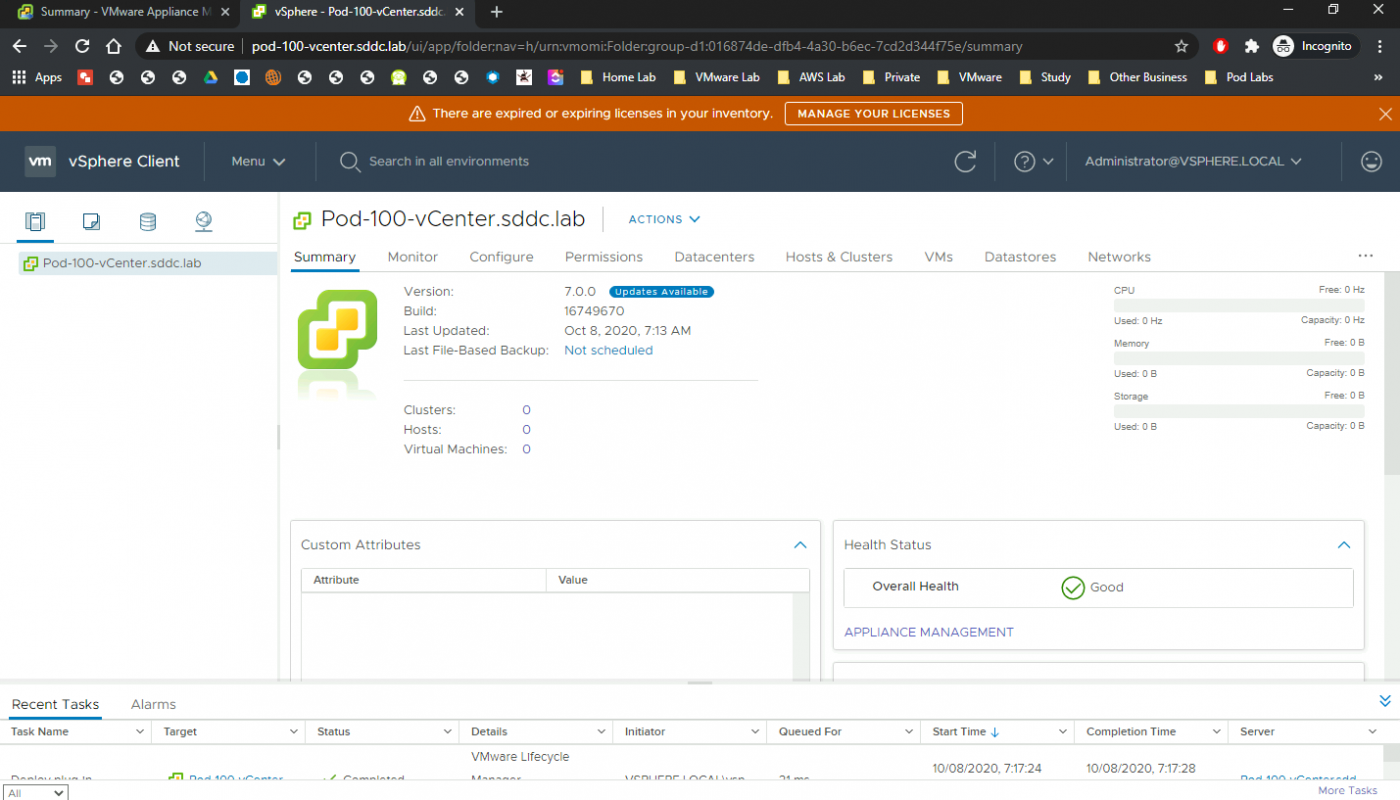
When STAGE 2 deployment is finished sometimes, you will get a screen that is finalised, and sometimes it does not do the auto-refresh properly, and it times out. The STAGE 2 deployment takes around 20 minutes, and after the deployment, you can refresh the screen and log in again and look at the vCenter Server Appliance summary screen:

Now you are ready to log into the vCenter Server GUI:
STEP 2» Configure vCenter Server
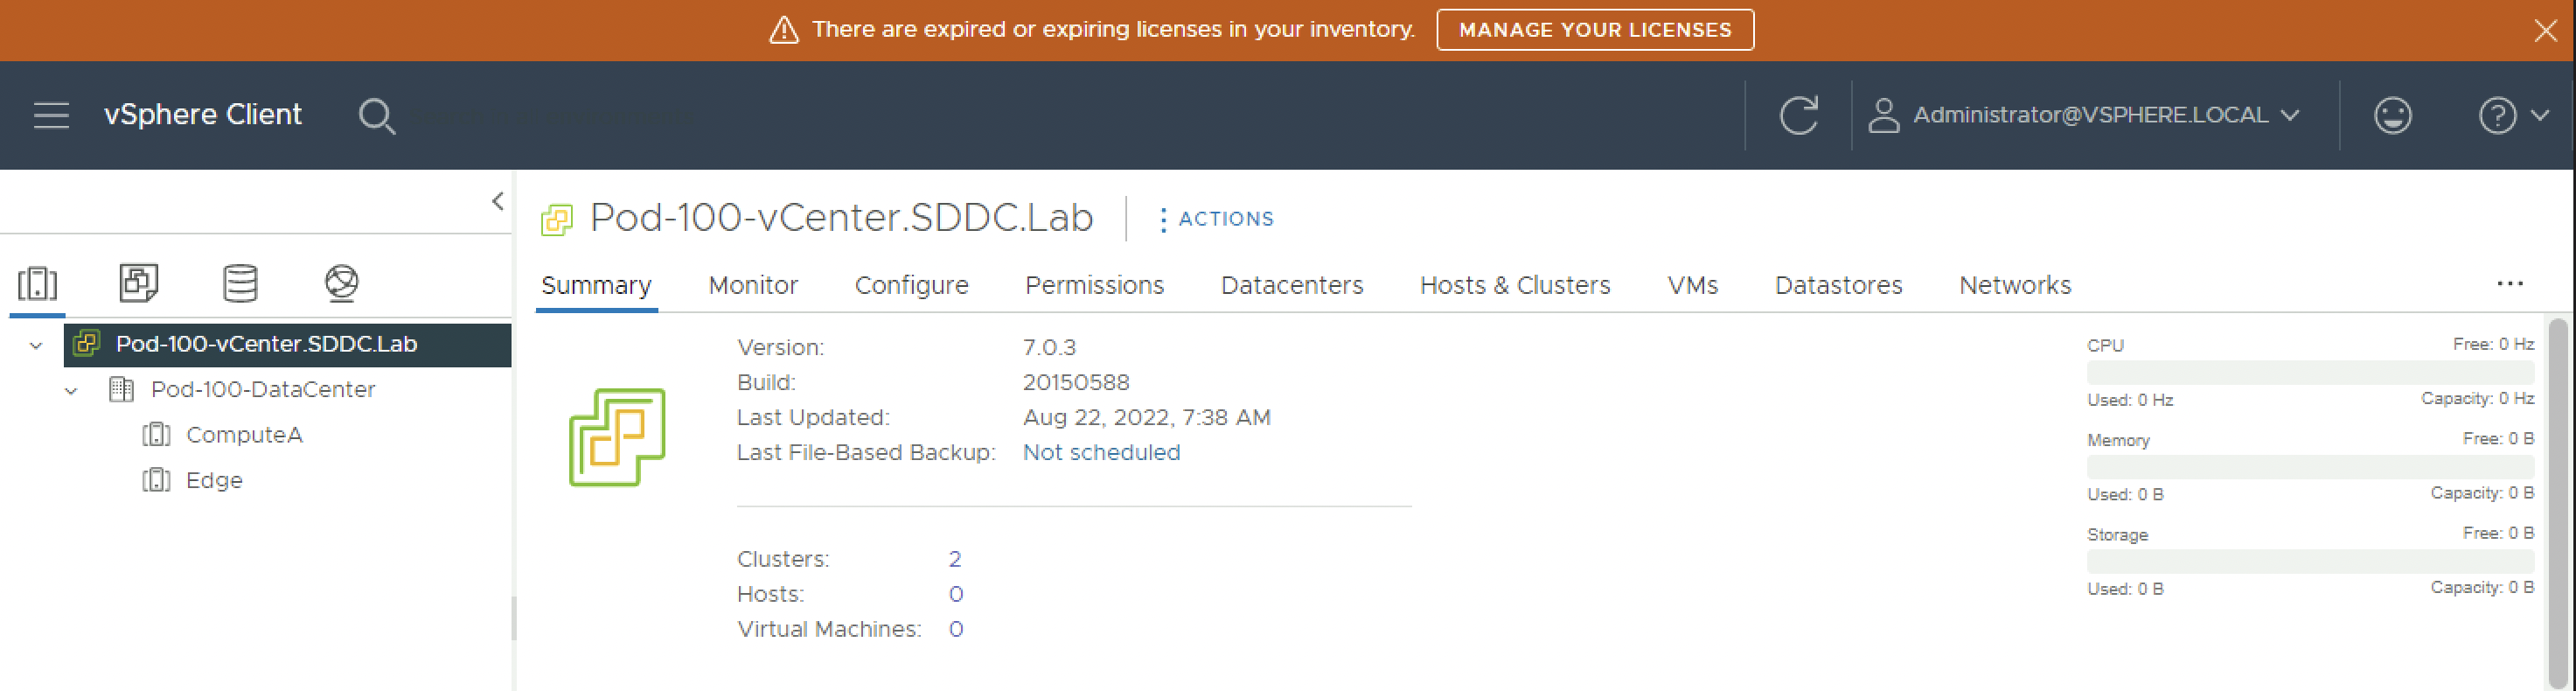
Create 〈virtual〉 Data Center with vSphere Clusters
After the Data Center and vSphere Cluster objects are created this looks something like the screenshot below.
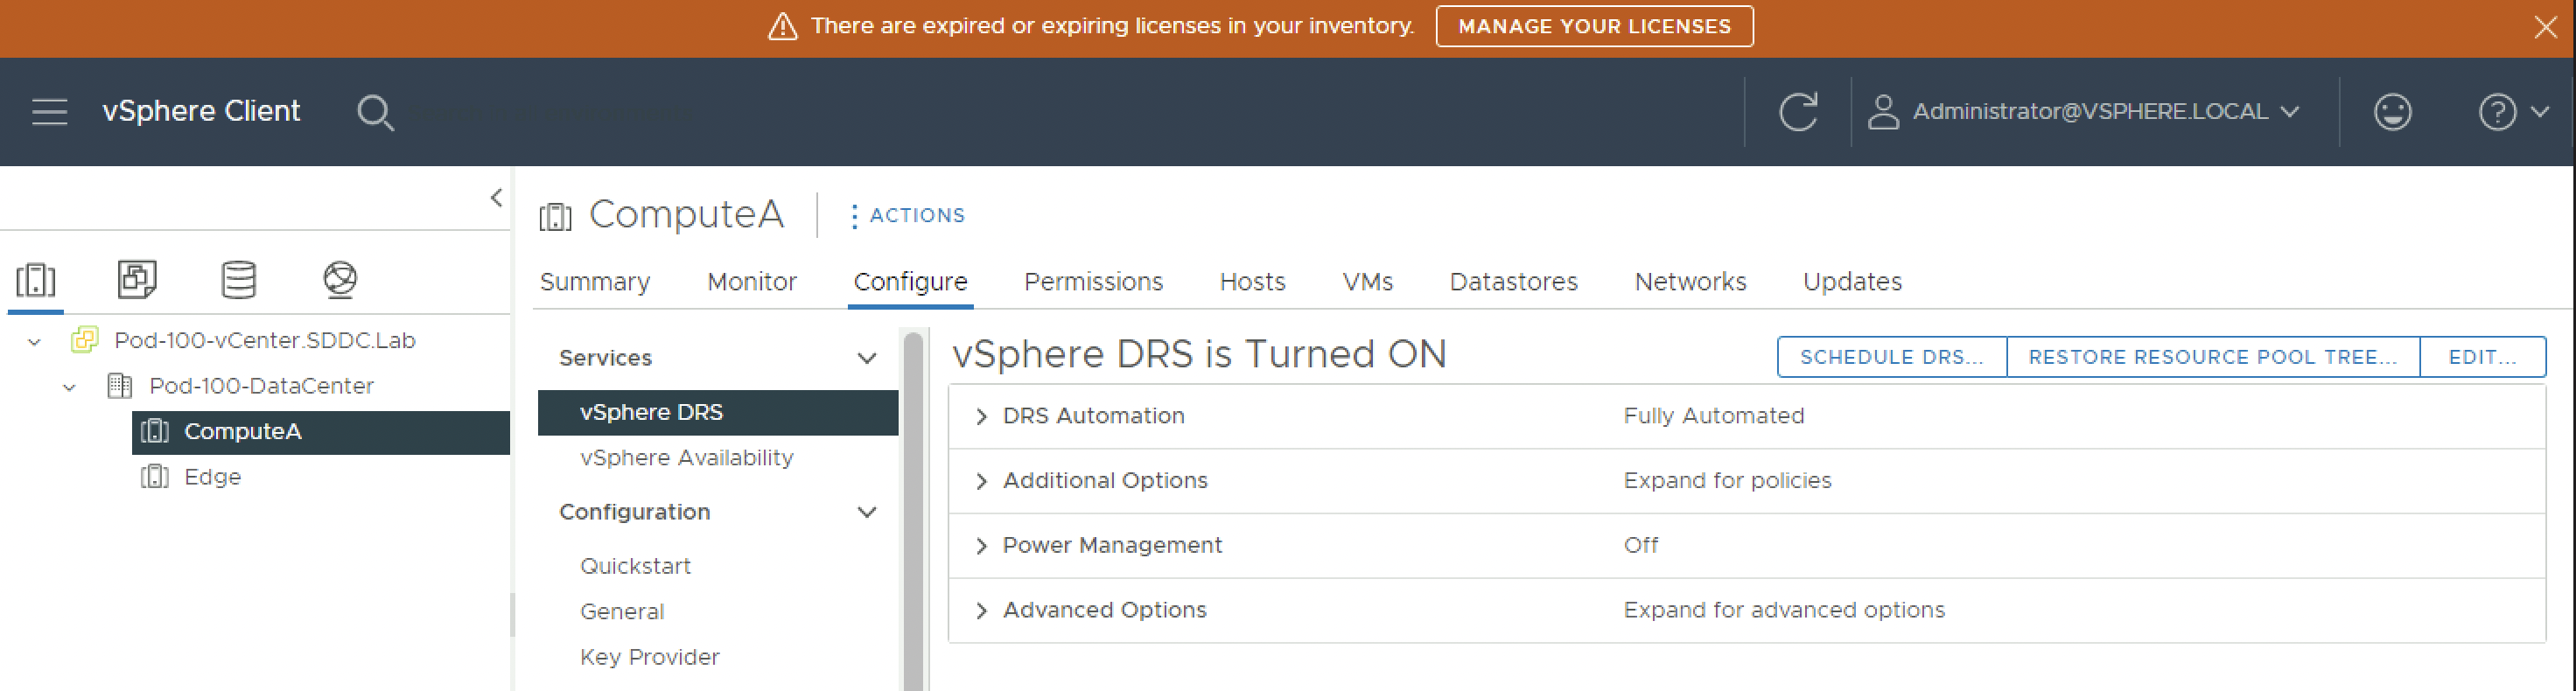
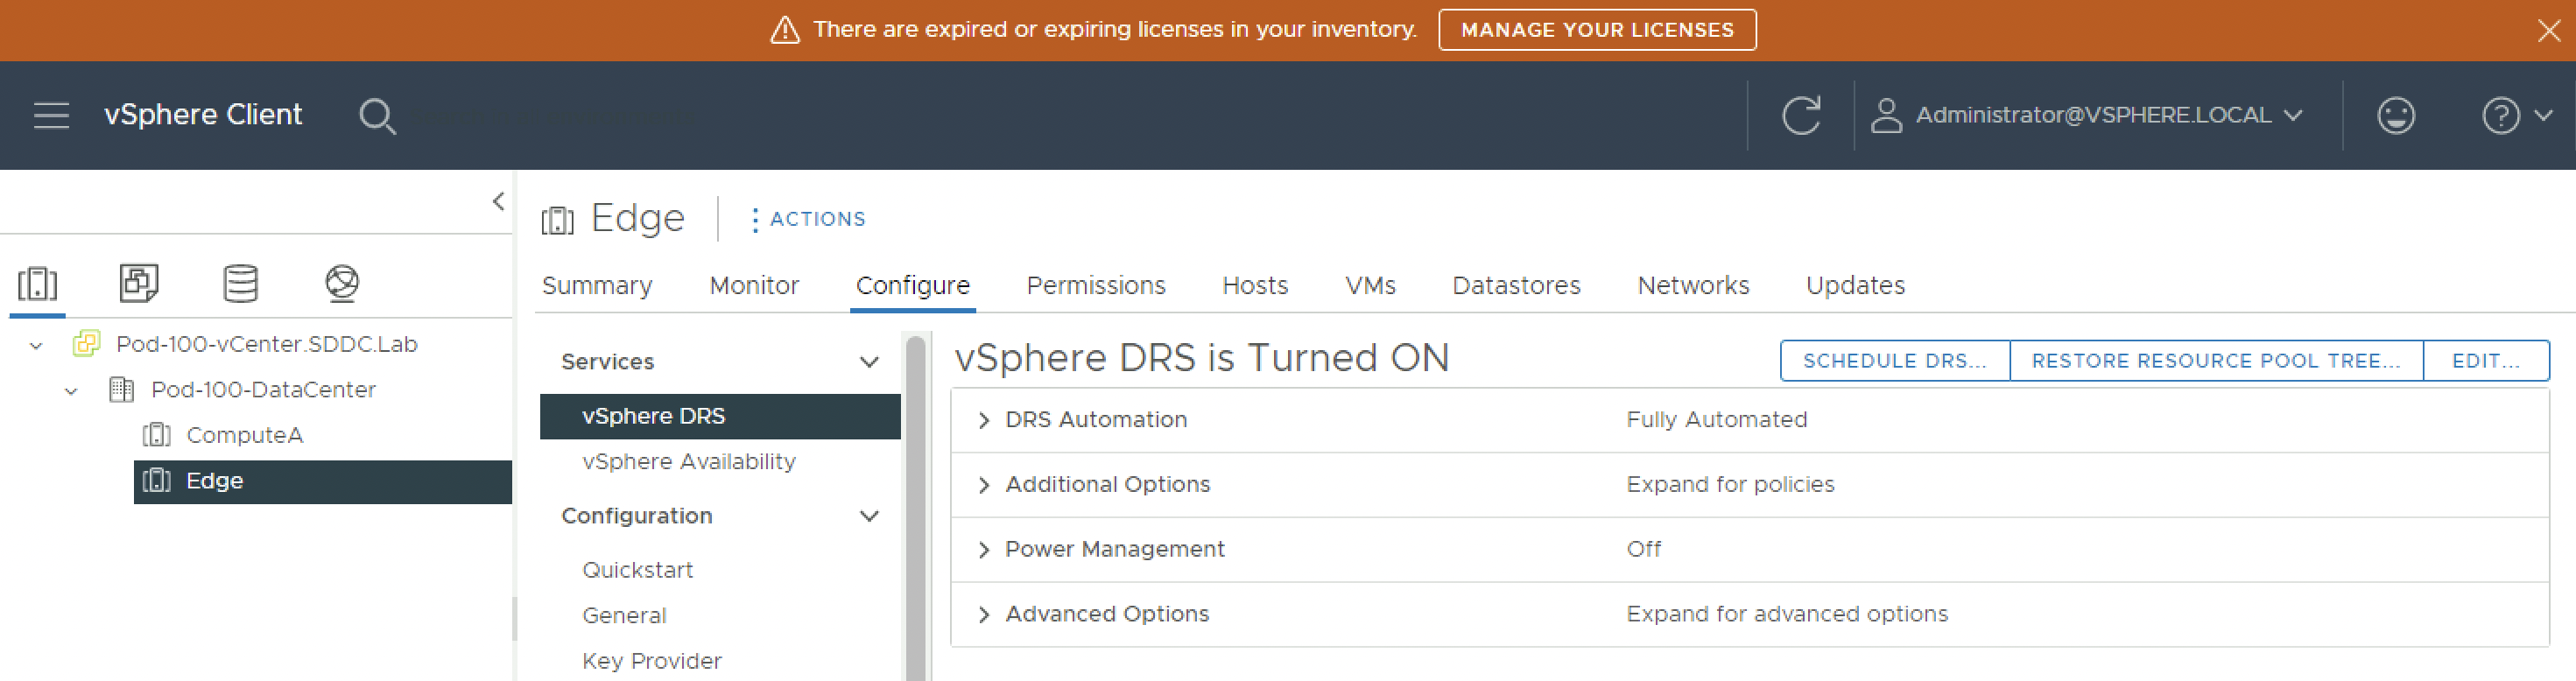
Configure DRS on the vSphere Clusters
Verify if DRS is enabled and set to “Fully Automated” and if not set it to the below settings.
Verify this on the Compute Cluster.
Verify this on the Edge Cluster.
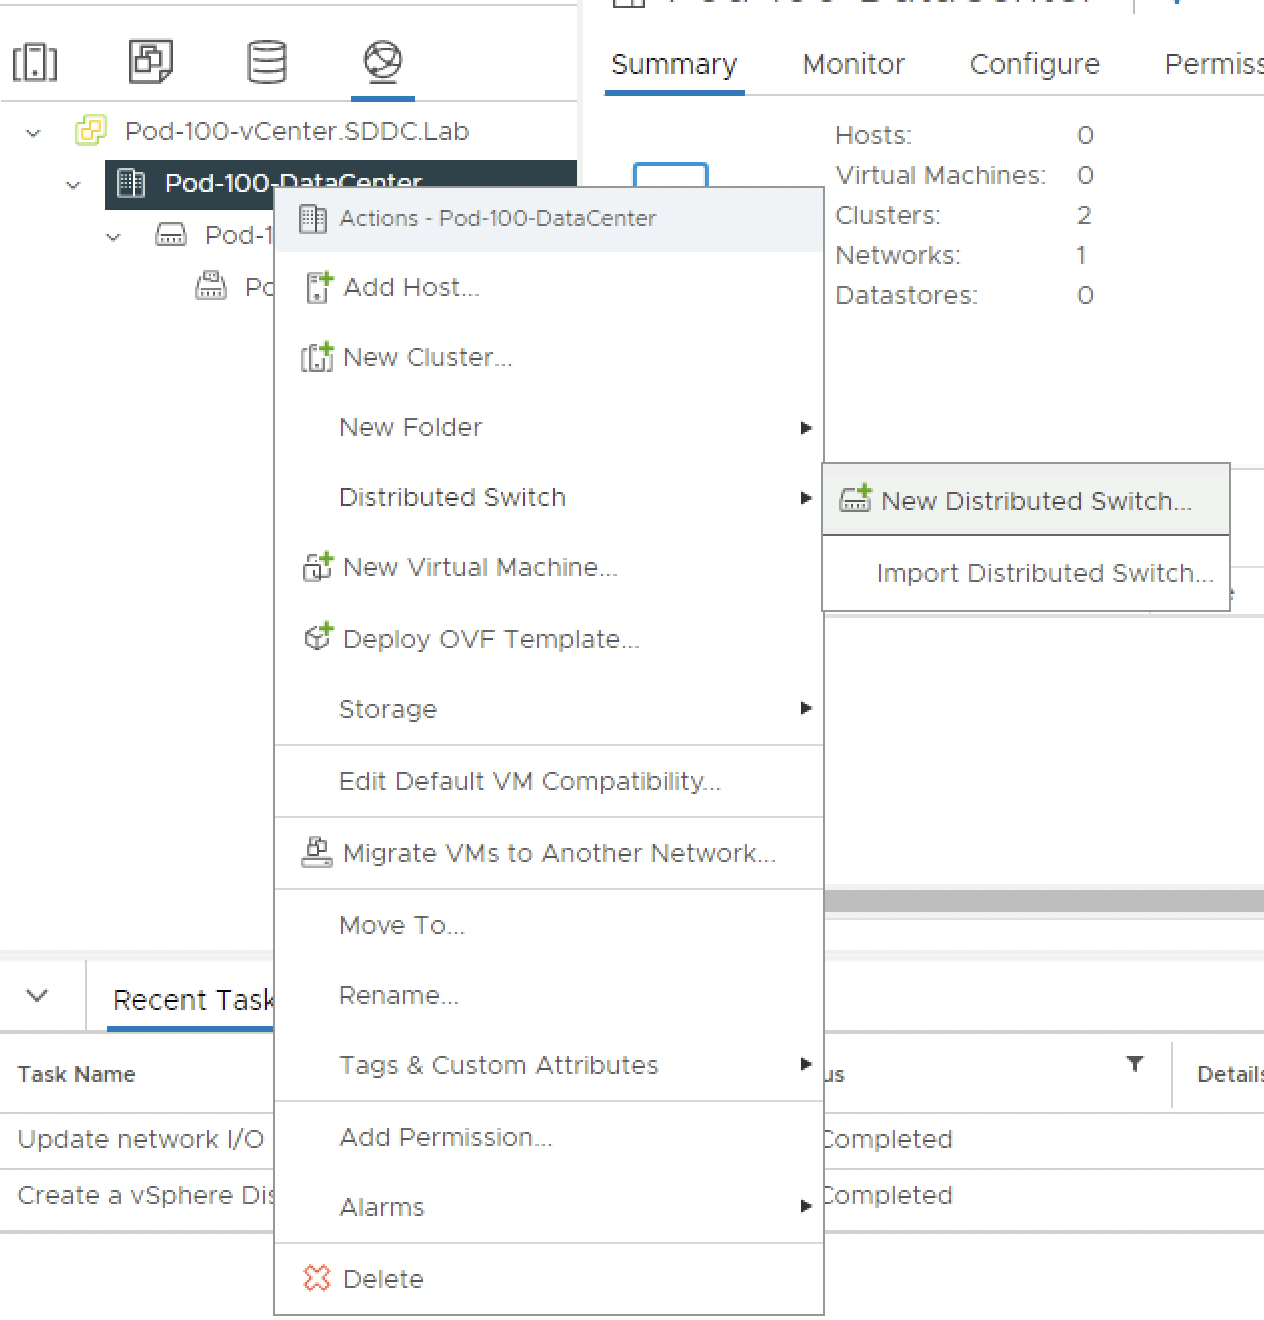
Create VDS and VDS Port Groups
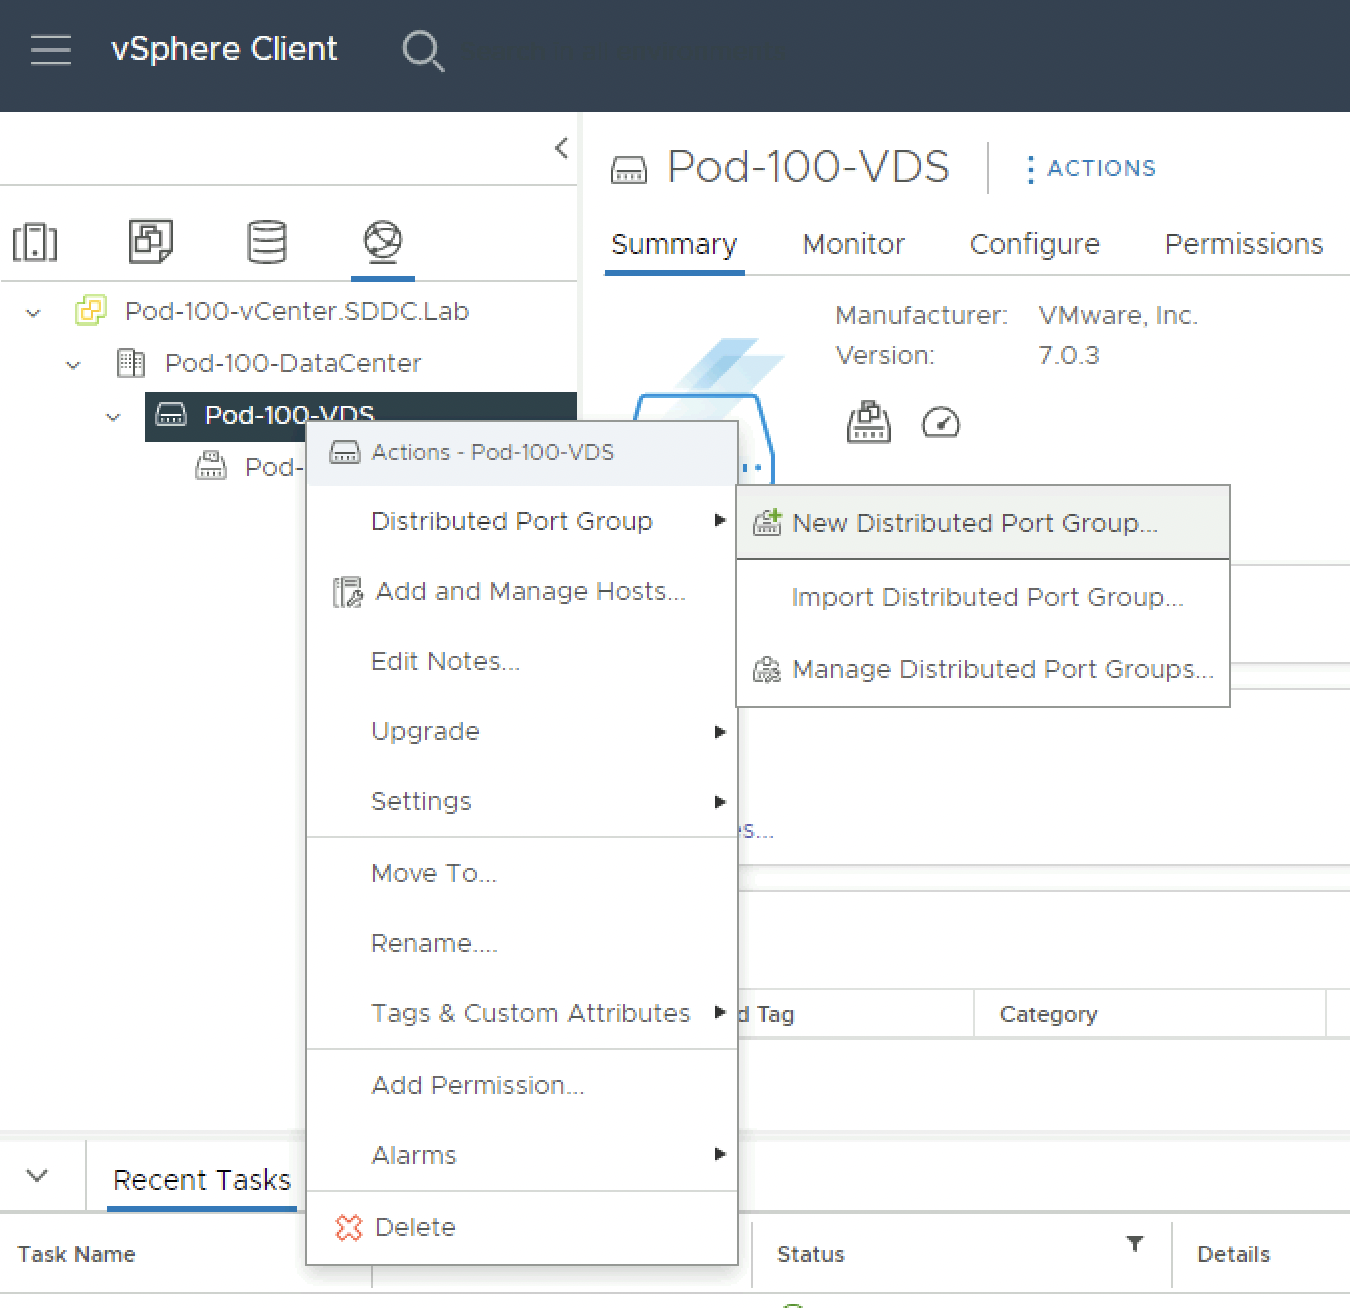
Browse to the Networking tab and right-click on the Data Center object and select Distributed Switch → New Distributed Switch to create a new Distributed Switch.
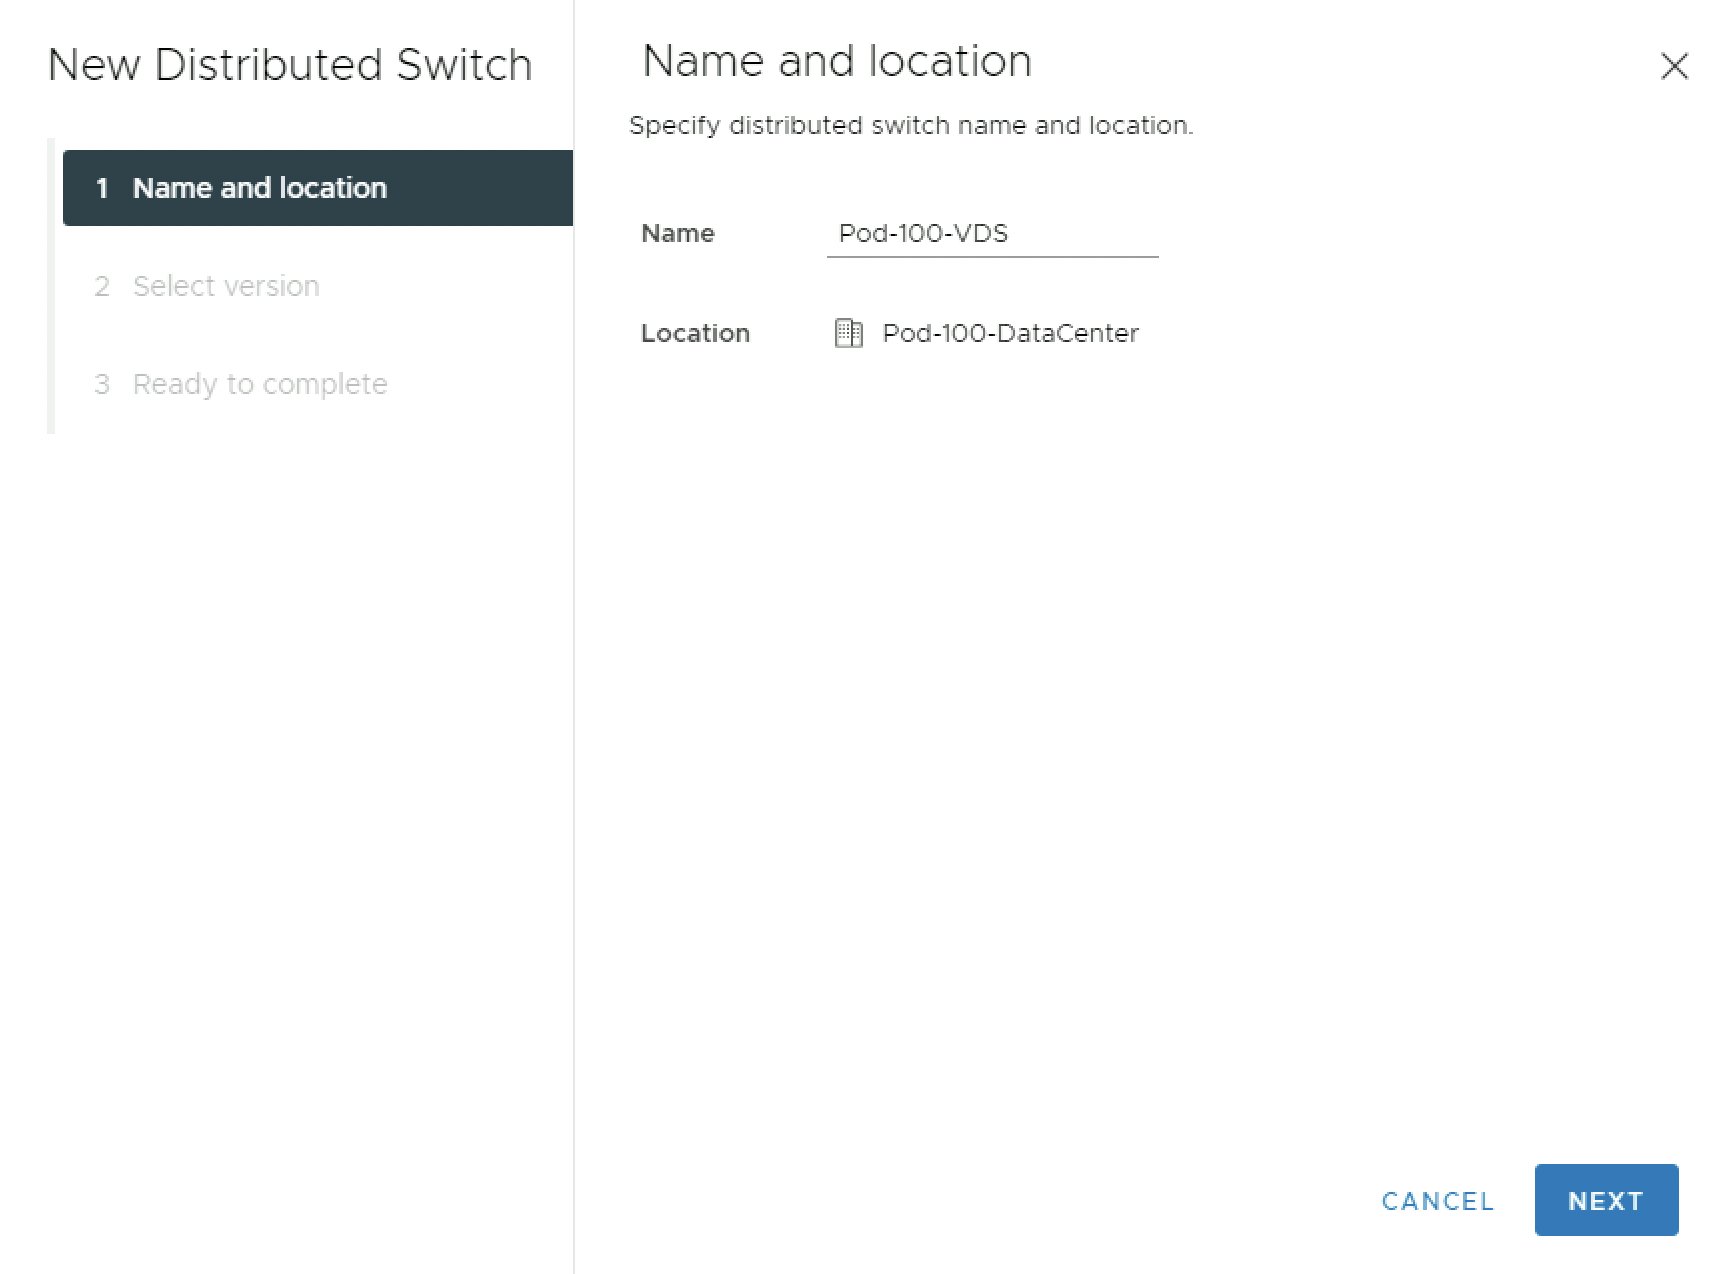
Provide a name for the new Distributed Switch:
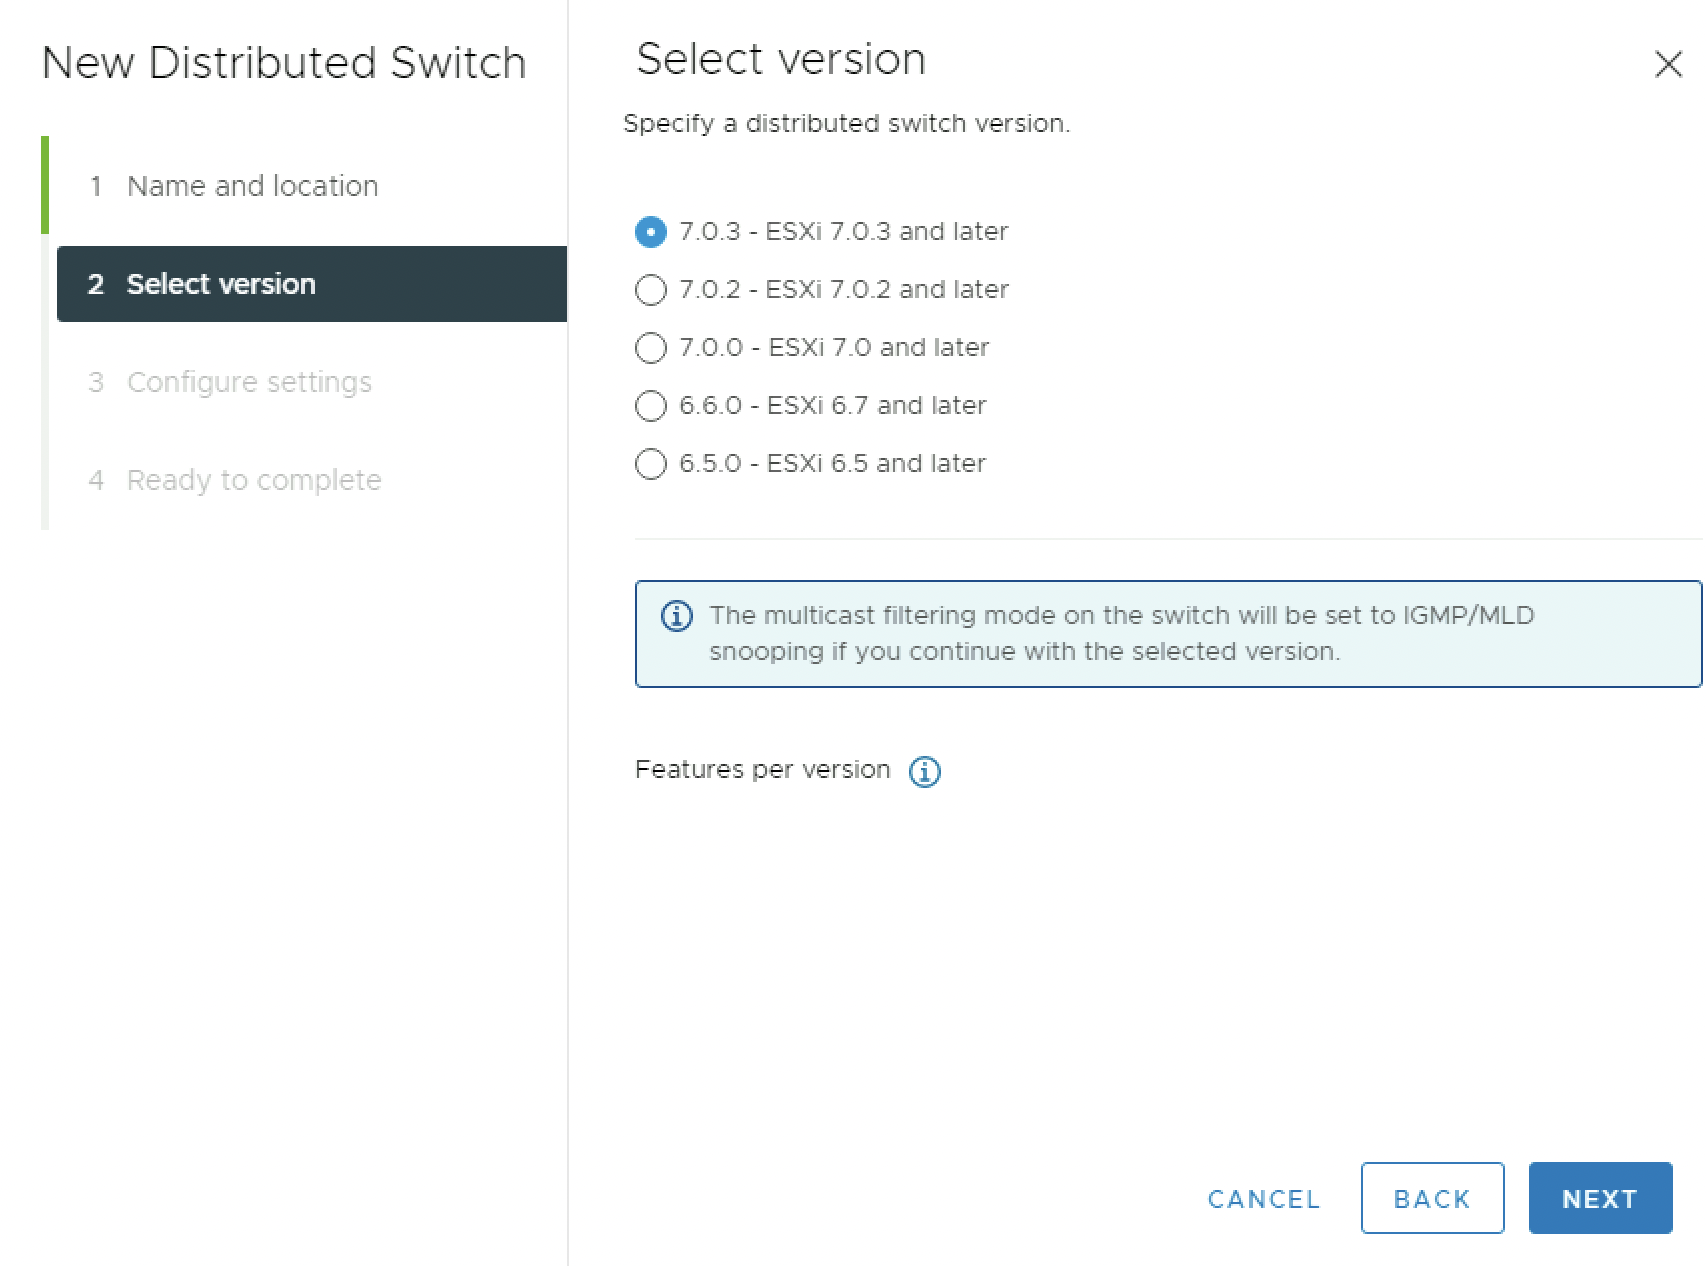
Select a Distributed Switch version:
Set the number of uplinks:

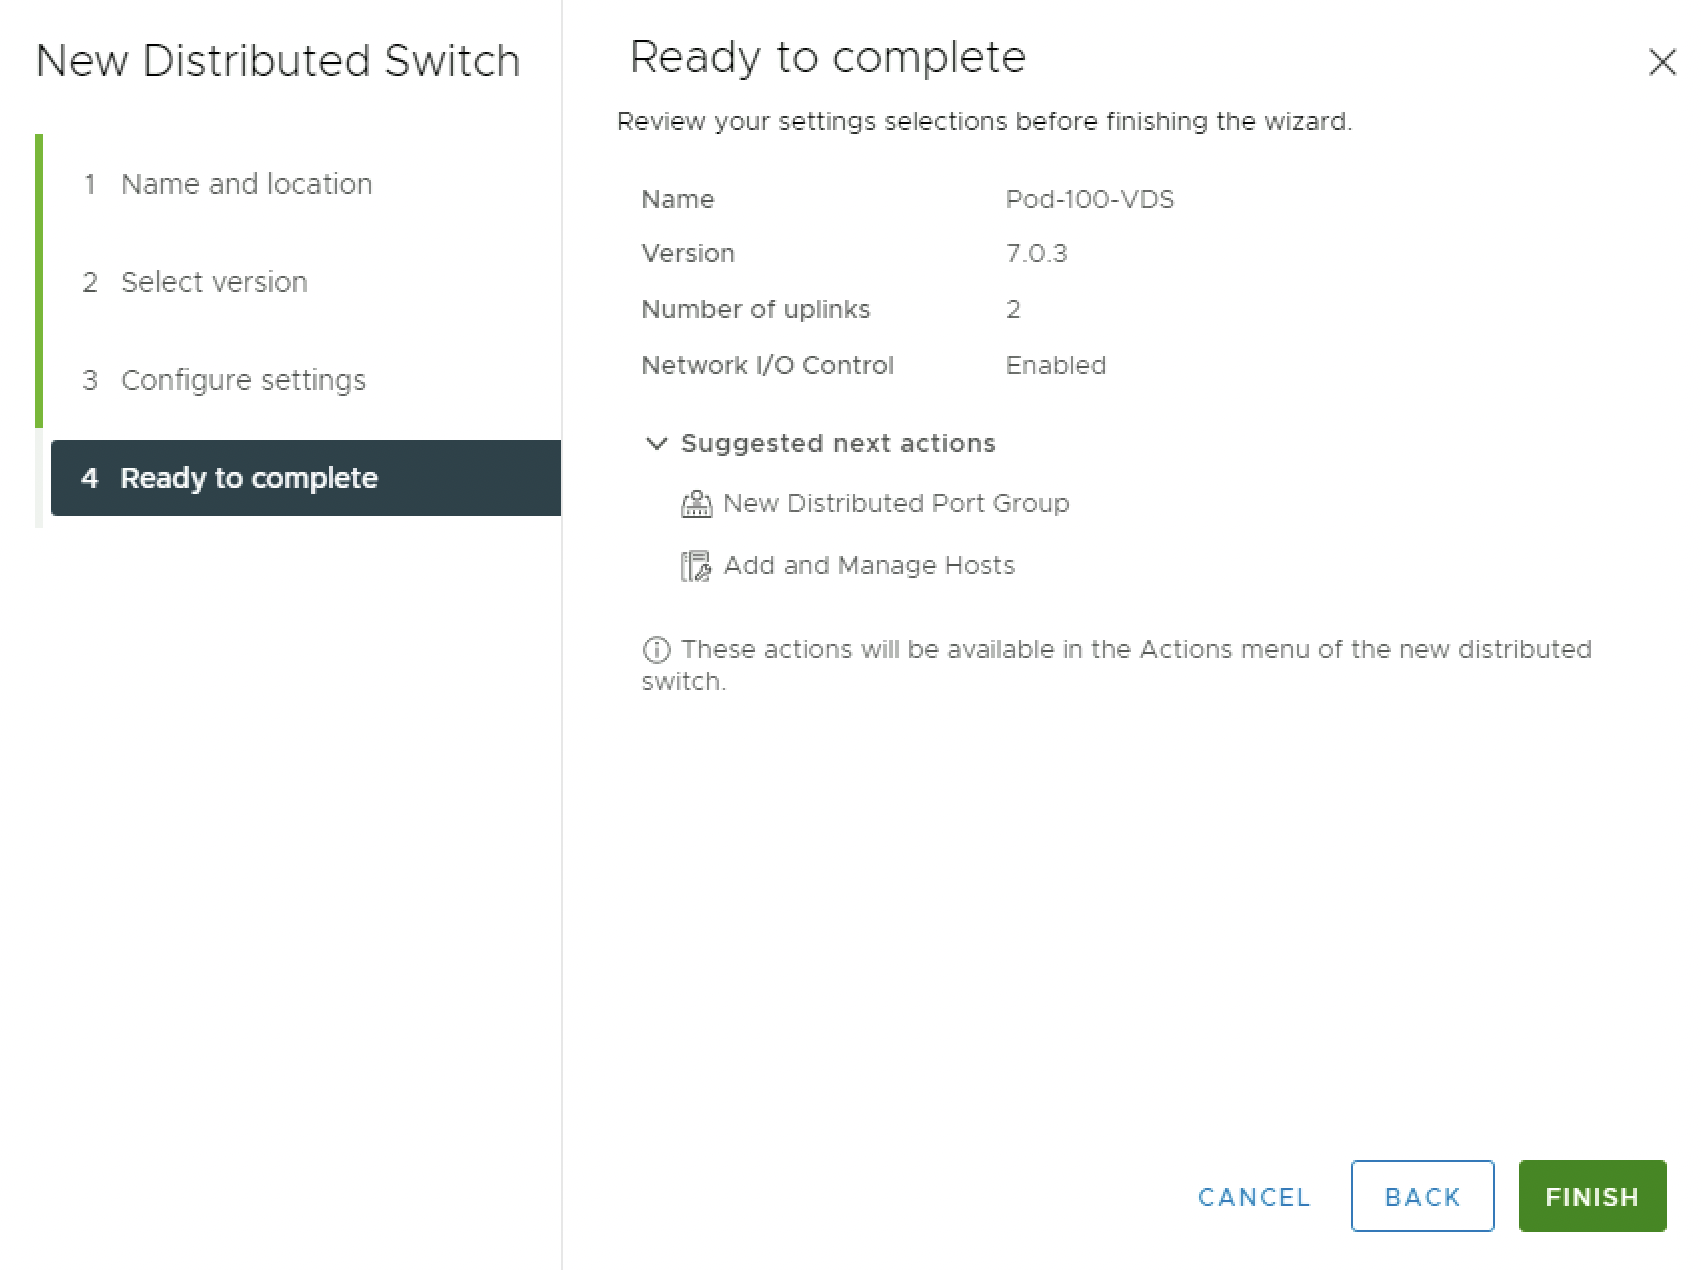
Review the details and click on finish:
Verify if the Distributed Switch has been created successfully:

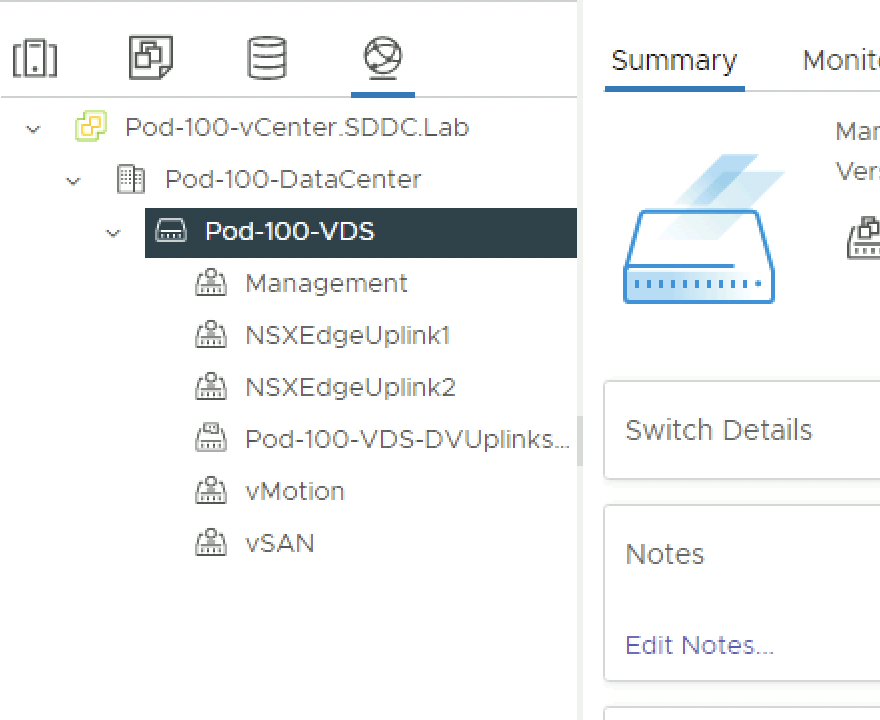
Now that the Distributed Switch is created it is time to create some Port Groups. the details can be found in the table below:
| Port Group Name | VLAN Type | VLAN ID/trunk range |
|---|---|---|
| Management | VLAN | 100 |
| NSXEdgeUplink1 | VLAN Trunk | 114, 116, 118 |
| NSXEdgeUplink2 | VLAN Trunk | 114, 117, 118 |
| vMotion | VLAN | 111 |
| vSAN | VLAN | 112 |
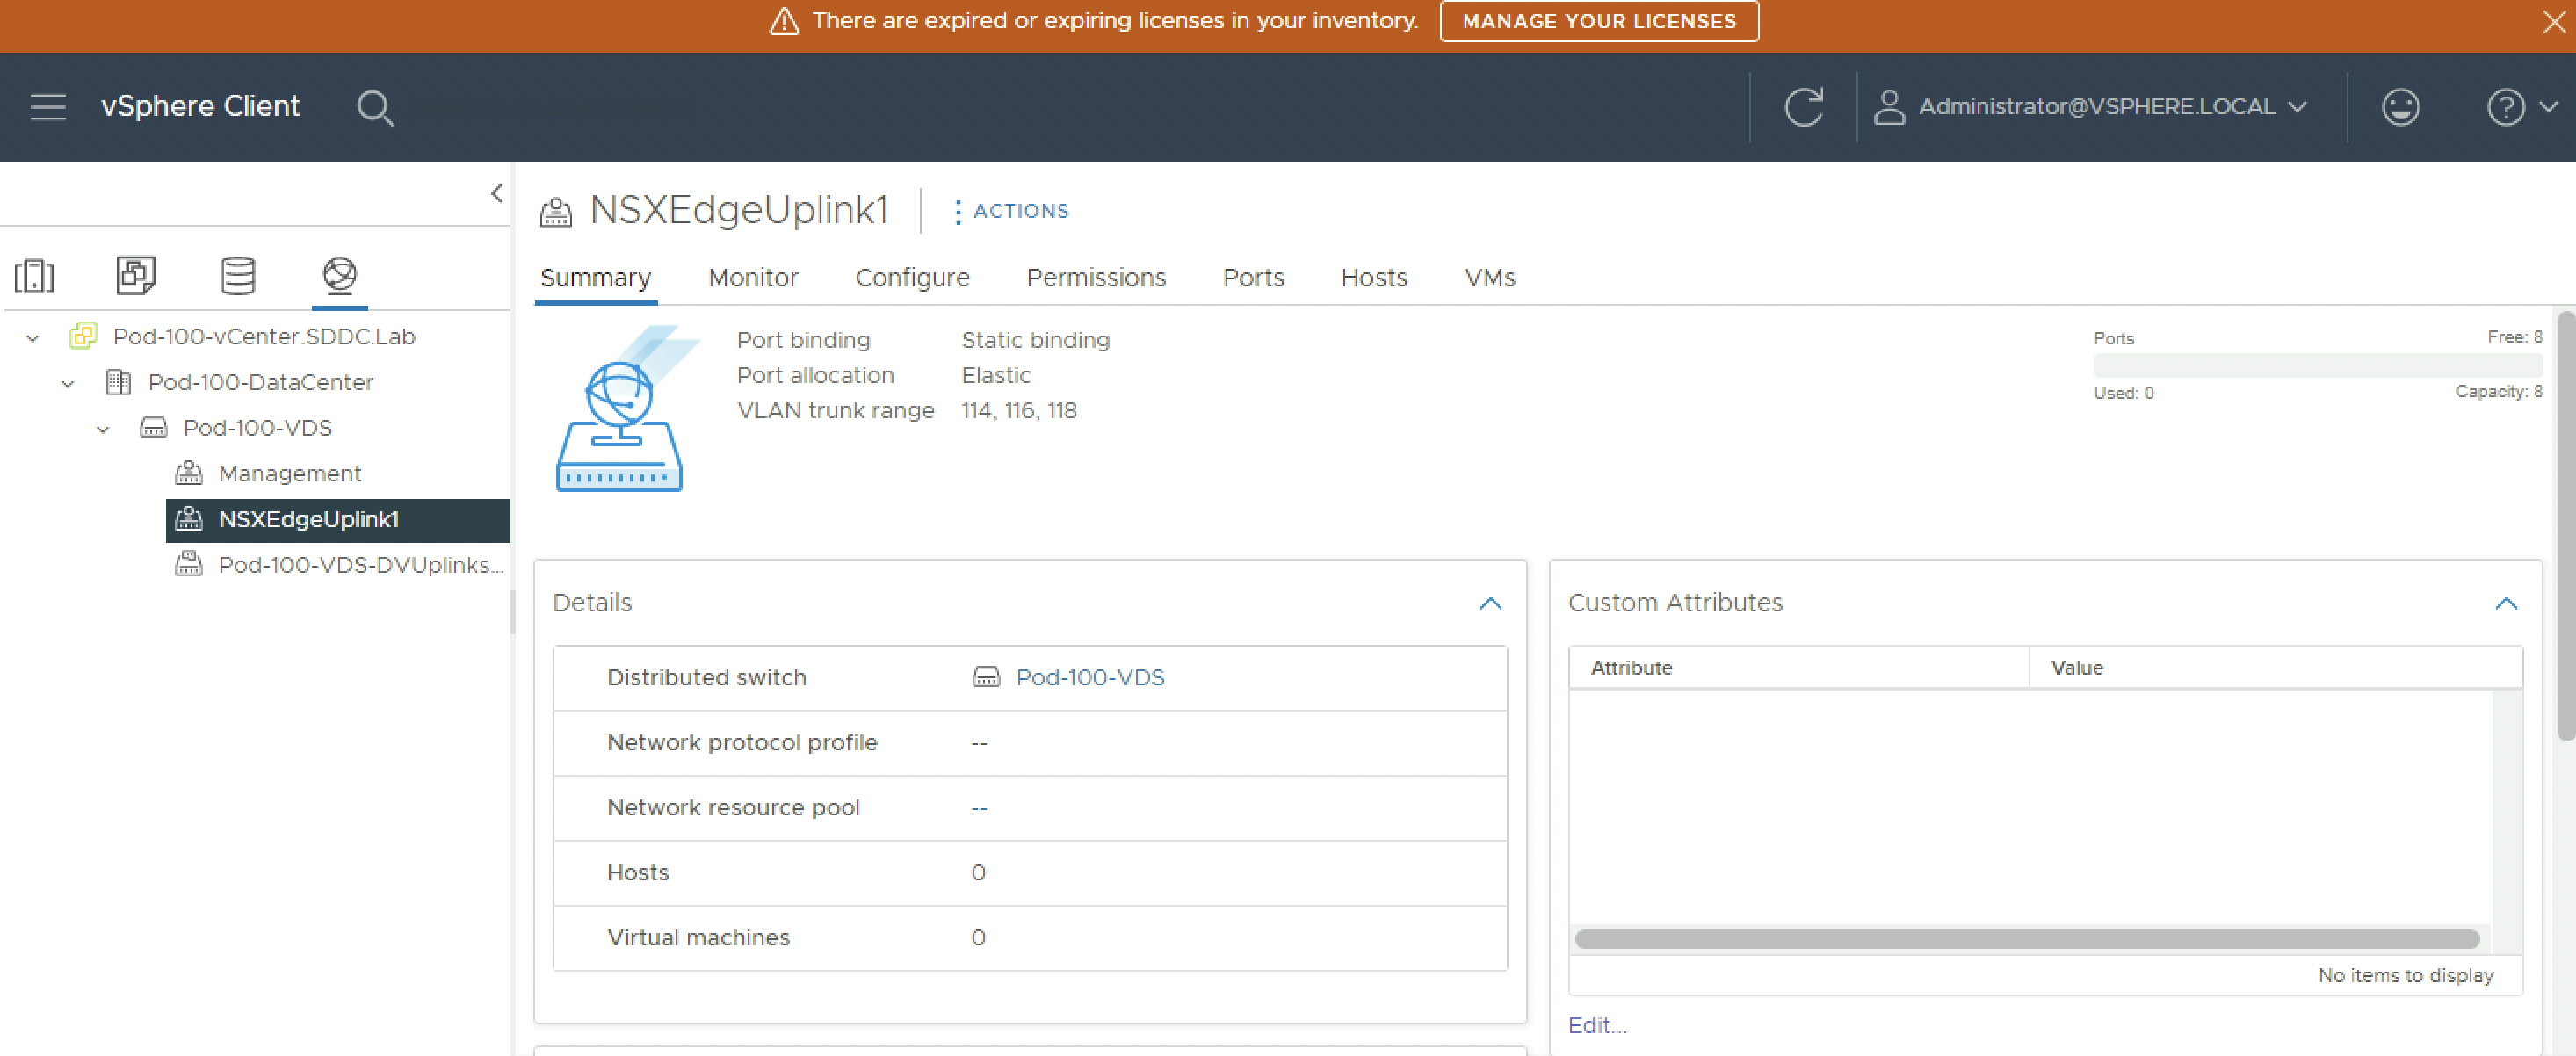
⚠️ The NSXEdgeUplink Port Groups will be created now, and will be used for the Virtual NSX Edge Transport Nodes.
Right-click on the Distributed Switch and select Distributed Port Group → New Distributed Port Group.
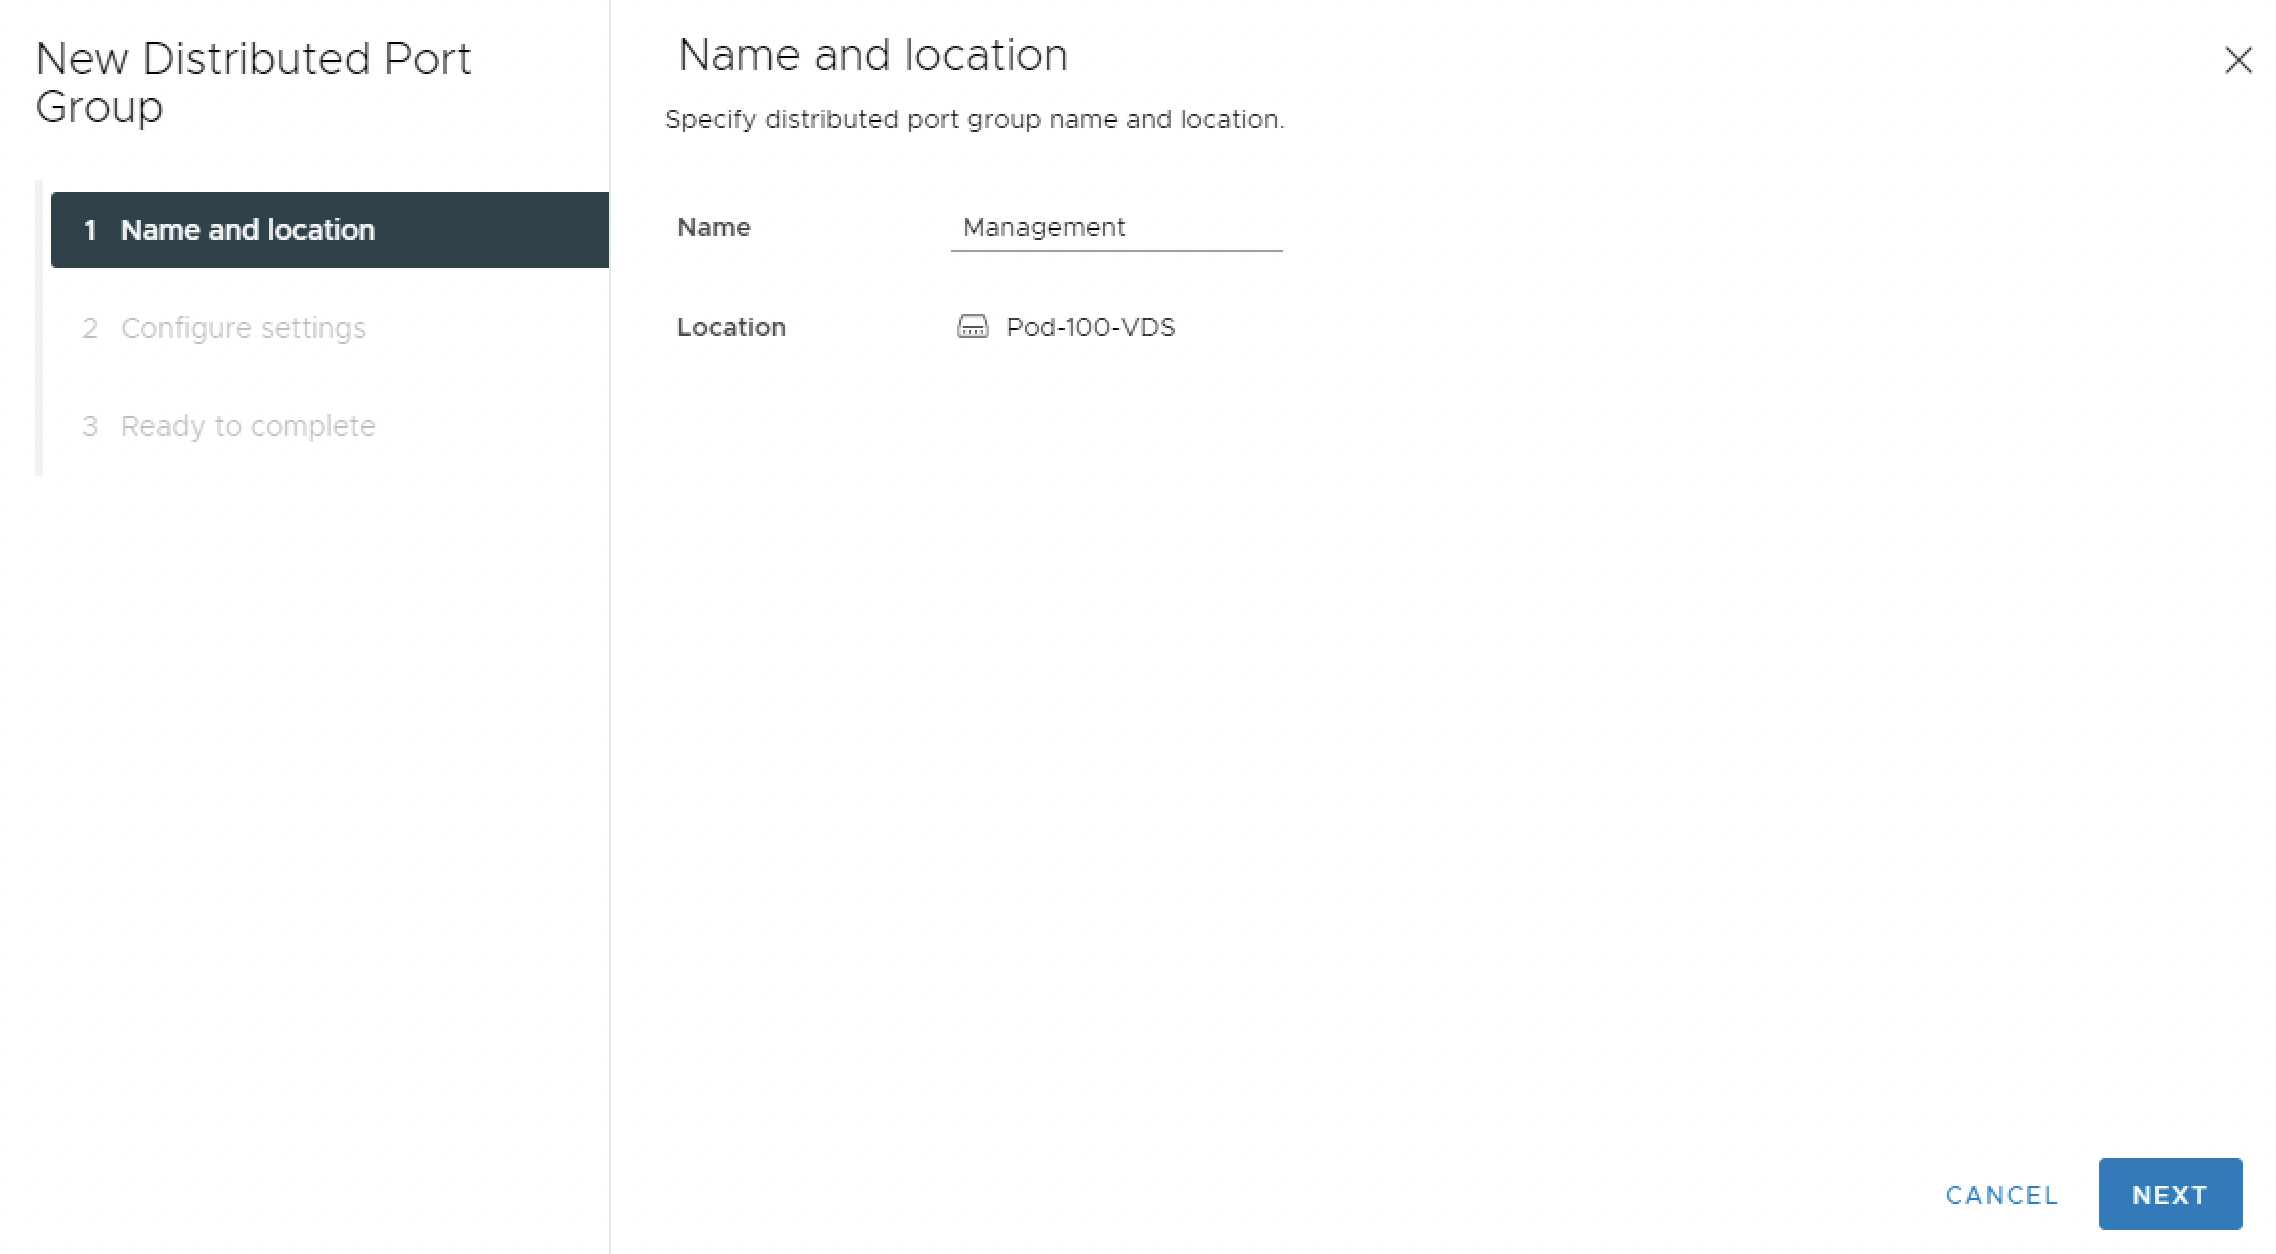
Provide a name for the new Distributed Port Group:
Set the VLAN Type to be VLAN and specify the VLAN id as provided in the table:
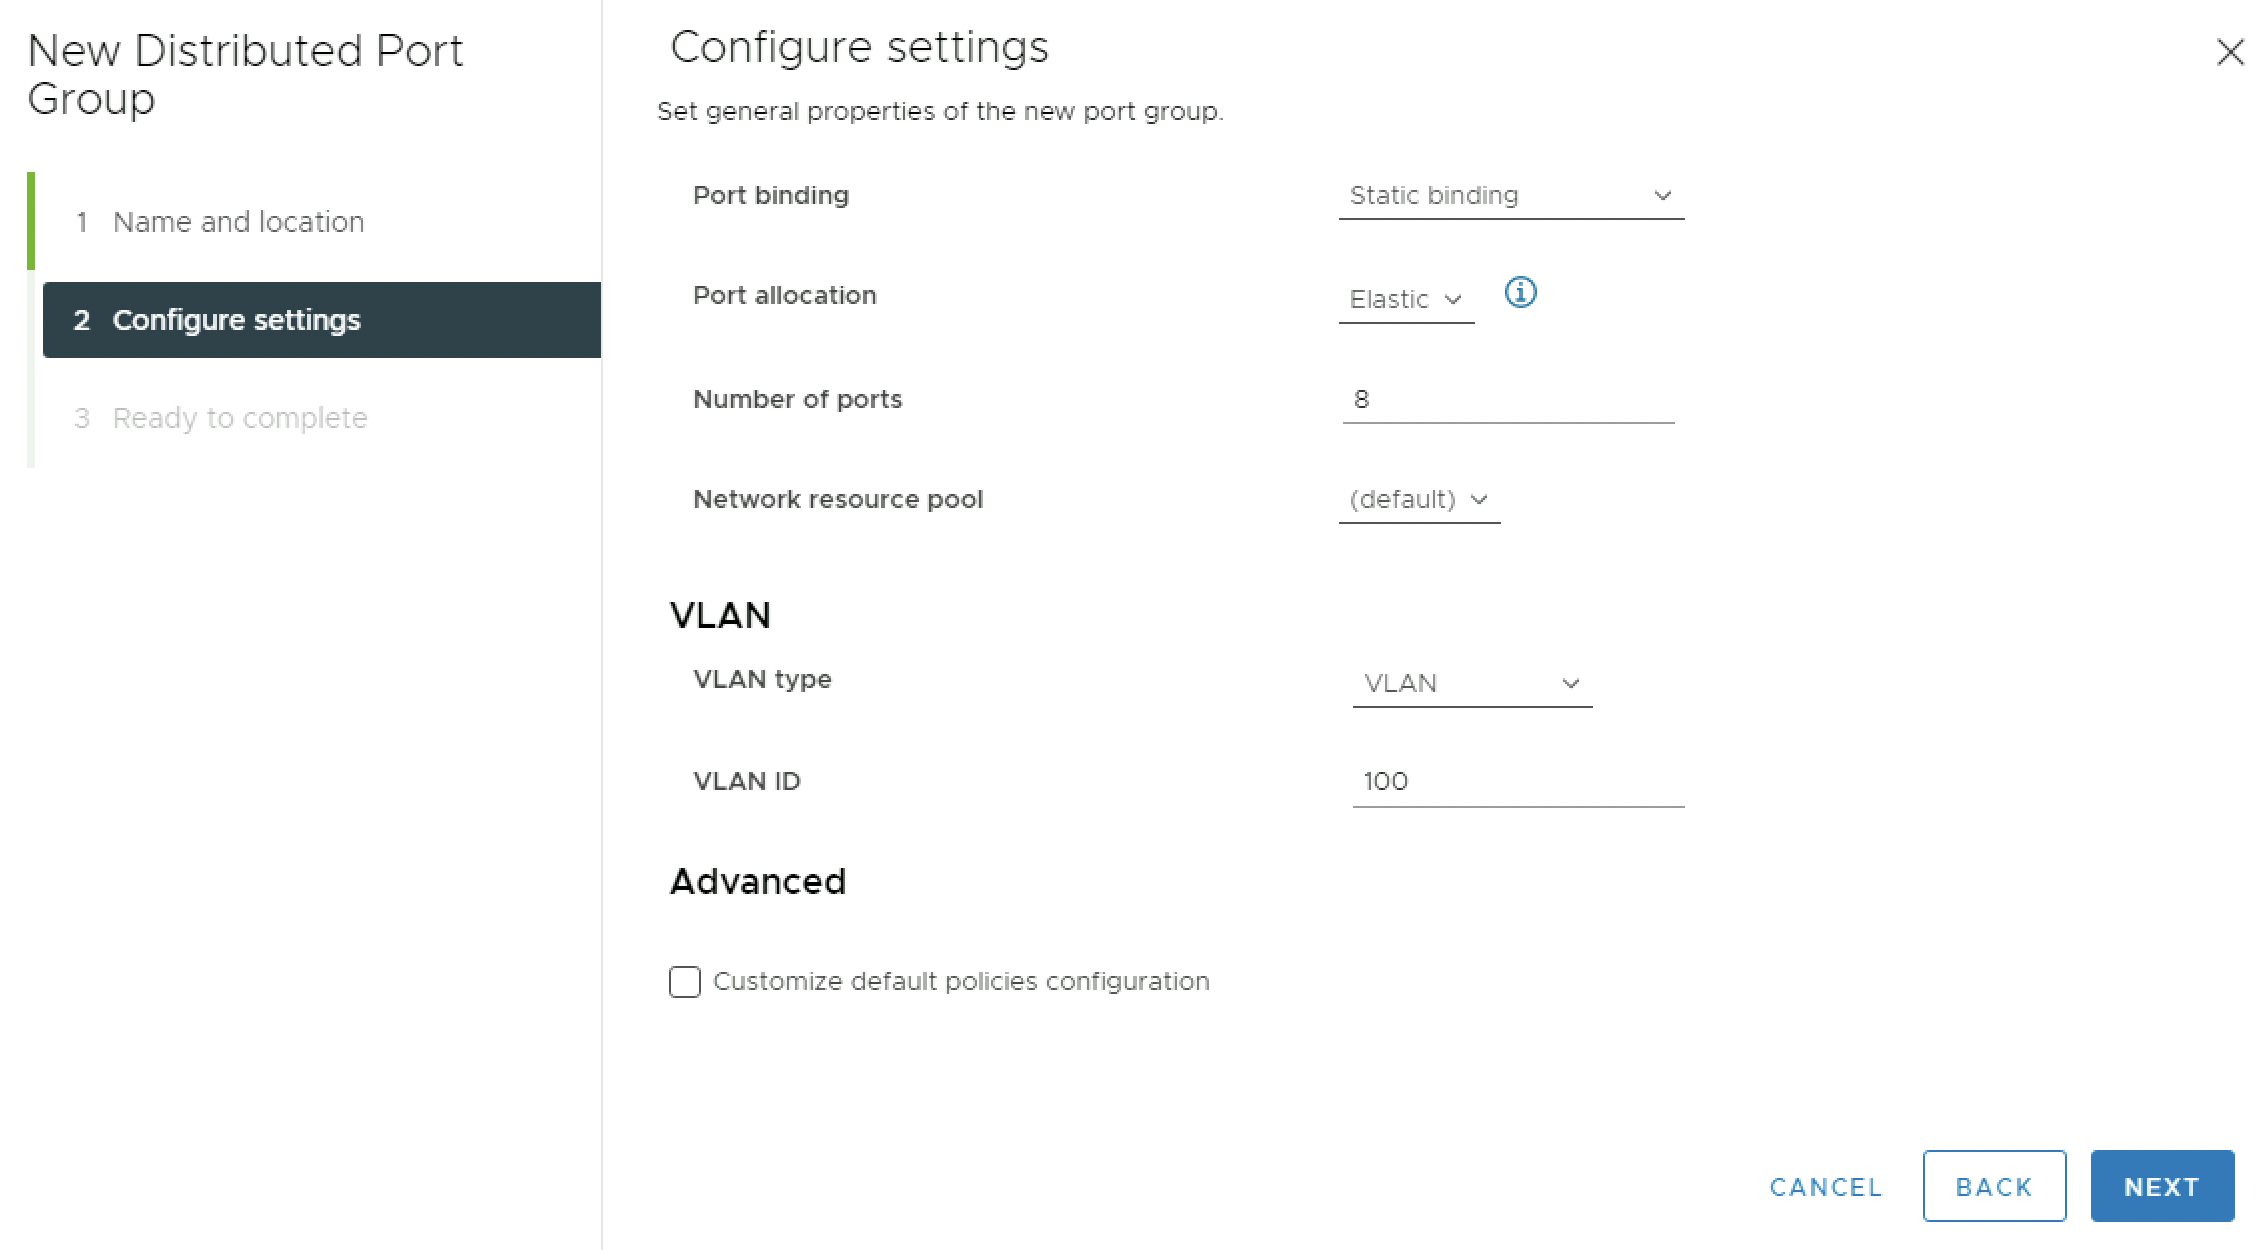
Review the details and click on finish:

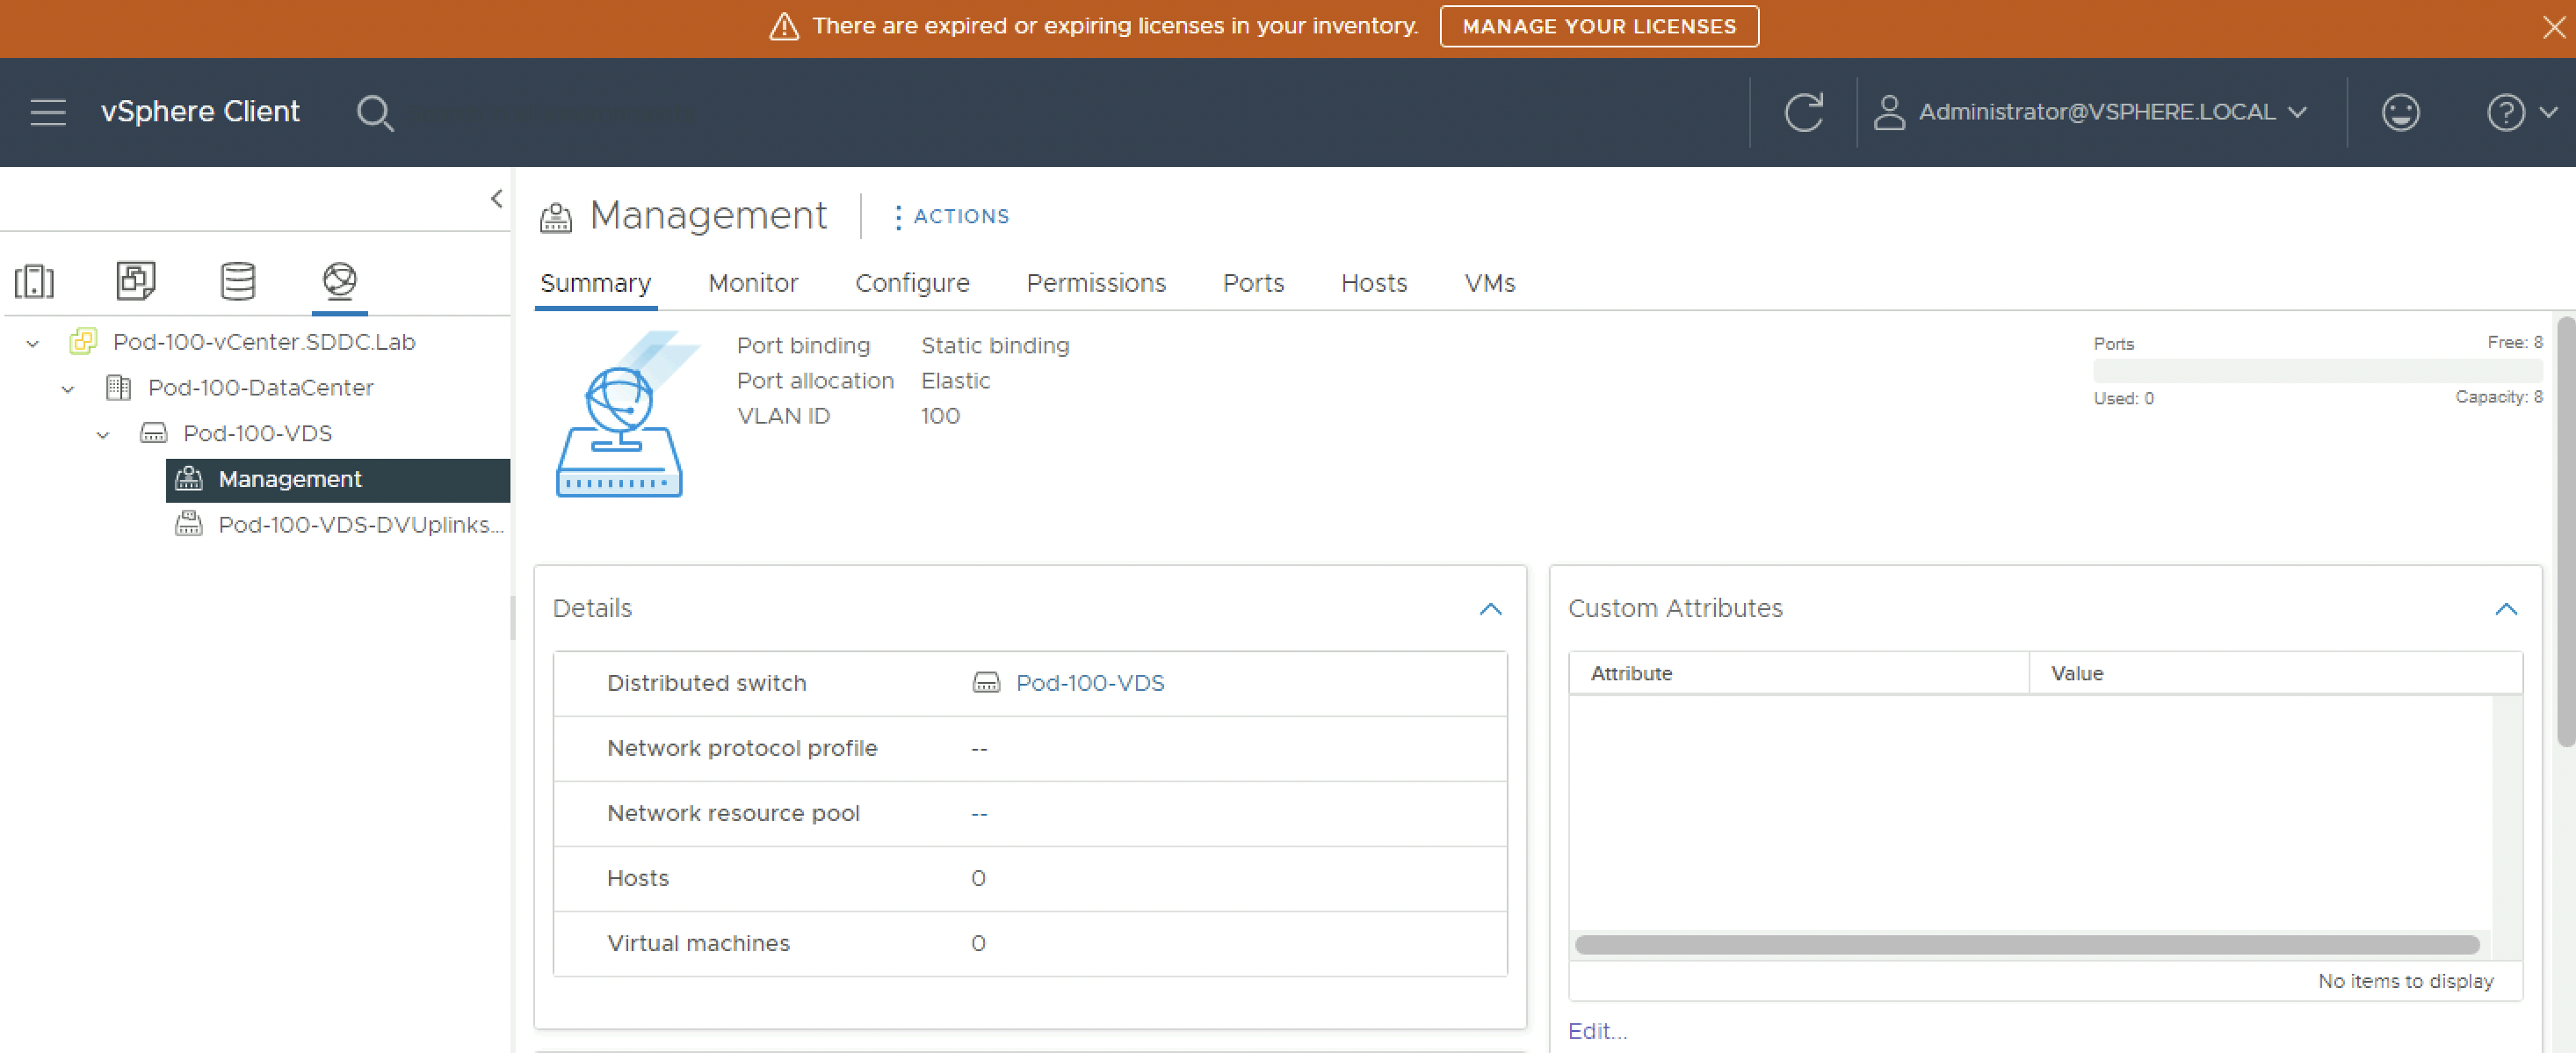
Verify if the Distributed Port Group has been created successfully:
⚠️ Repeat the same steps to create the vMotion and VSAN Distributed Port Groups.
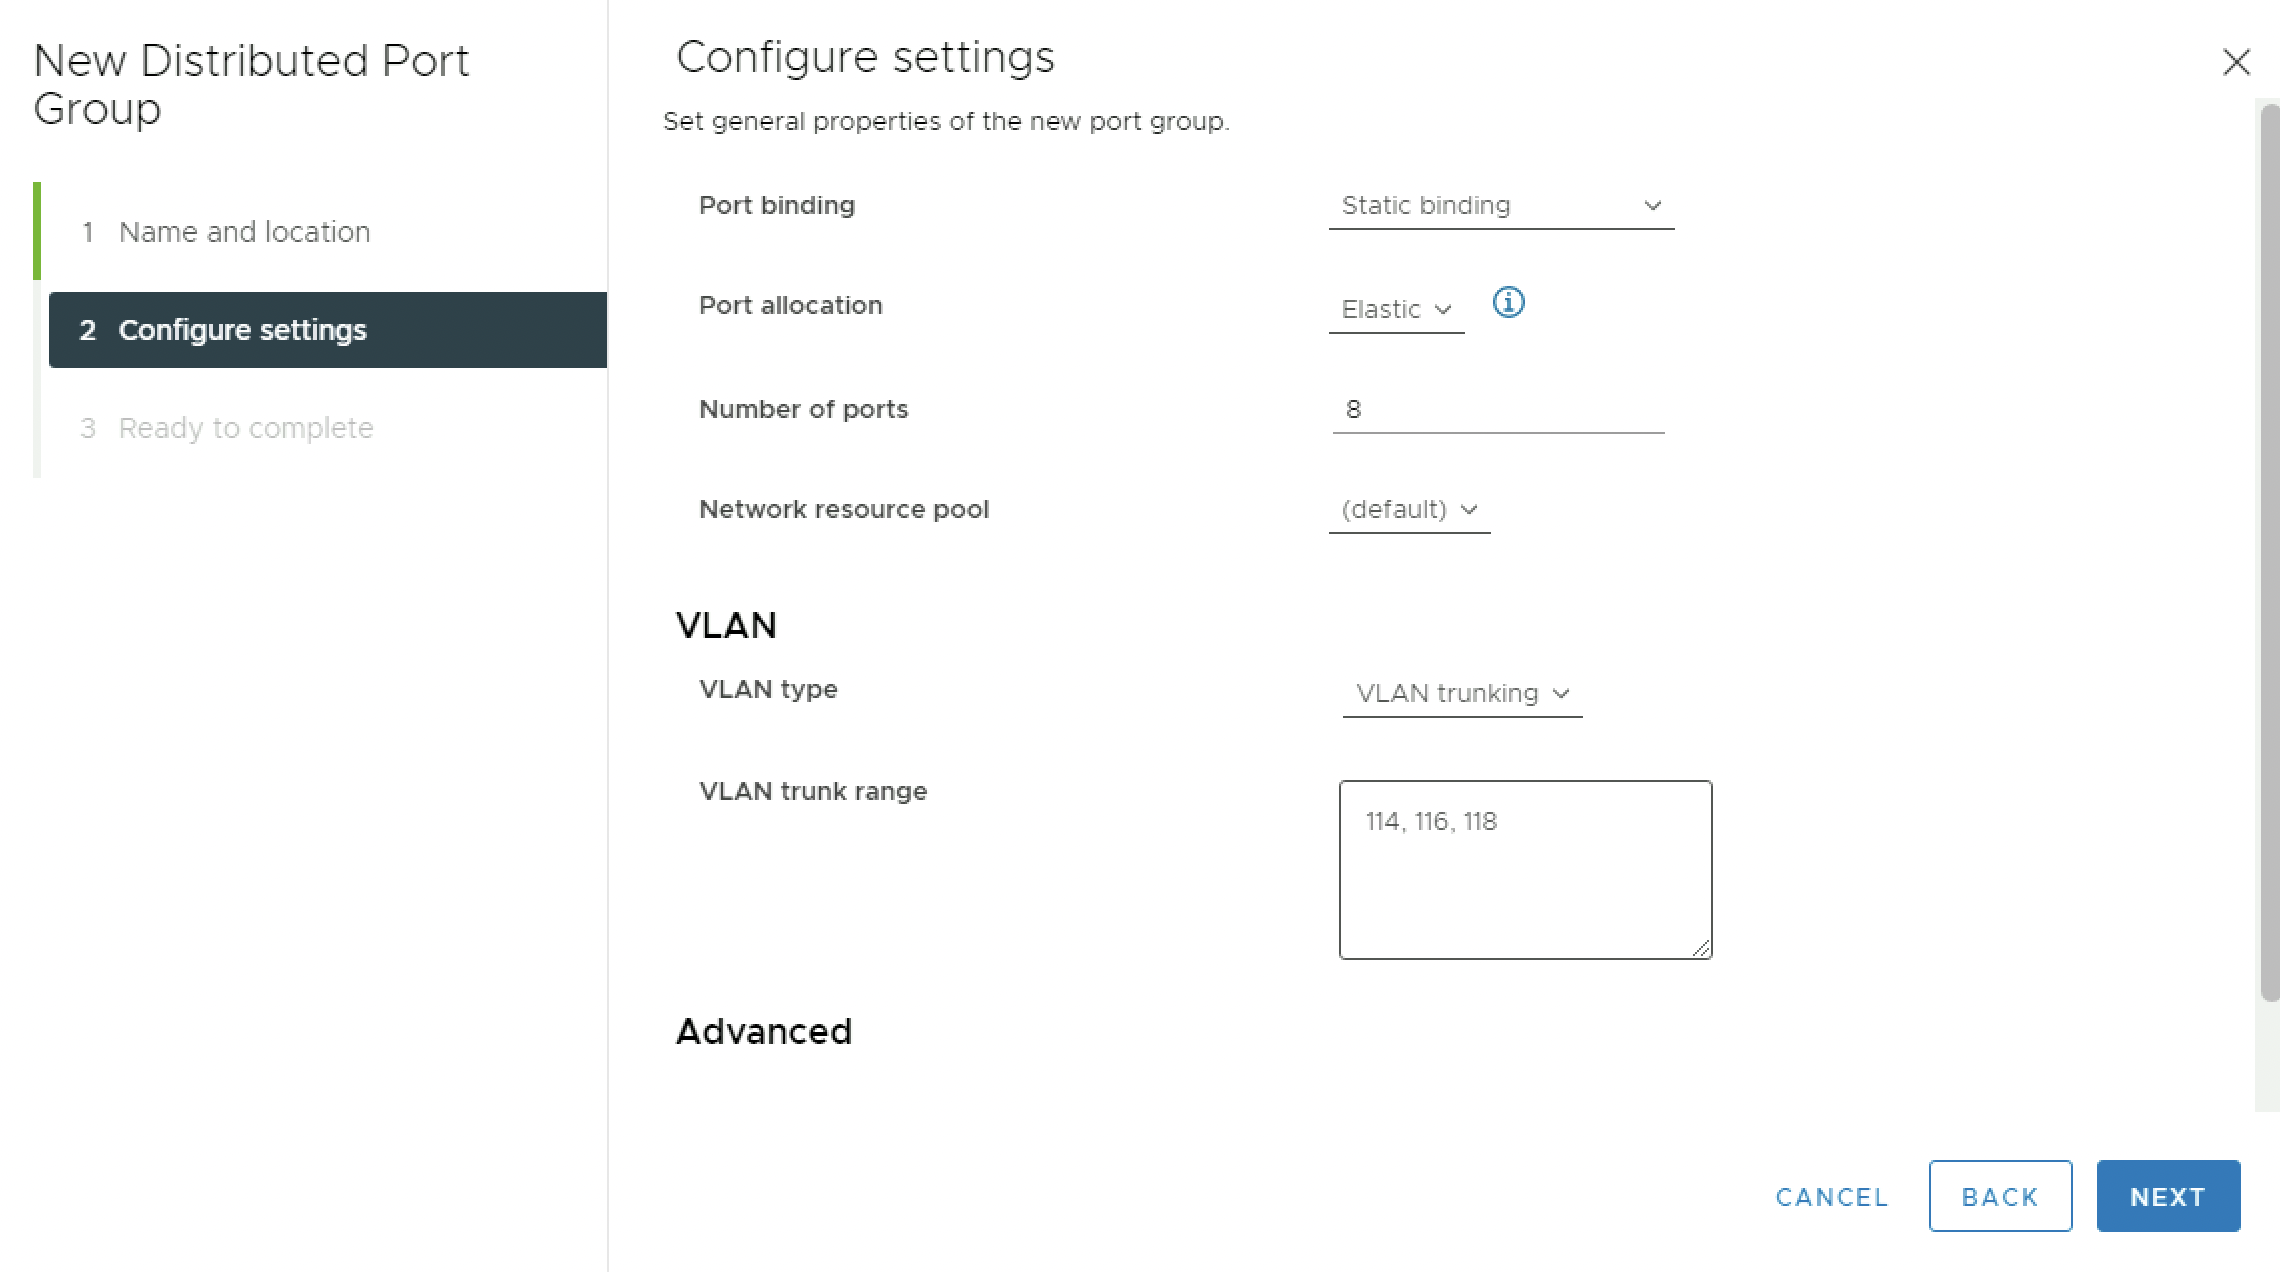
The Distributed Port Groups that are going to be used for the Virtual Edge Transport Nodes are slightly different.
Provide a name for the new Distributed Port Group:

Set the VLAN Type to be VLAN Trunking and specify the VLAN trunk range as provided in the table:
The VLANS that are trunked are the BGP Uplink VLANs, the TEP and RTEP VLANs.
Review the details and click on finish:
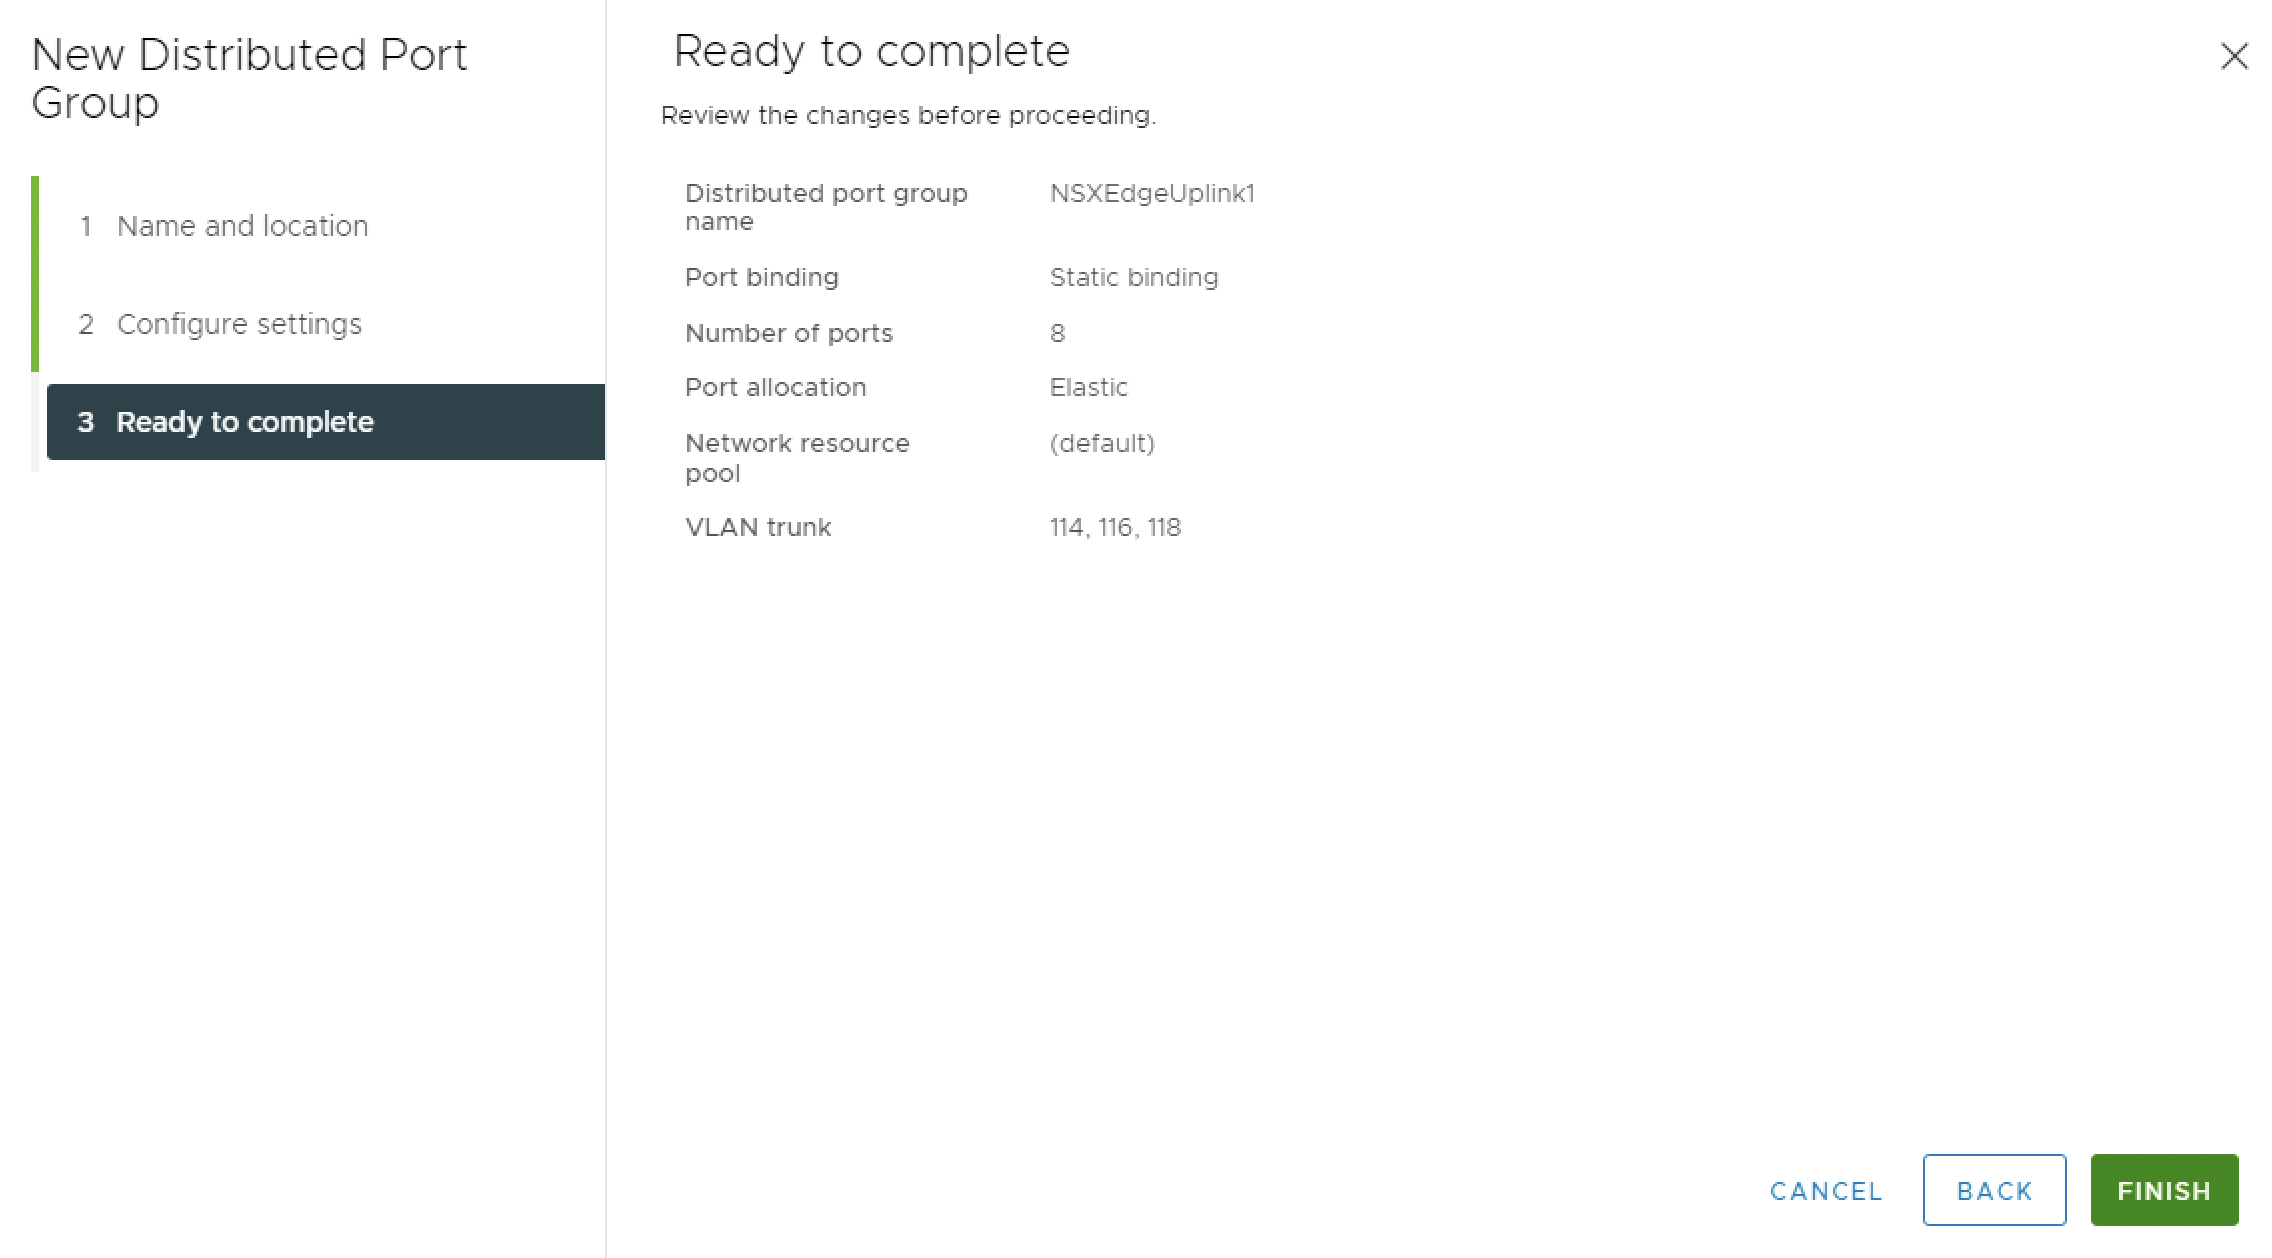
Verify if the Distributed Port Group has been created successfully:
⚠️ Repeat the same steps to create the second NSXEdgeUplink2 Distributed Port Group.
When all the required Distributed Port Groups are created it should look like this:
STEP 3» Deploy the ESXi
Now that your vCenter Server is up and running and reachable the next step is to deploy the (nested) ESXi Compute and Edge hosts. Per Pod I am deploying in total six (nested) ESXi hosts (as per the diagrams in the diagrams section above) For Pod 100 the details for the (nested) ESXi hosts to deploy are found in the table below:
| ESXi Hostname | VM Name | vmk0 IP address | Purpose |
|---|---|---|---|
| Pod-100-ESXi-31 | IH-Pod-100-ESXi-31 | 10.203.100.31/24 | Compute Host |
| Pod-100-ESXi-32 | IH-Pod-100-ESXi-32 | 10.203.100.32/24 | Compute Host |
| Pod-100-ESXi-33 | IH-Pod-100-ESXi-33 | 10.203.100.33/24 | Compute Host |
| Pod-100-ESXi-91 | IH-Pod-100-ESXi-91 | 10.203.100.91/24 | Edge Host |
| Pod-100-ESXi-92 | IH-Pod-100-ESXi-92 | 10.203.100.92/24 | Edge Host |
| Pod-100-ESXi-93 | IH-Pod-100-ESXi-93 | 10.203.100.93/24 | Edge Host |
⚠️ In this article I am only deploying Compute and Edge Hosts, but the same steps below can also be used to deploy your Management hosts(Figure 2]). Lab:Install and configure a (nested) vSphere SDDC It all depends on the amount of available resources you have.
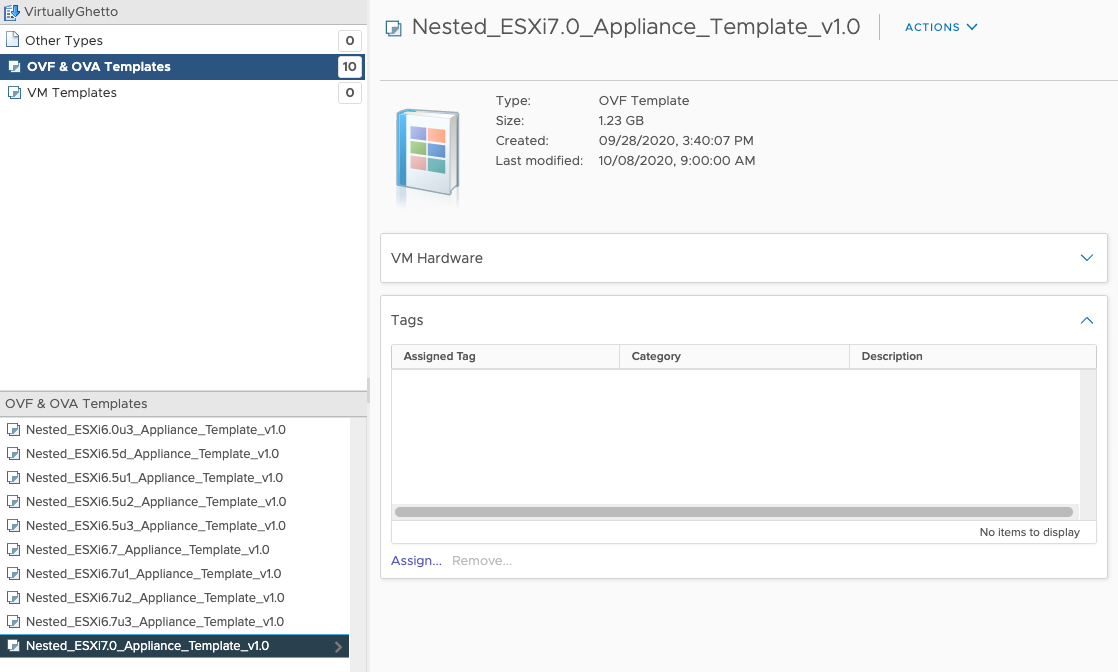
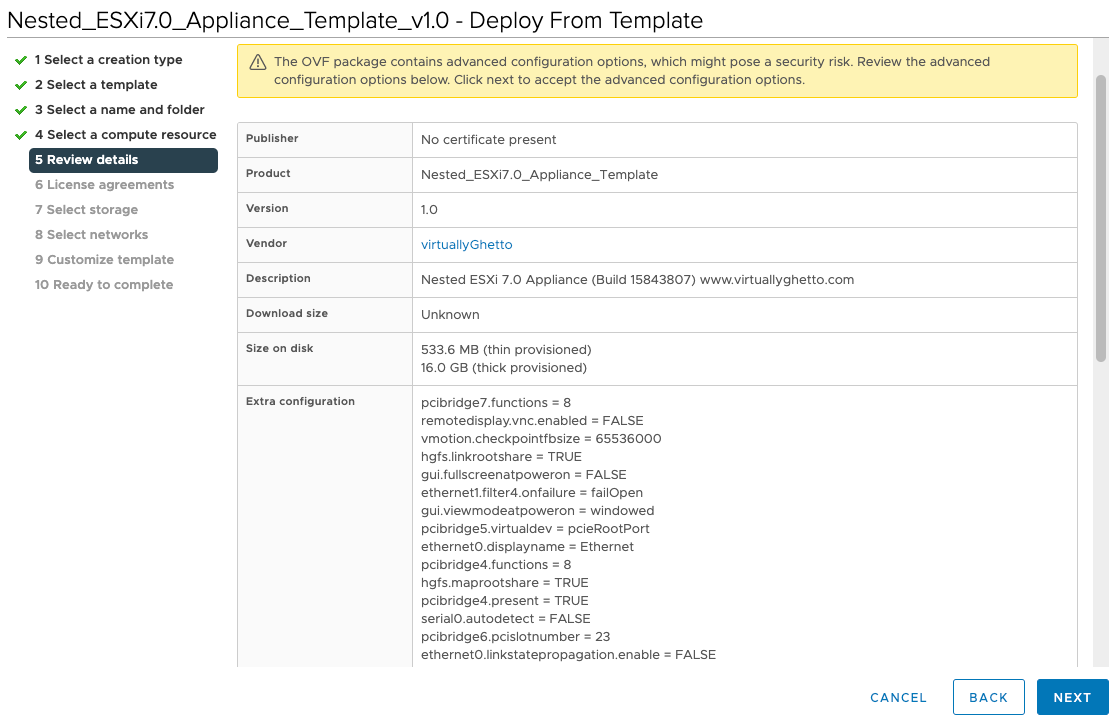
I am using an ova template (Nested_ESXi7.0_Appliance_Template_v1.0)that has been provided by William Lam.
Create a new Virtual Machine:

Select: Deploy from template:

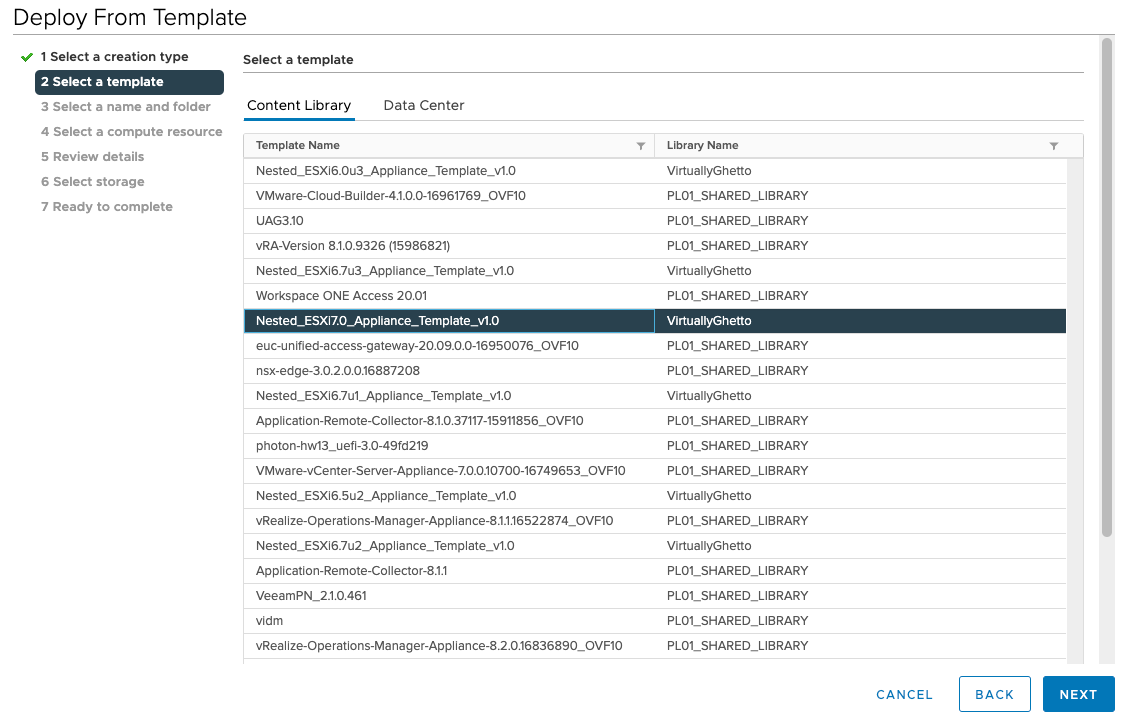
Choose the OVA/OVF Template you want to deploy from:
Provide a Virtual Machine name:

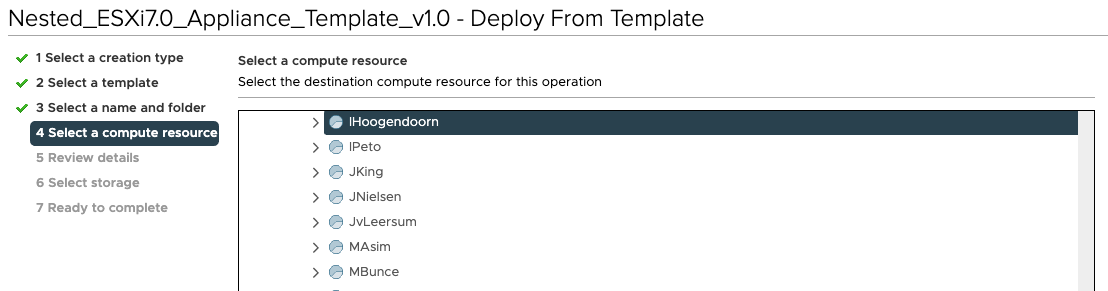
Select the correct Resource Pool (the one with your name on it):
Review the details:
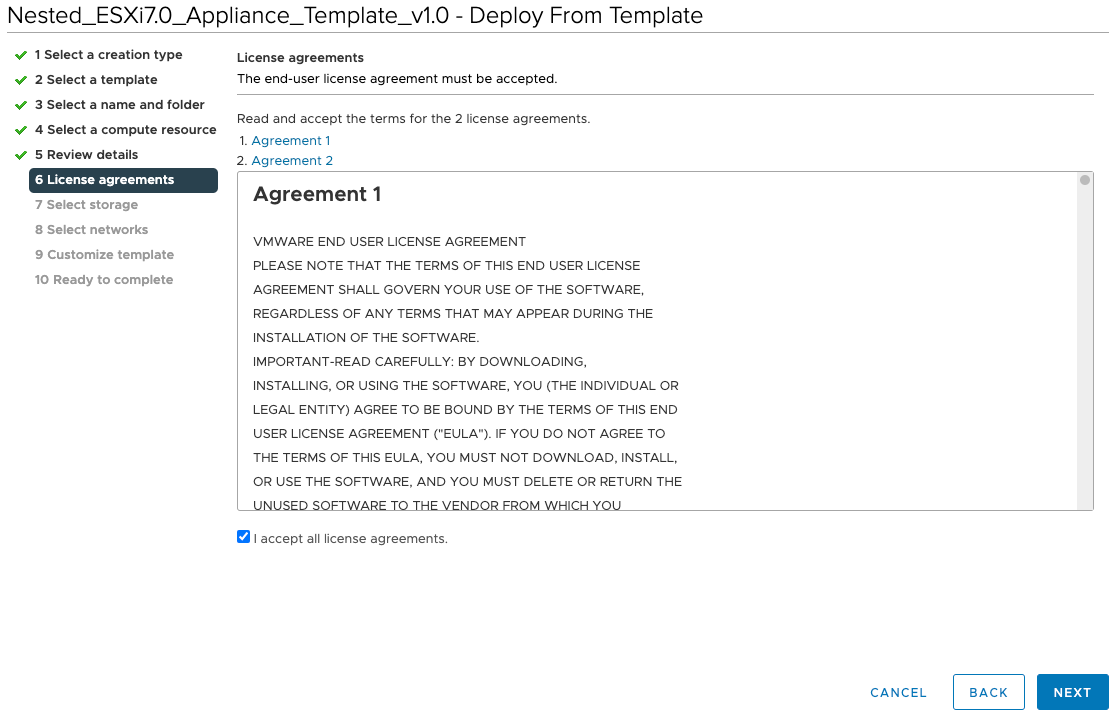
Accept the licence agreement:
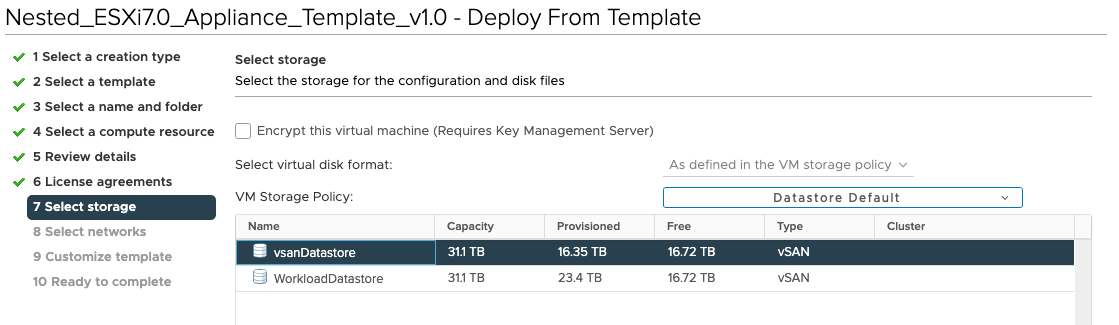
Select the Storage:
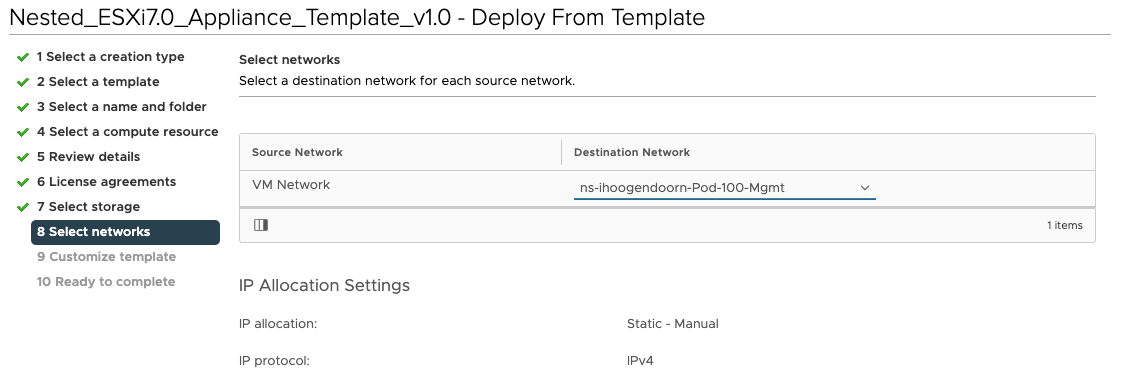
Select the destination network:
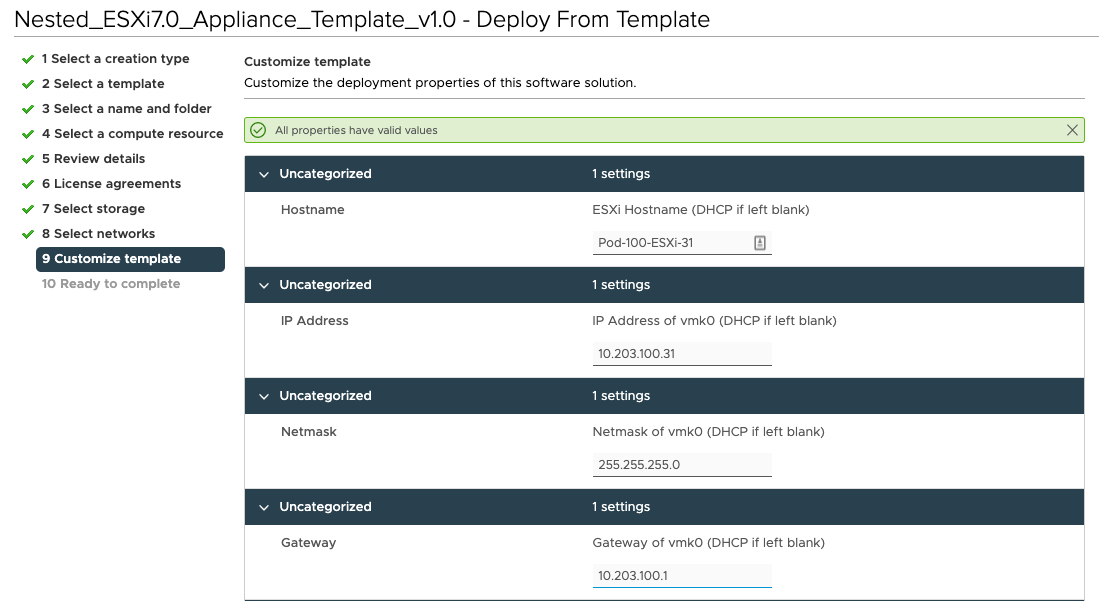
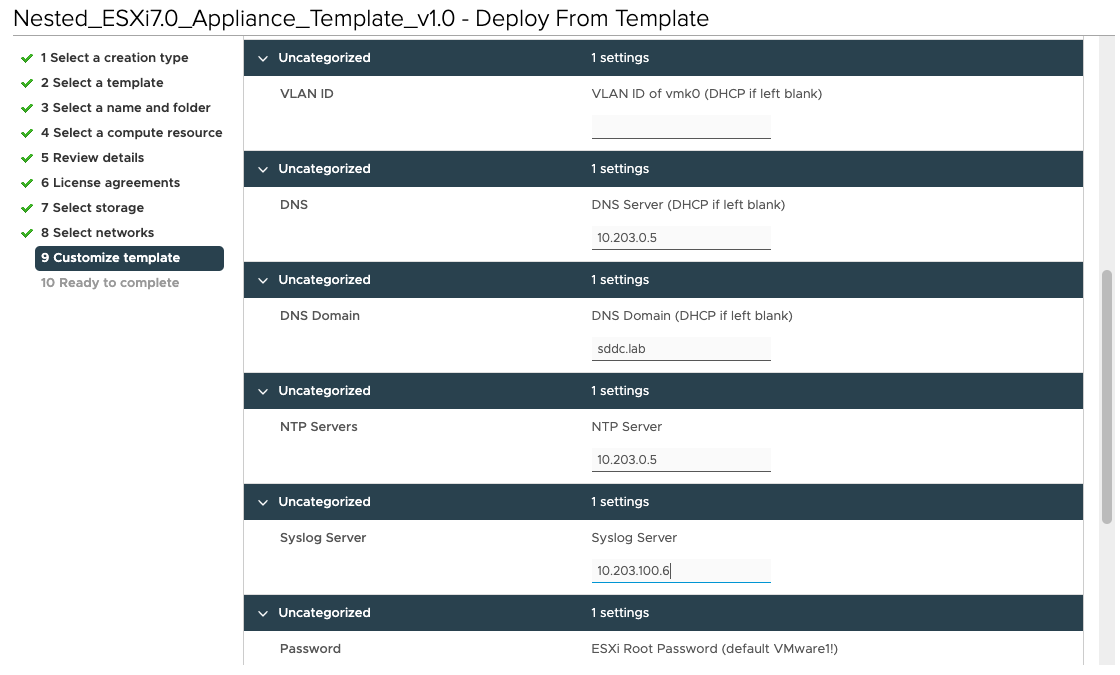
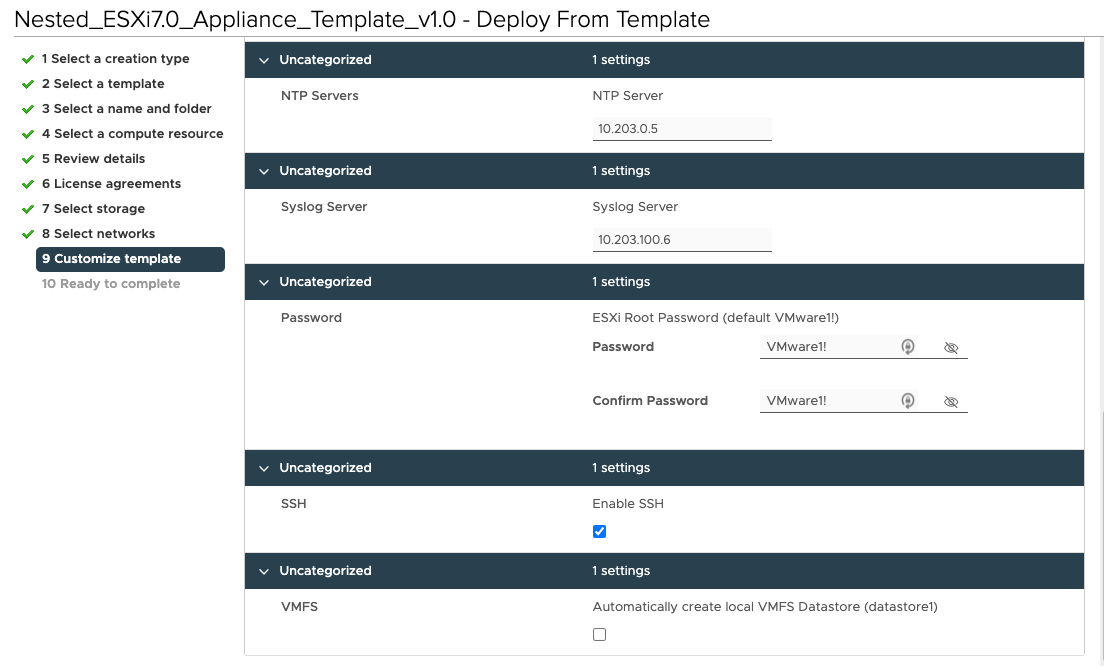
Specify the template specific properties like passwords, IP address, DNS, default gateway settings, etc.:
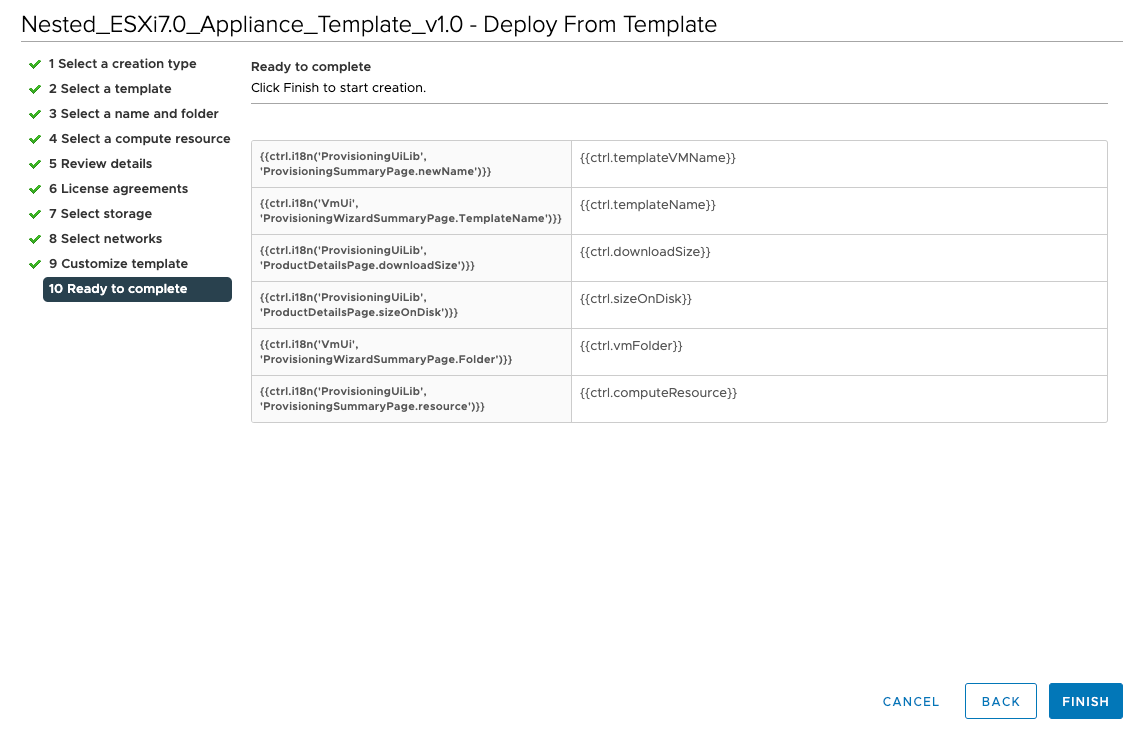
Review the Summary before you start the actual deploy:
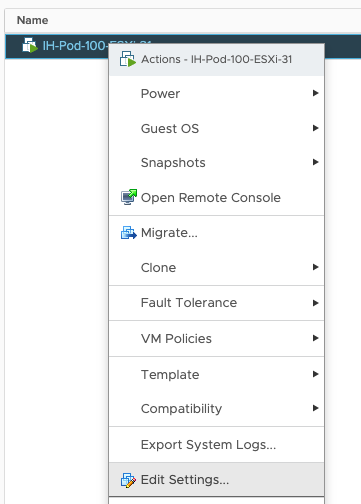
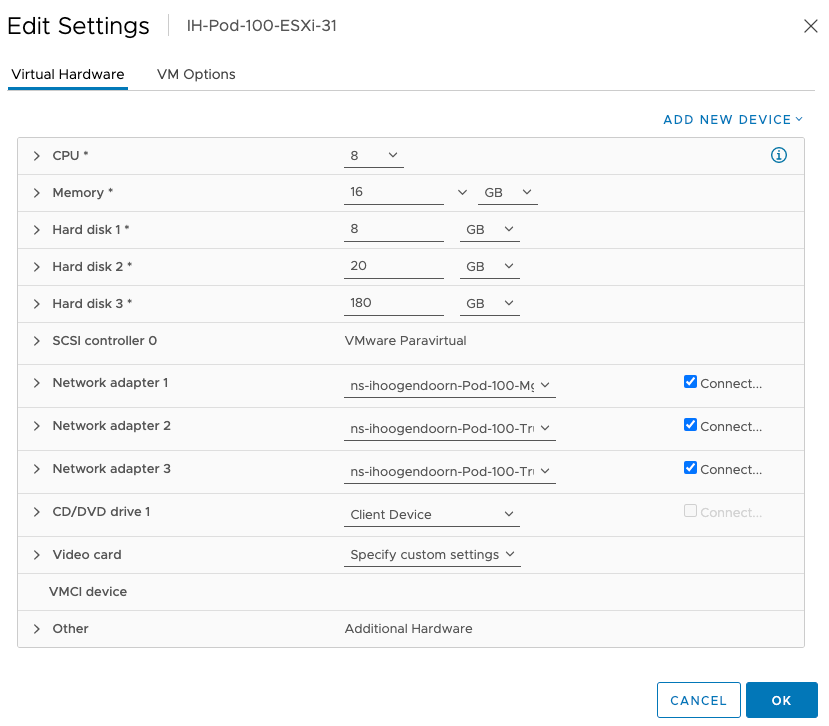
Now that the first (nested) ESXi host is deployed, we need to add an additional Virtual Network adapter and change the CPU, RAM, and Hard Disk settings. Let's edit the settings the newly created (nested) ESXi host:
Add Network Adapter so we can use the first NIC dedicated for management.
| vNIC# | Port Group |
|---|---|
| Network Adapter 1 | Pod-100-Mgmt |
| Network Adapter 2 | Pod-100-Trunk |
| Network Adapter 3 | Pod-100-Trunk |
Change the CPU, RAM, and Hard Disk settings:
| Property | |
|---|---|
| vCPU | 8 |
| RAM | 16 GB |
| Hard Disk 1 | 8 GB |
| Hard Disk 2 | 20 GB |
| Hard Disk 3 | 180 GB |
Edit the VM settings:
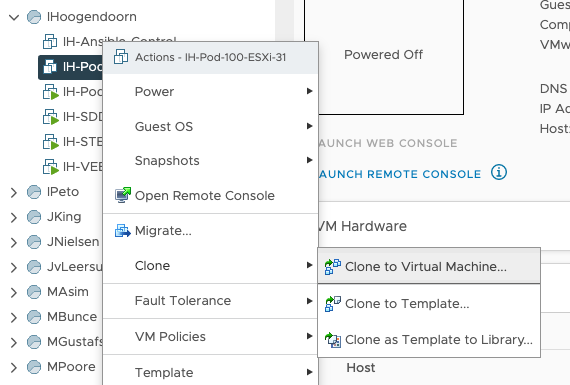
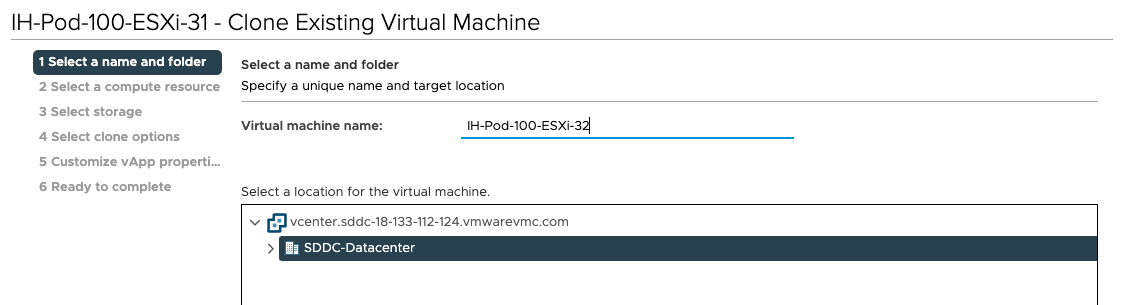
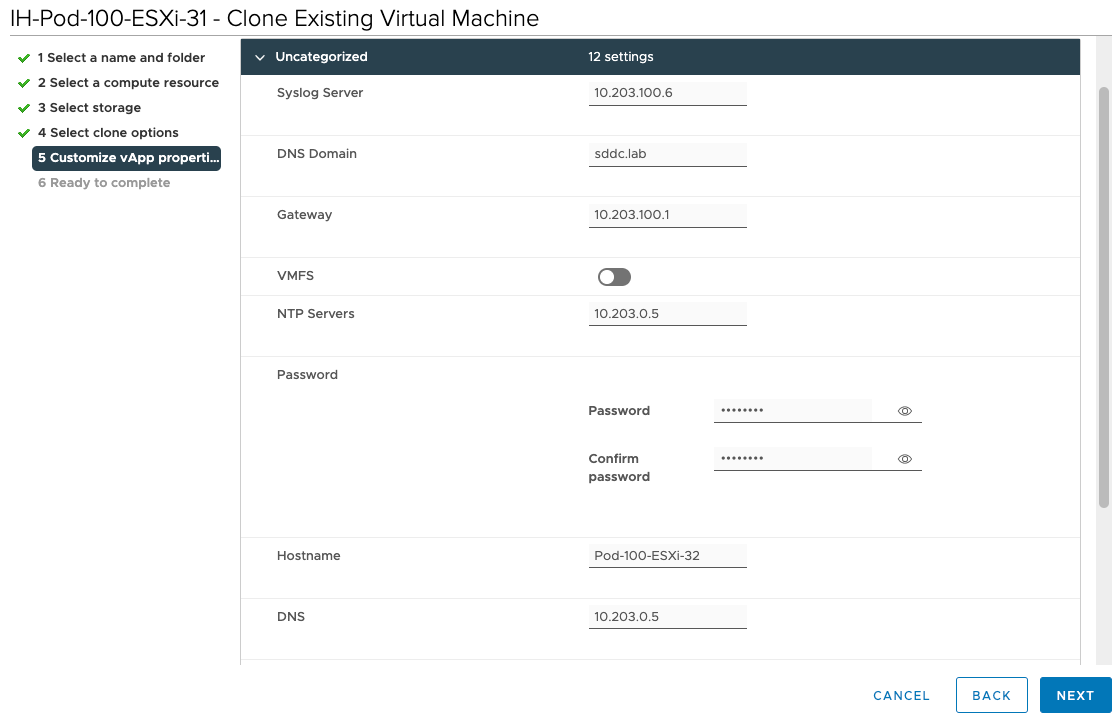
Now that you have just change the settings, you can use this Virtual Machine and clone this five times and specify the (nested) ESXi host-specific parameters during the clone wizard. Clone the Virtual Machine:
Provide a Virtual Machine name:
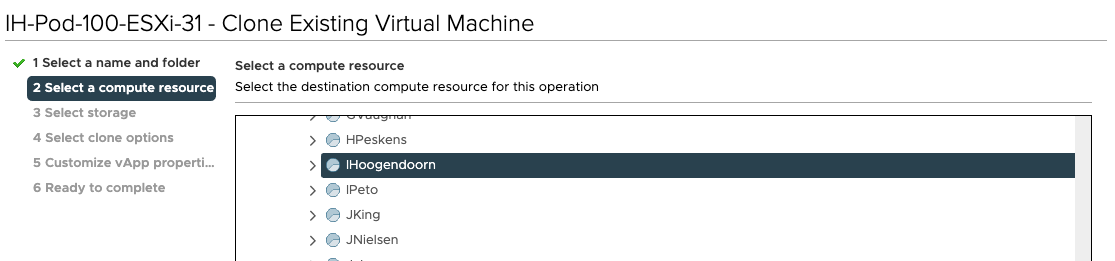
Select the correct Resource Pool (the one with your name on it):
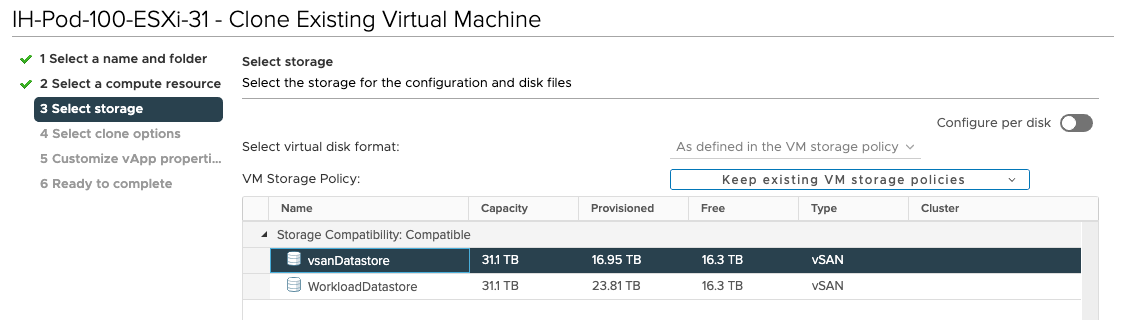
Select the Storage:
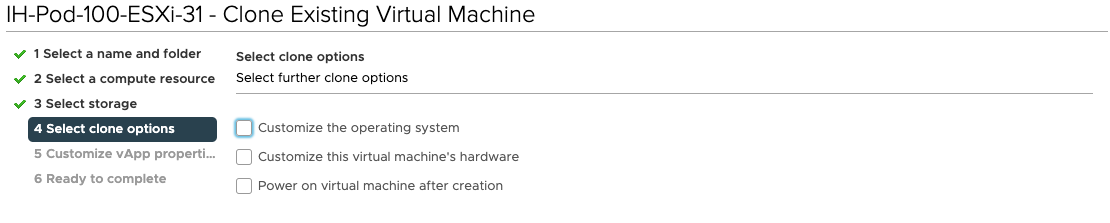
As you are cloning, this exact VM and the Virtual Machines will be identical, you don't need any OS or hardware modification, and you can choose for yourself if you want to power the VM on after deployment. I prefer powering them up all at the same time.
Specify the template specific properties like passwords, IP address, DNS, default gateway settings, etc. Most of the details are already predefined, the only thing you need to change is the hostname and the management IP address:
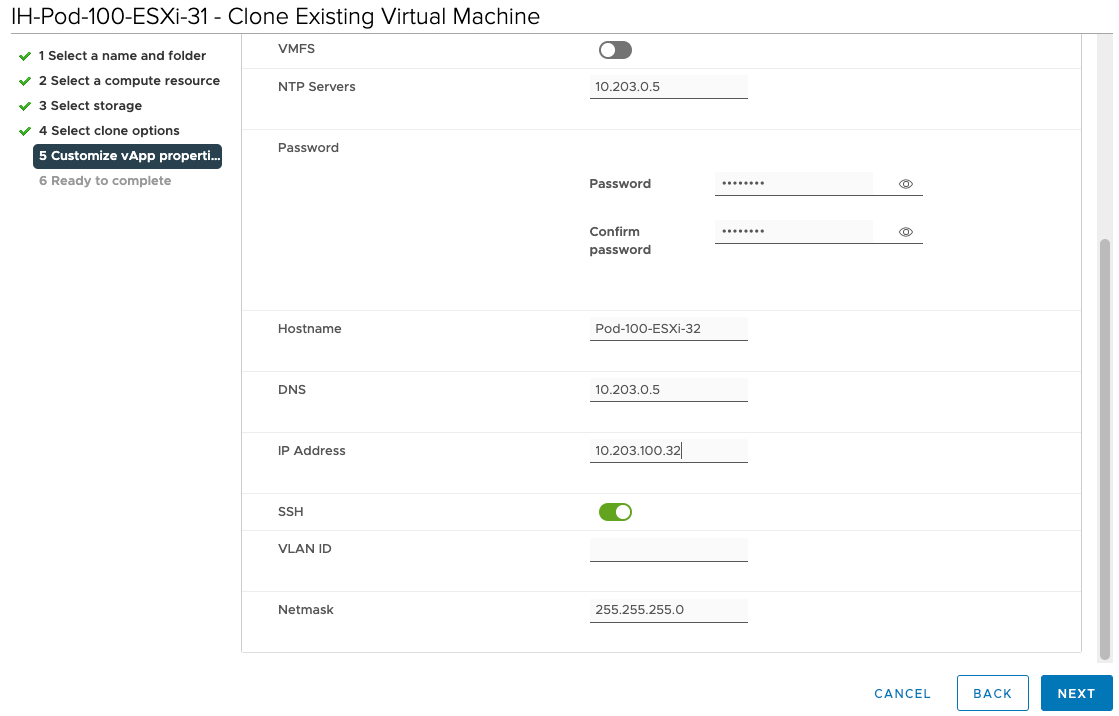
Now you have ESXI-31 and ESXI-32; repeat the cloning steps for all the (nested) ESXi hosts you required in your SDDC lab / Pod. I deployed everything according to the diagram in Figure 1.
STEP 4» Add the ESXi Servers to a vSphere Cluster and configure VSAN
Add ESXi hosts to vSphere Clusters
| ESXi hostname | Username | Password |
|---|---|---|
| pod-100-computea-1.sddc.lab | root | VMware1! |
| pod-100-computea-2.sddc.lab | root | VMware1! |
| pod-100-computea-3.sddc.lab | root | VMware1! |
| pod-100-edge-1.sddc.lab | root | VMware1! |
| pod-100-edge-2.sddc.lab | root | VMware1! |
| pod-100-edge-3.sddc.lab | root | VMware1! |
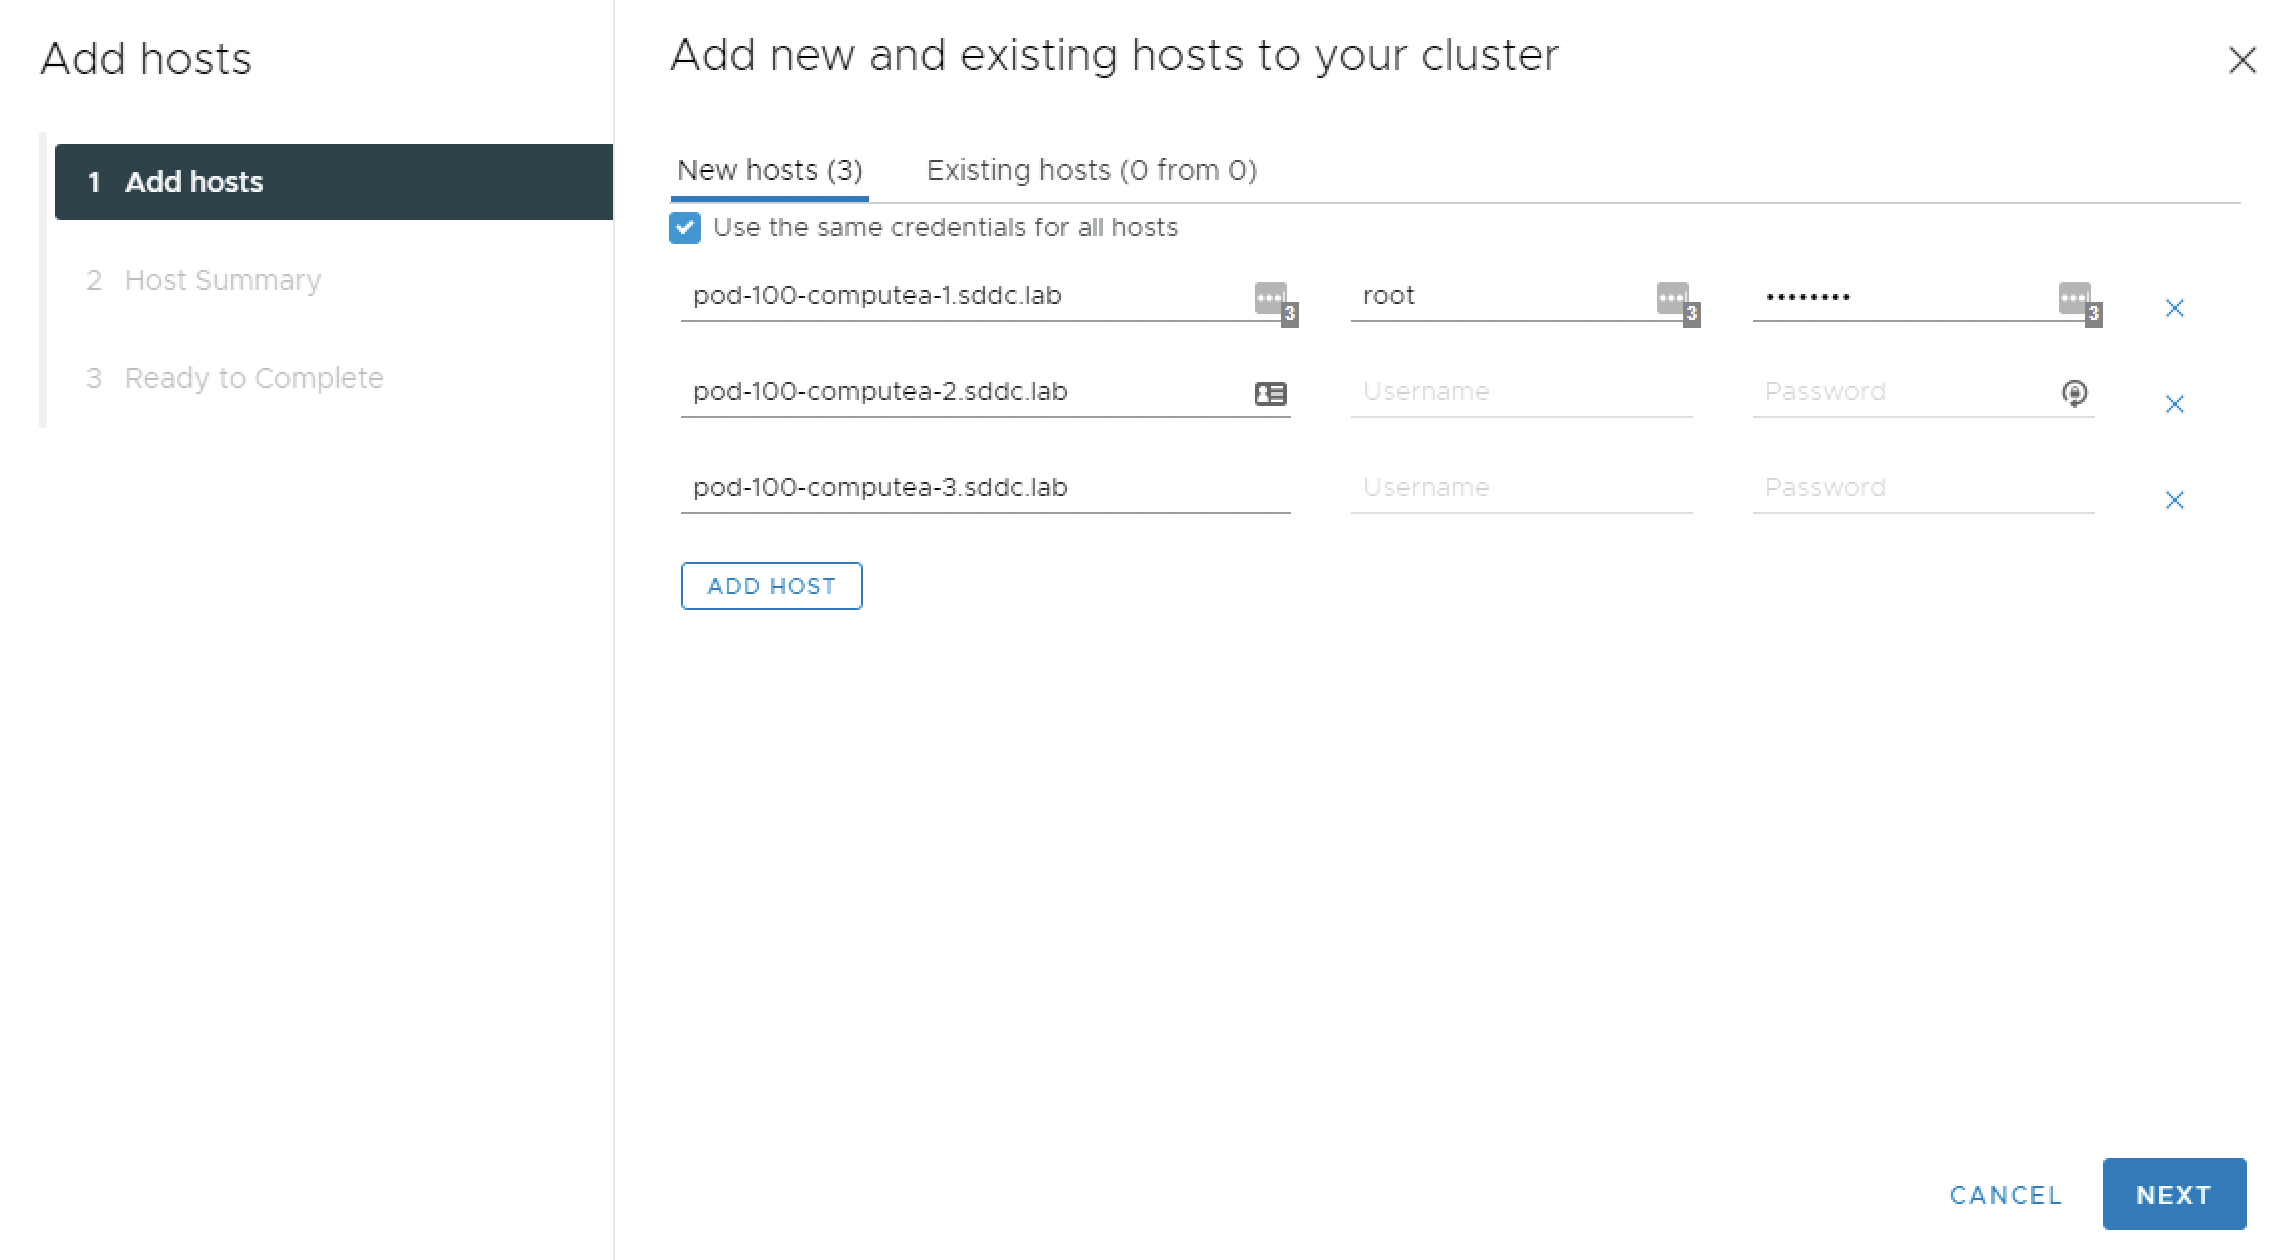
Right-click on the Compute Cluster and select Add Hosts.

Specify the FQDNs for all the hosts you need to add and if the credentials are the same you can check the box and only specify the credentials of the first host you are adding.
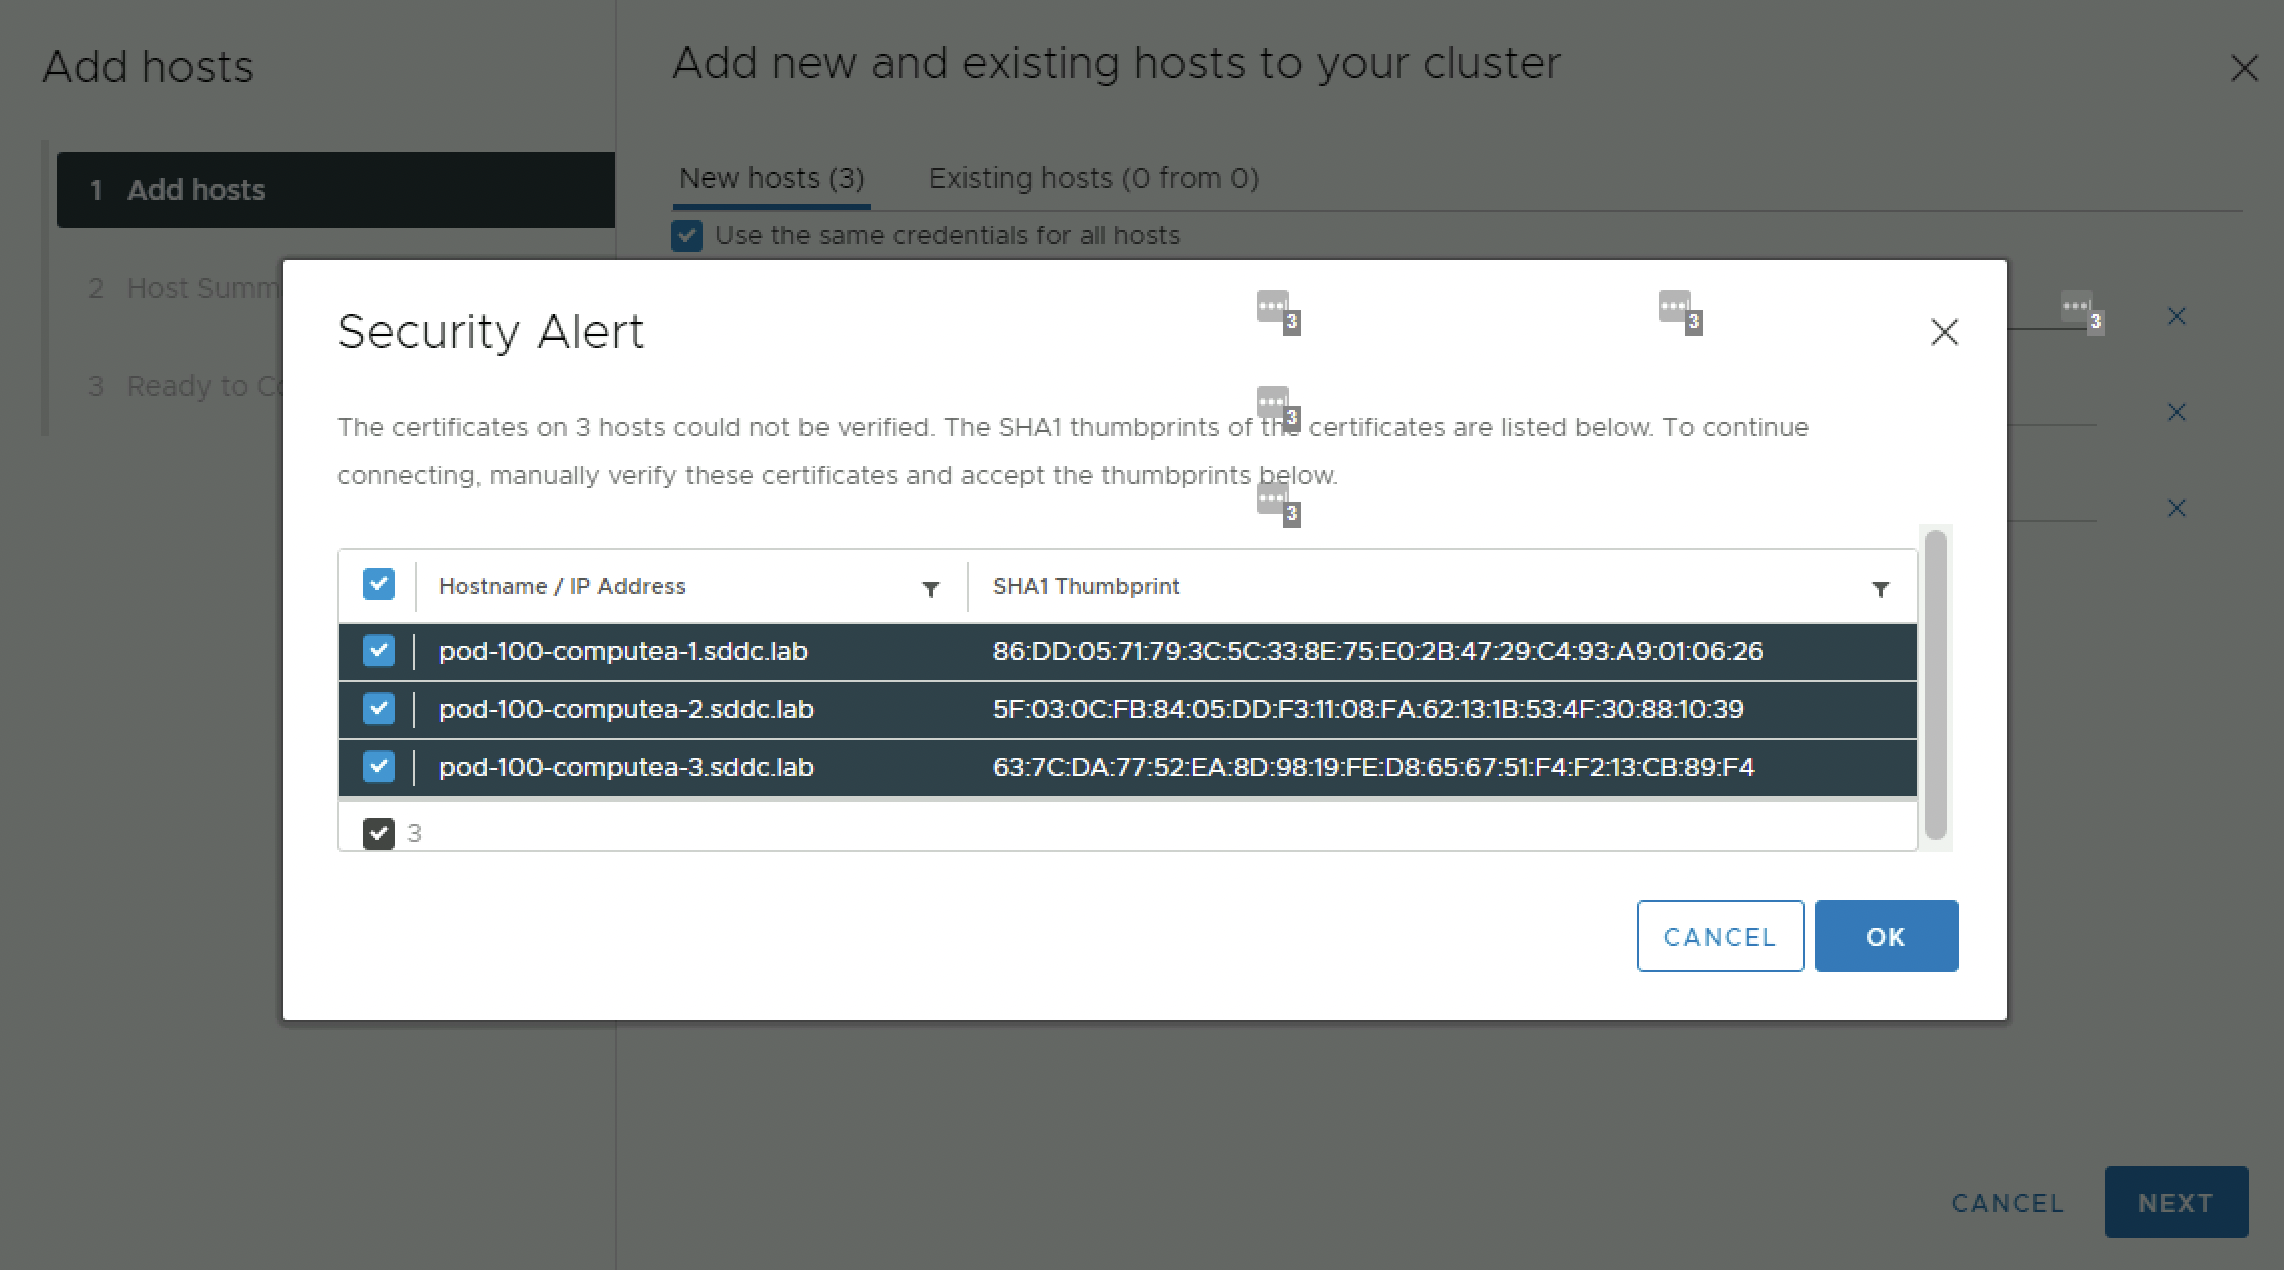
Accept the SHA1 thumbprints/certificates:
Look at the summary:
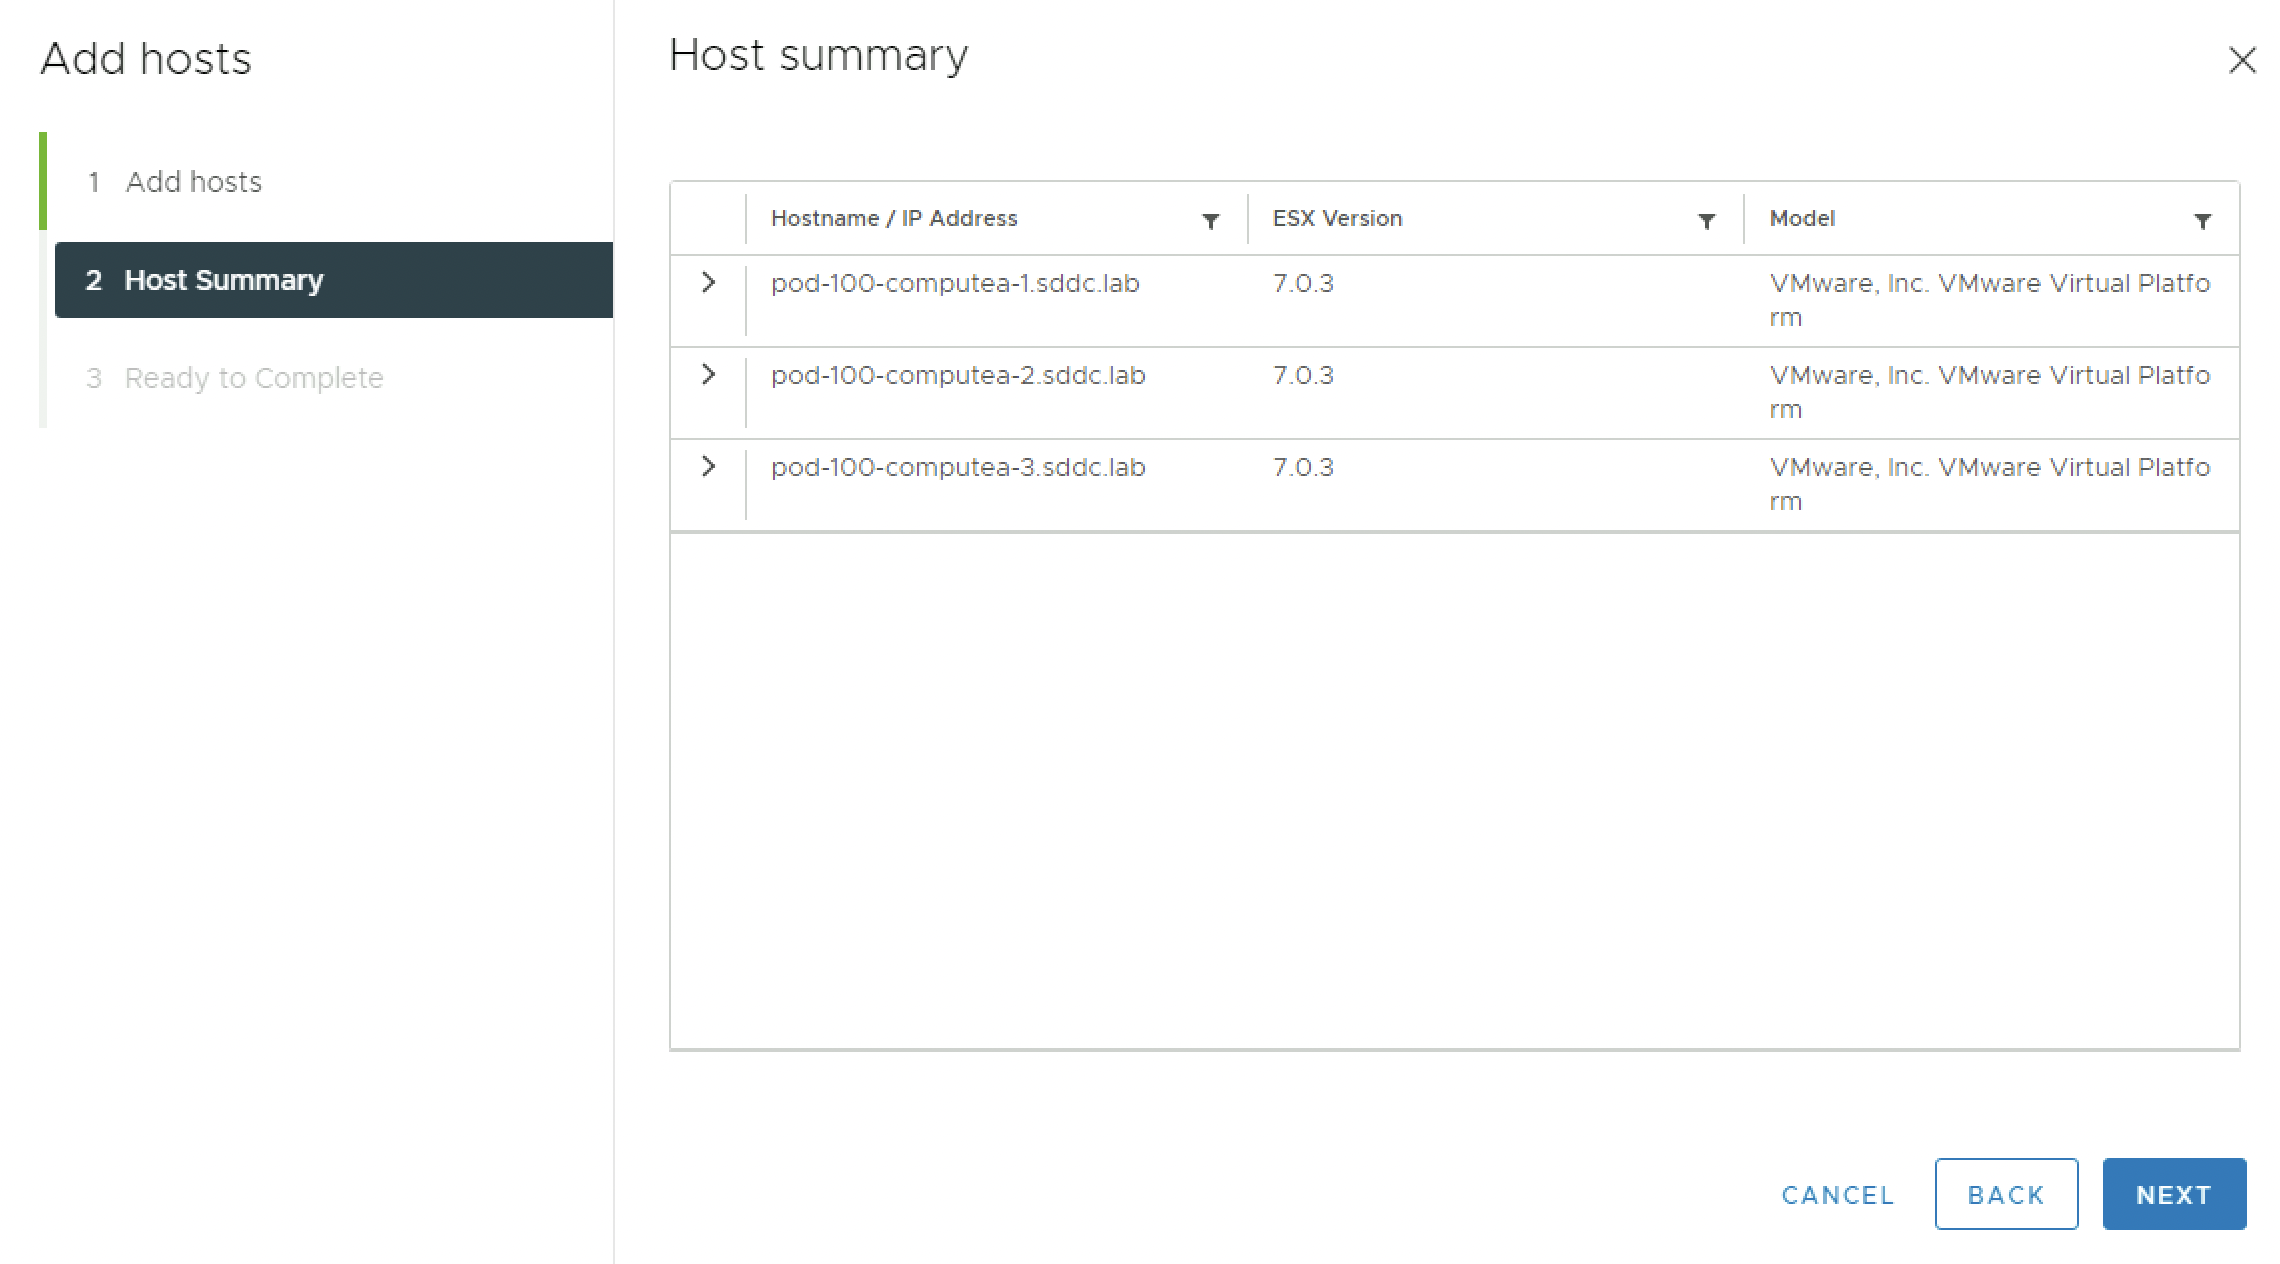
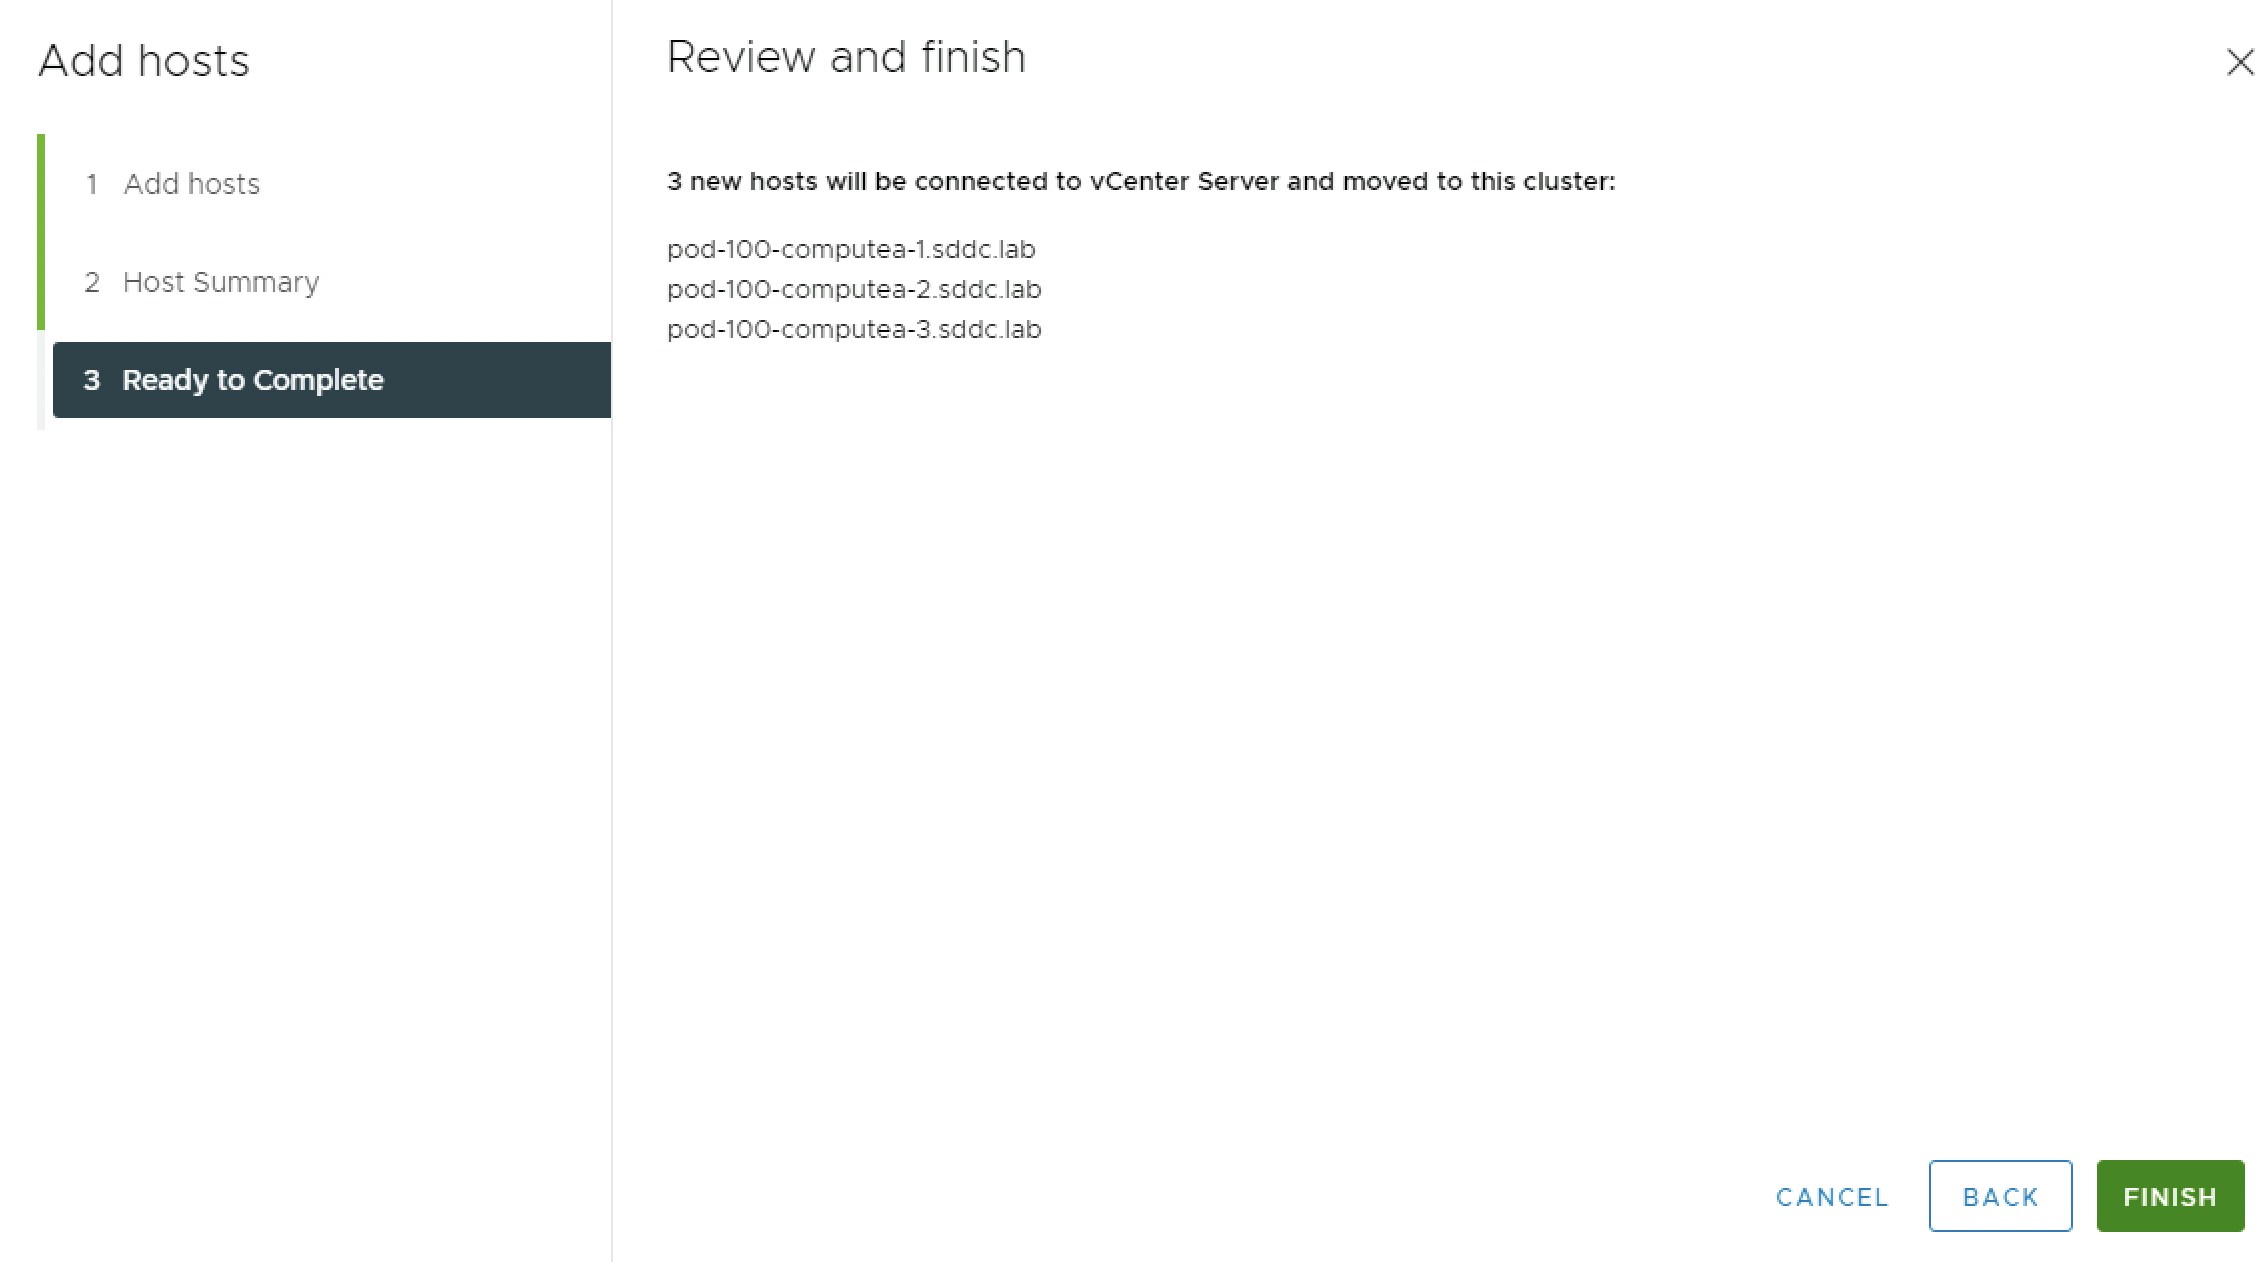
Review the Summary and Finish.
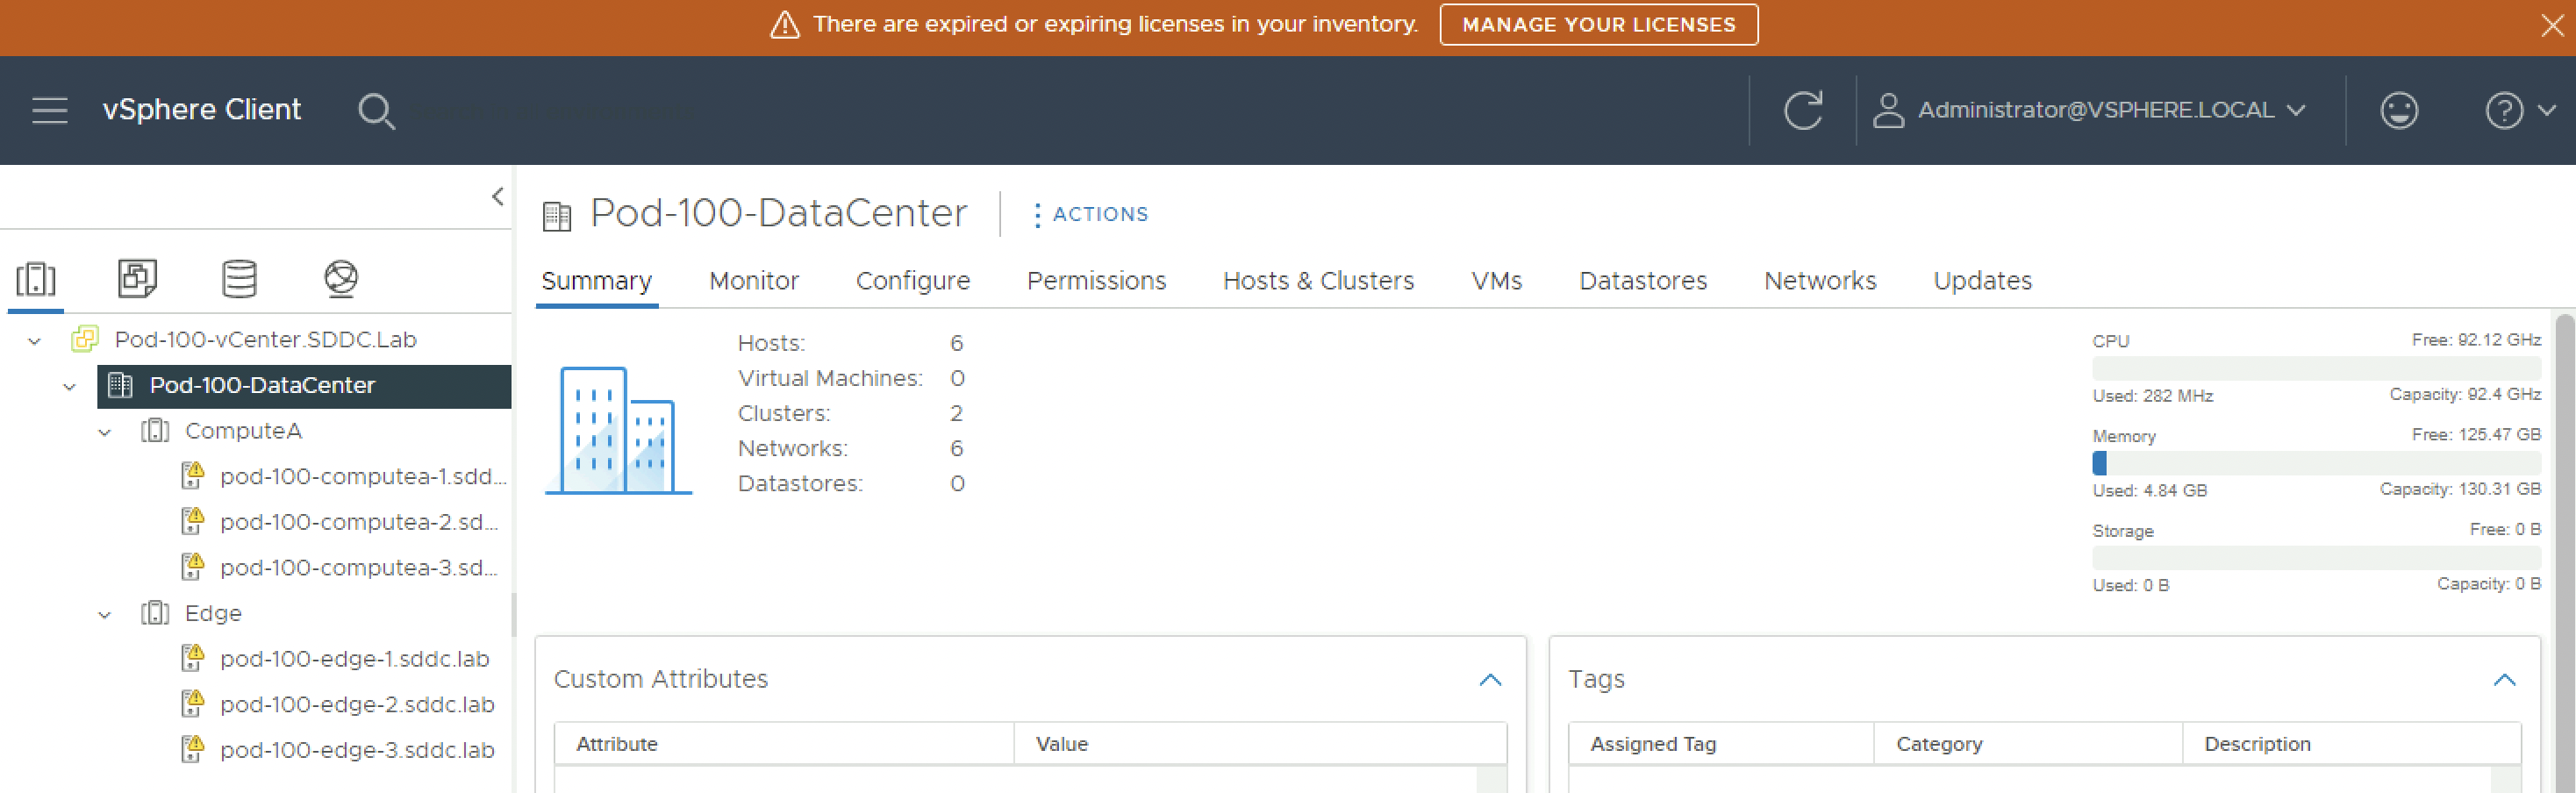
Verify if the hosts are added successfully:

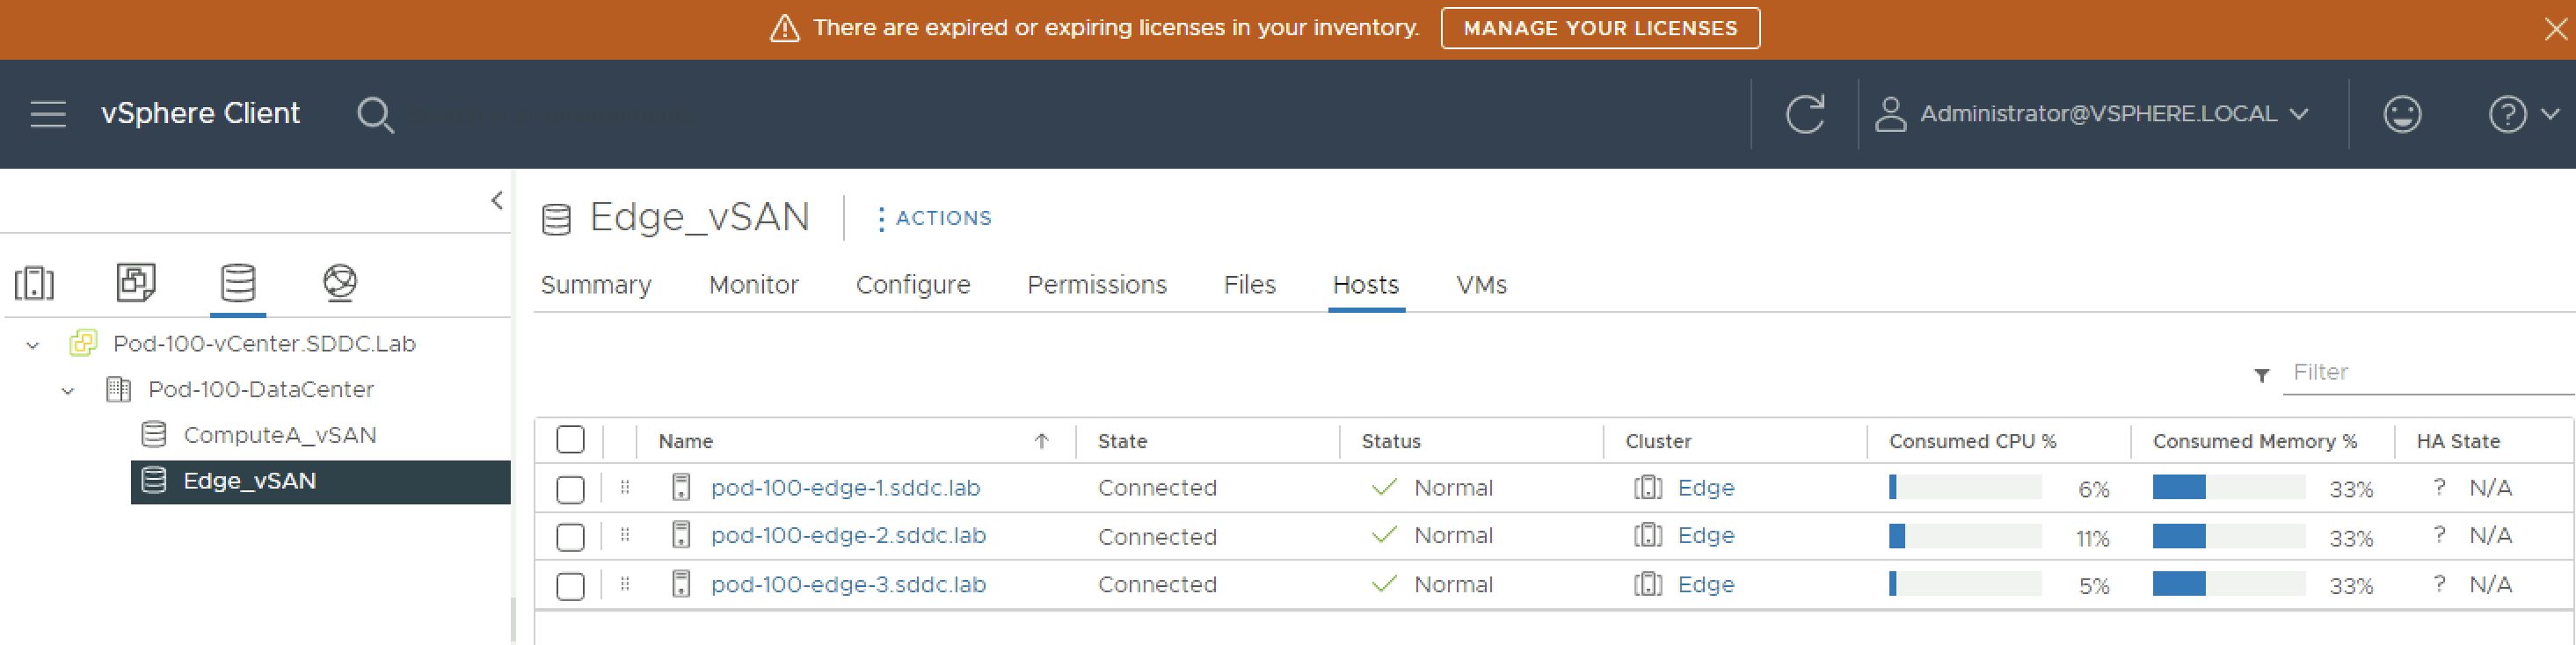
⚠️ Repeat the same steps to add the ESXi Edge hosts to the vSphere Edge Cluster.
When all the hosts are added to the clusters this should look something like this:
Add hosts to VDS and move vmk0 to VDS 〈Port Group〉
Now that the VDS is created and the Port Groups are in place and the ESXi hosts are added to the cluster, you can now add the hosts to the VDS and migrate the vmk0 management port to the VDS (Port Group).
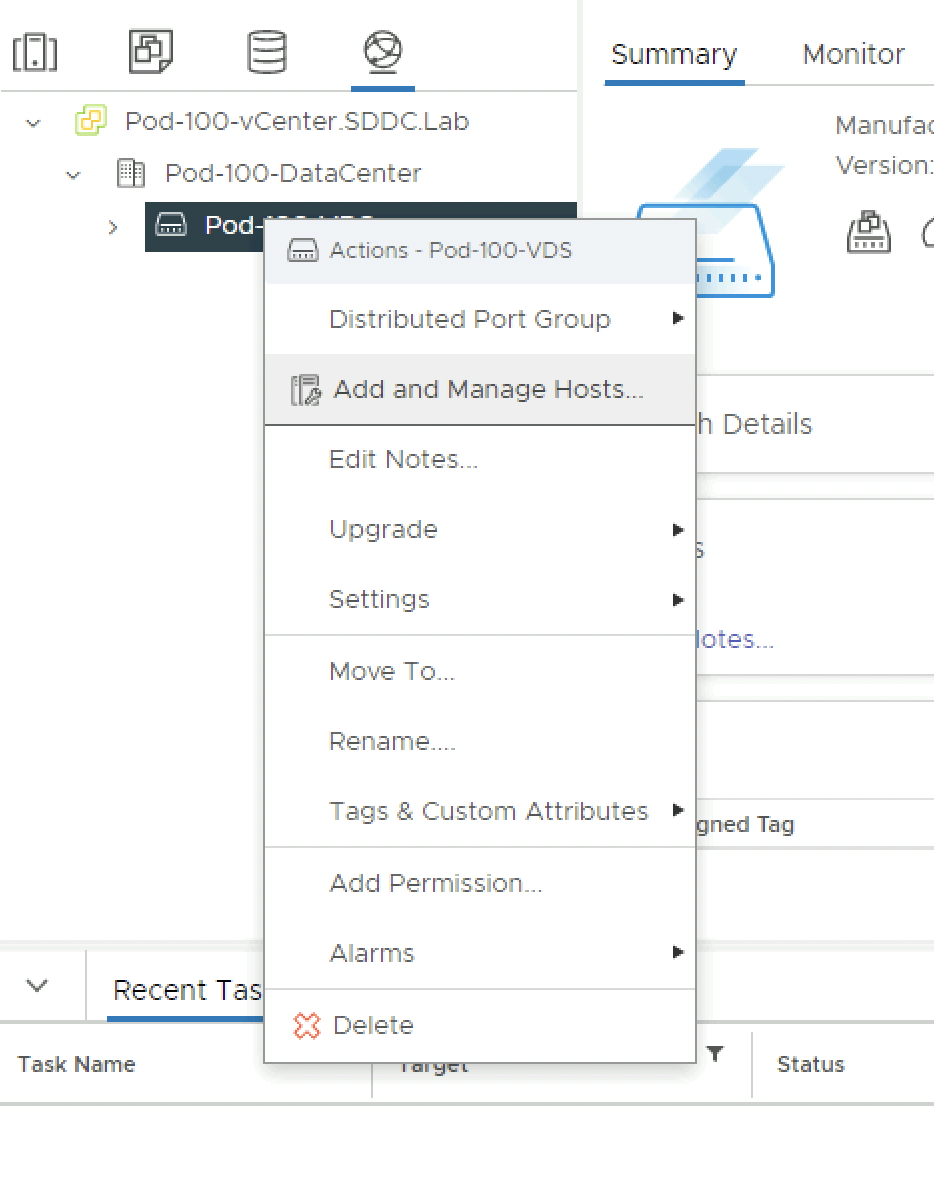
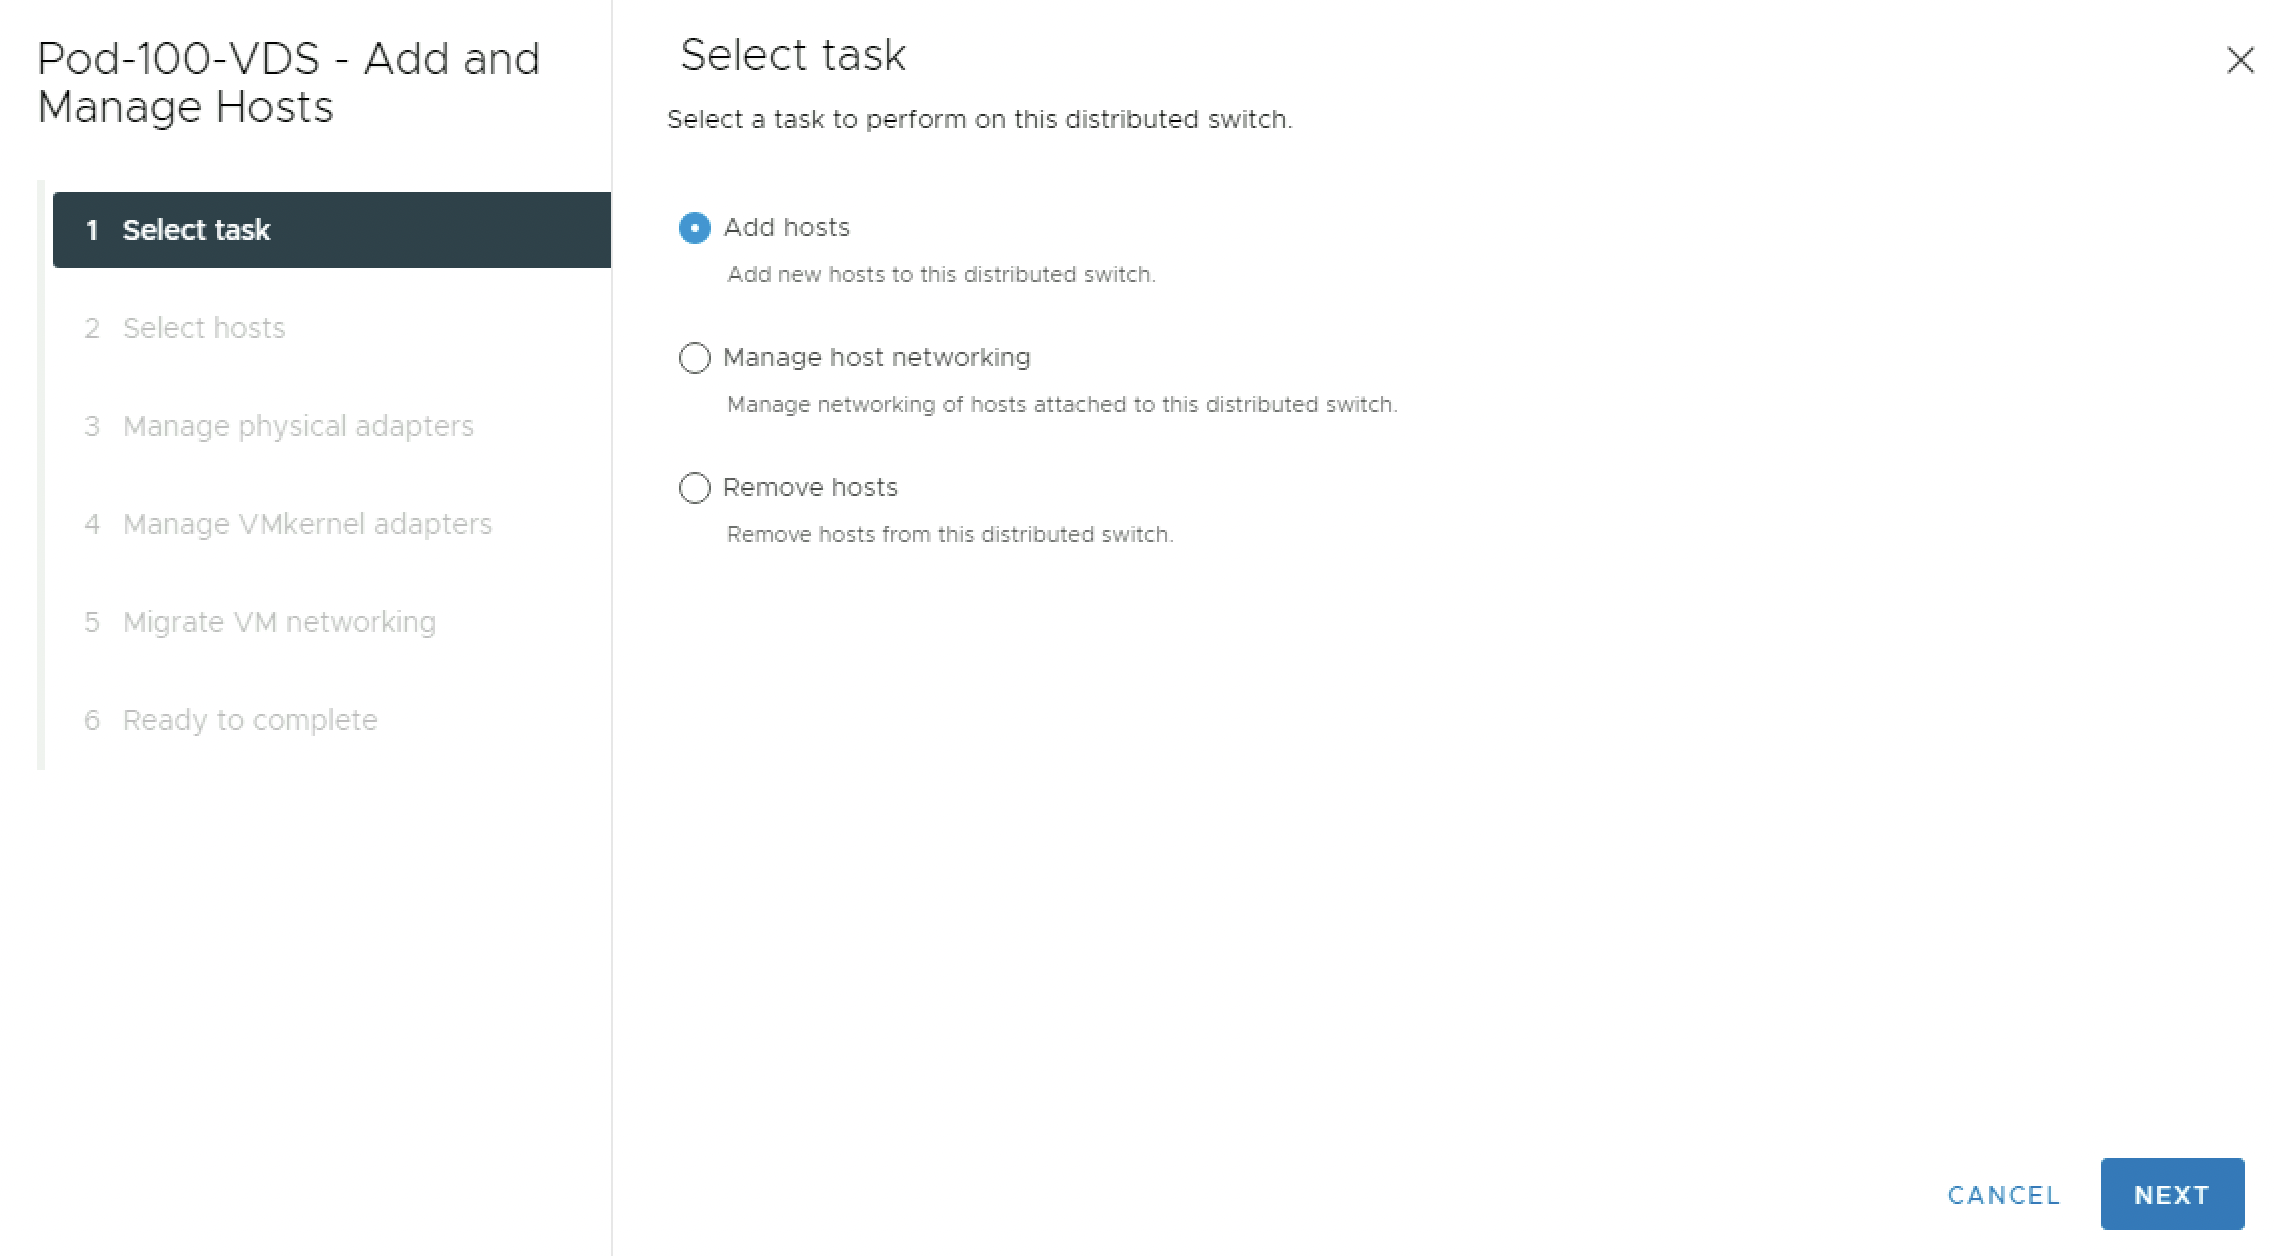
Go to the Networking tab and right-click on the VDS and select Add and Manage Hosts.
Select “Add hosts”:
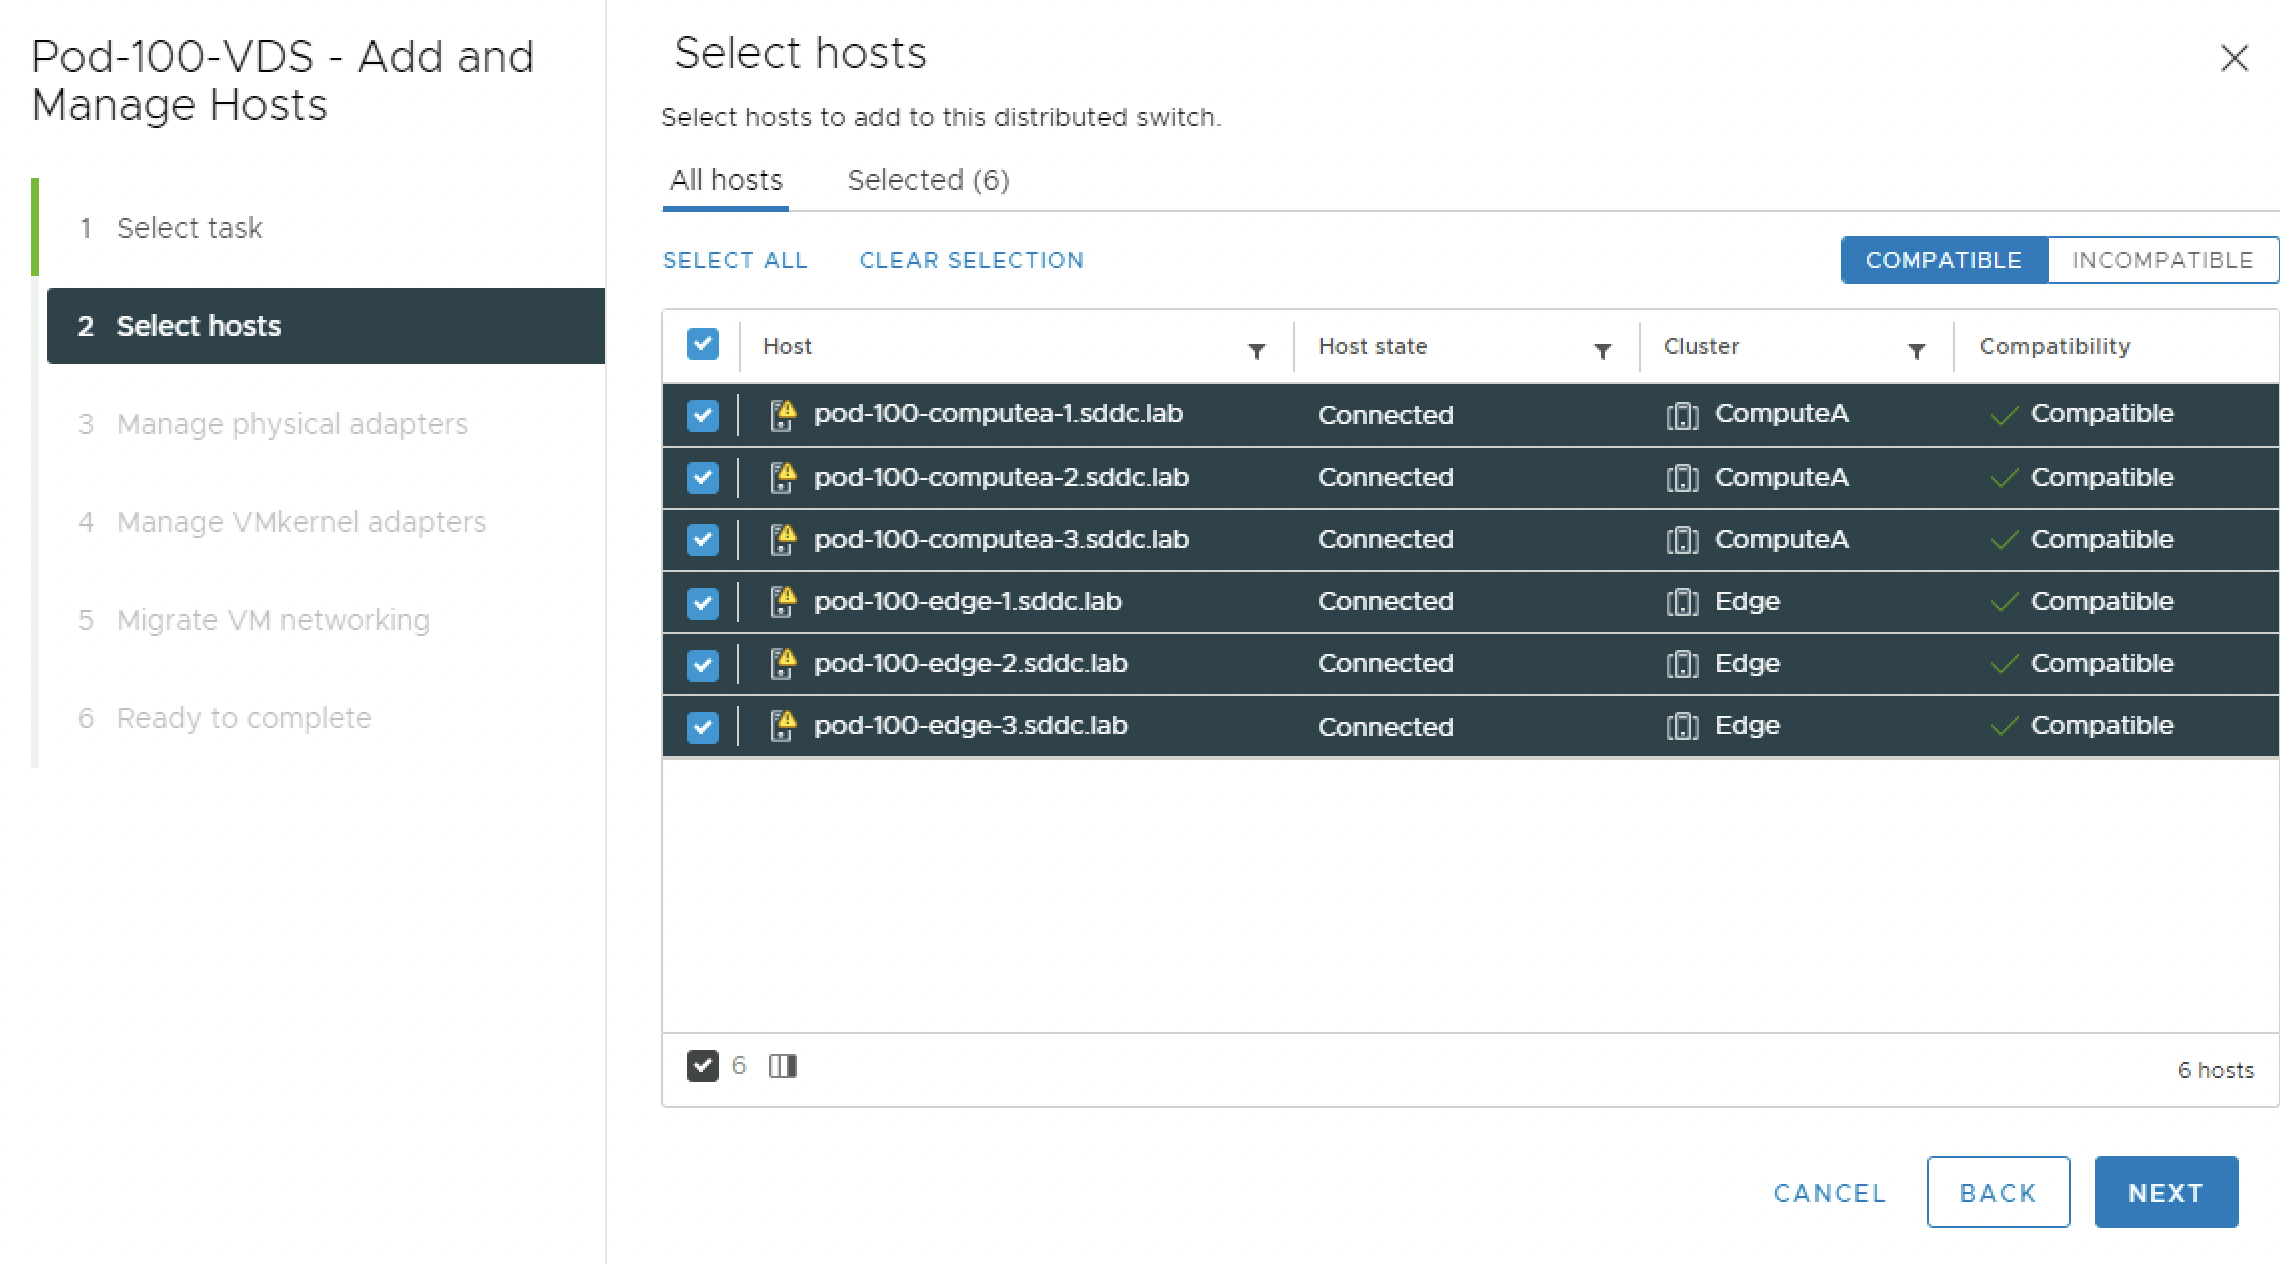
Select all the hosts you want to the VDS:
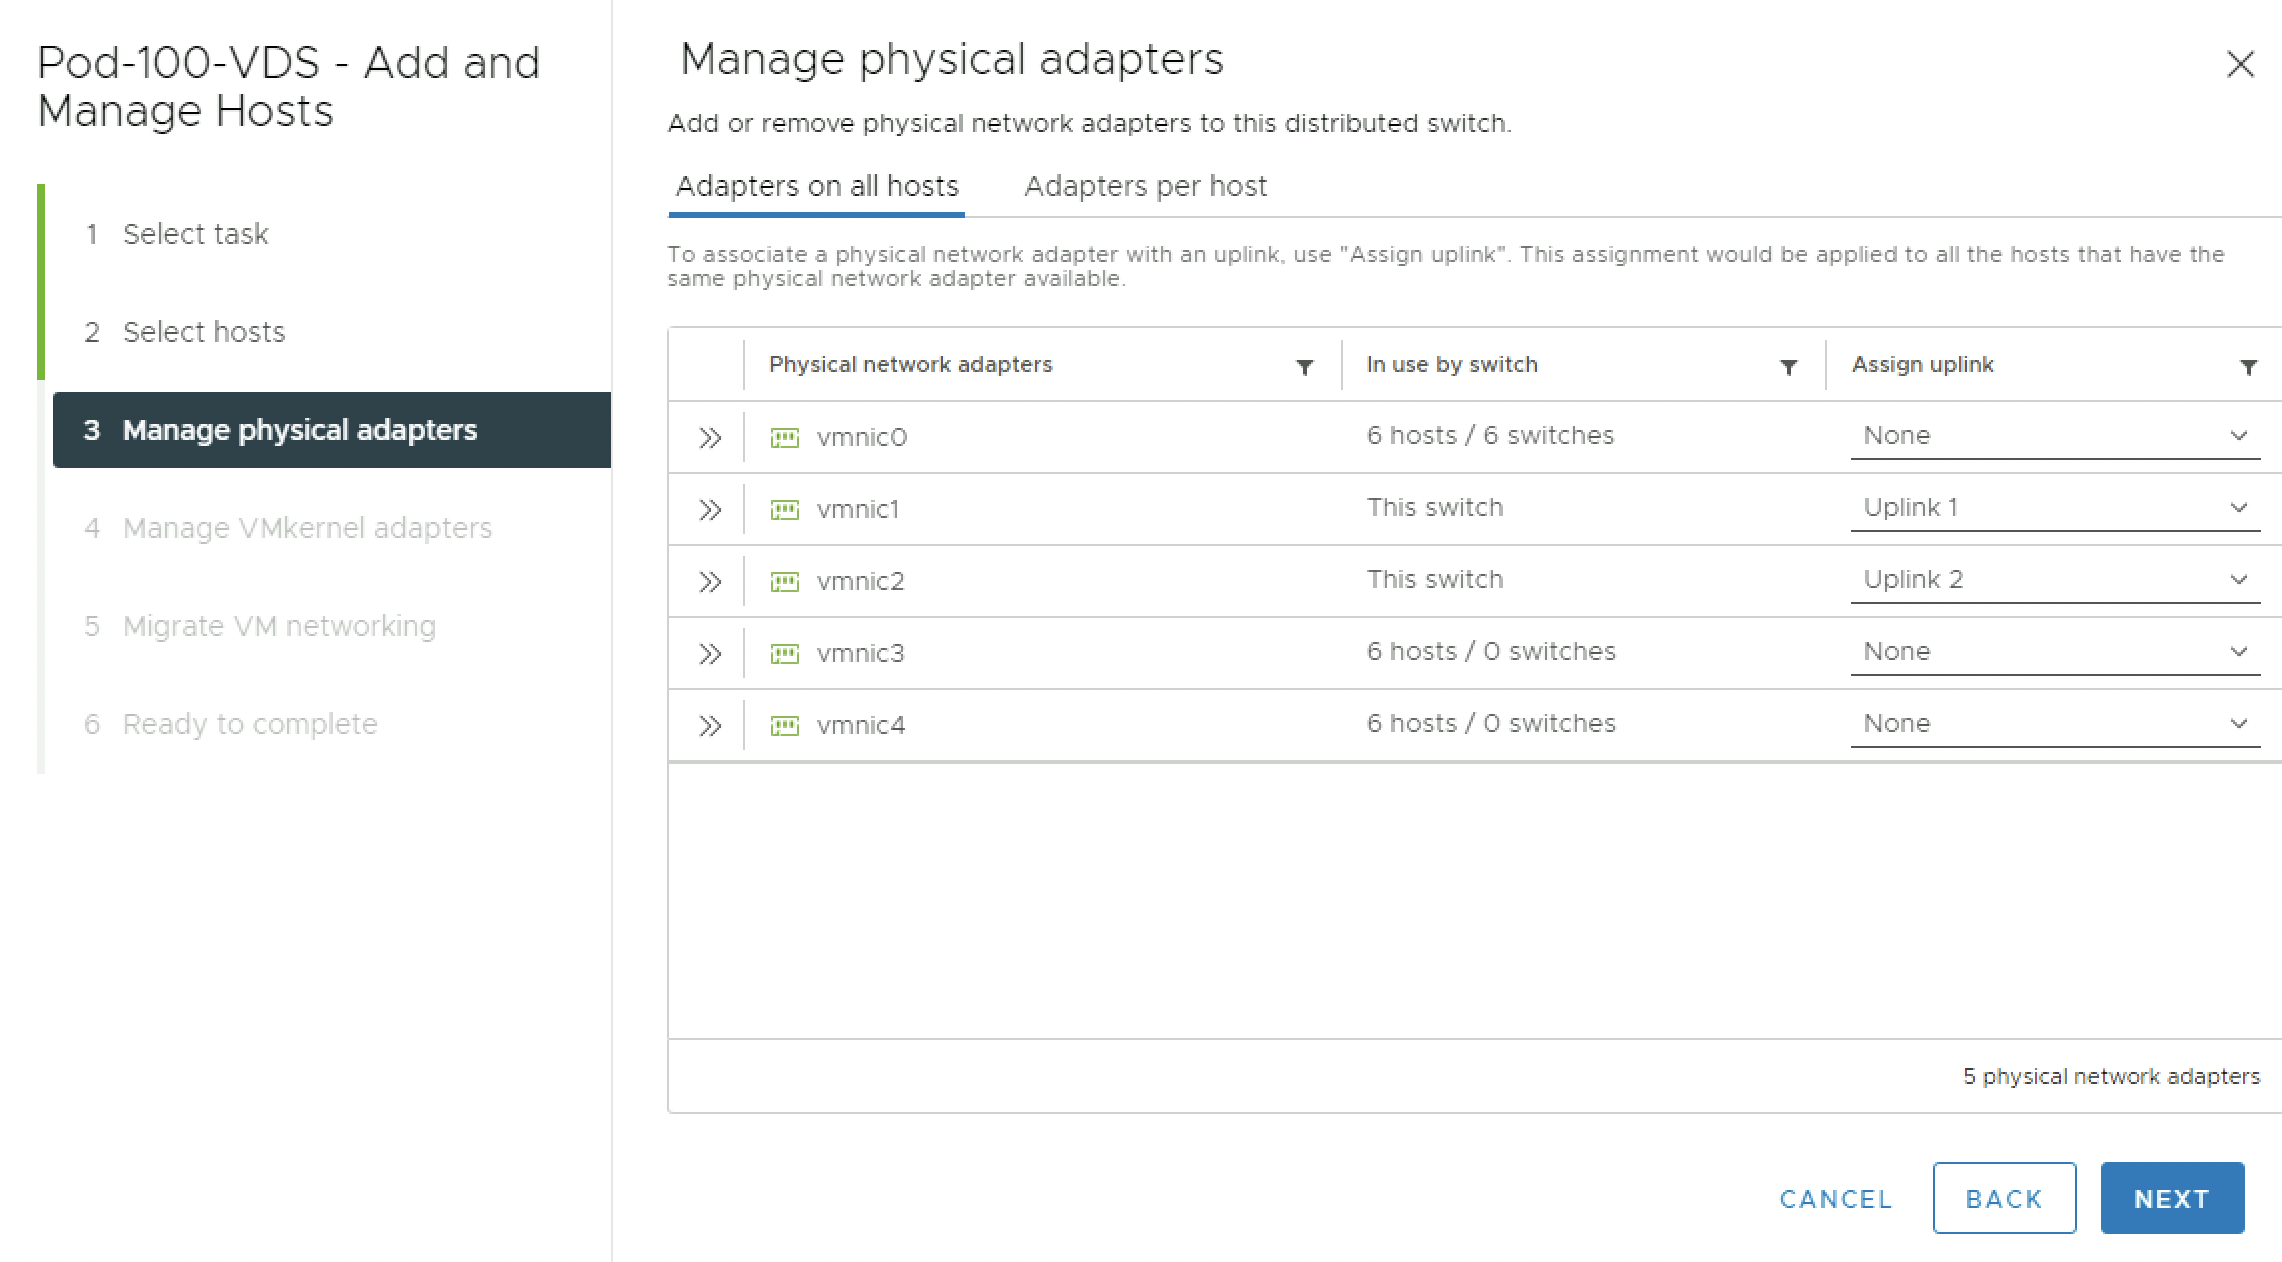
Assign the pNICs (vmnics) to the VDS Uplinks.
In my case I have 5 pNICs available on my ESXi hosts, and I will use vmnic1 and vmnic2 as shown below:
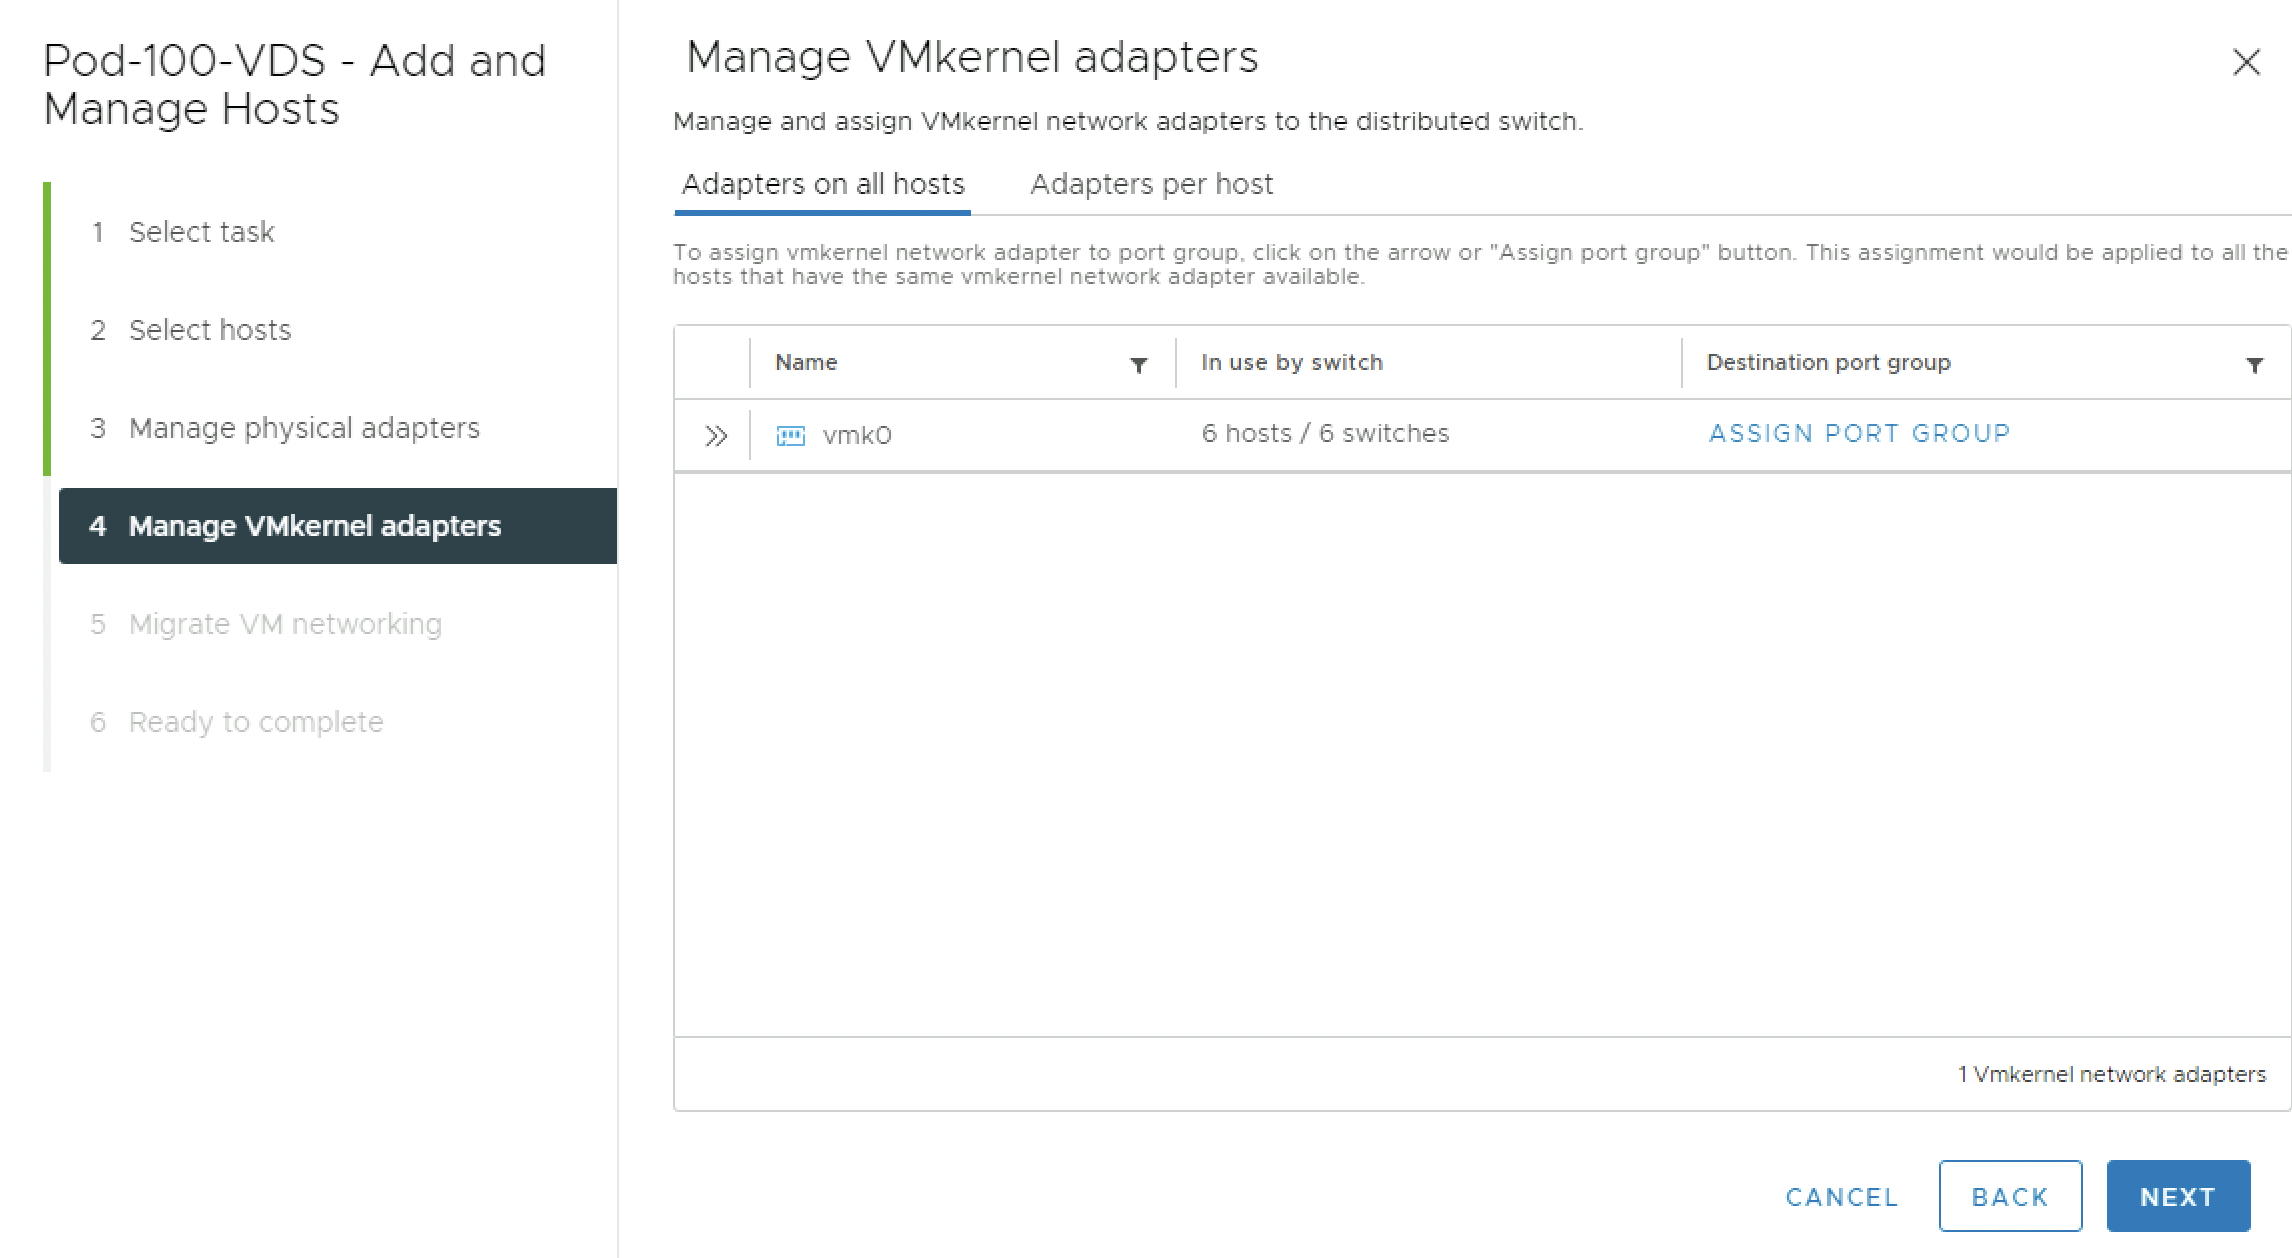
Move the vmk0 from the VSS to the VDS (Management Port Group). Click on “Assign”:
Select the Management Port Group and click on “assign” again:
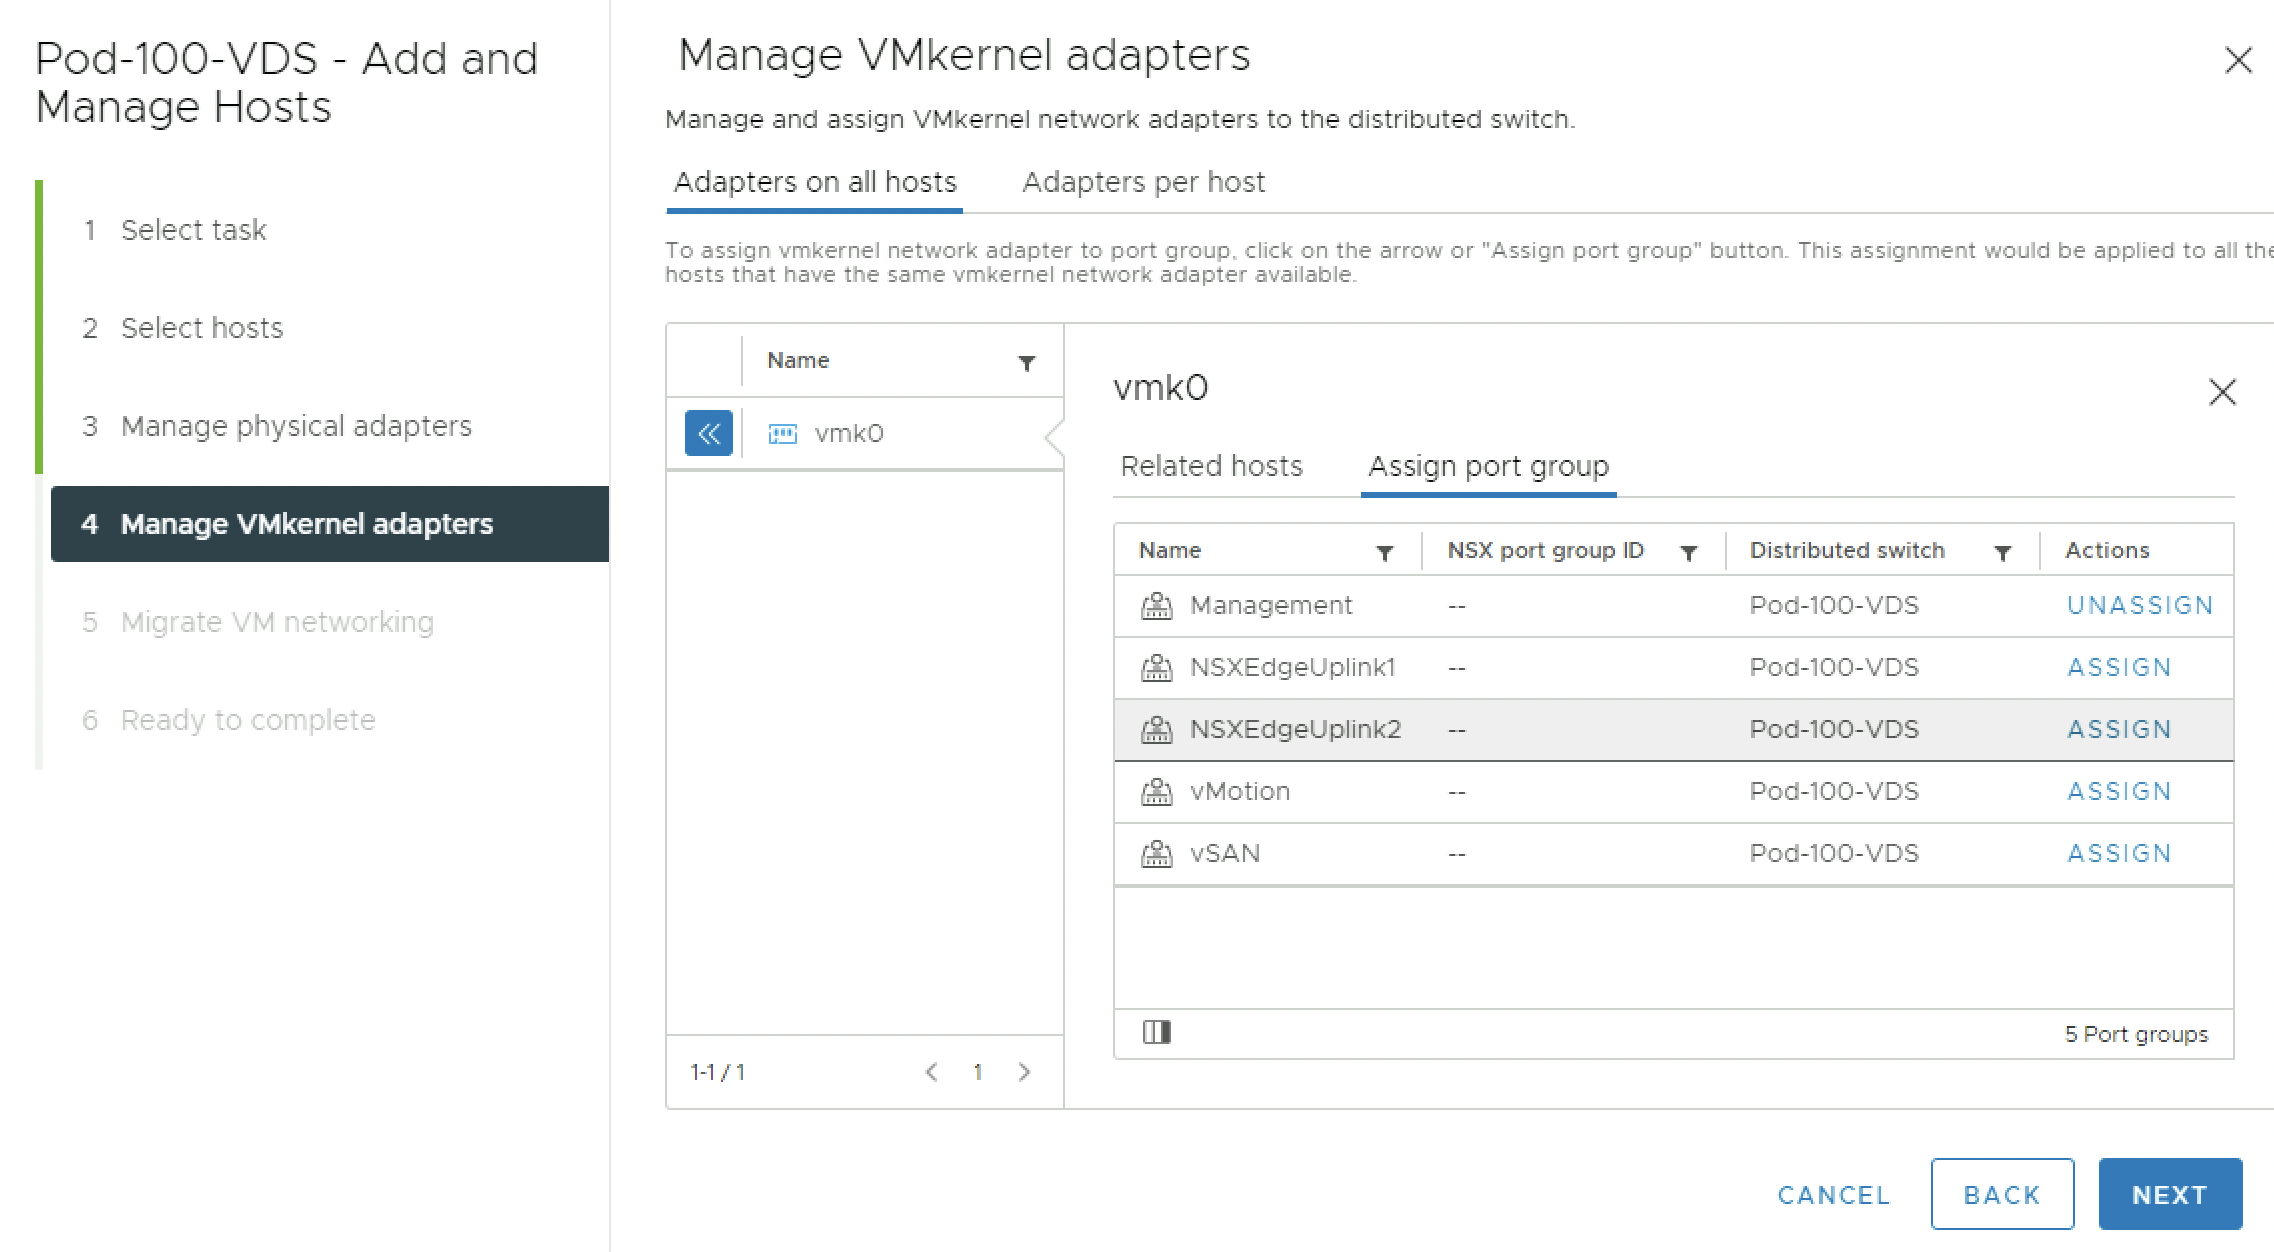
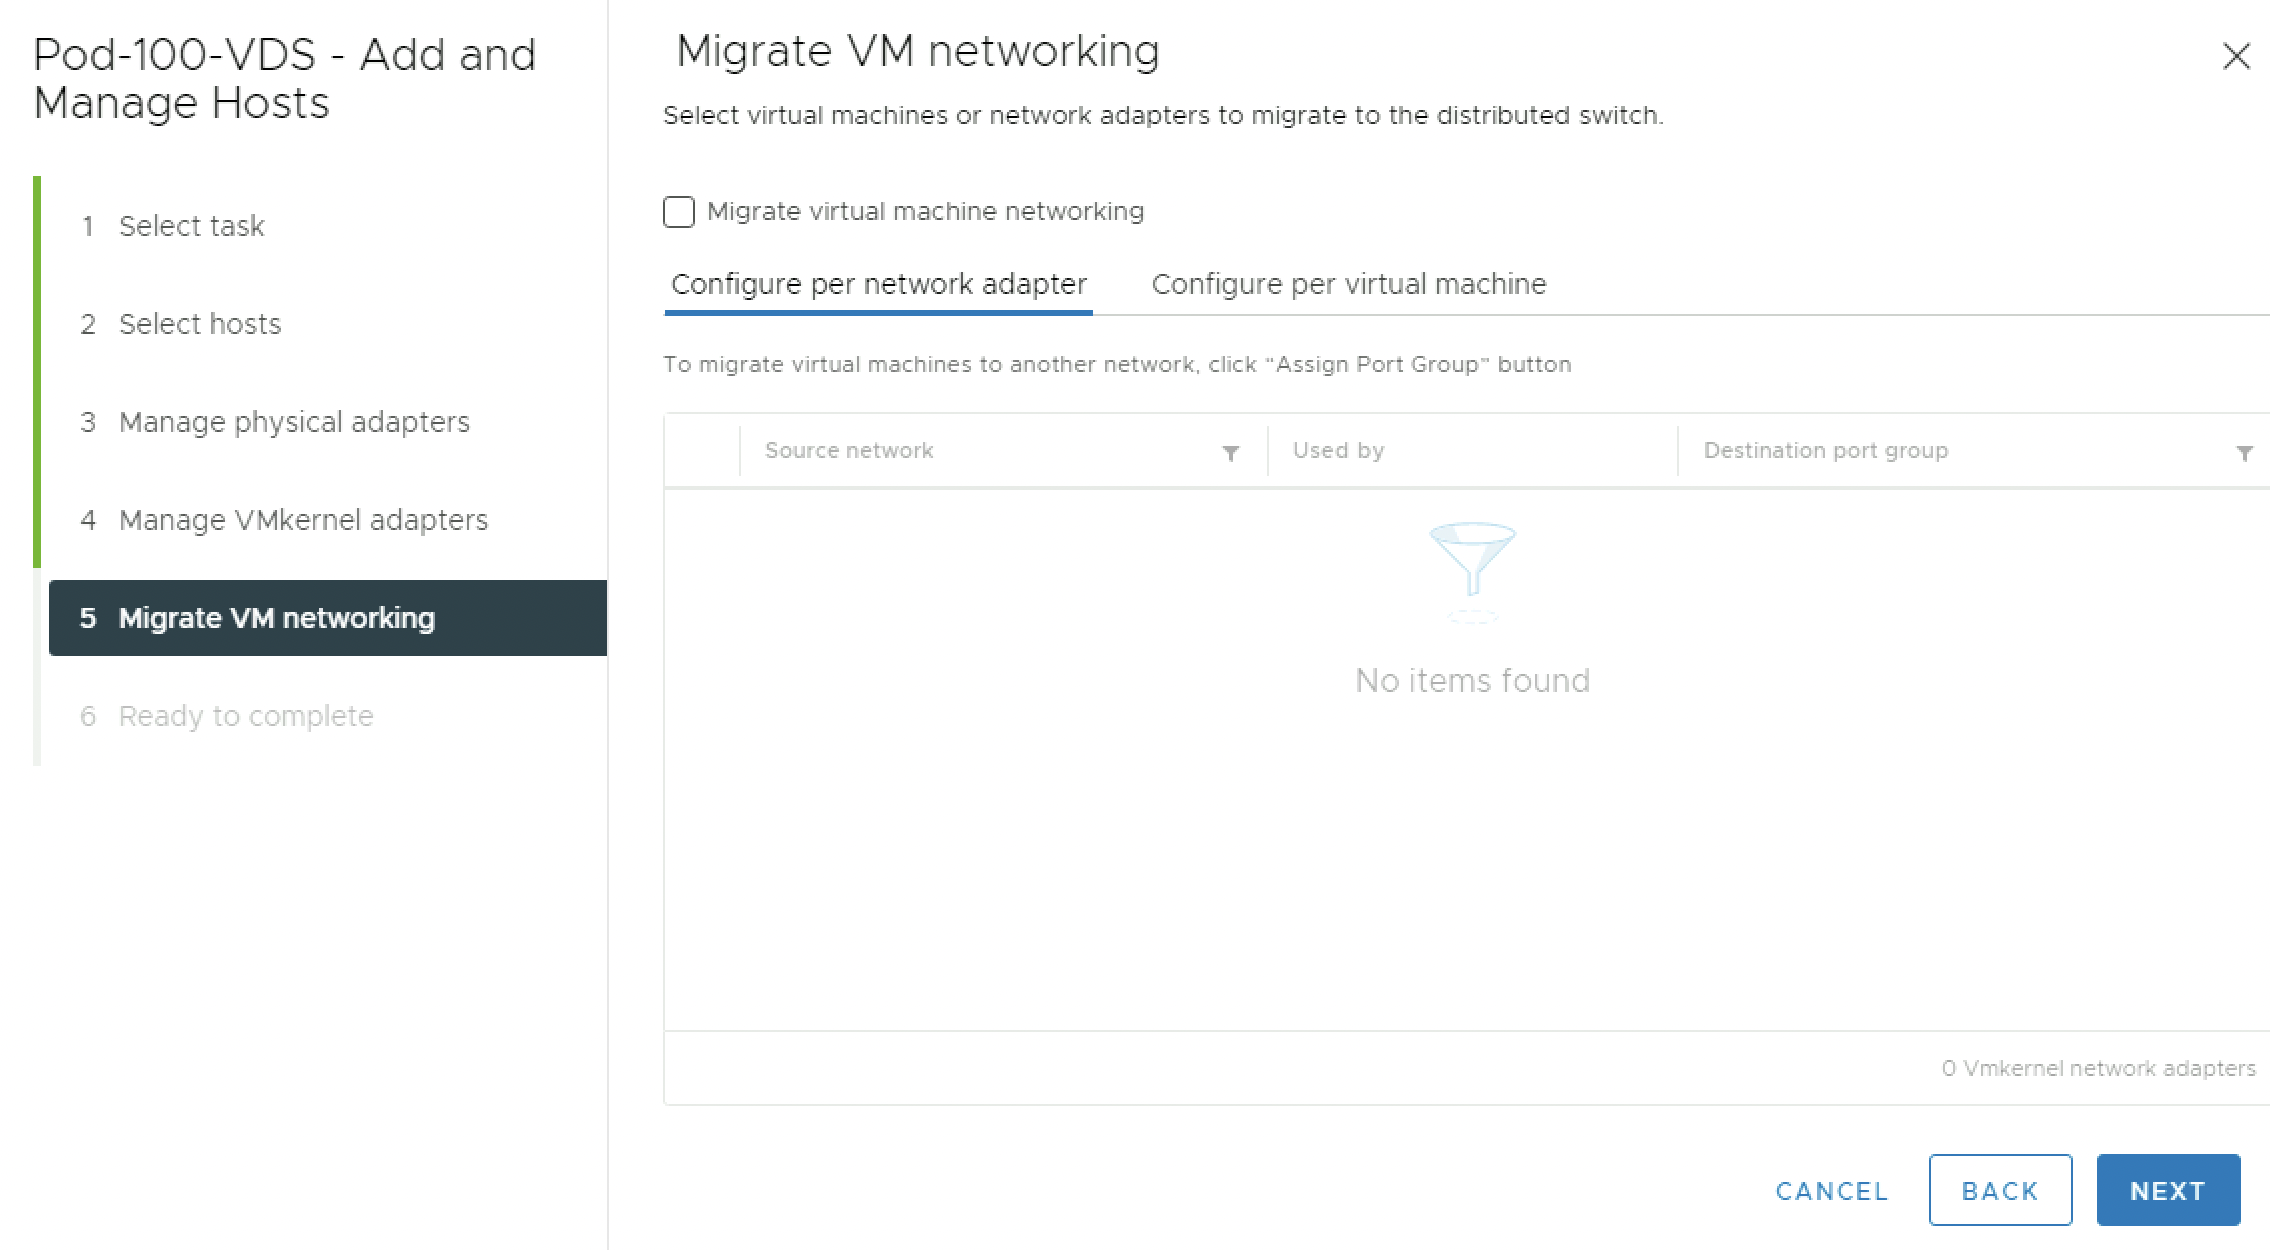
You do not have any (Compute) Virtual Machines so there is nothing to migrate:
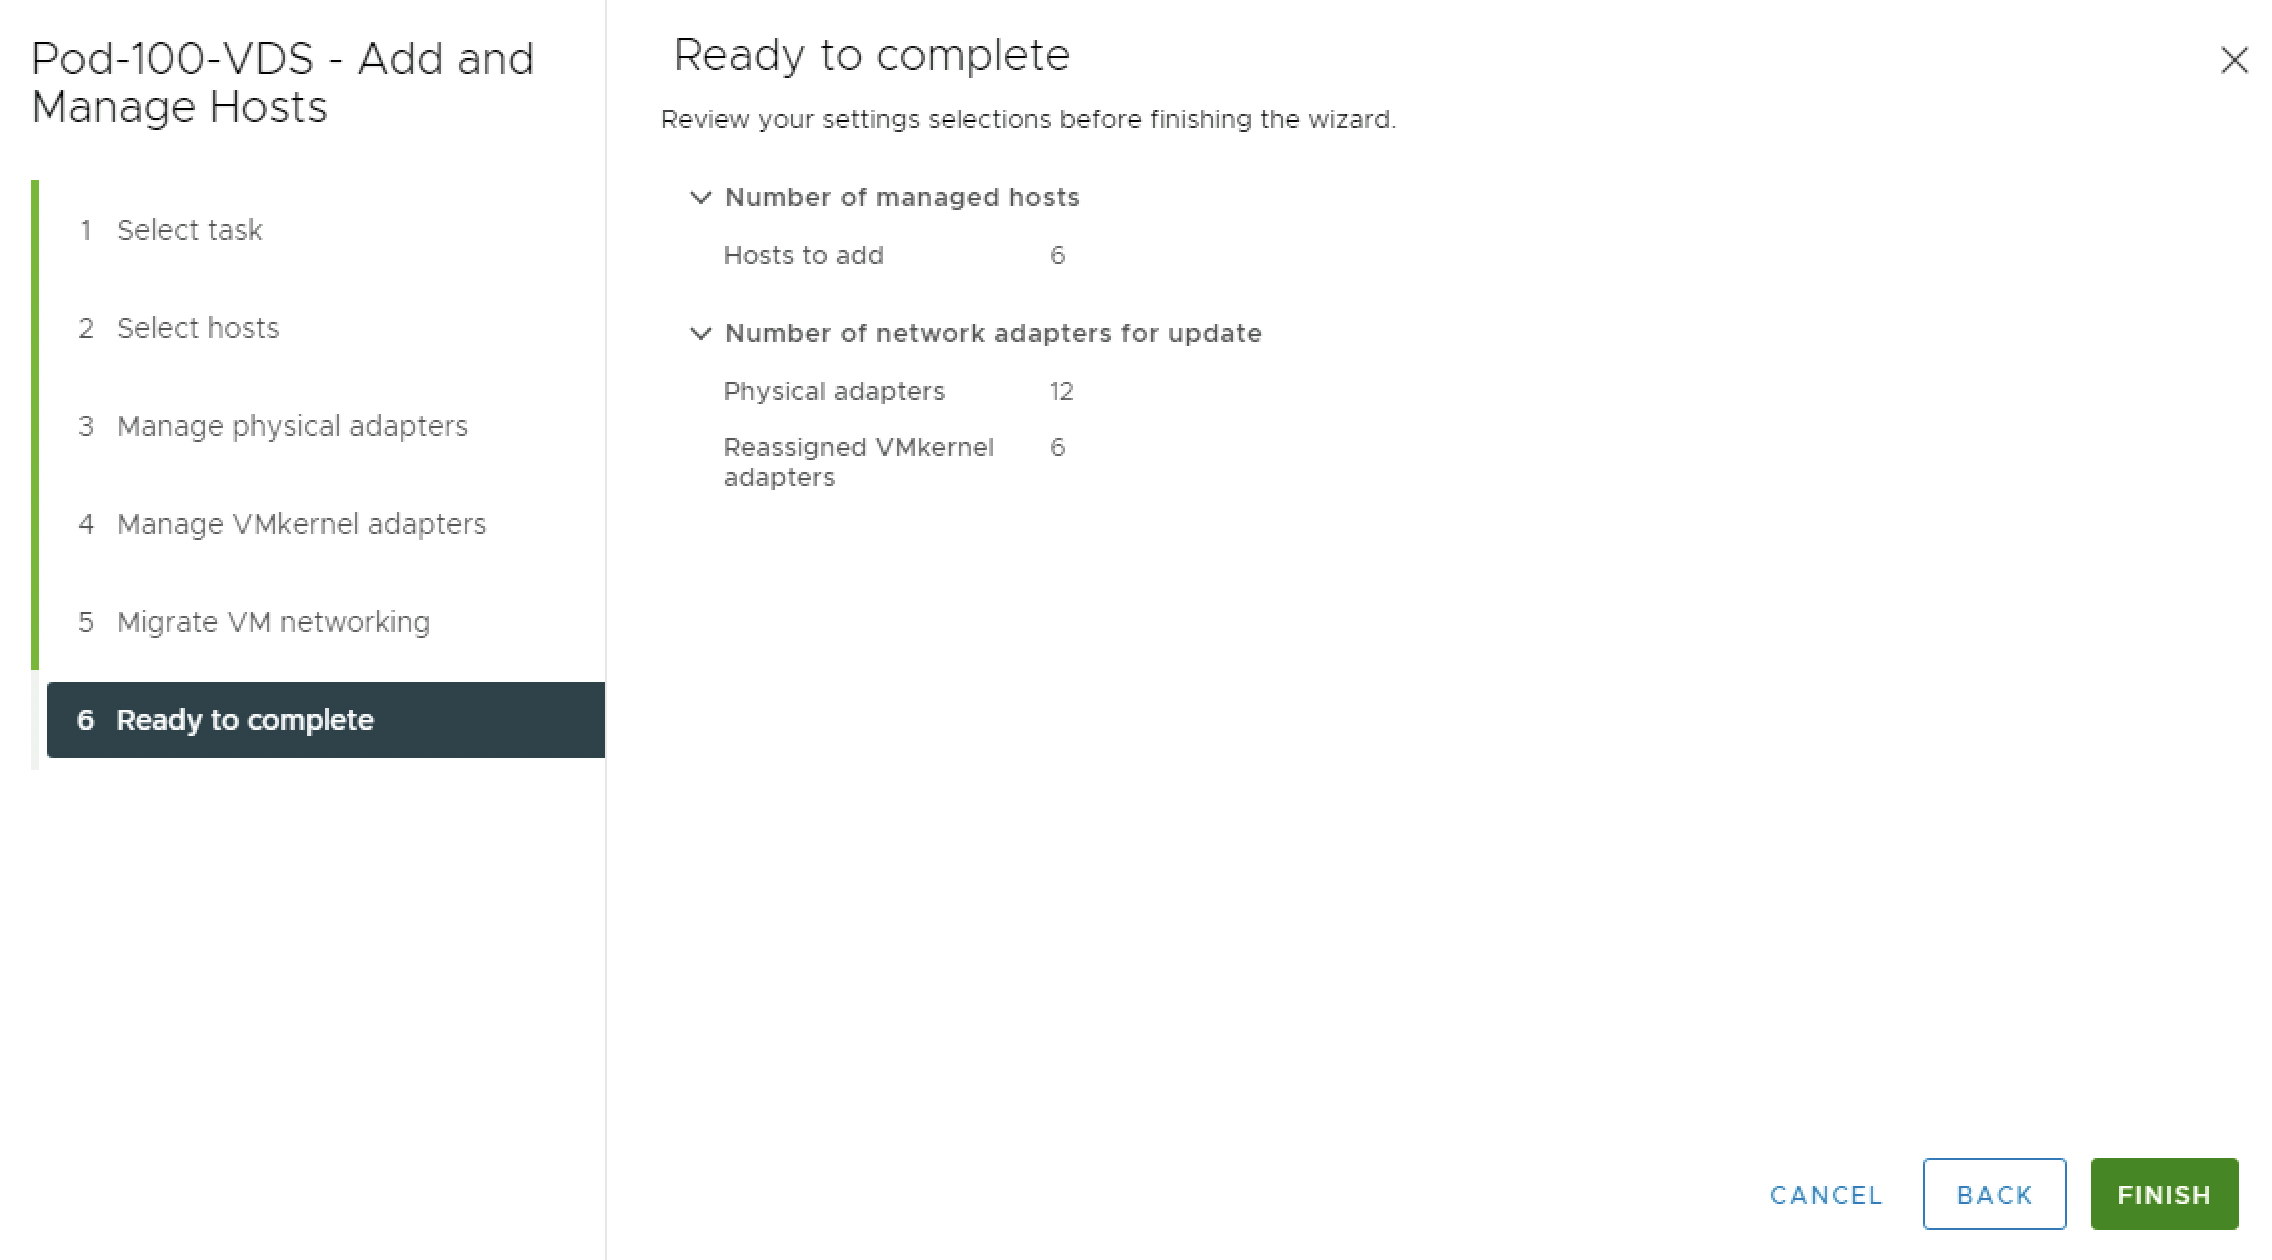
Review the Summary and Finish.
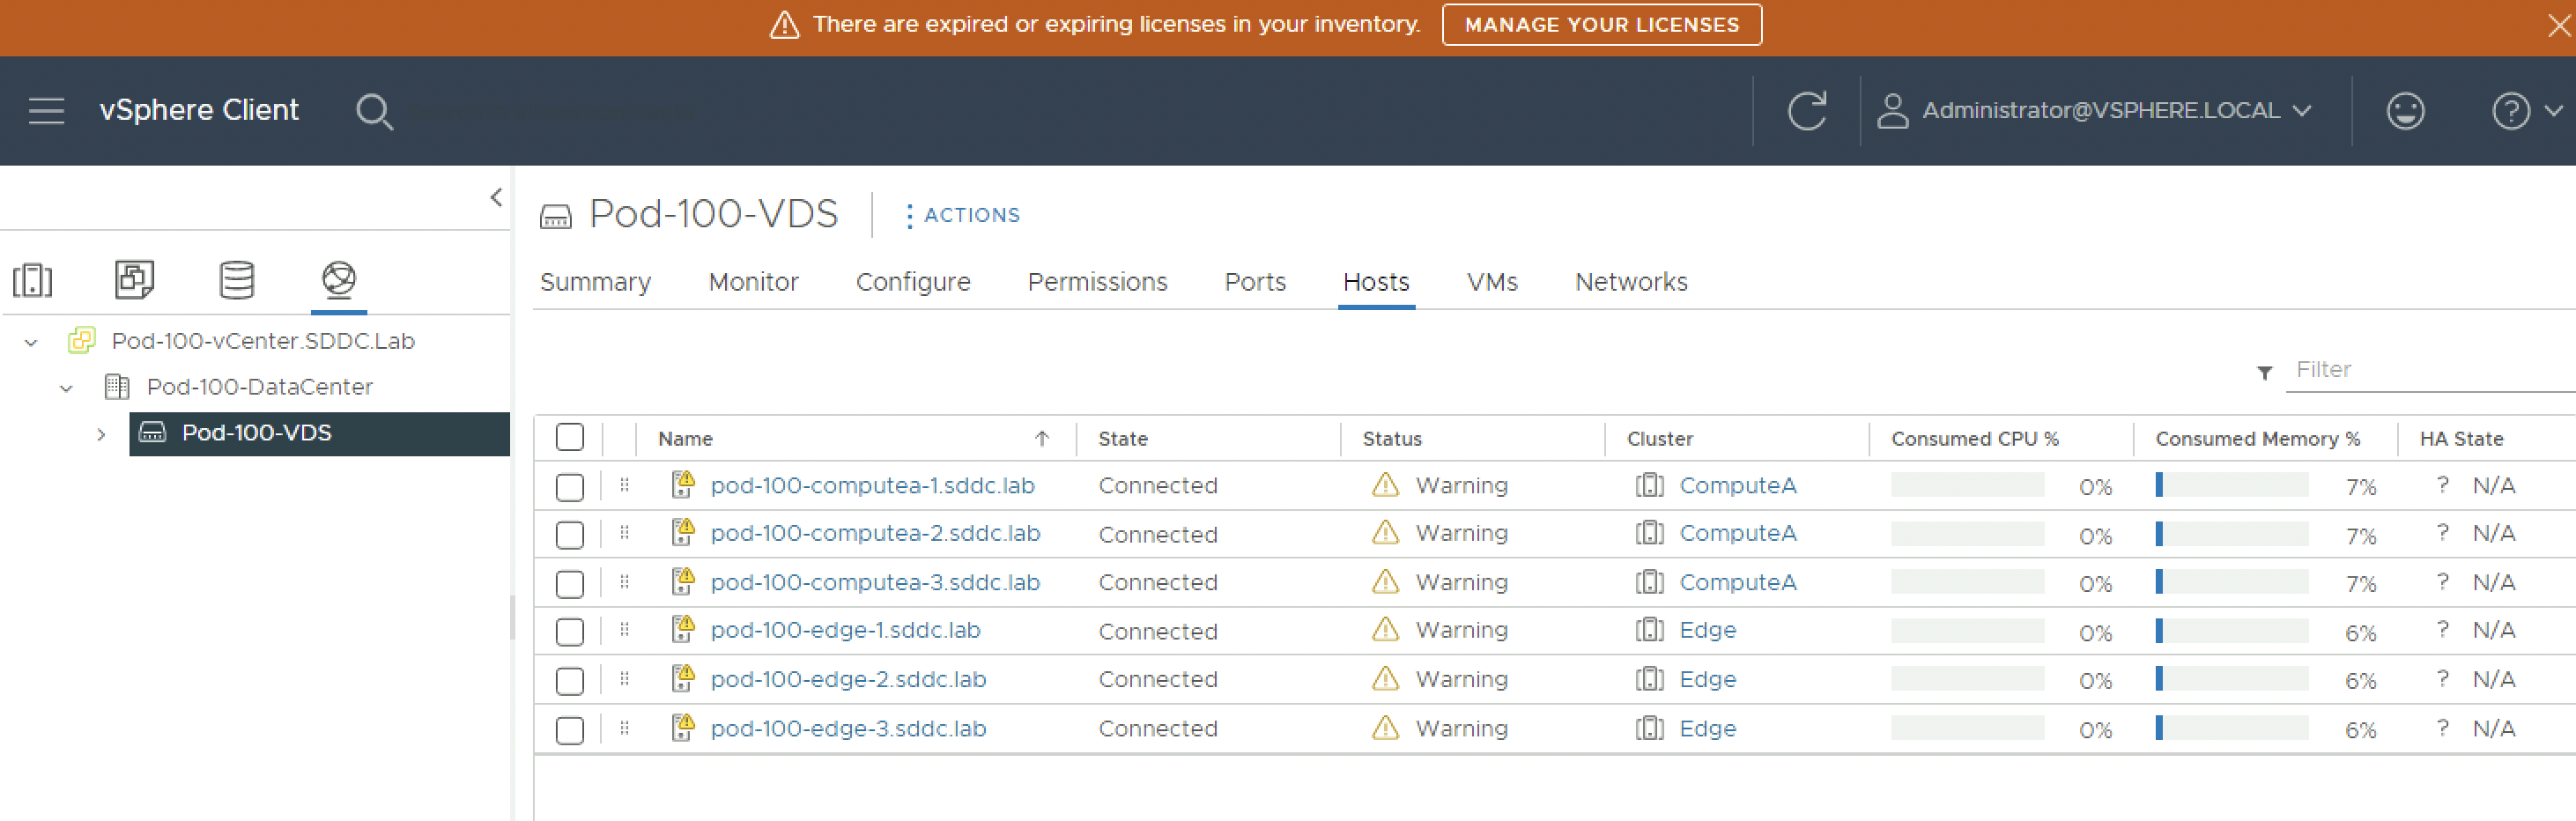
Verify if all the hosts has been added to the VDS correctly:
Create vMotion vmk interface on ESXi hosts
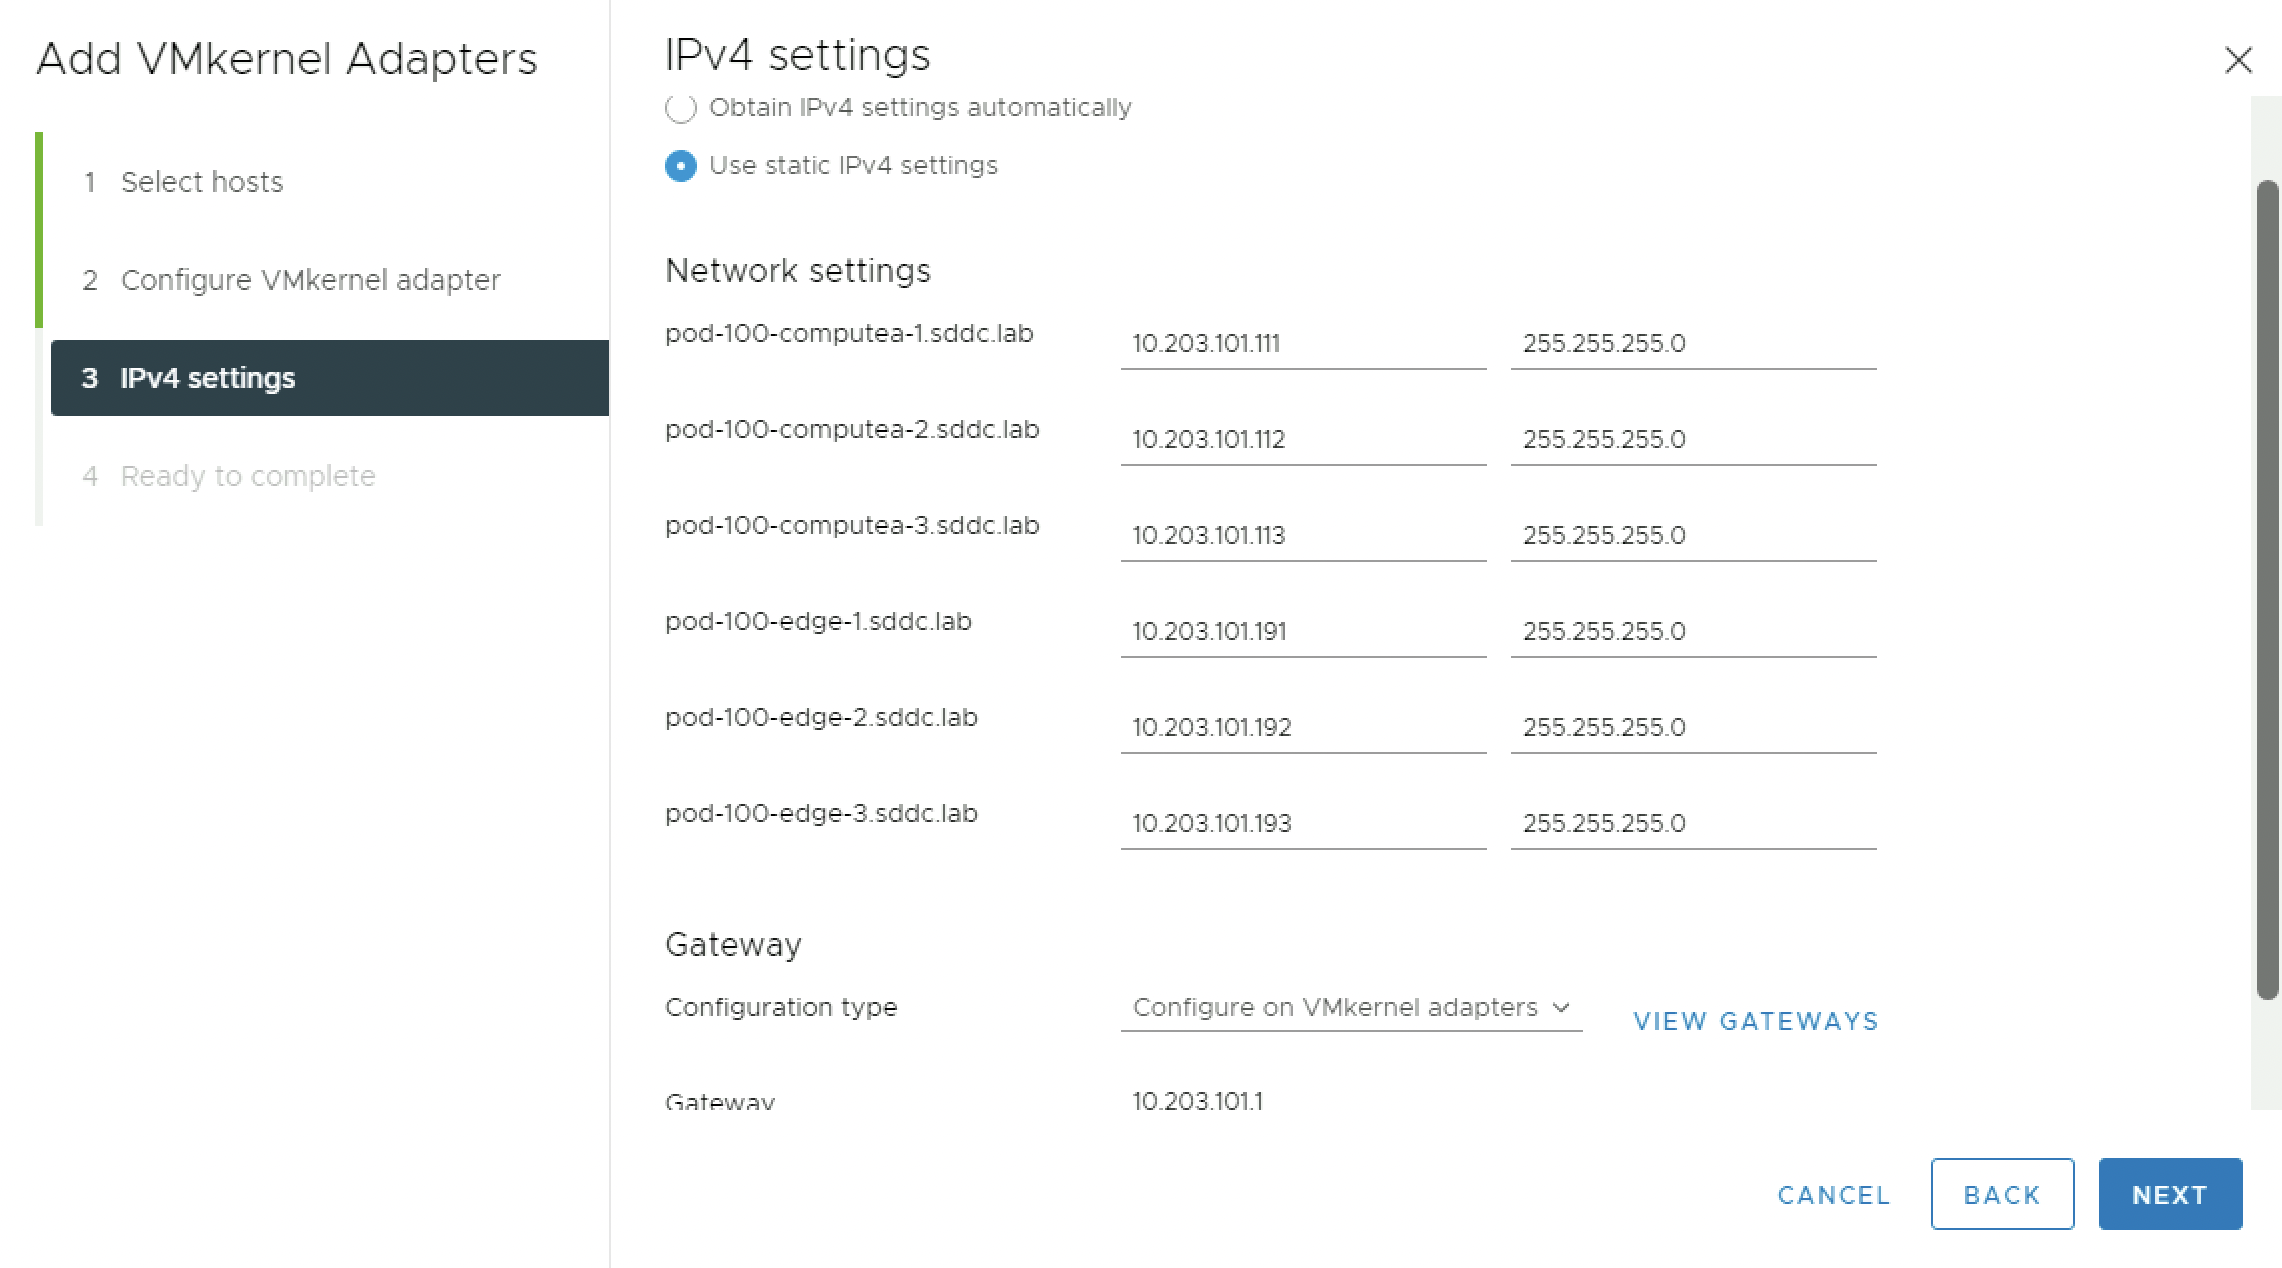
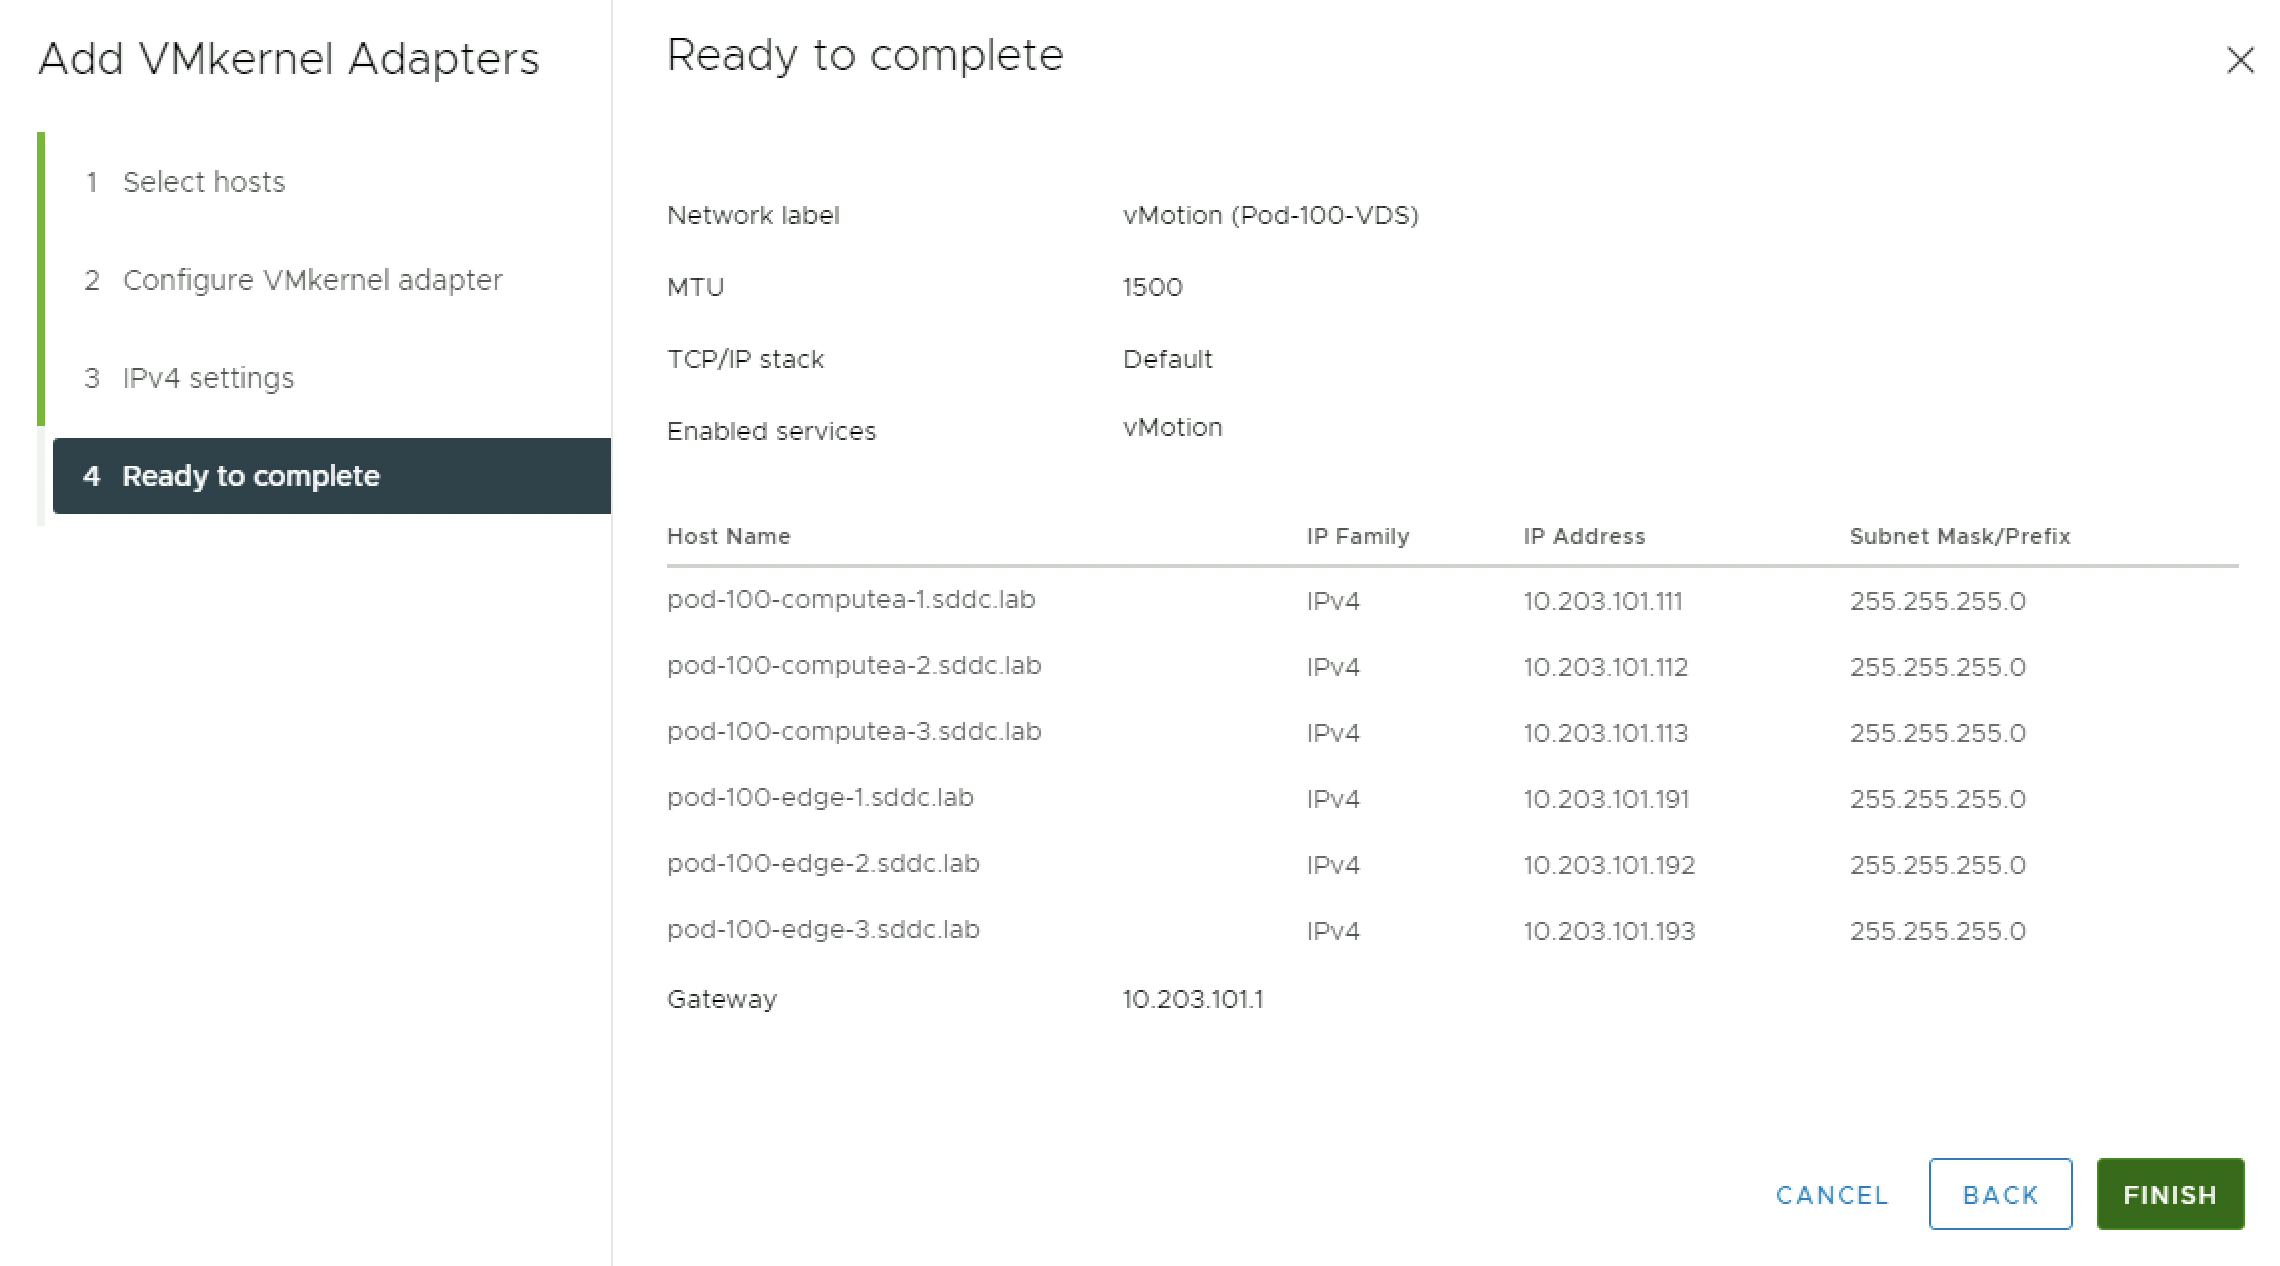
To allow Virtual vMotion is is good practice to use a dedicated vmk interface and VLAN for that. The table below will show the IP addresses that I am using per host for the vMotion vmk interfaces.
| ESXi hostname | vMotion IP address | VDS Portgroup | Subnetmask | Gateway |
|---|---|---|---|---|
| pod-100-computea-1.sddc.lab | 10.203.101.111 | vMotion | 255.255.255.0 | 10.203.101.1 |
| pod-100-computea-2.sddc.lab | 10.203.101.112 | vMotion | 255.255.255.0 | 10.203.101.1 |
| pod-100-computea-3.sddc.lab | 10.203.101.113 | vMotion | 255.255.255.0 | 10.203.101.1 |
| pod-100-edge-1.sddc.lab | 10.203.101.191 | vMotion | 255.255.255.0 | 10.203.101.1 |
| pod-100-edge-2.sddc.lab | 10.203.101.192 | vMotion | 255.255.255.0 | 10.203.101.1 |
| pod-100-edge-3.sddc.lab | 10.203.101.193 | vMotion | 255.255.255.0 | 10.203.101.1 |
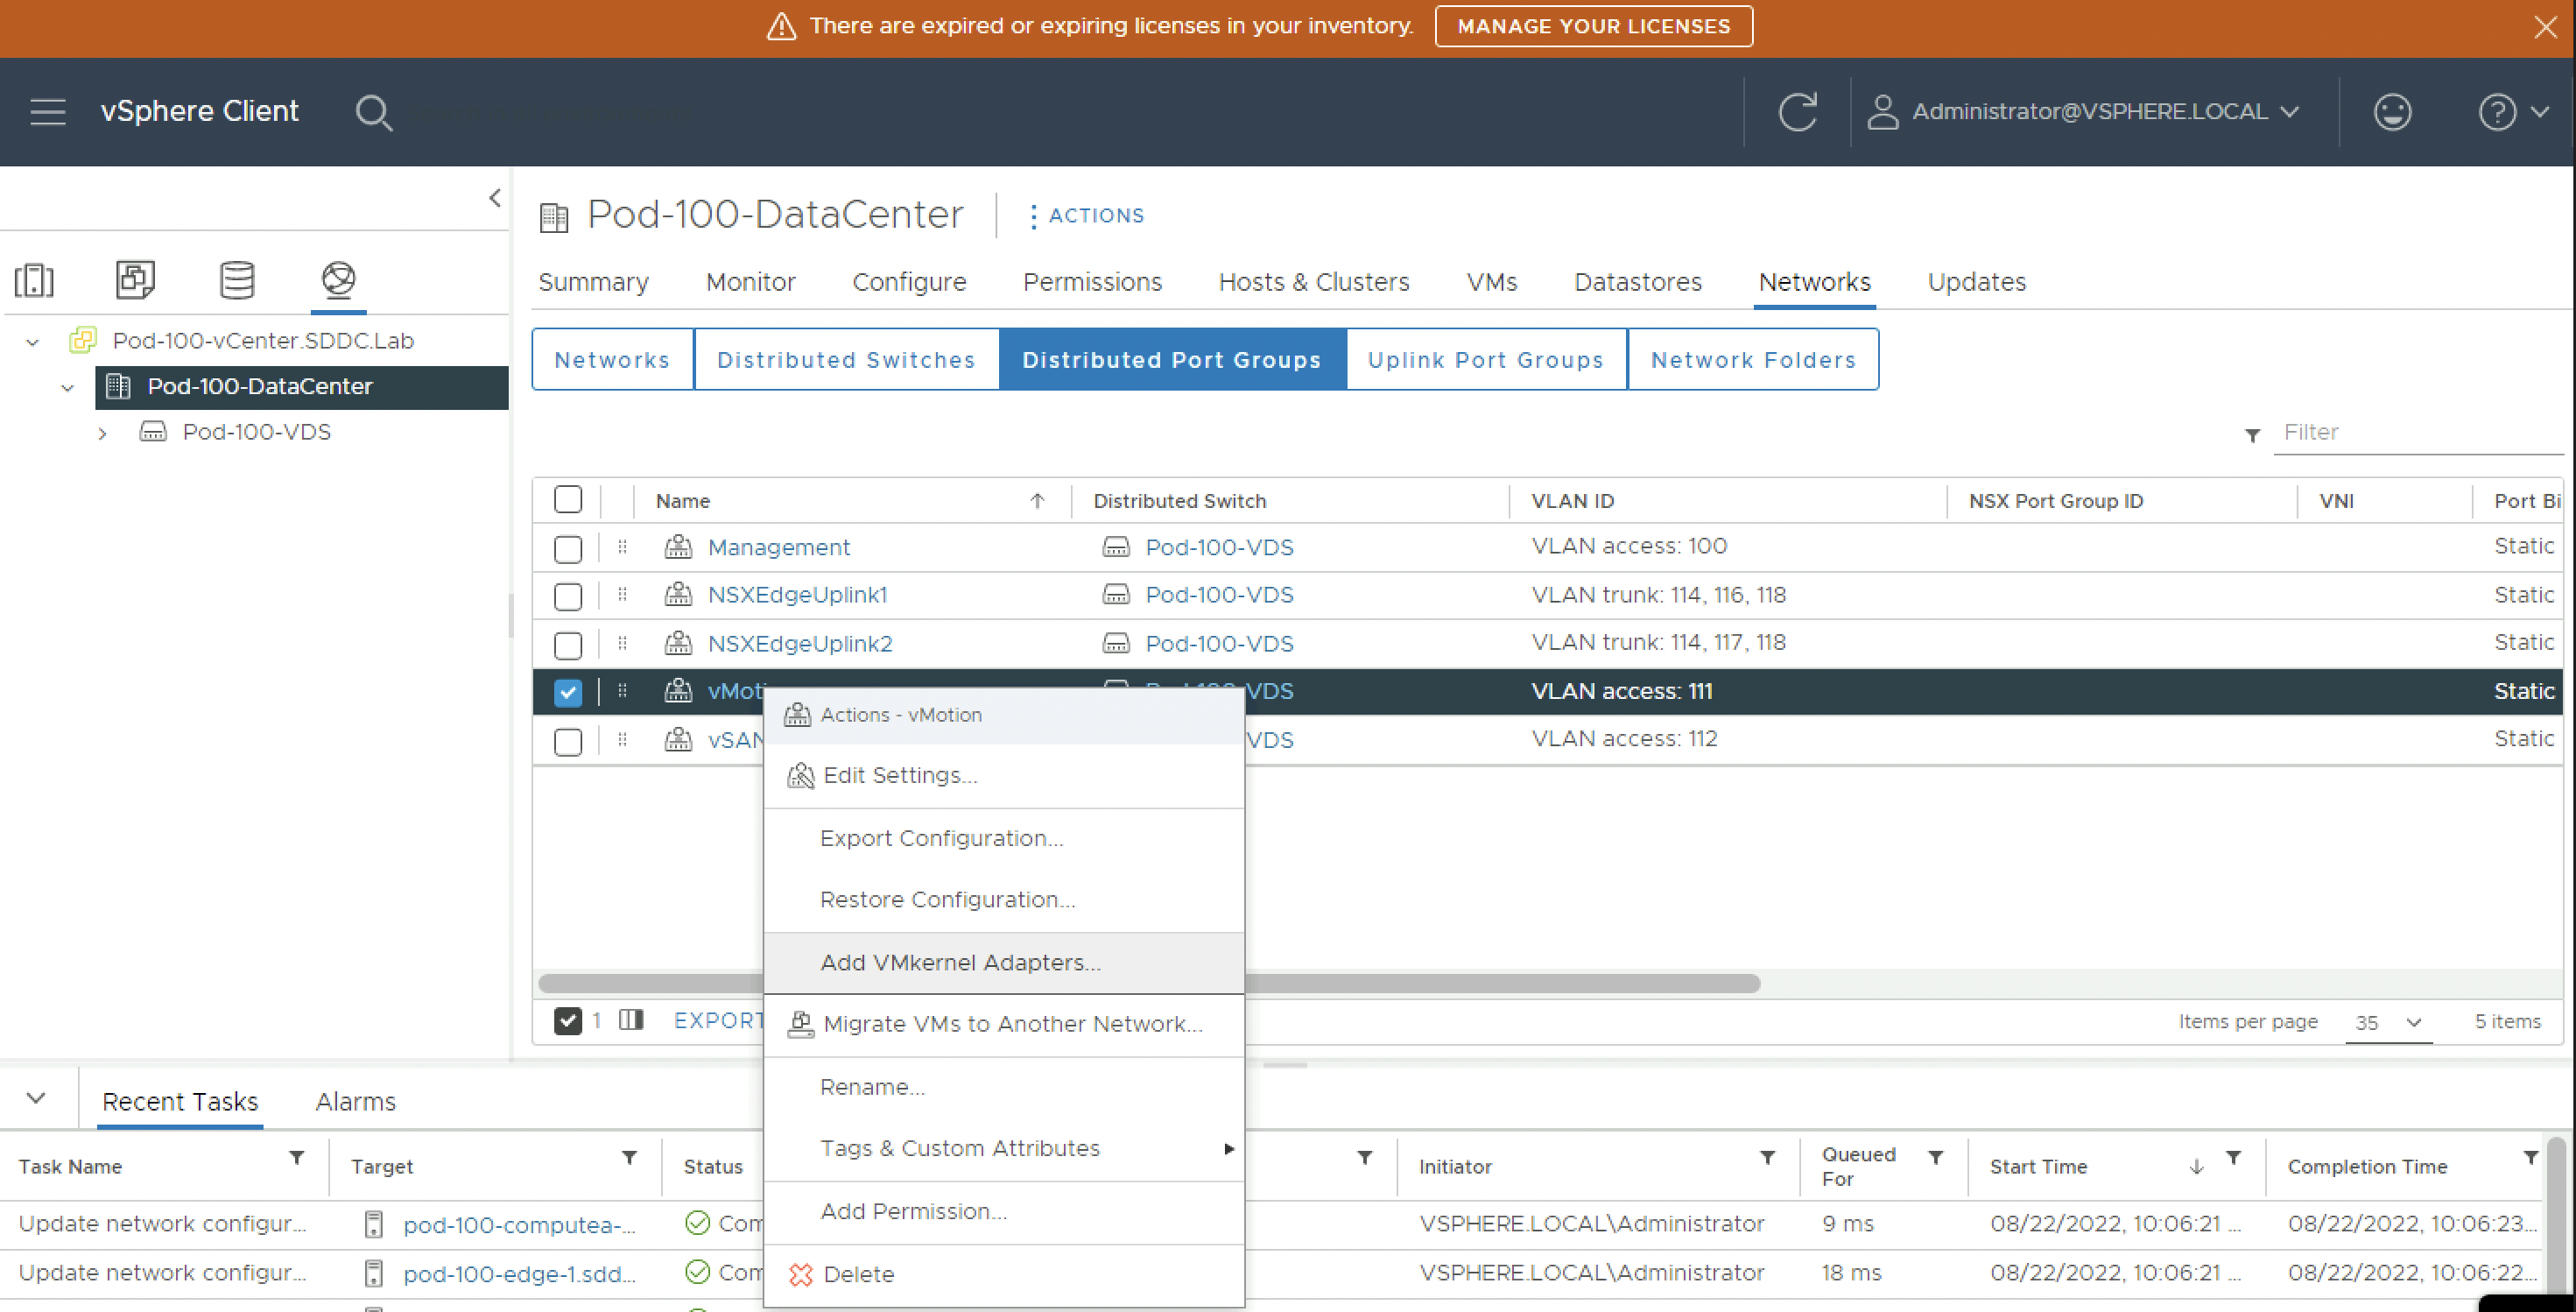
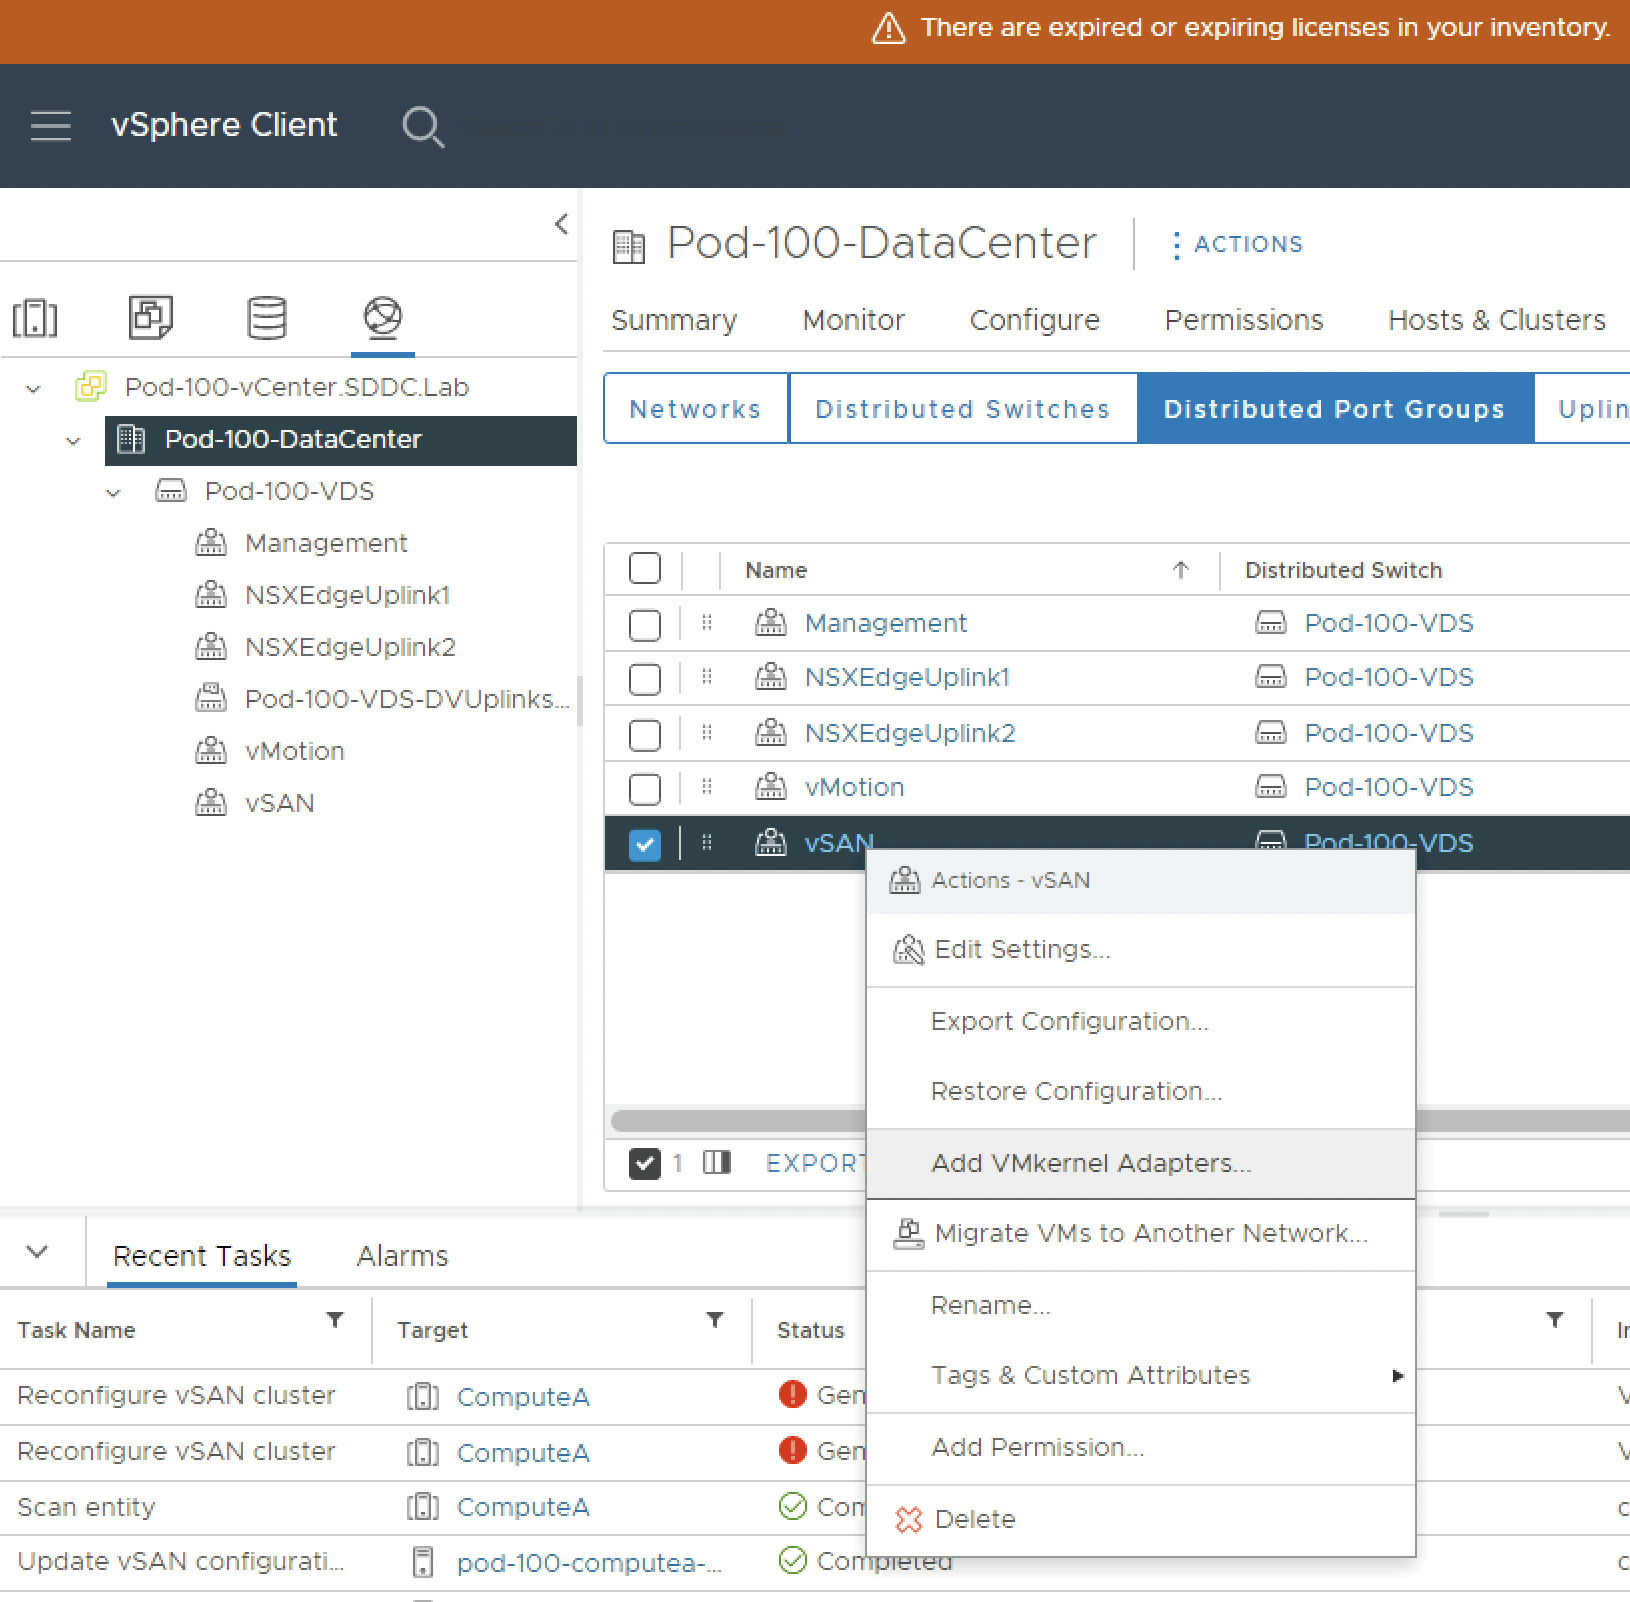
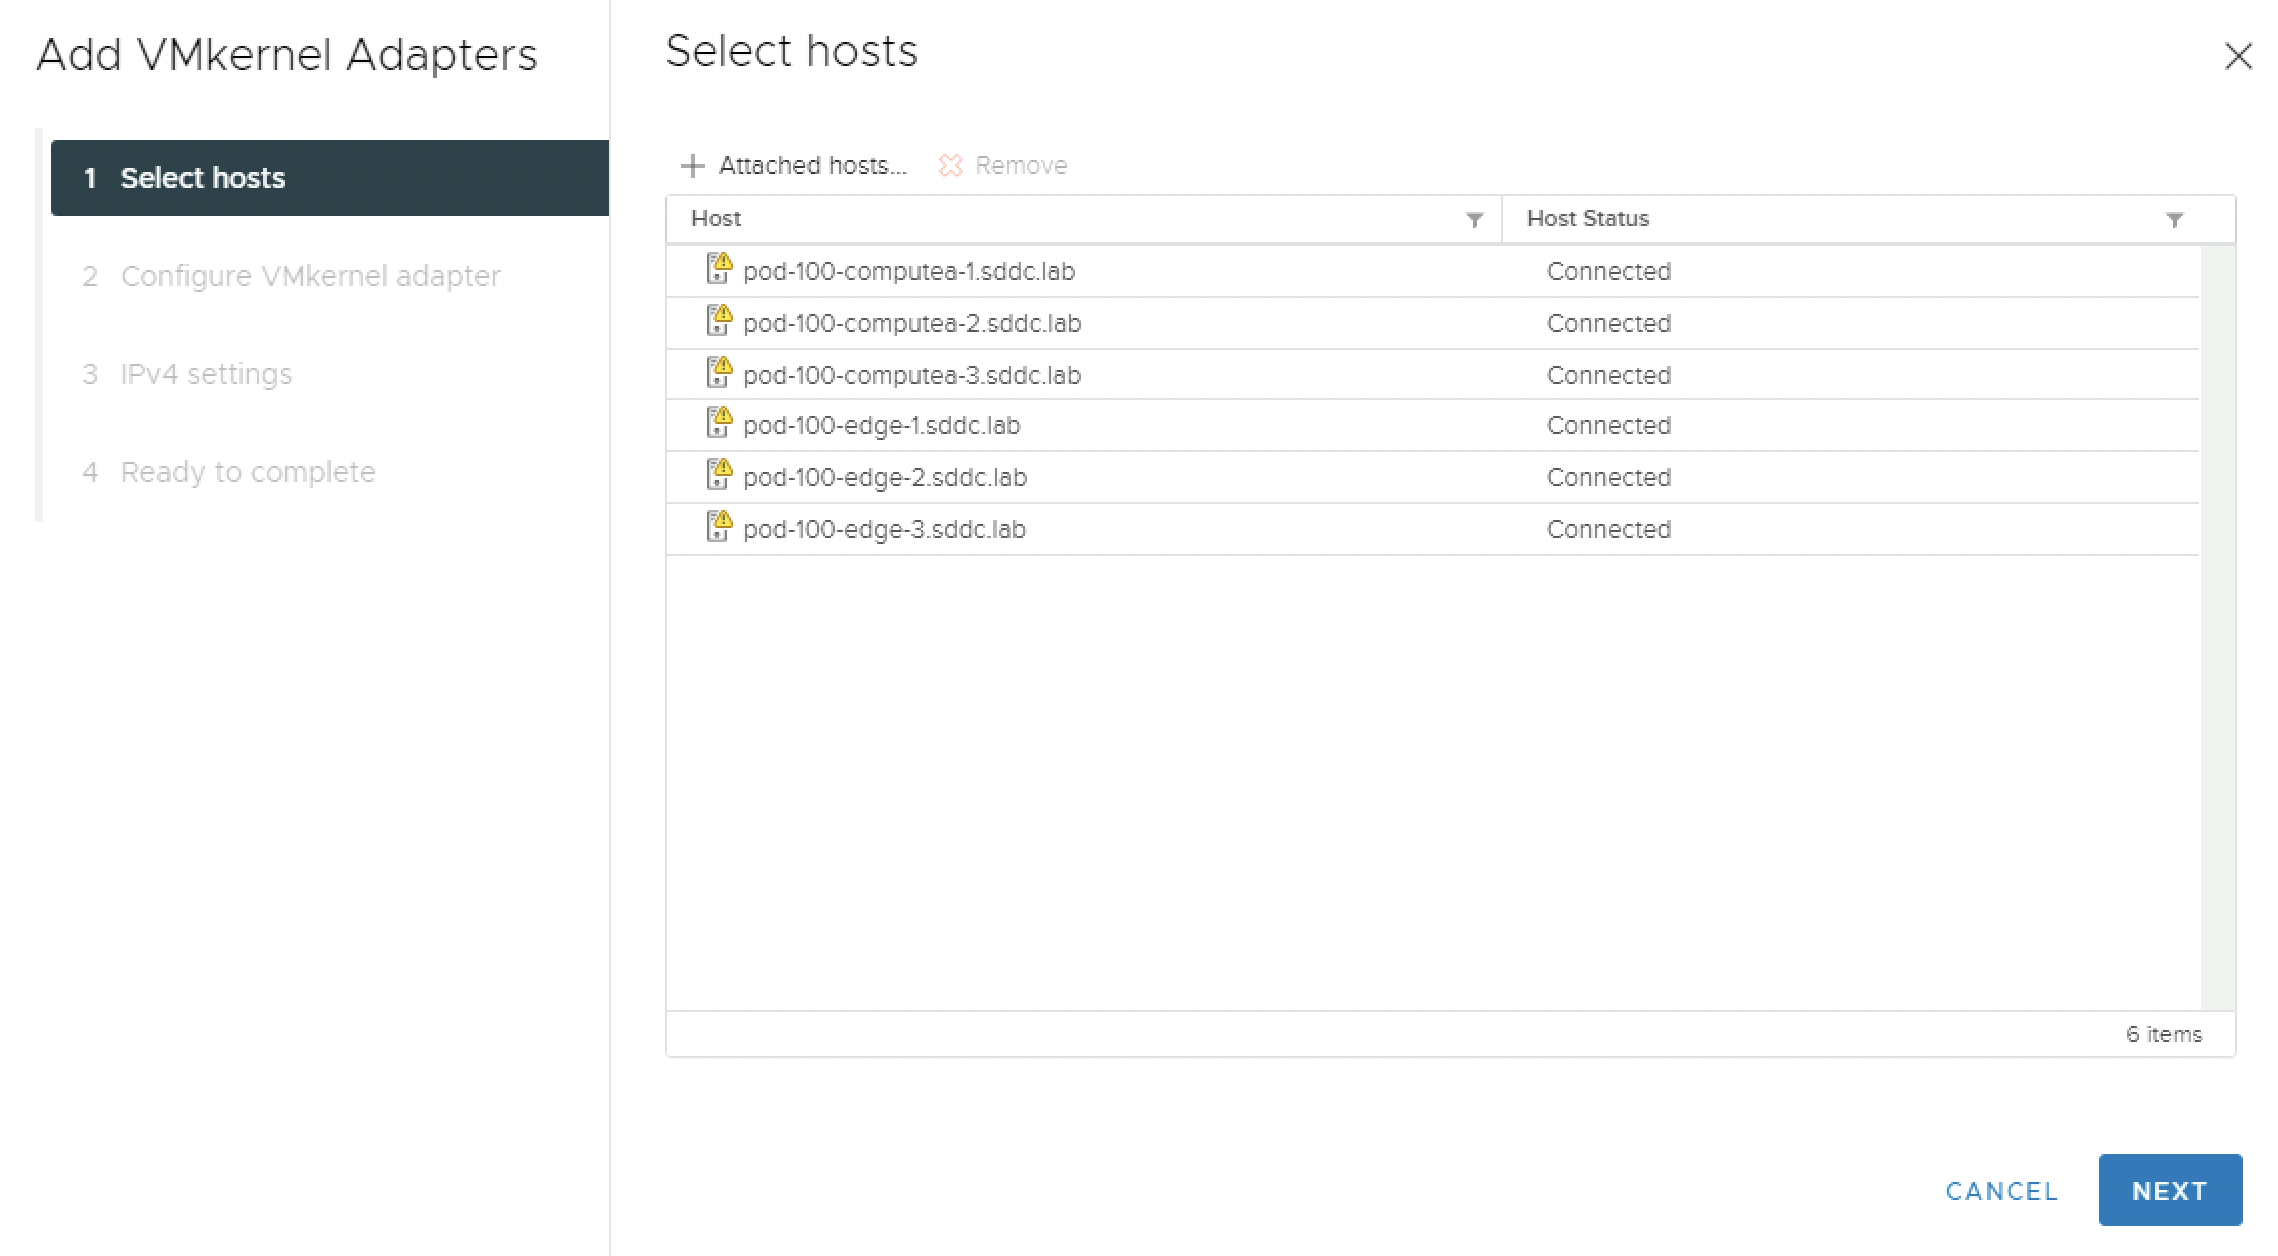
When you go to the Networking tab and the Distributed Port Groups sub-tab you can right-click on the vMotion Port Group and “Add VMkernel Adapters.
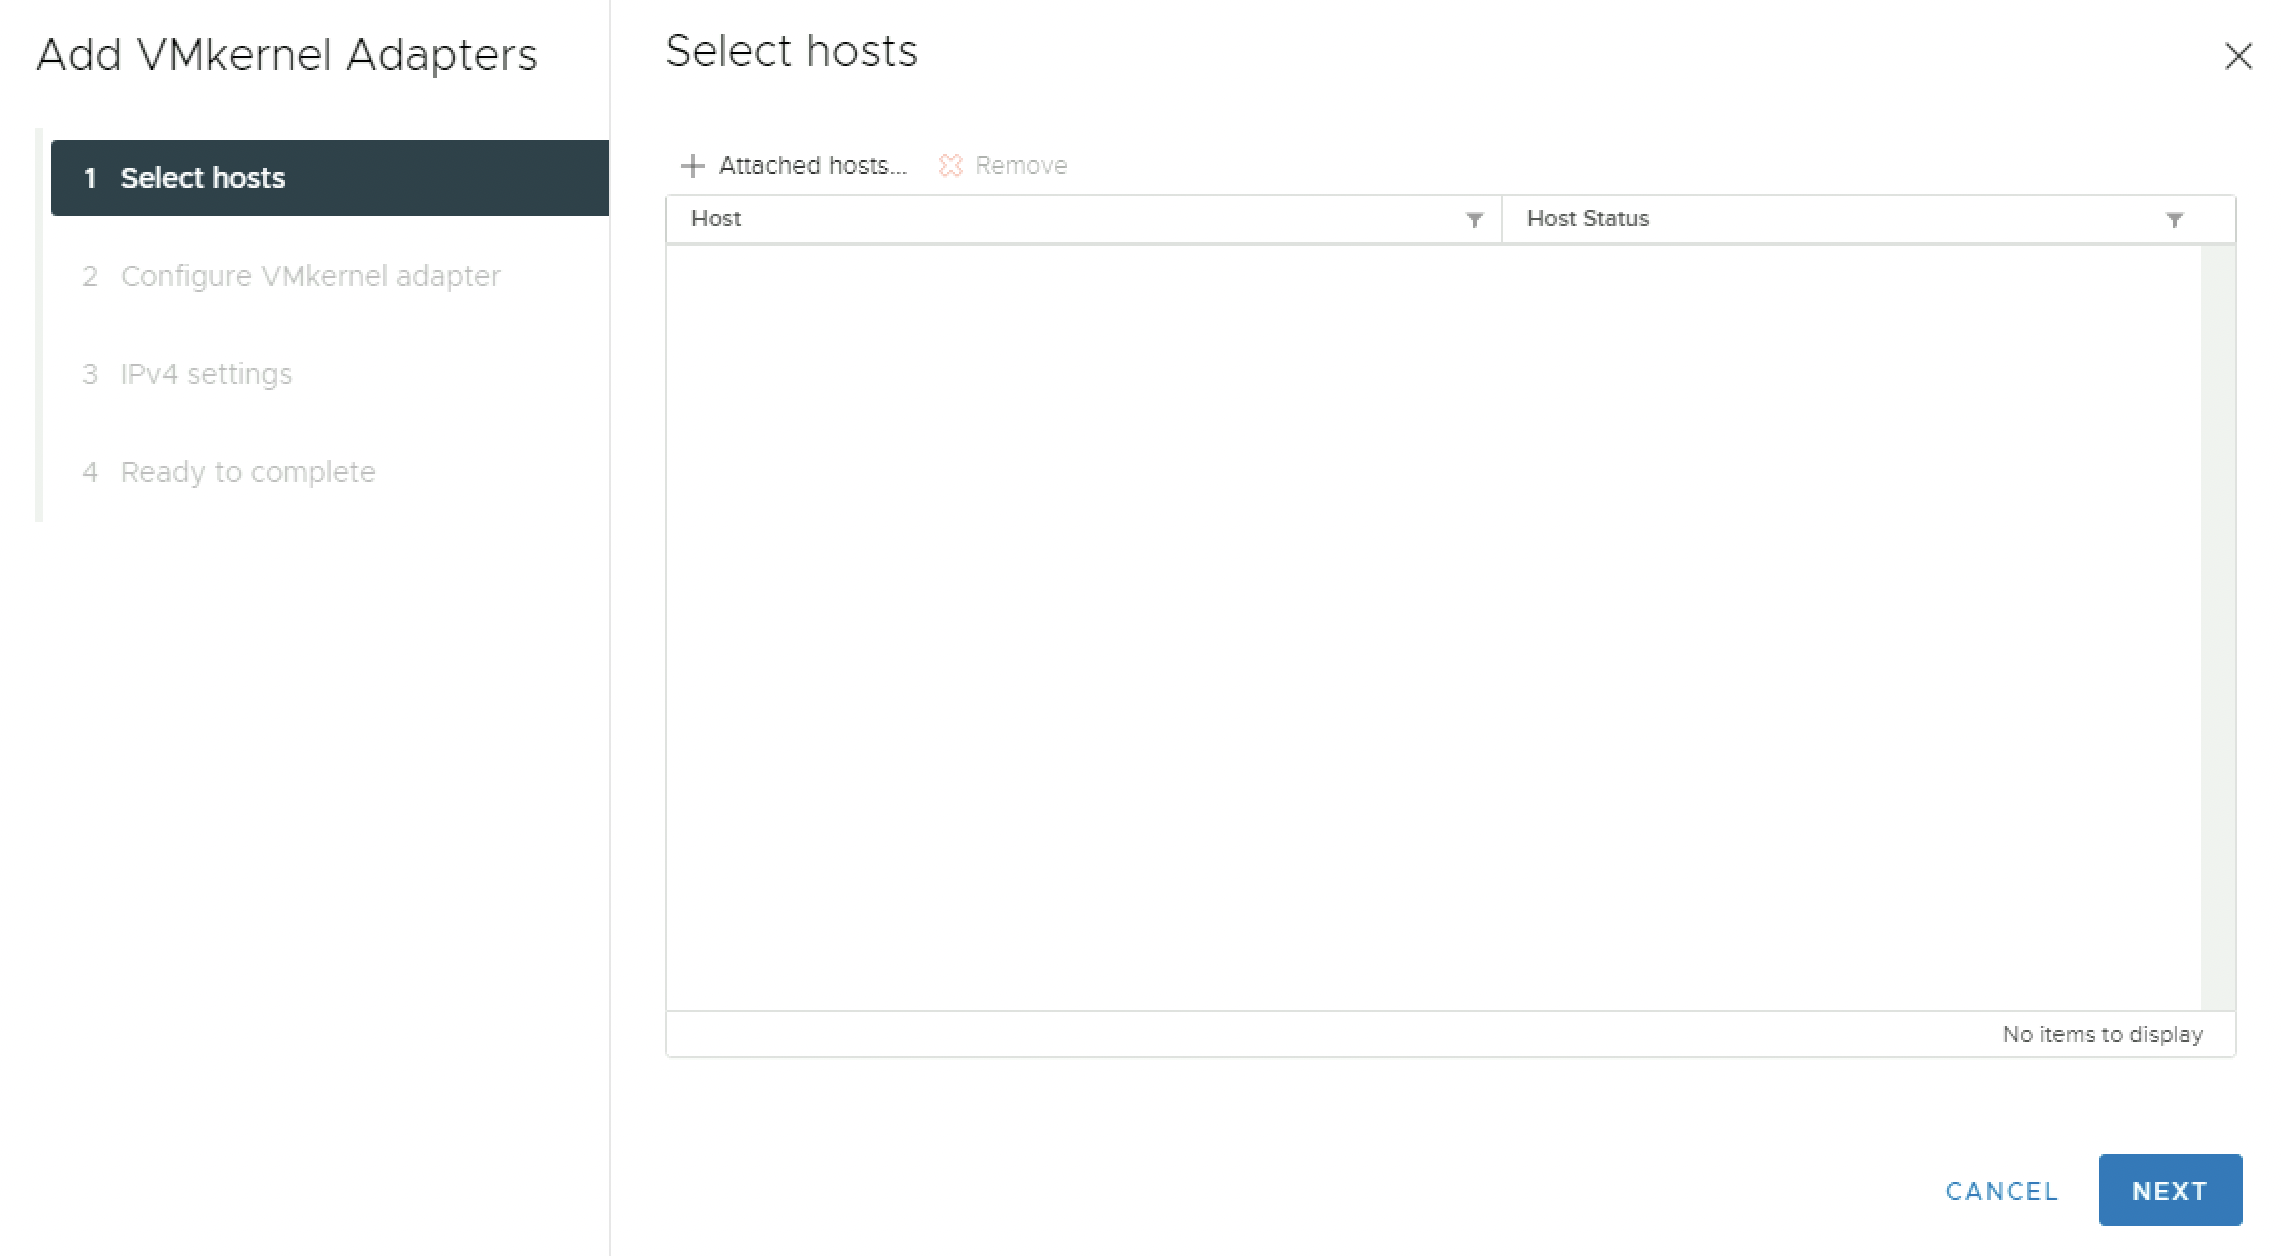
Click on “+Attached hosts”:

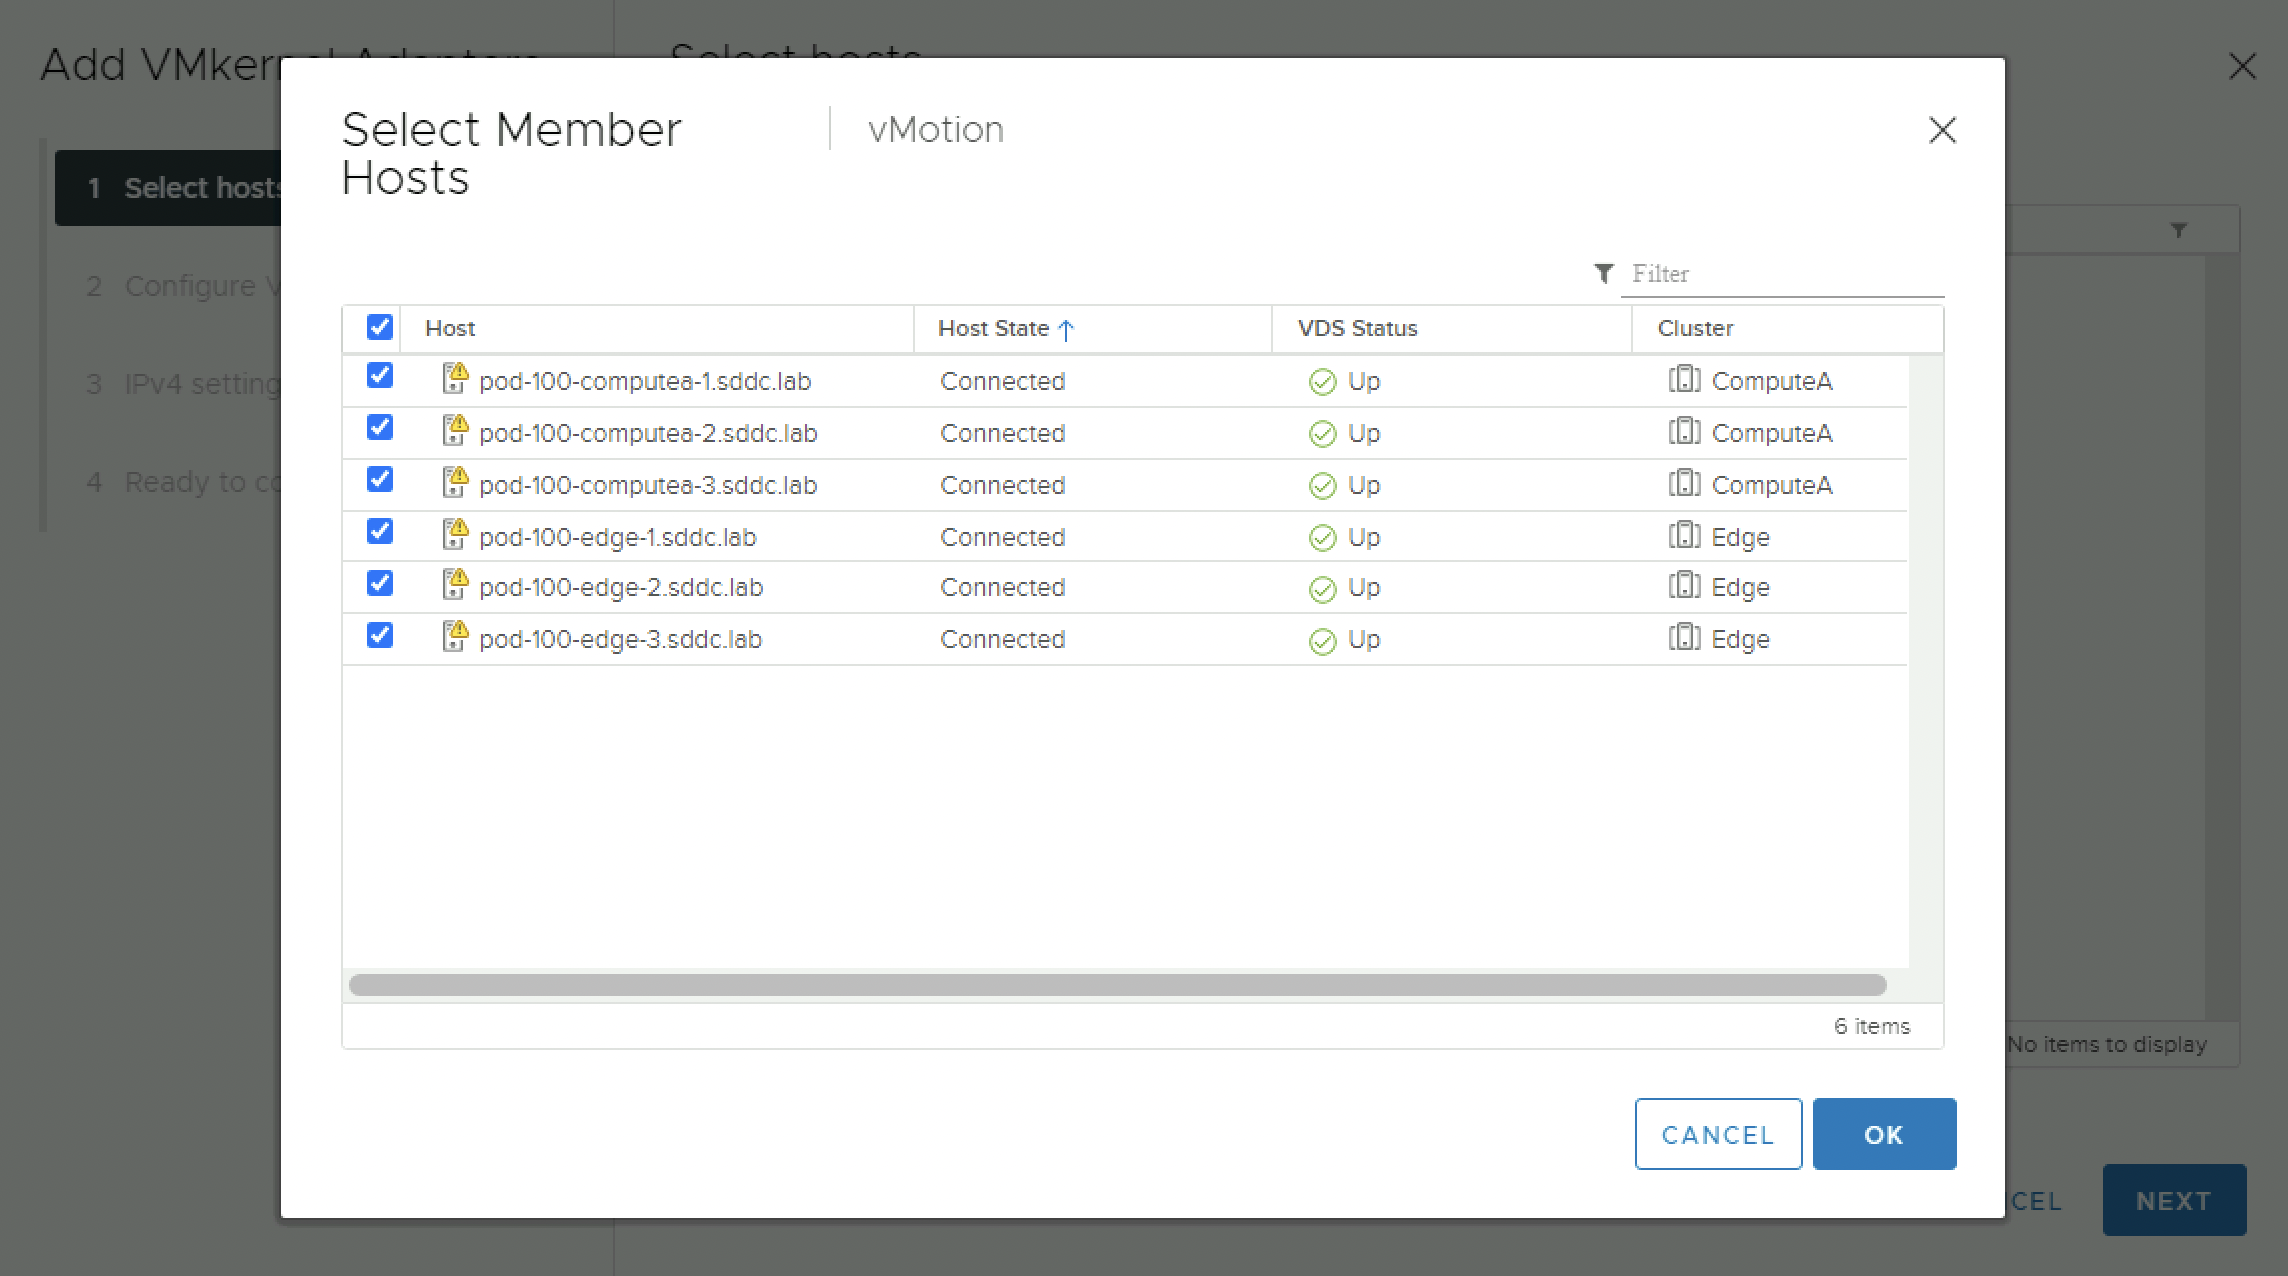
Select all the hosts you want to add a vMotion vmk interface:
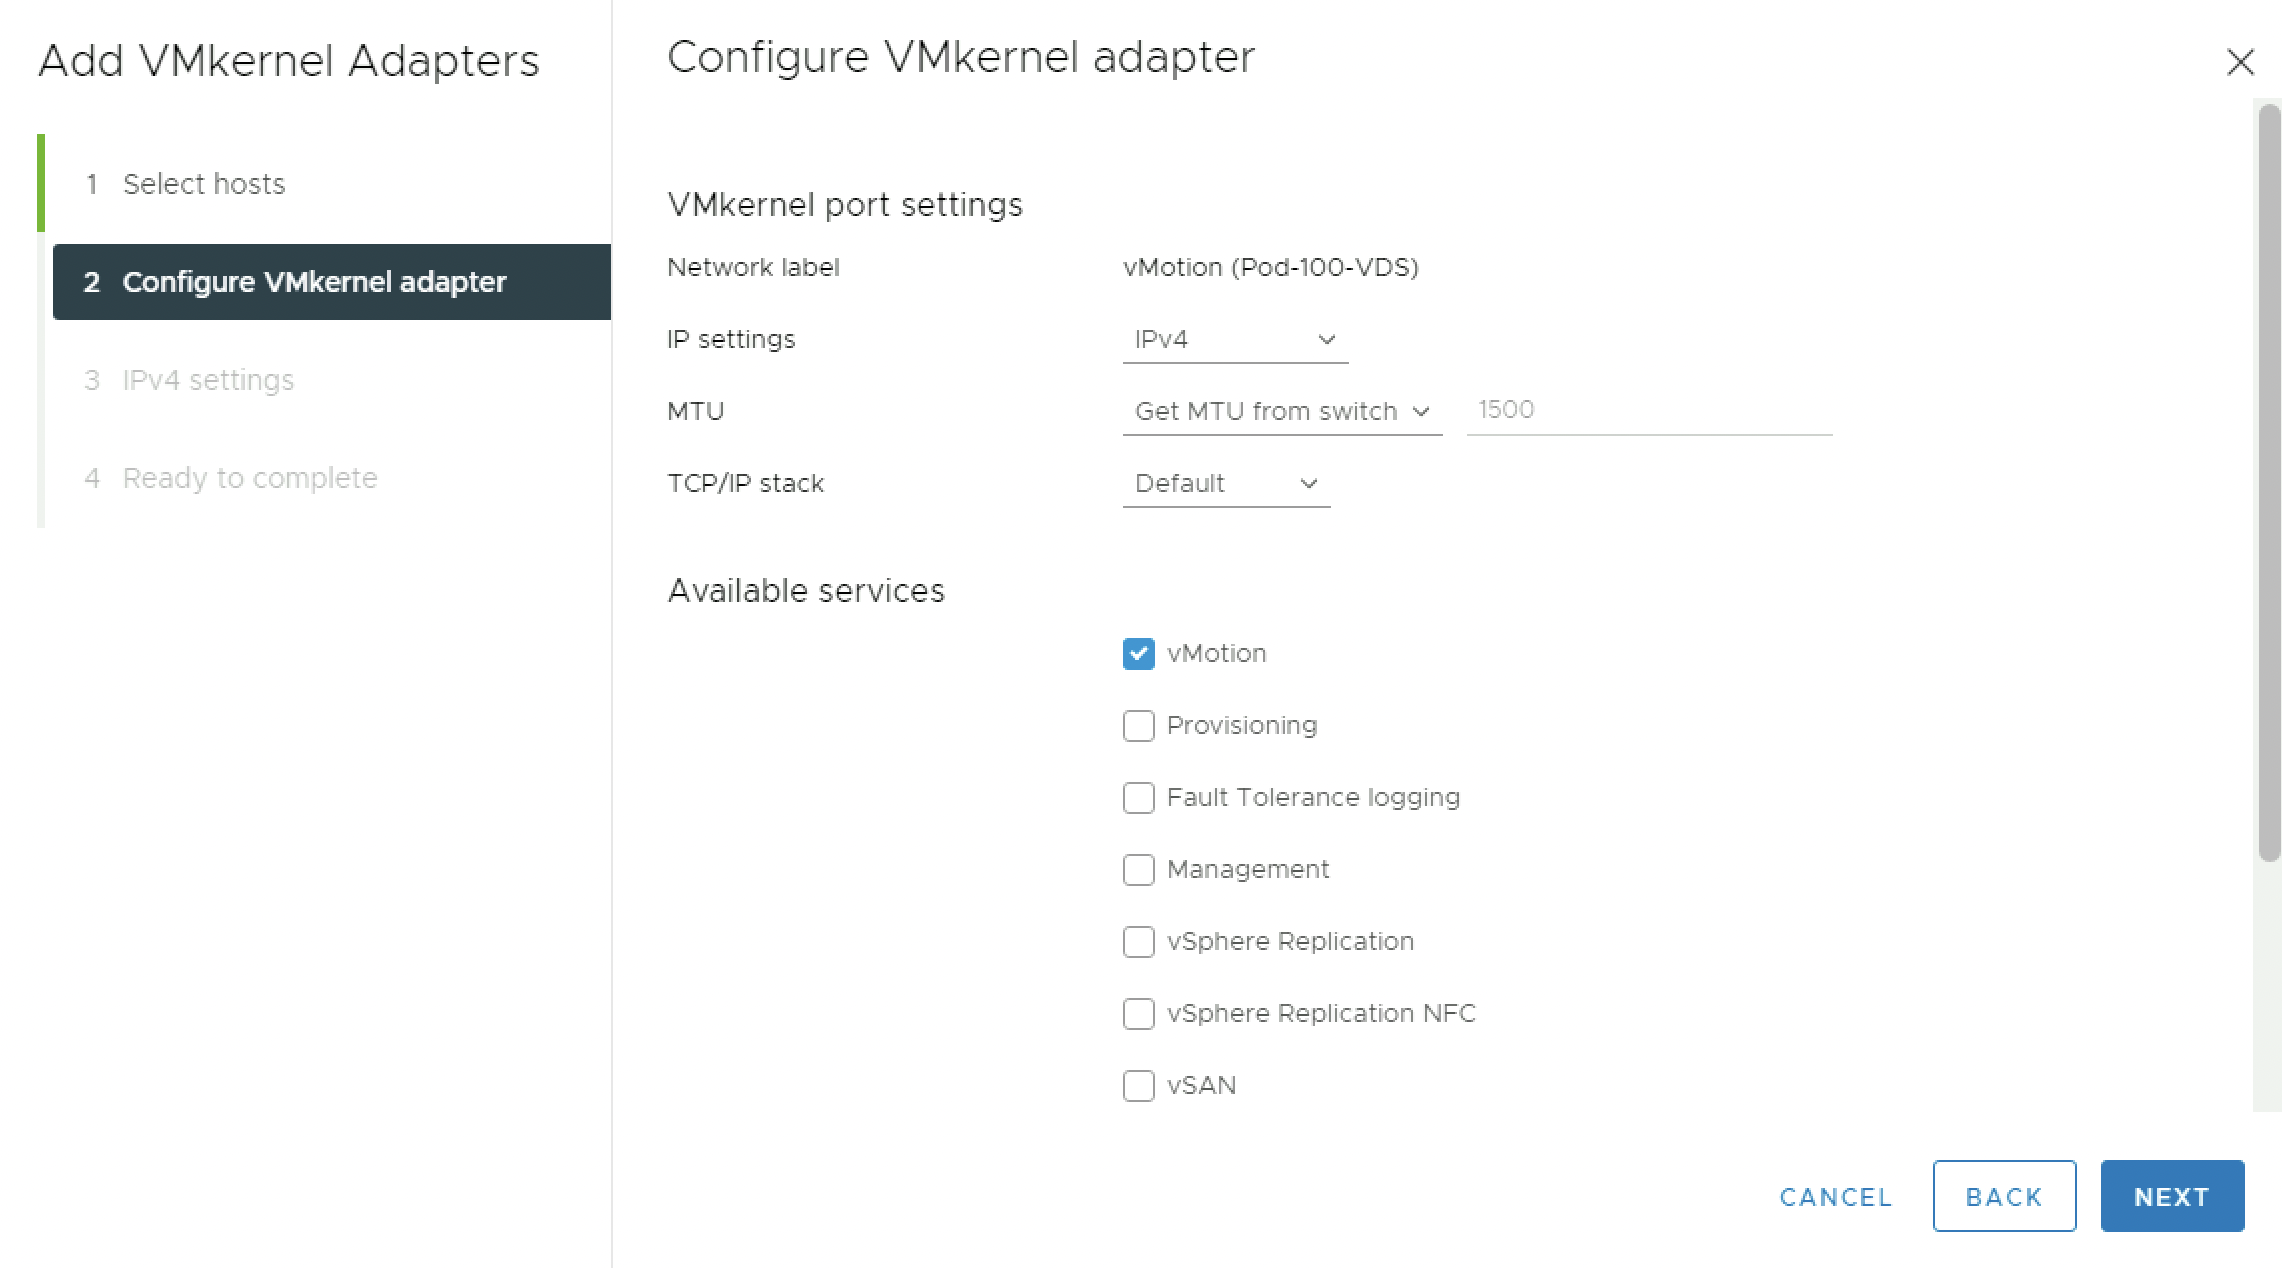
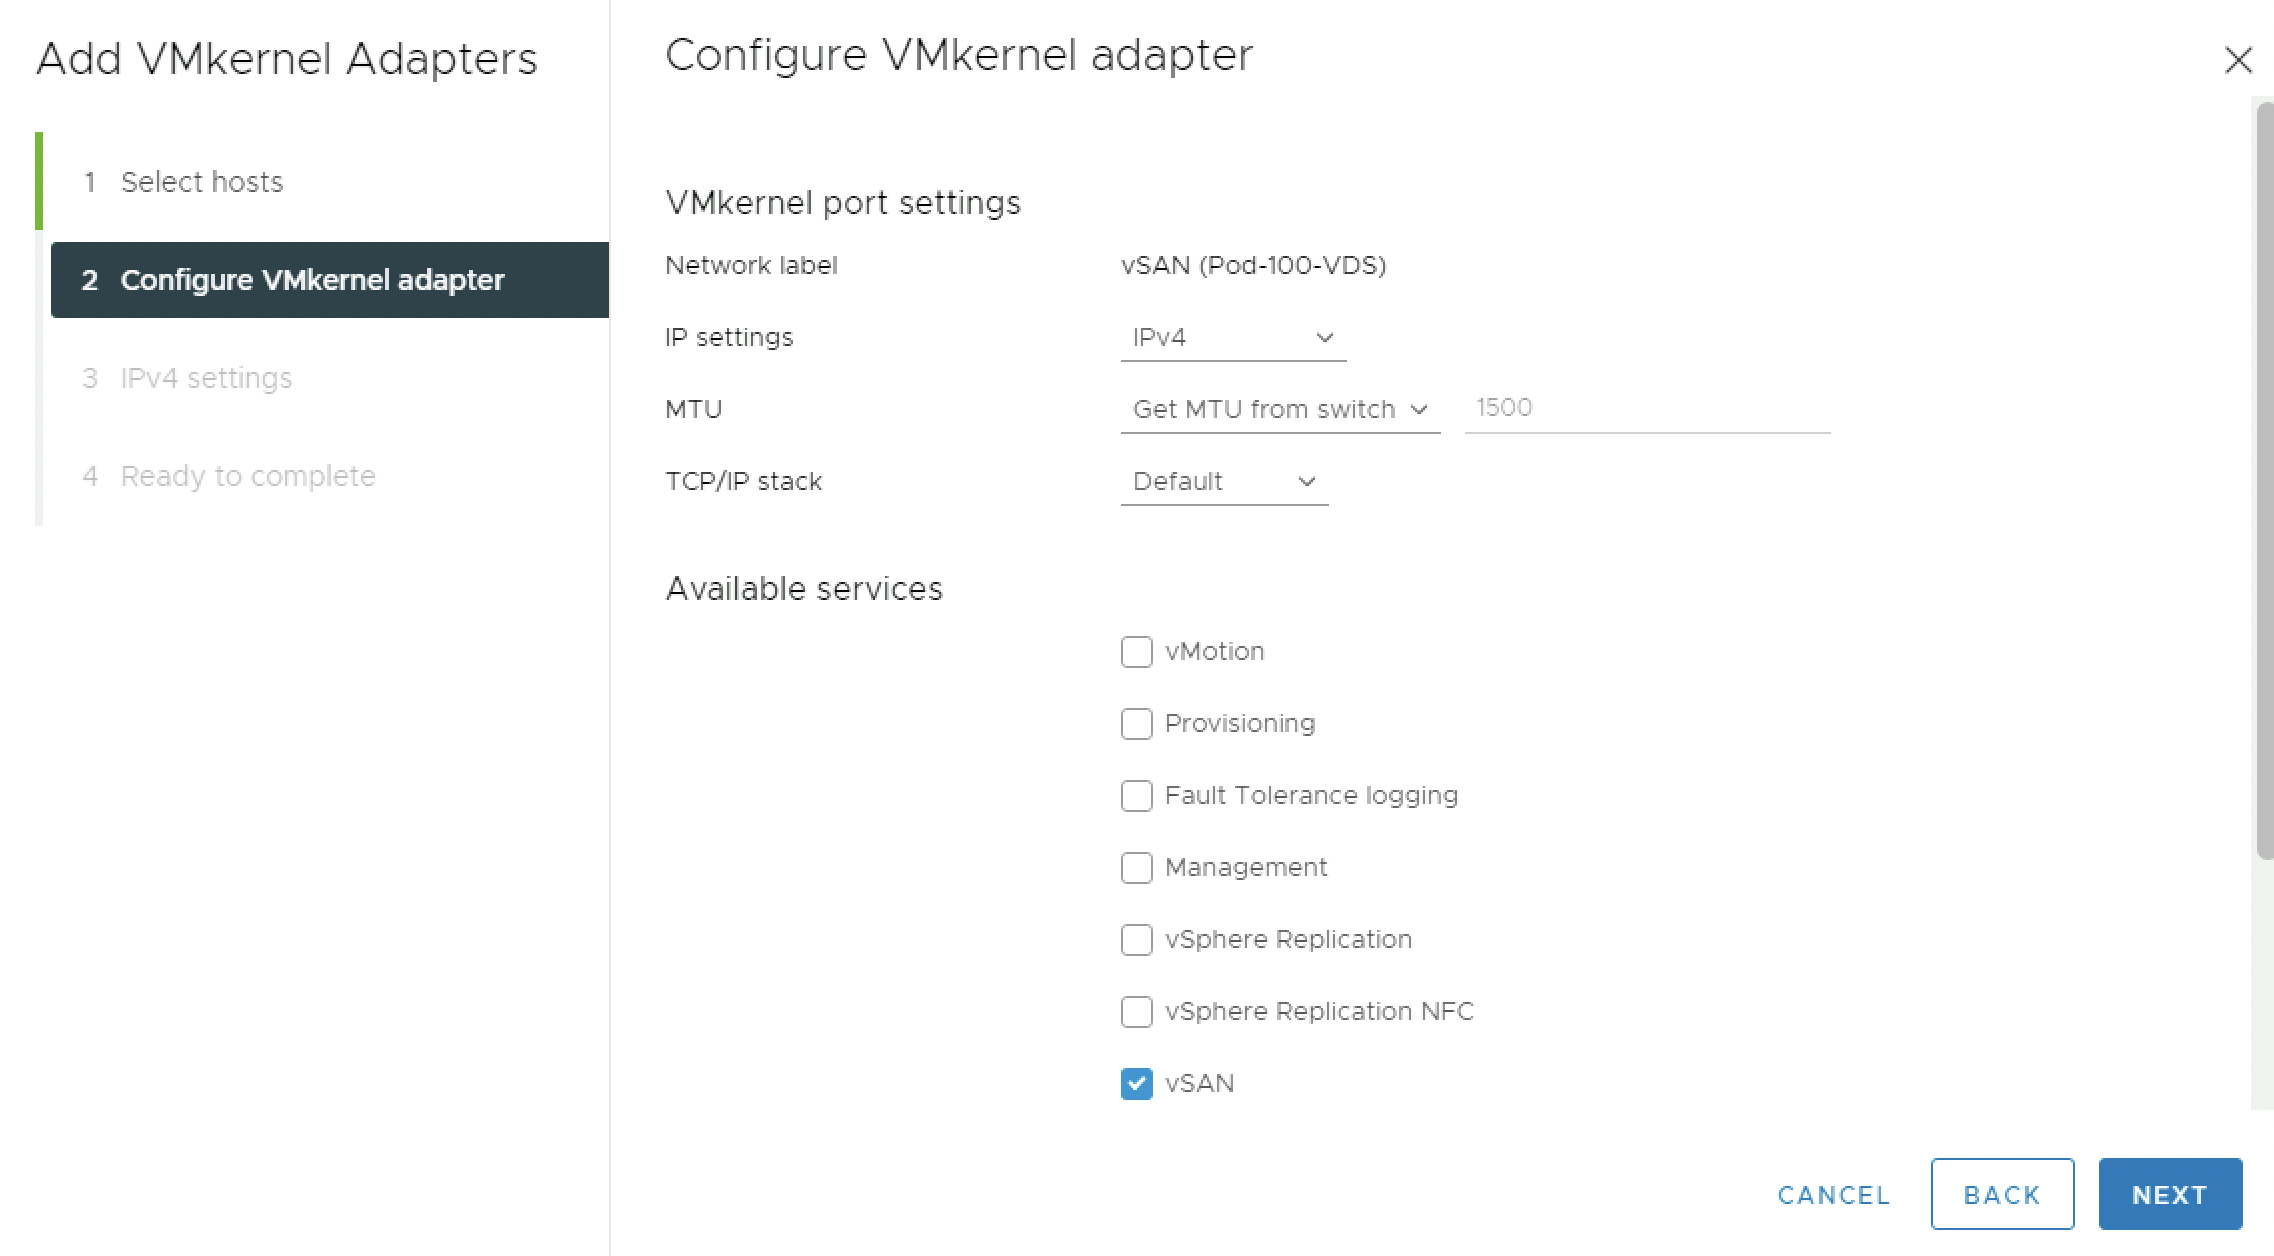
Enable the vMotion service by checking the checkbox:
Use static IPv4 settings, and use the IP address settings provided in the table:
Review the Summary and Finish.
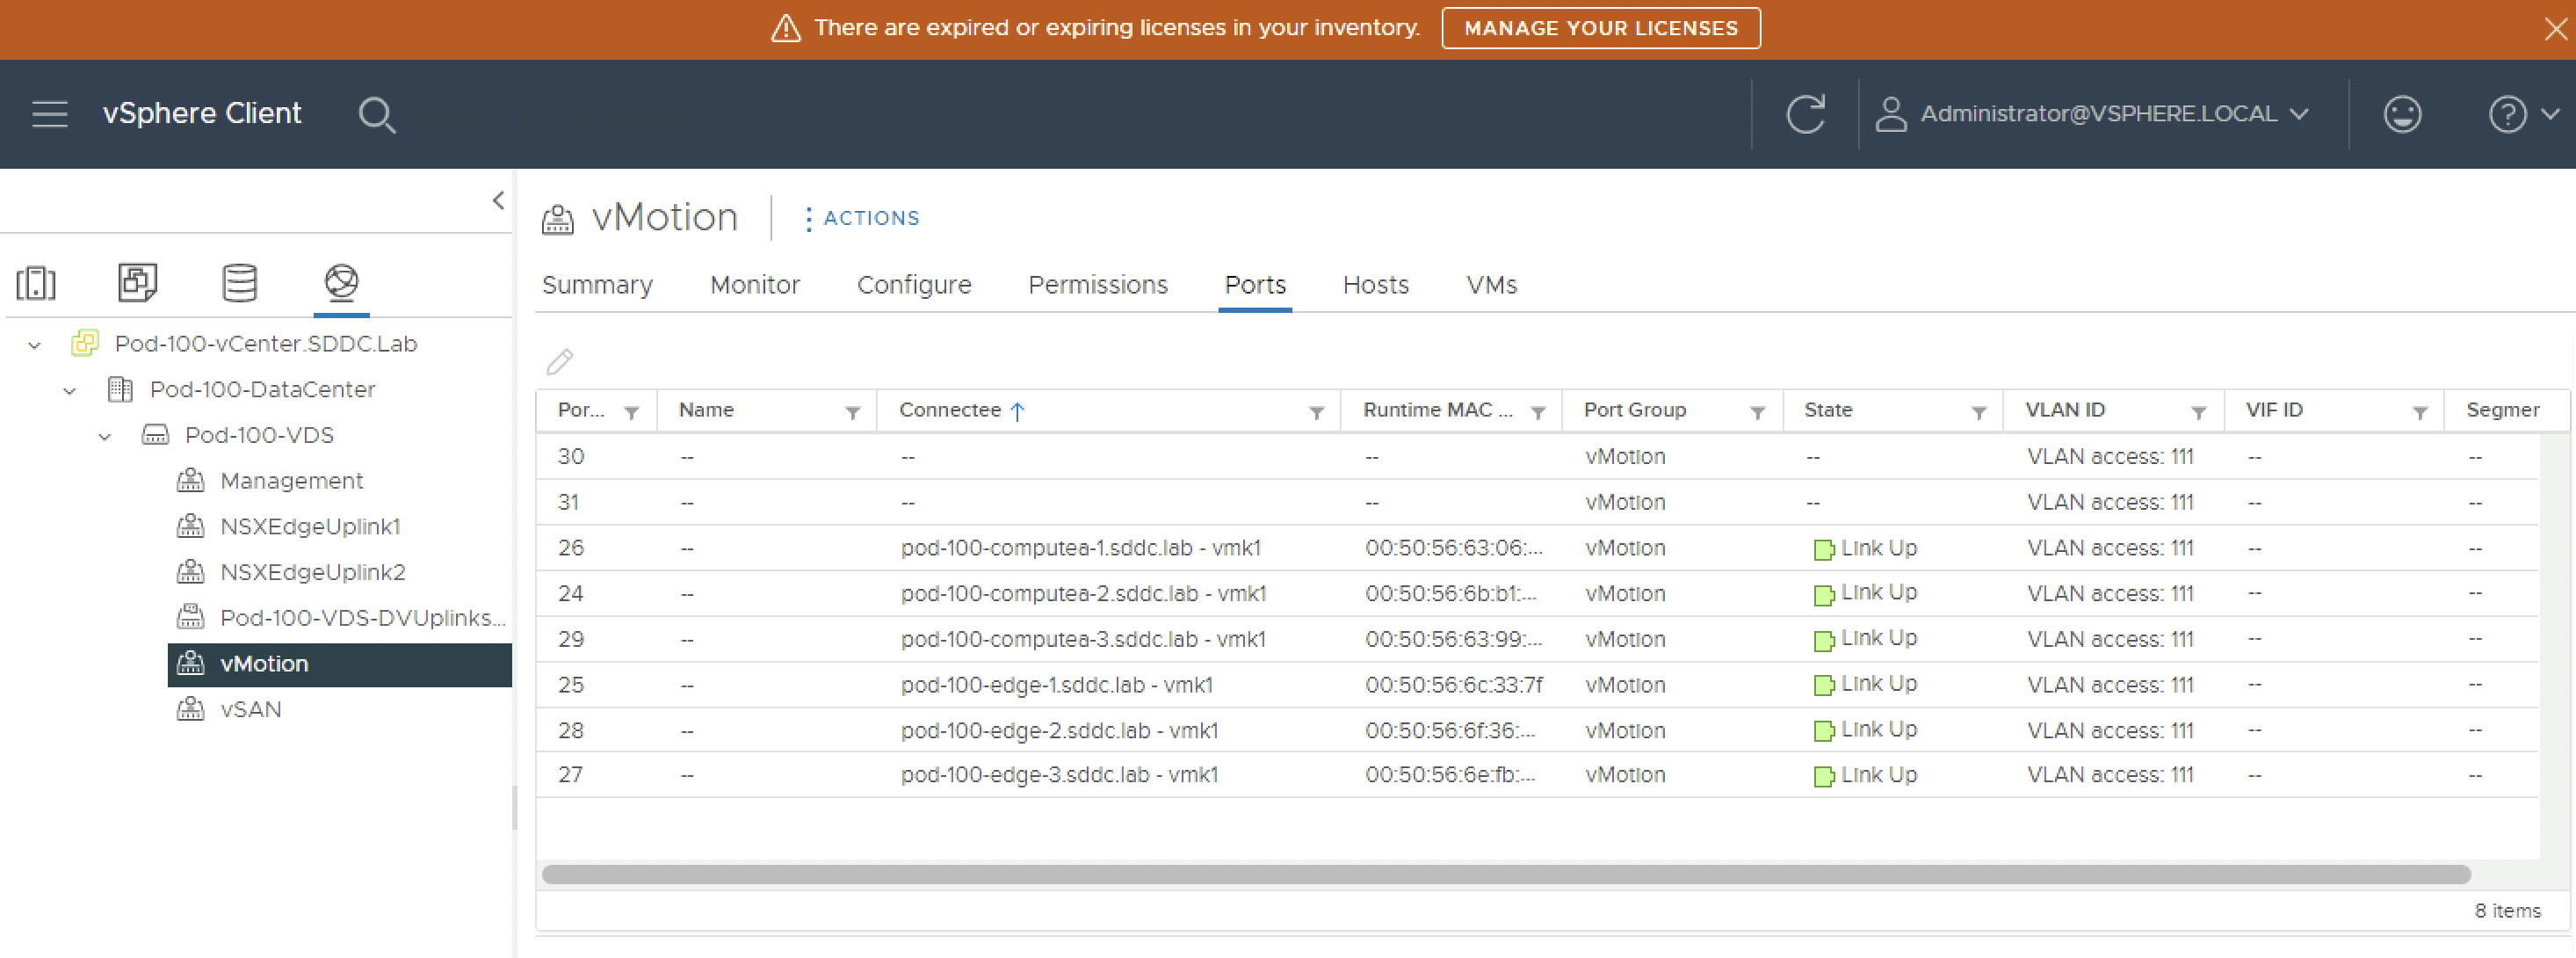
Verify if the vmk vMotion interfaces have a virtual switch port assigned:
Configure vSAN
Before you can configure vSAN you need to add a vmk interface dedicated for vSAN. This is similar to the steps you just followed for the vMotion vmk, but now with a different Port Group and VLAN.
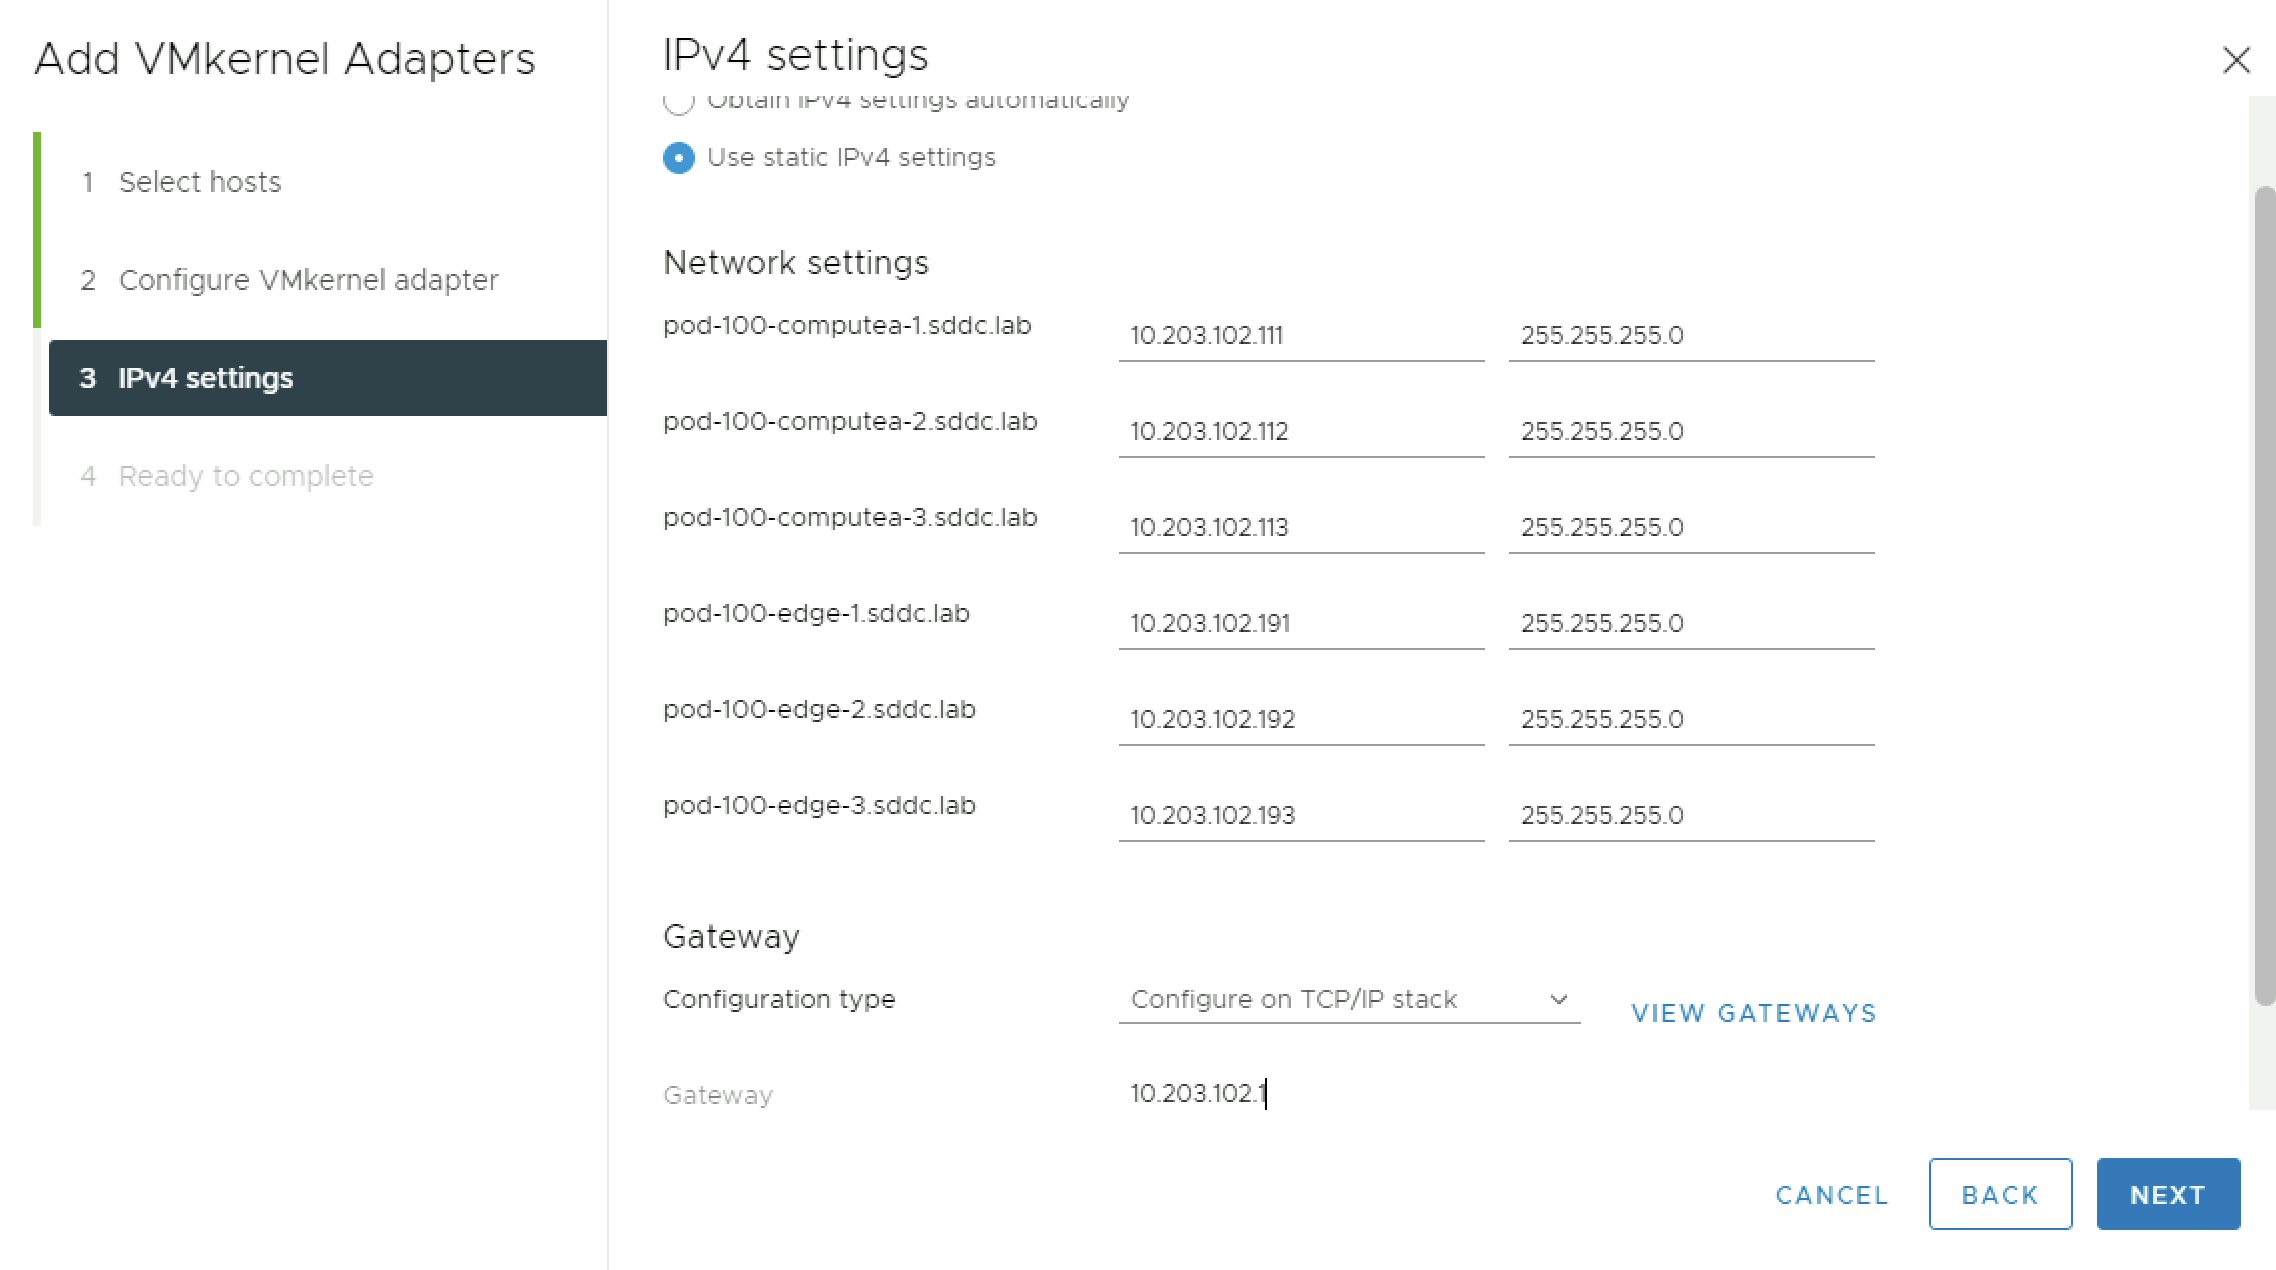
| ESXi hostname | vSAN IP address | VDS Portgroup | Subnetmask | Gateway |
|---|---|---|---|---|
| pod-100-computea-1.sddc.lab | 10.203.102.111 | vSAN | 255.255.255.0 | 10.203.102.1 |
| pod-100-computea-2.sddc.lab | 10.203.102.112 | vSAN | 255.255.255.0 | 10.203.102.1 |
| pod-100-computea-3.sddc.lab | 10.203.102.113 | vSAN | 255.255.255.0 | 10.203.102.1 |
| pod-100-edge-1.sddc.lab | 10.203.102.191 | vSAN | 255.255.255.0 | 10.203.102.1 |
| pod-100-edge-2.sddc.lab | 10.203.102.192 | vSAN | 255.255.255.0 | 10.203.102.1 |
| pod-100-edge-3.sddc.lab | 10.203.102.193 | vSAN | 255.255.255.0 | 10.203.102.1 |
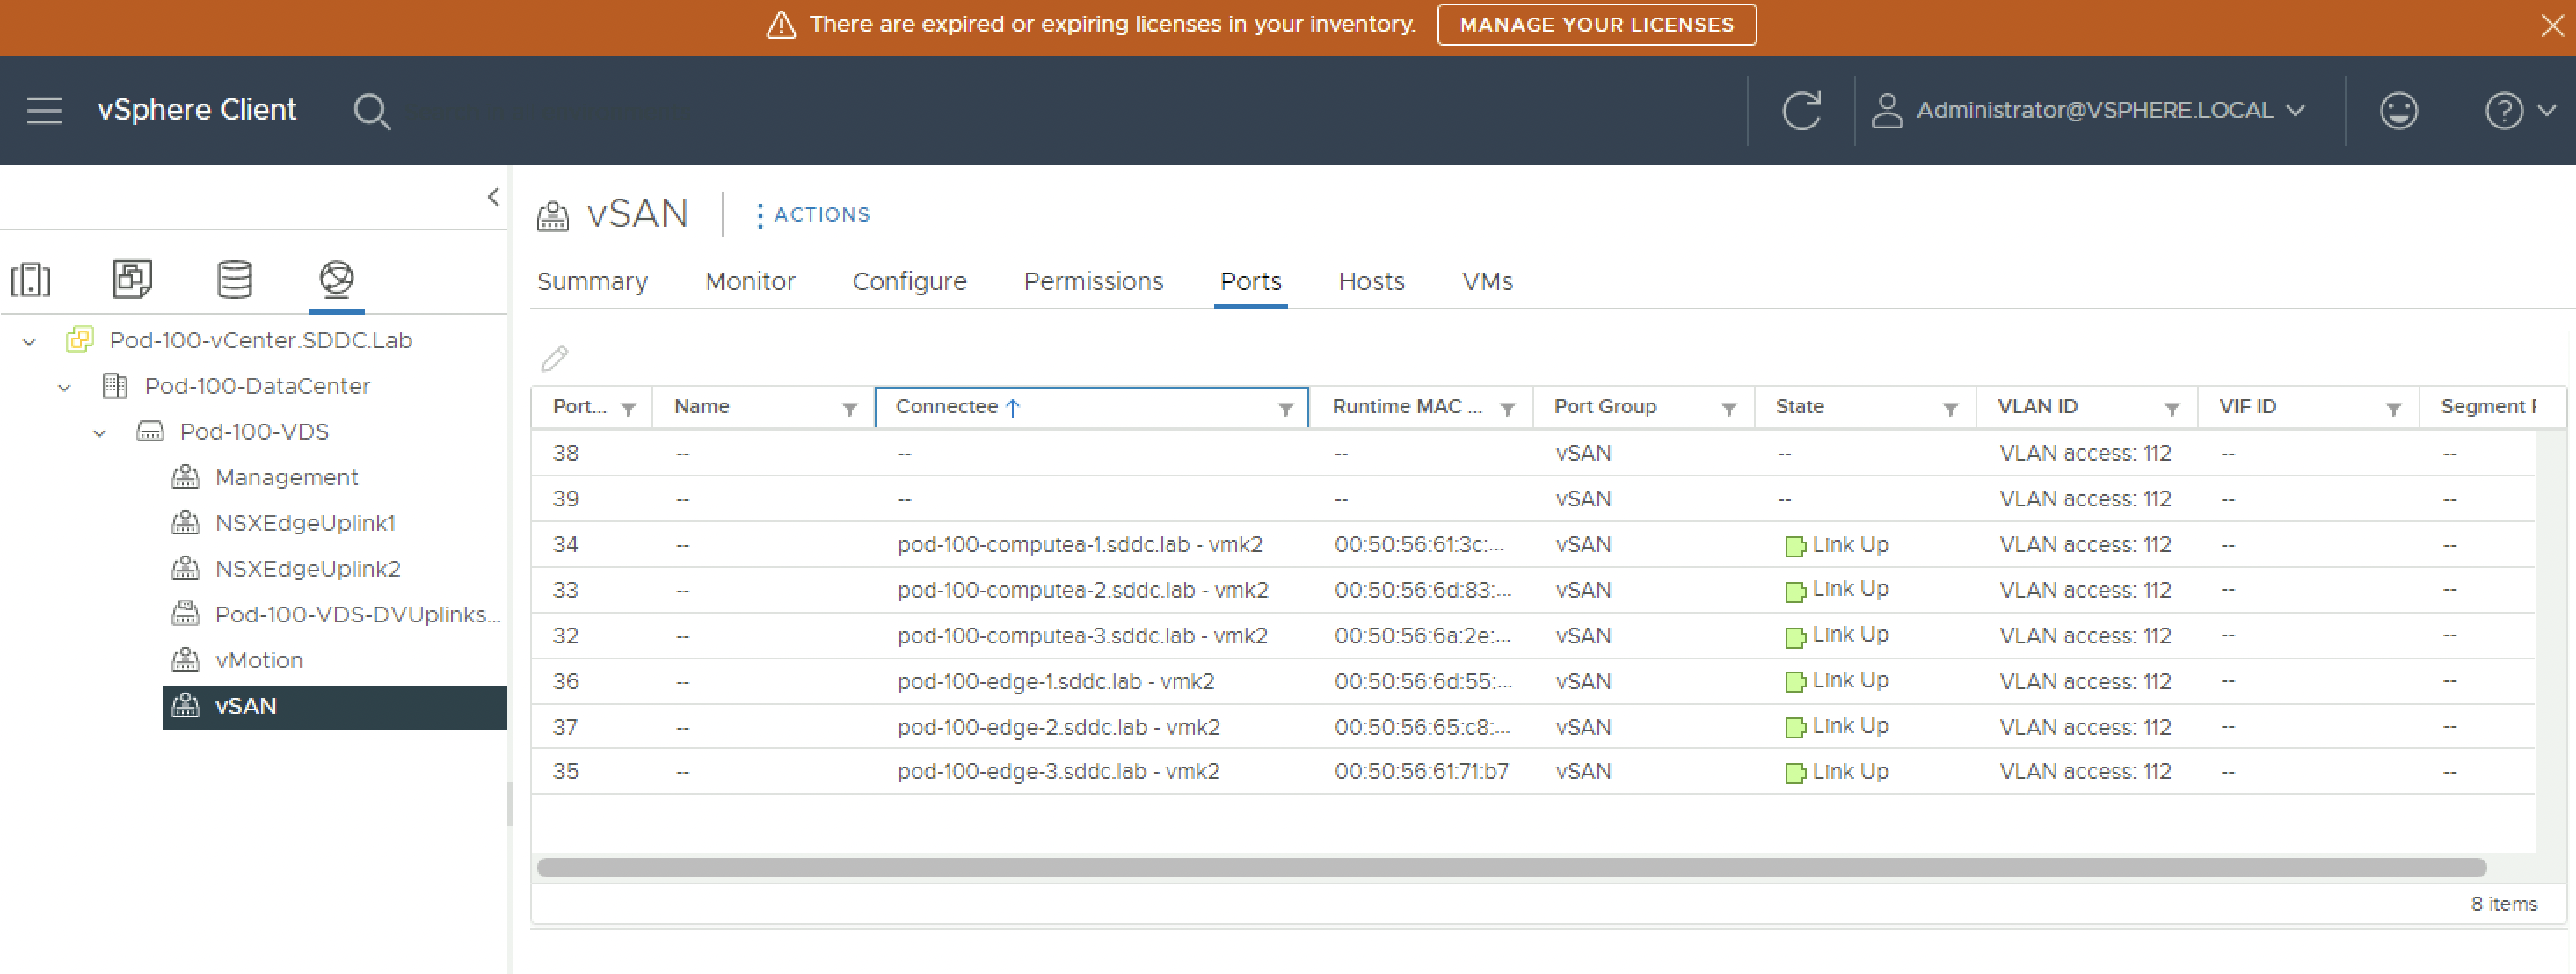
When you go to the Networking tab and the Distributed Port Groups sub-tab you can right-click on the vSAN Port Group and “Add VMkernel Adapters.
Select all the hosts you want to add a vSAN vmk interface:
Select all the hosts you want to add a vSAN vmk interface:
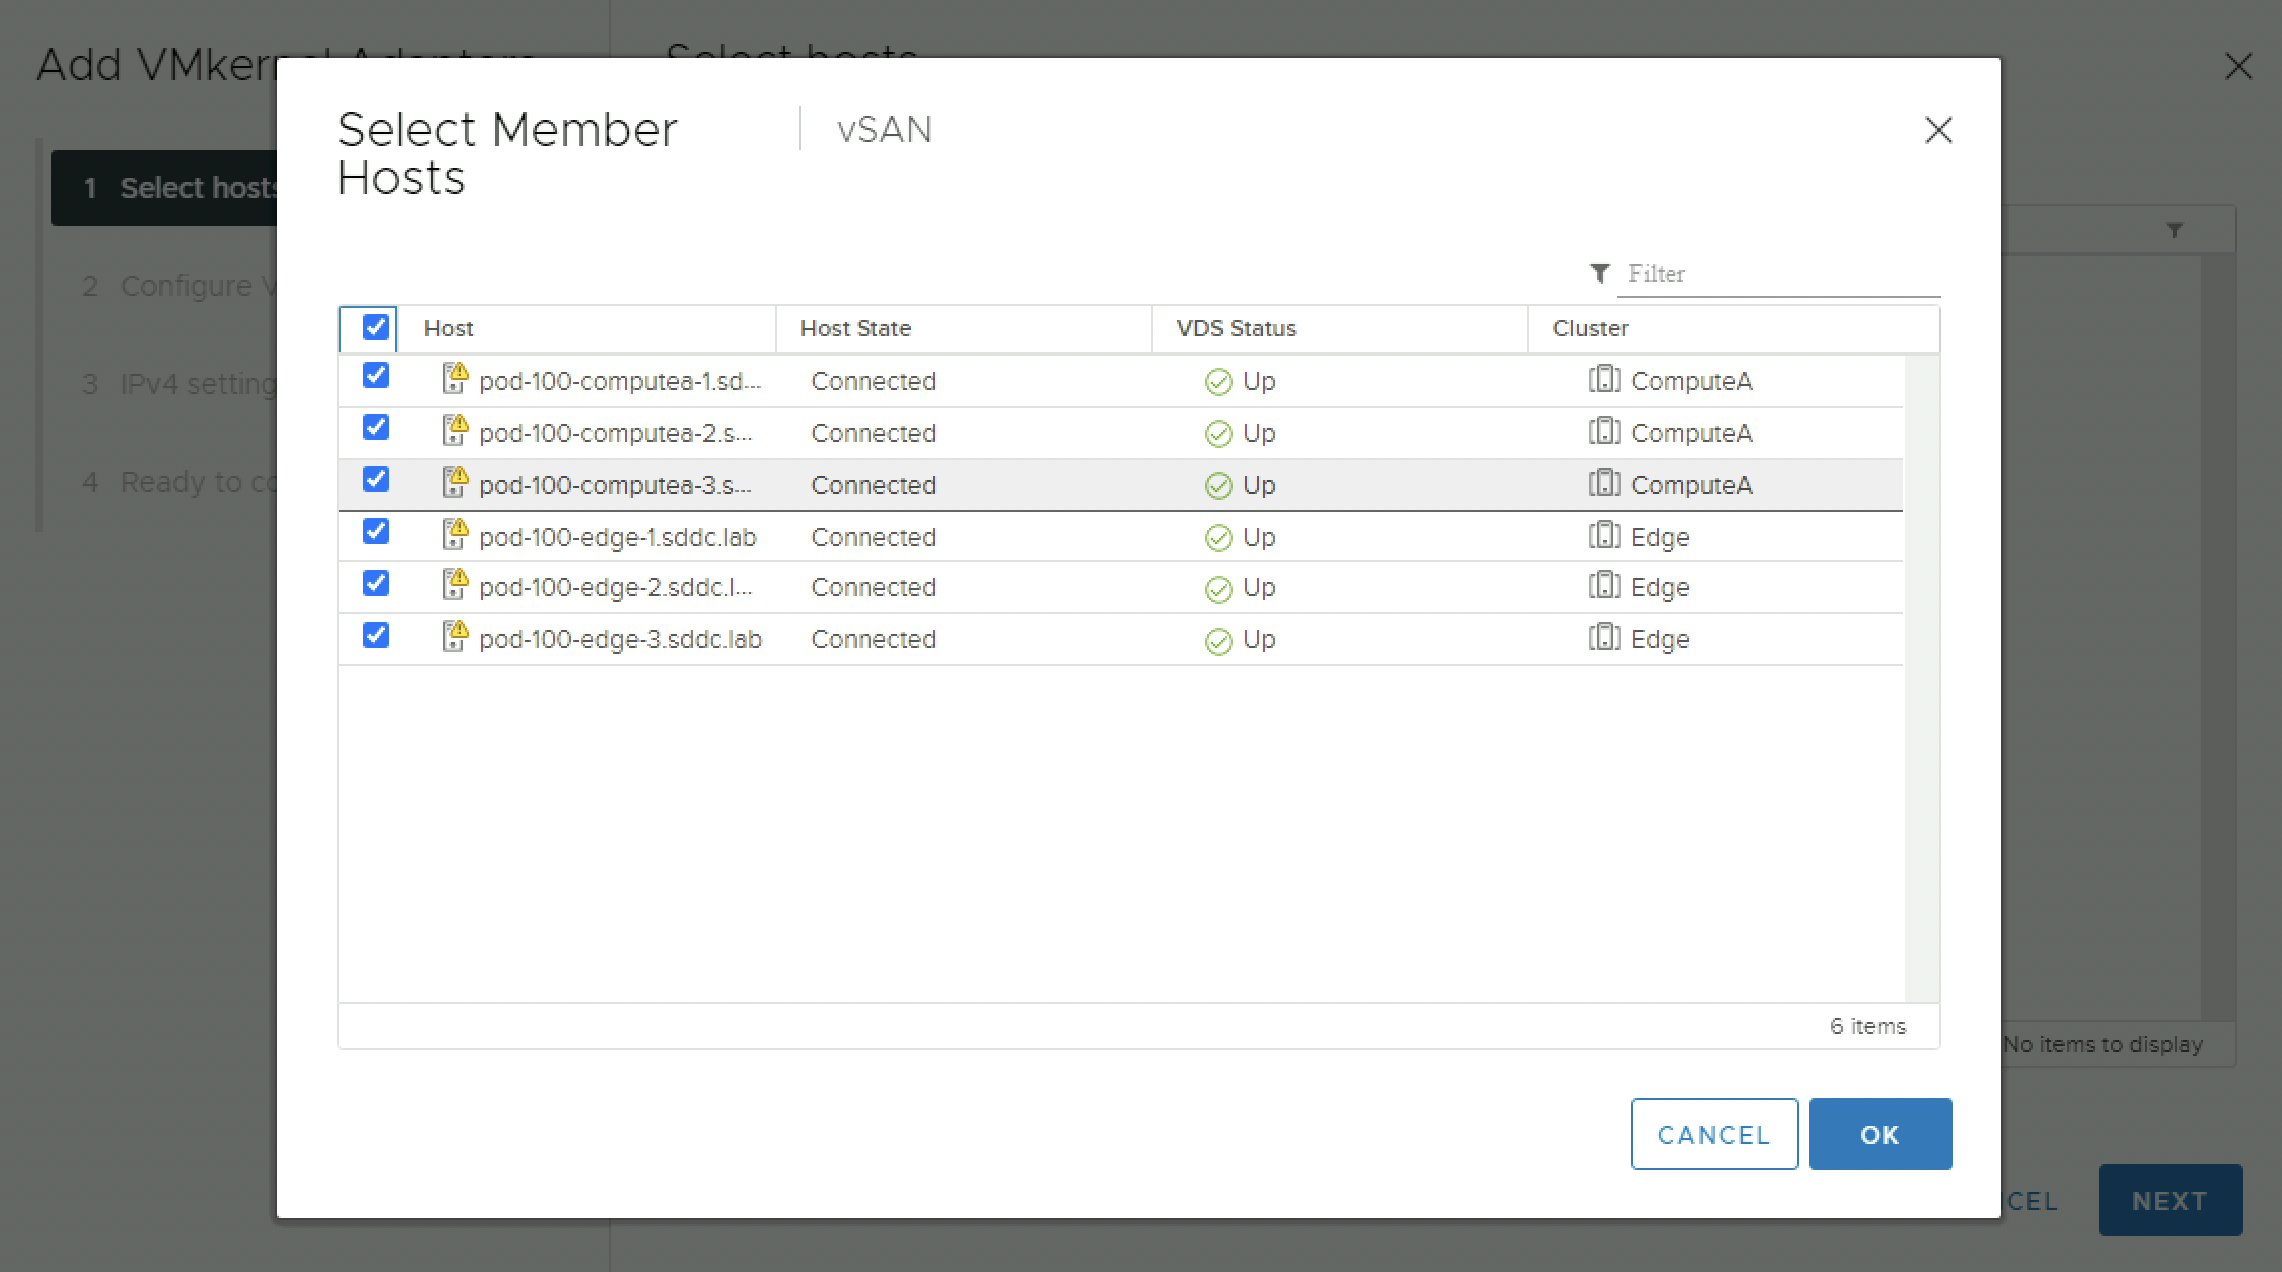
Verify the selected hosts (again):
Enable the vSAN service by checking the checkbox:
Use static IPv4 settings, and use the IP address settings provided in the table:
Review the Summary and Finish.
Verify if the vmk vSAN interfaces have a virtual switch port assigned:
Now that the vSAN vmk is in place you can start to configure vSAN.
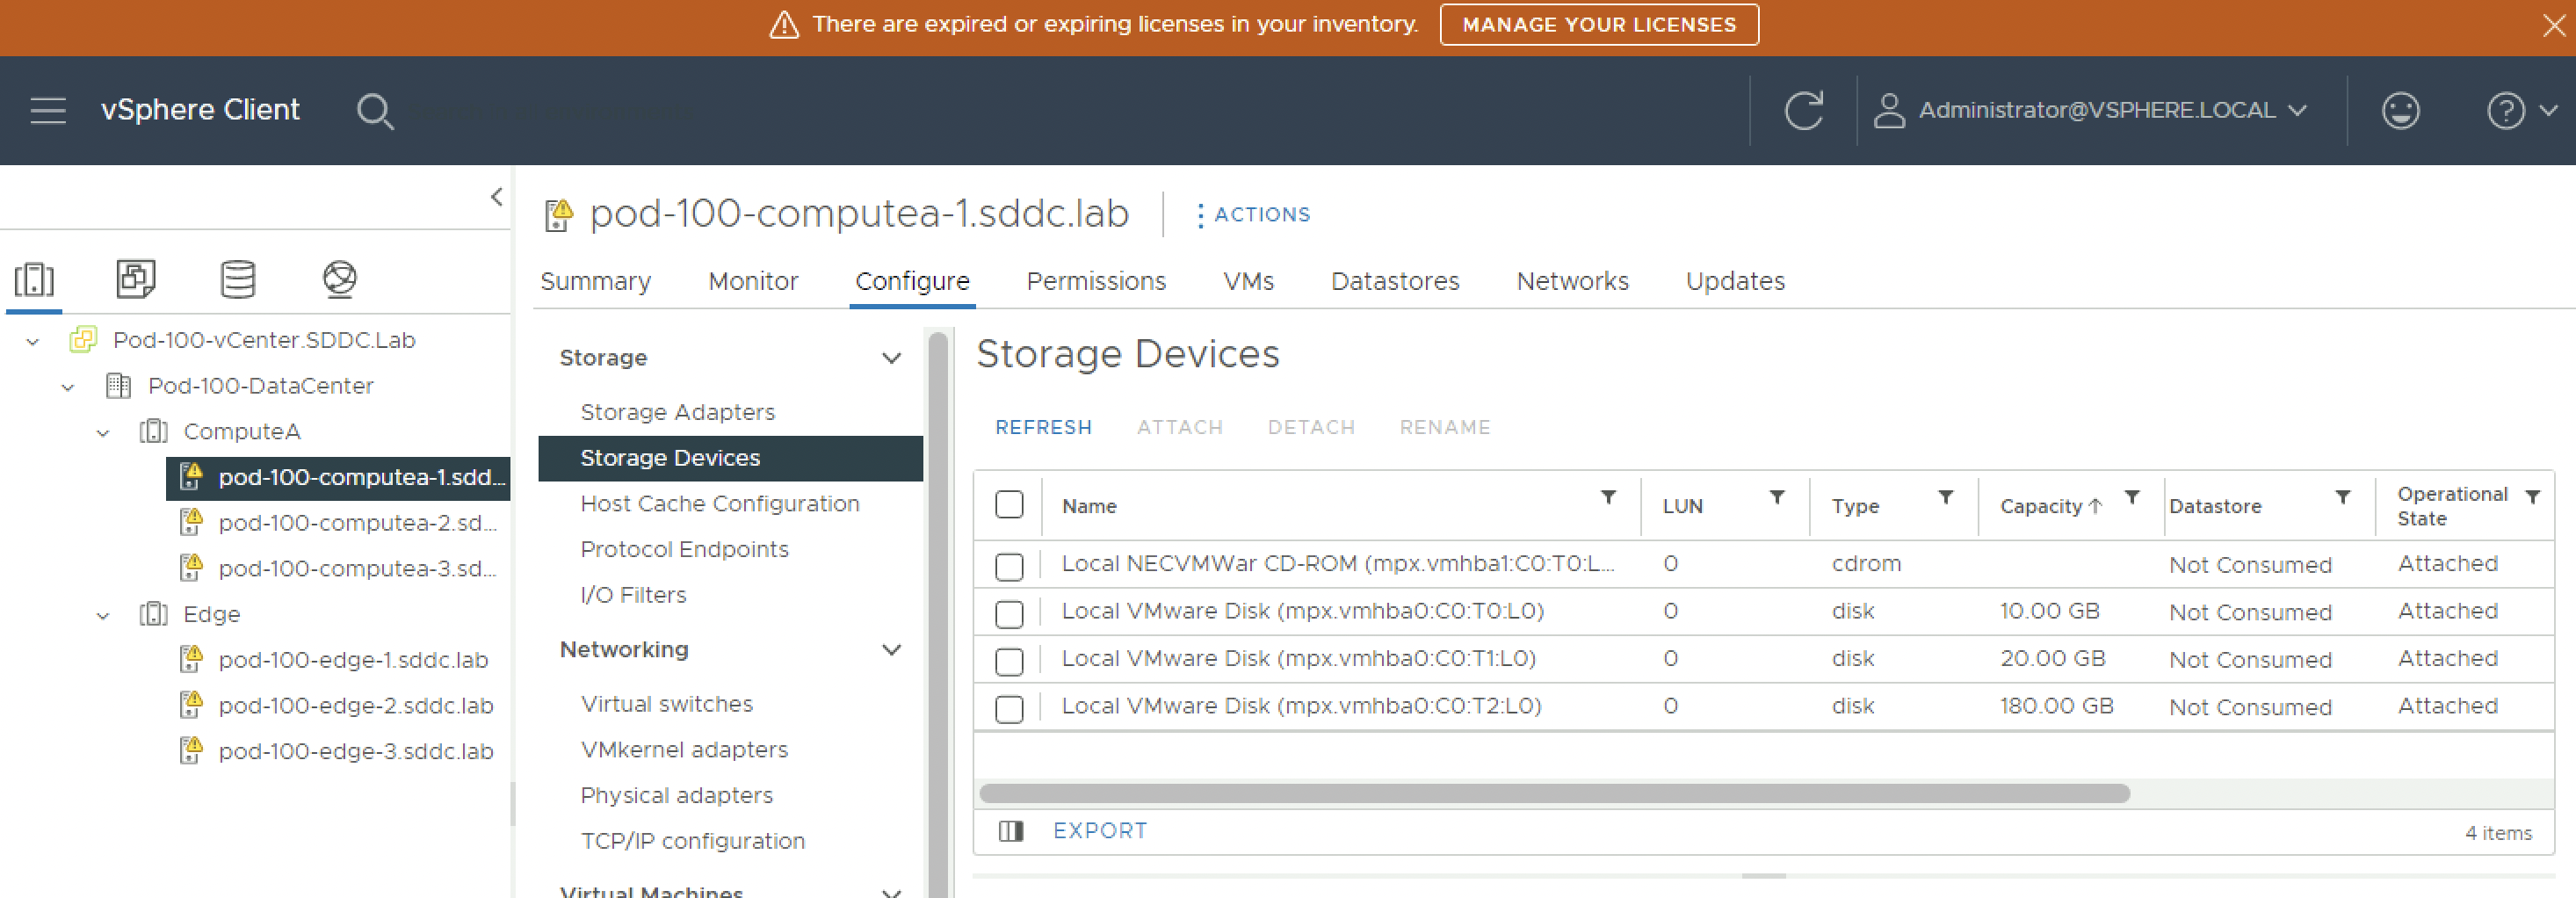
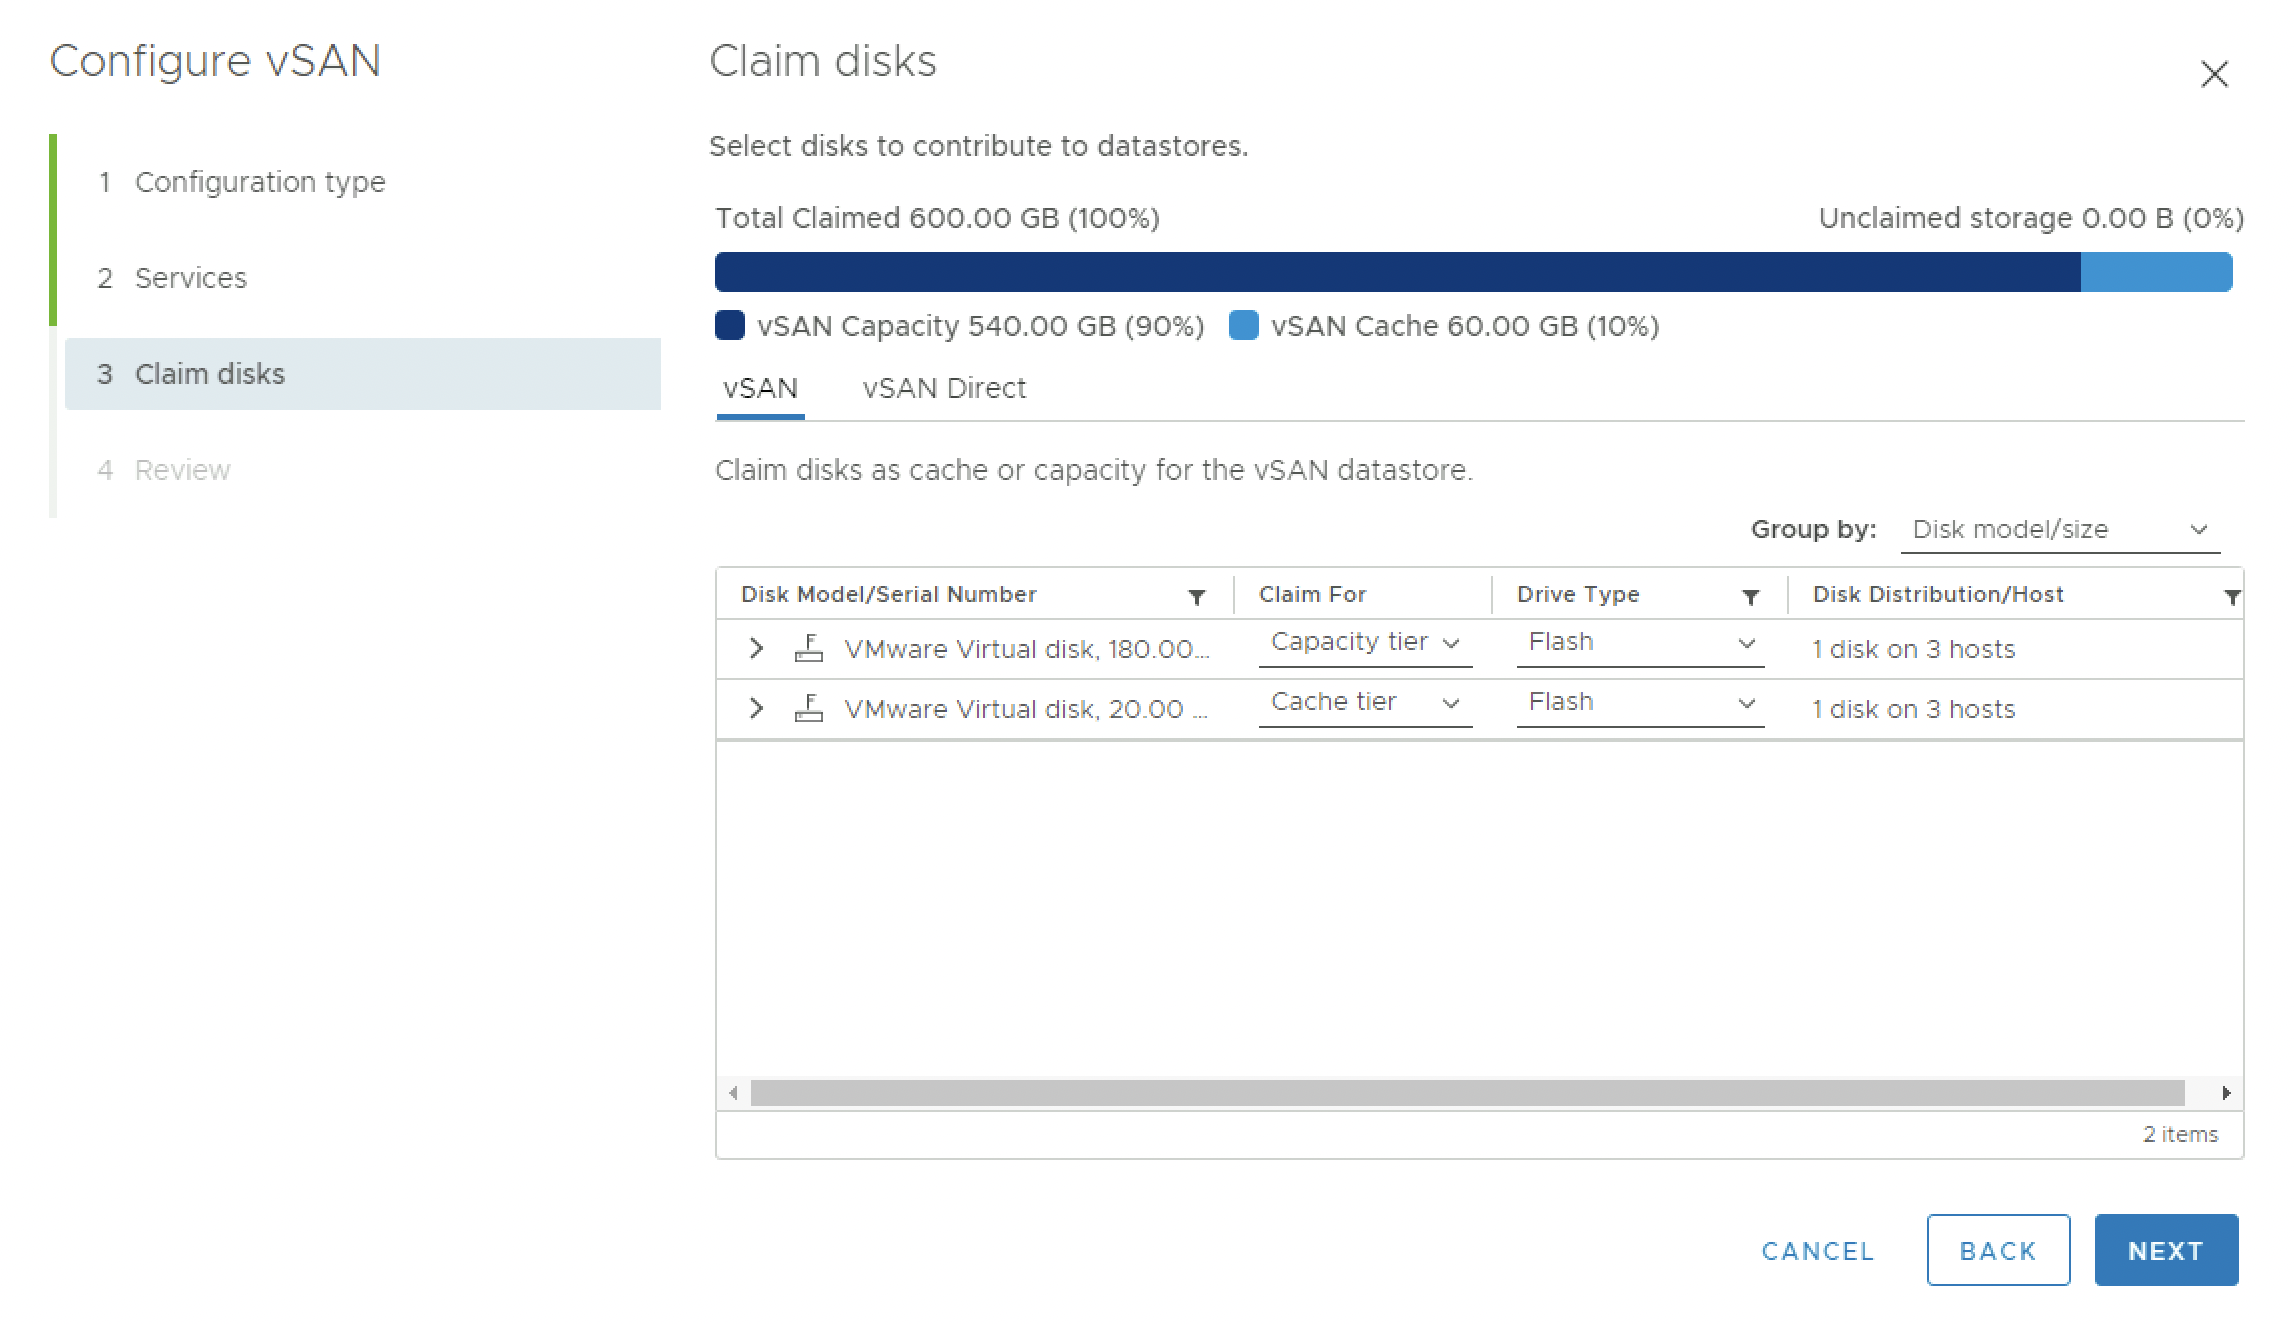
Each host has three Disks.
- 1 x 10 GB (ESXi boot disk)
- 1 x 20 GB (vSAN cache disk)
- 1 x 180 GB (vSAN capacity disk)
When you look at the Storage Devices on the ESXi hosts it looks something like this:
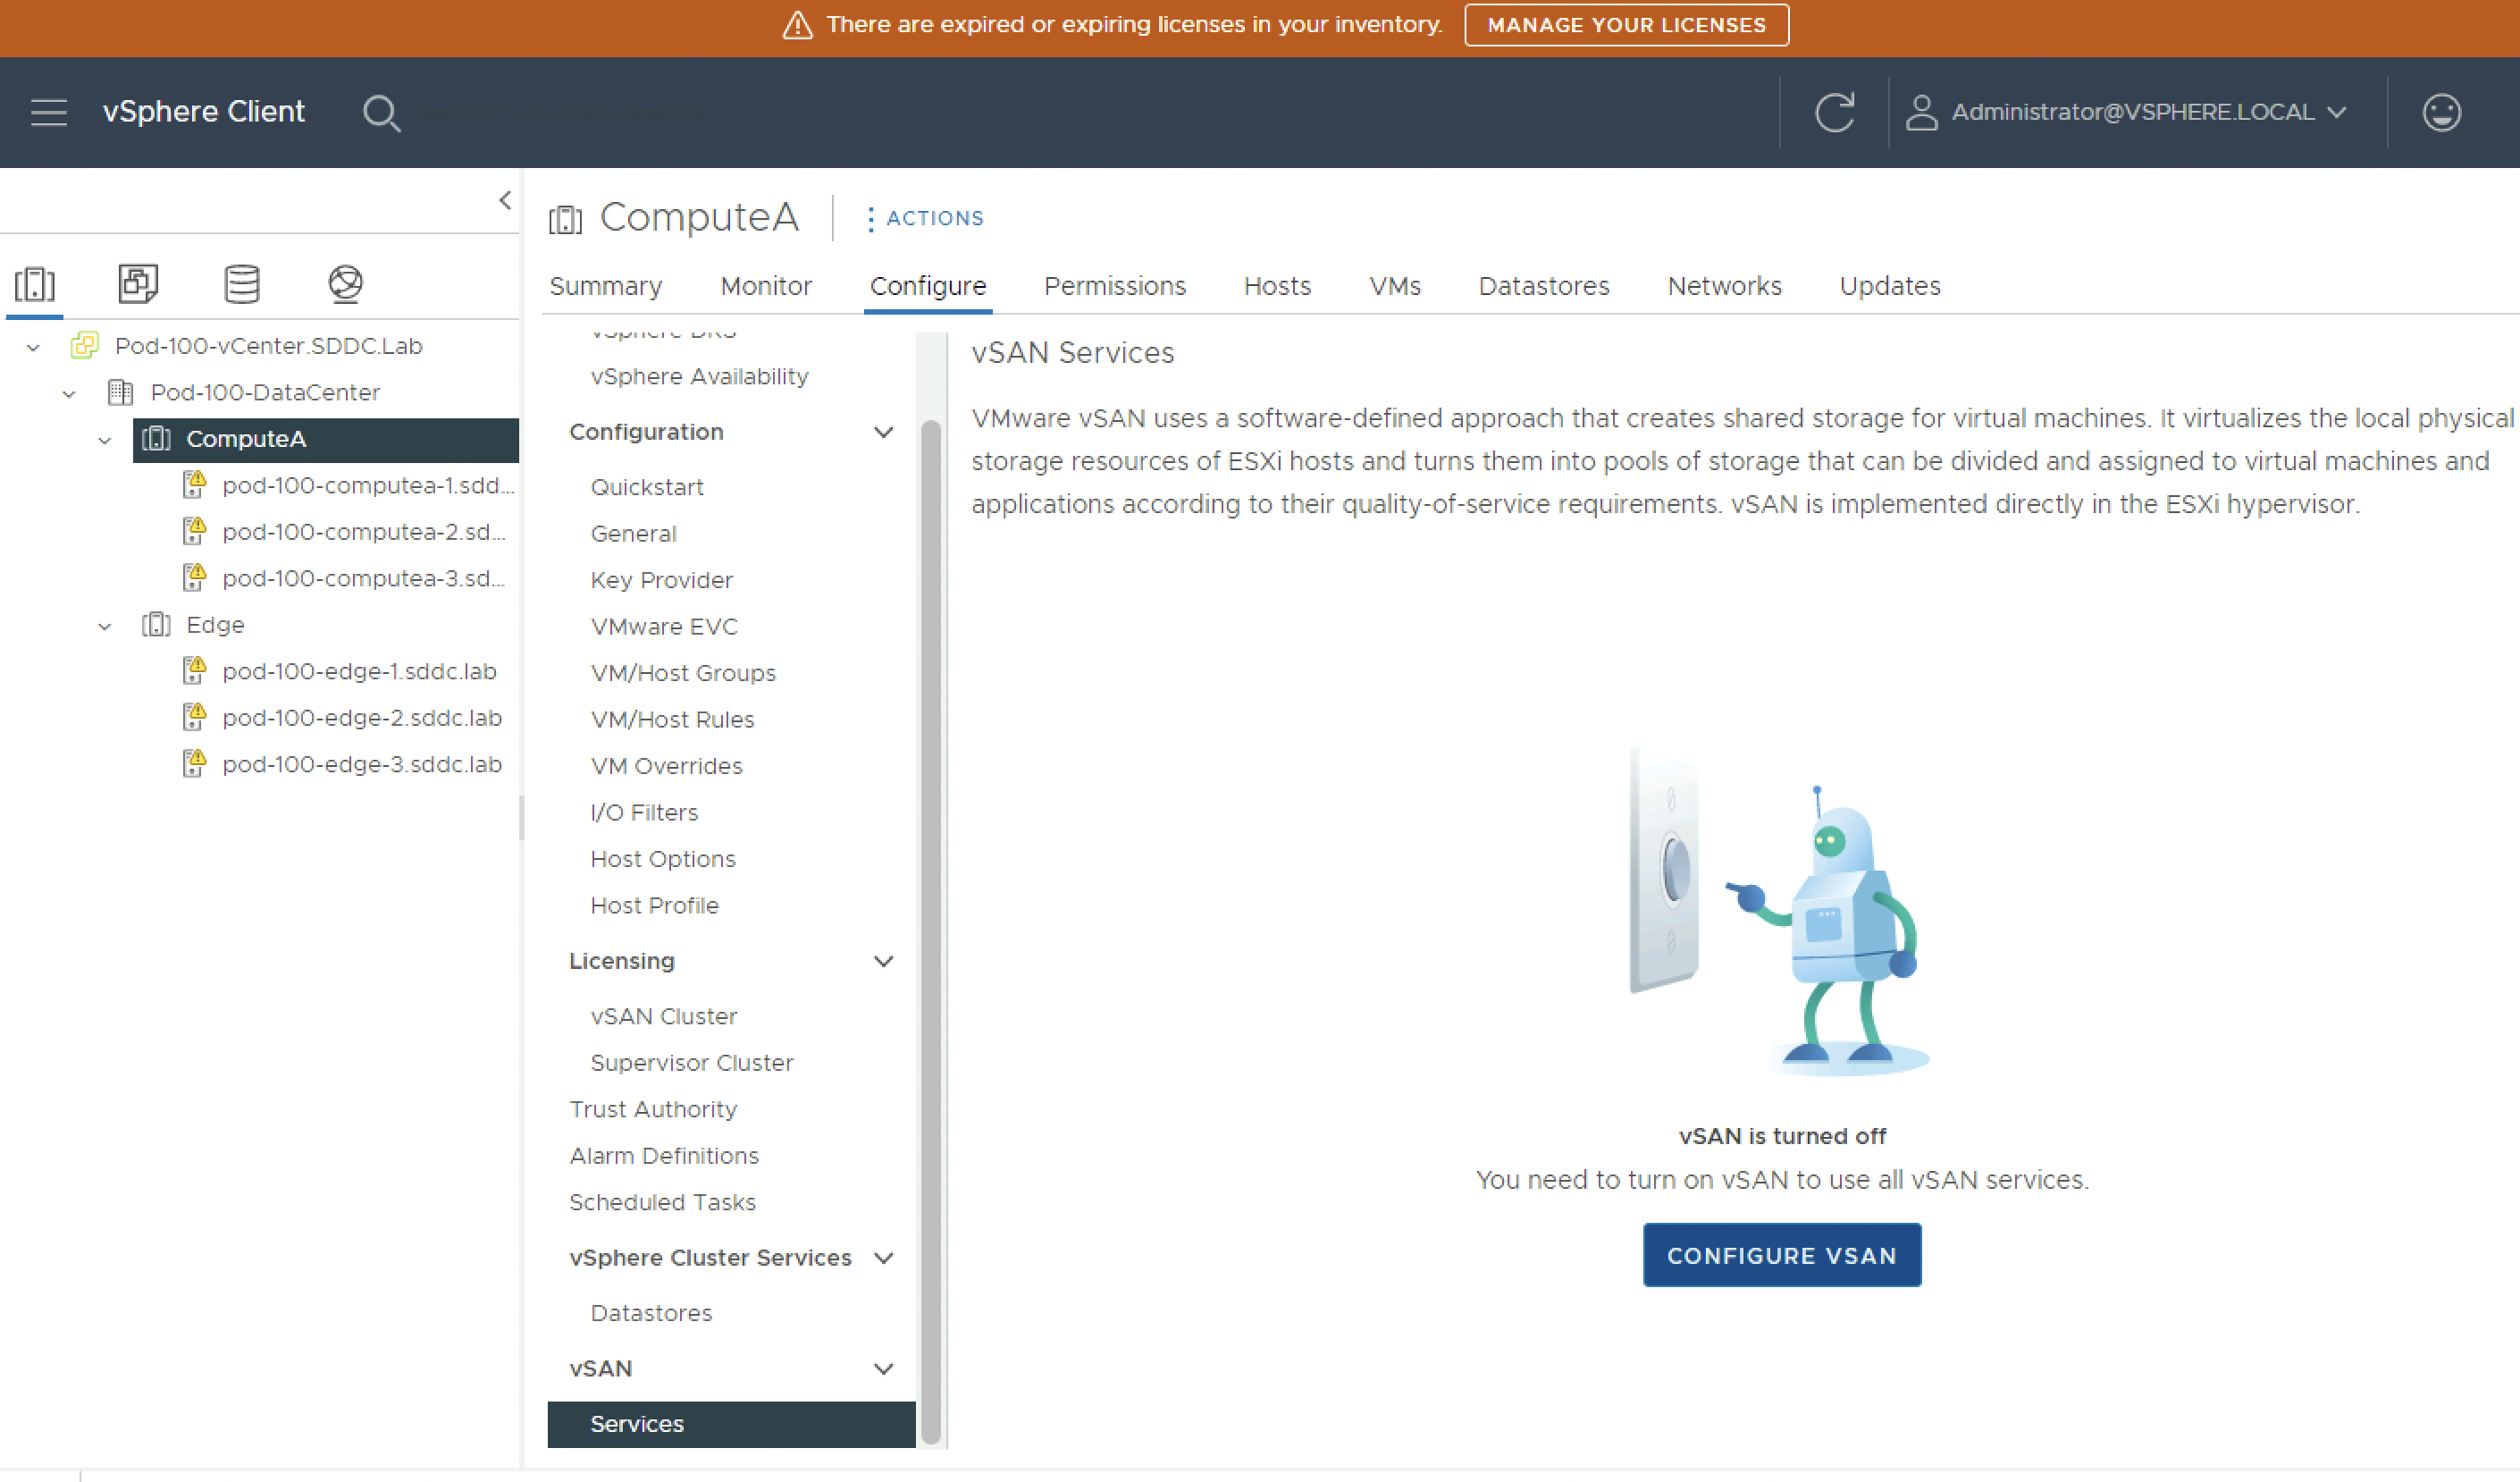
To enable vSAN select the vSphere Cluster object, and in the configure tab select Services in the vSAN section. Click on “Configure vSAN” to open the wizard.
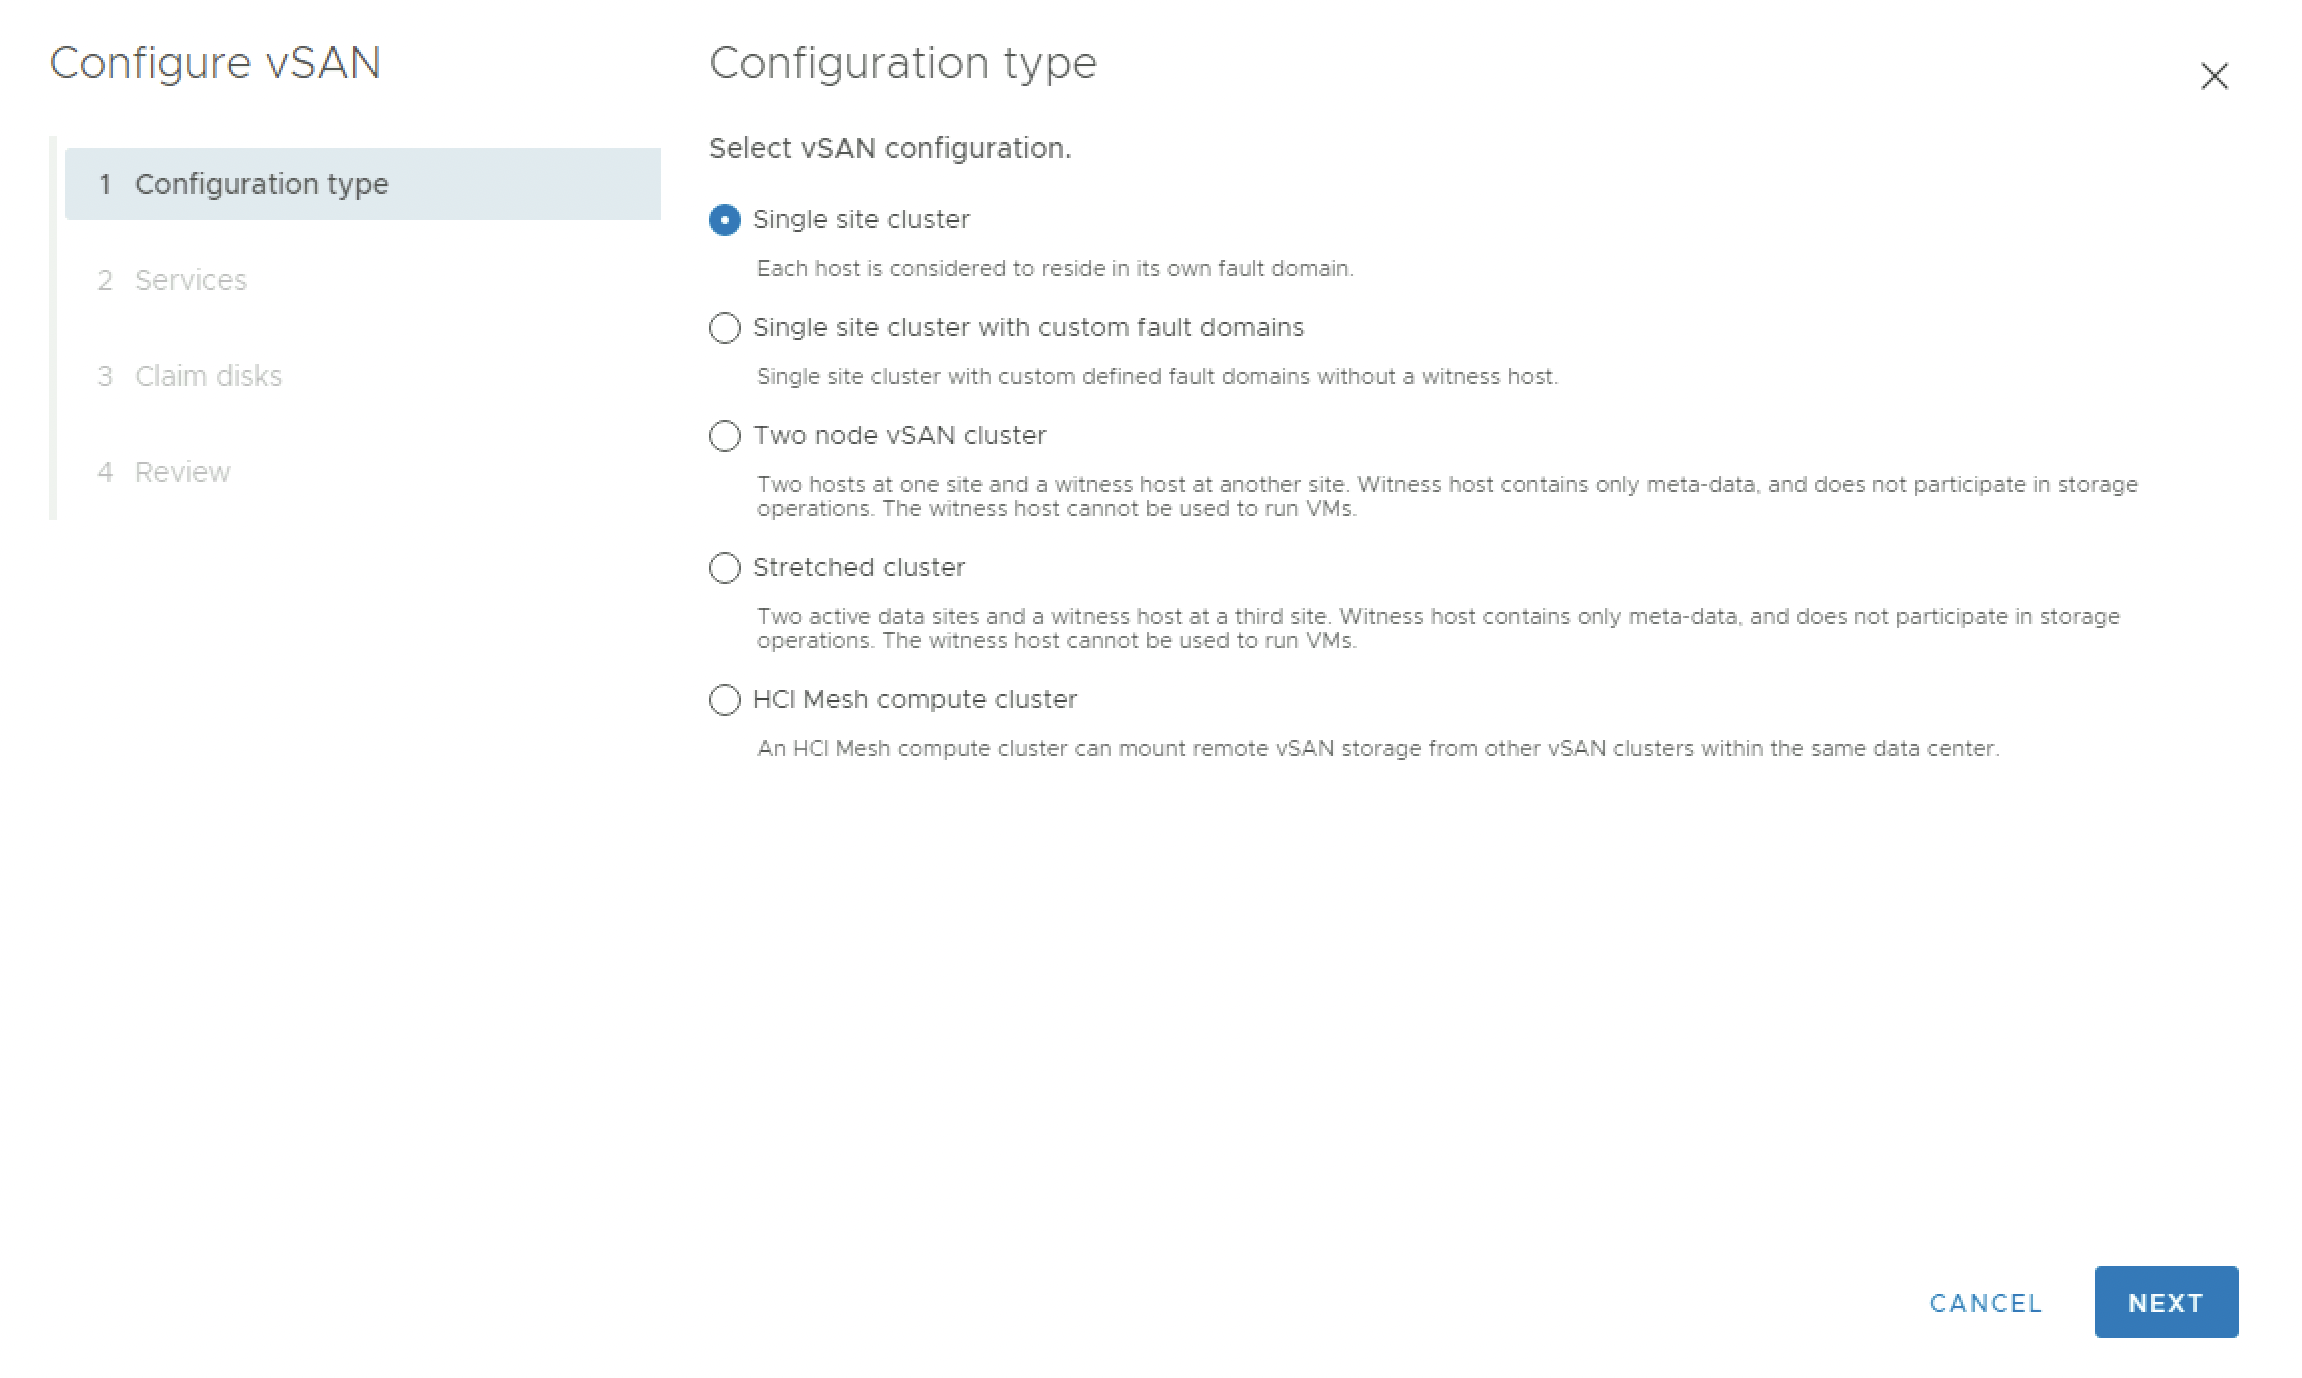
Select “Single site cluster”:
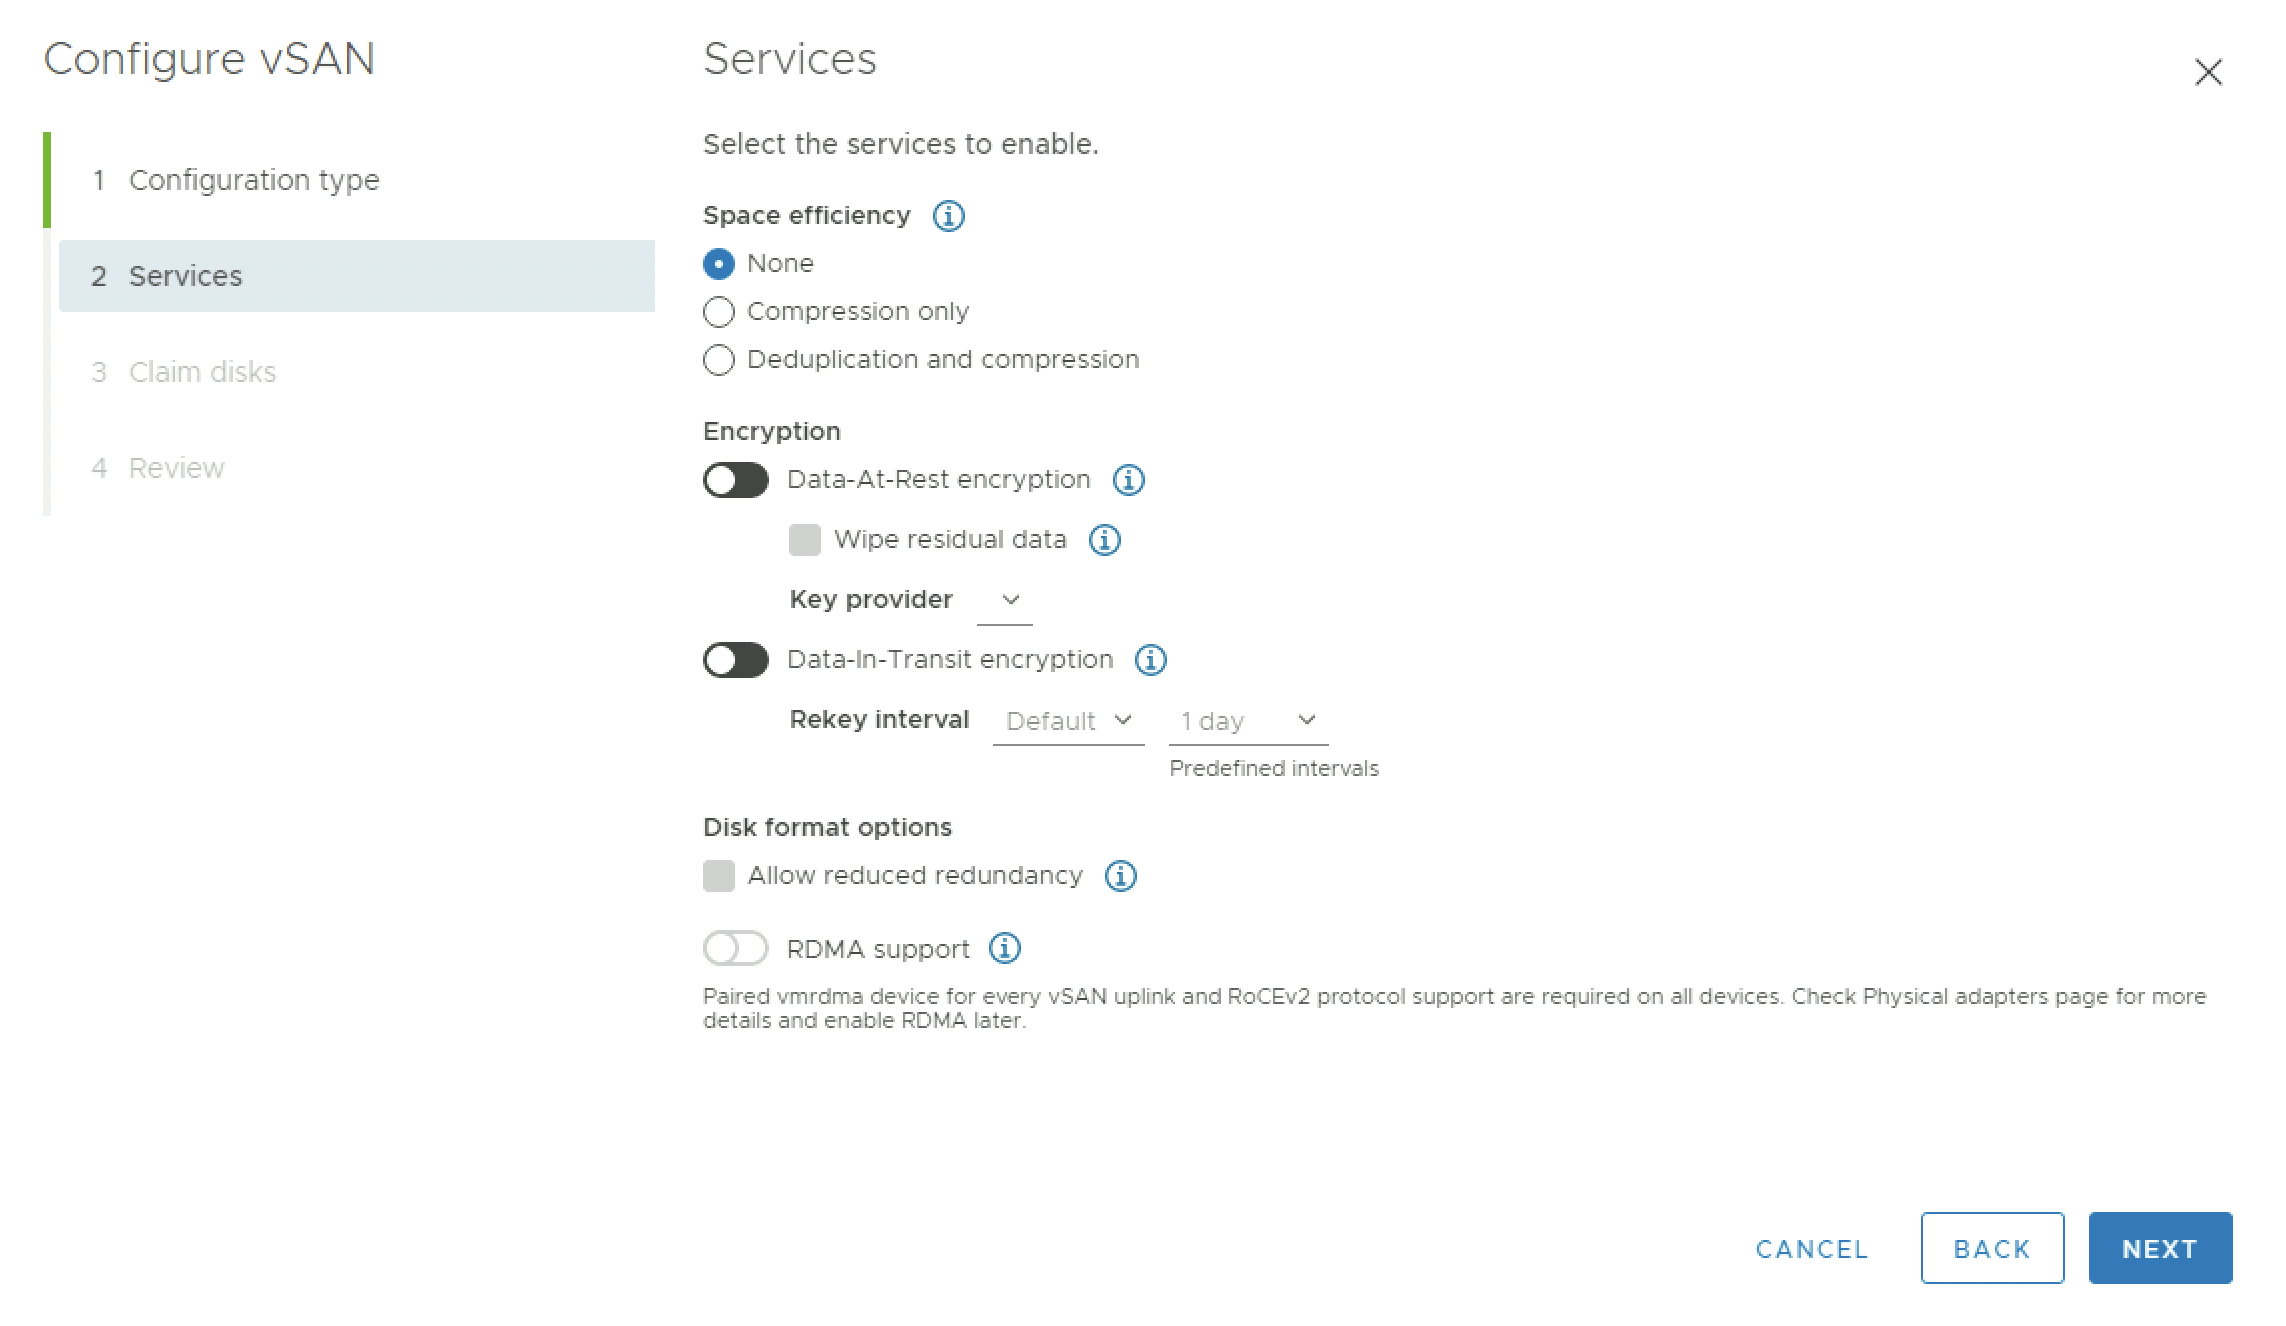
Leave all the services settings default:
The wizard will detect what disk is the caching and capacity disk. Just make sure this is correct and change this if required:
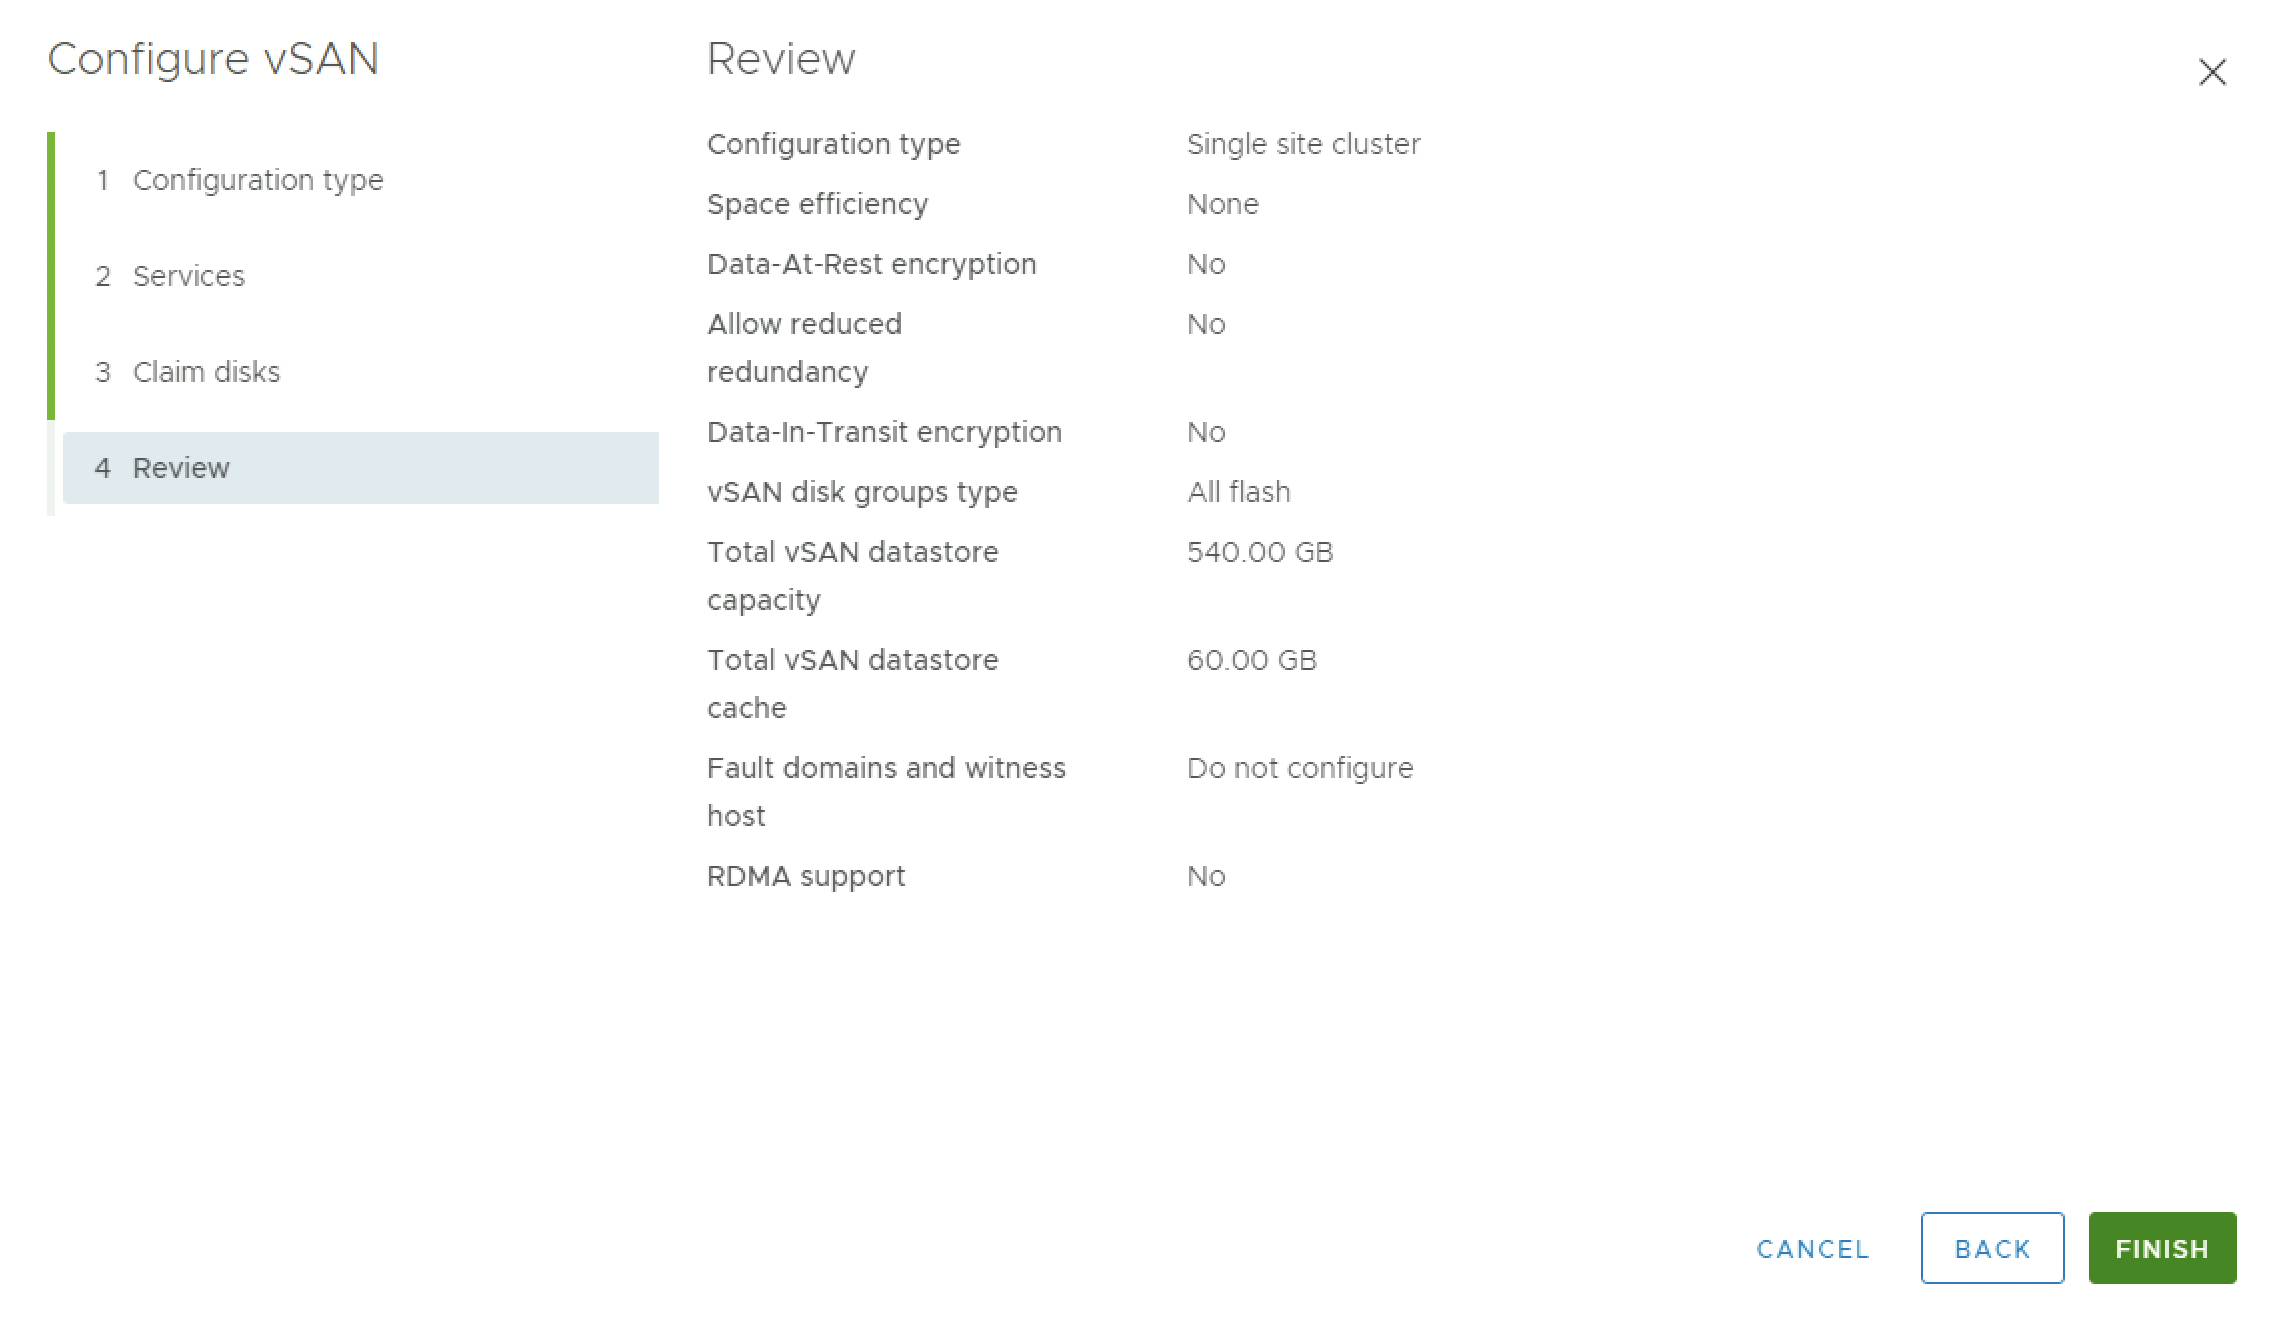
Review the Summary and Finish.
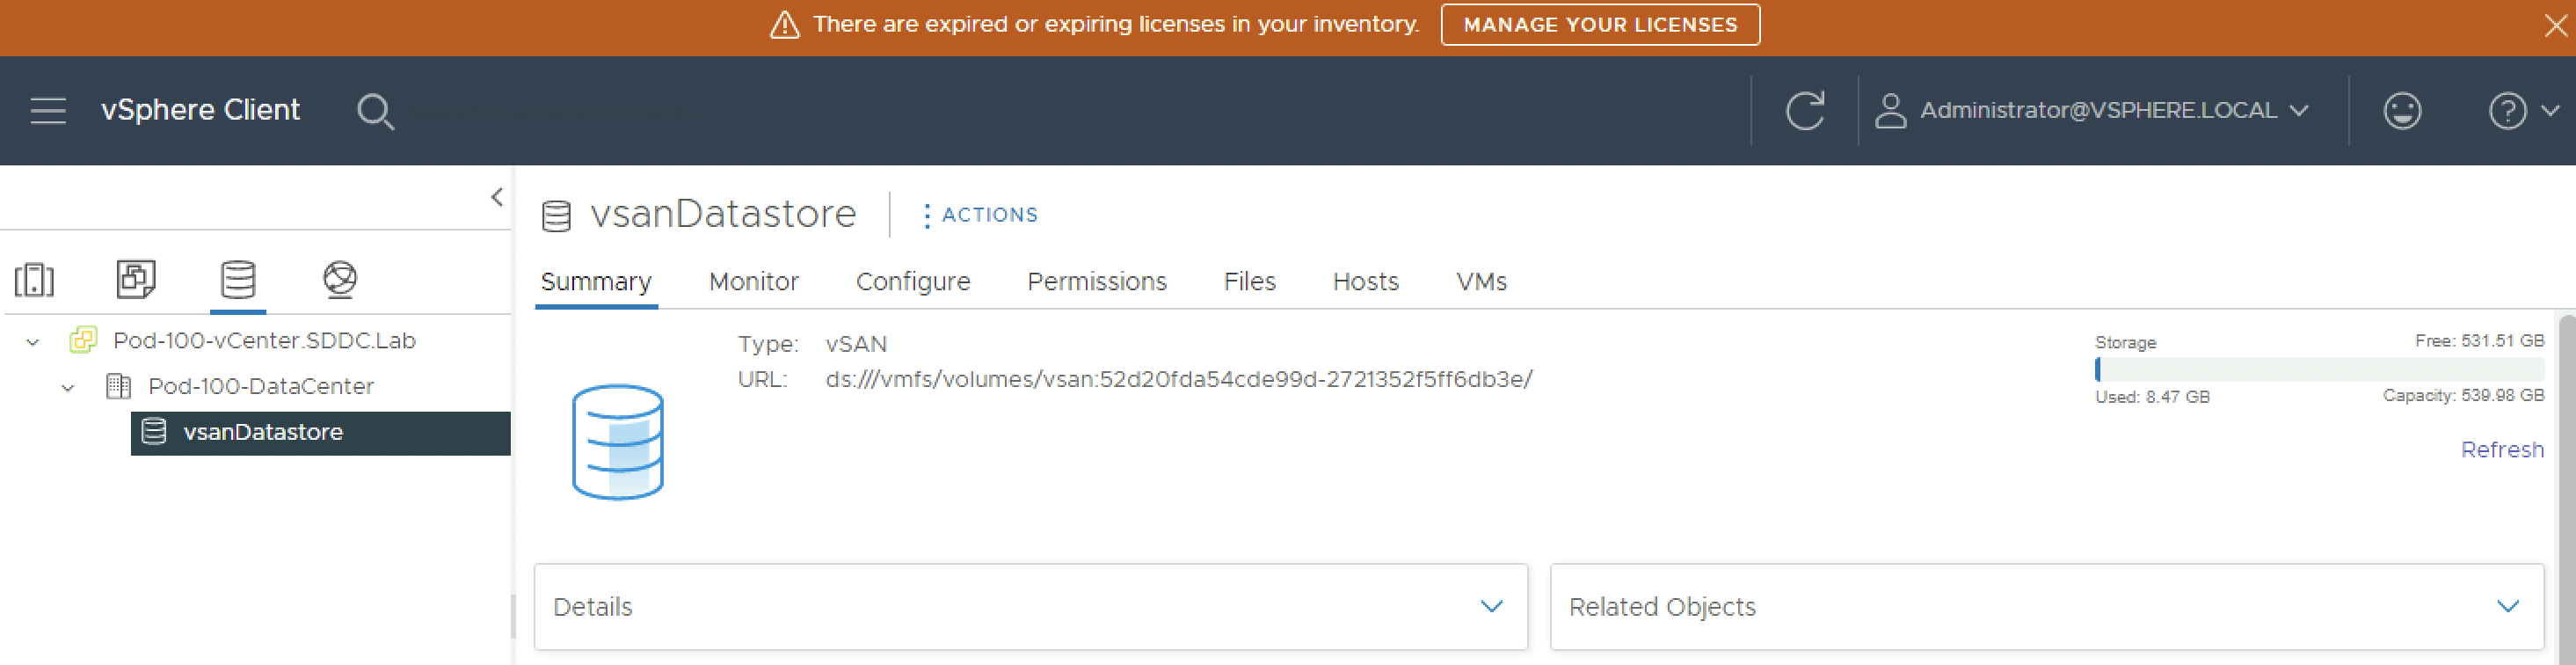
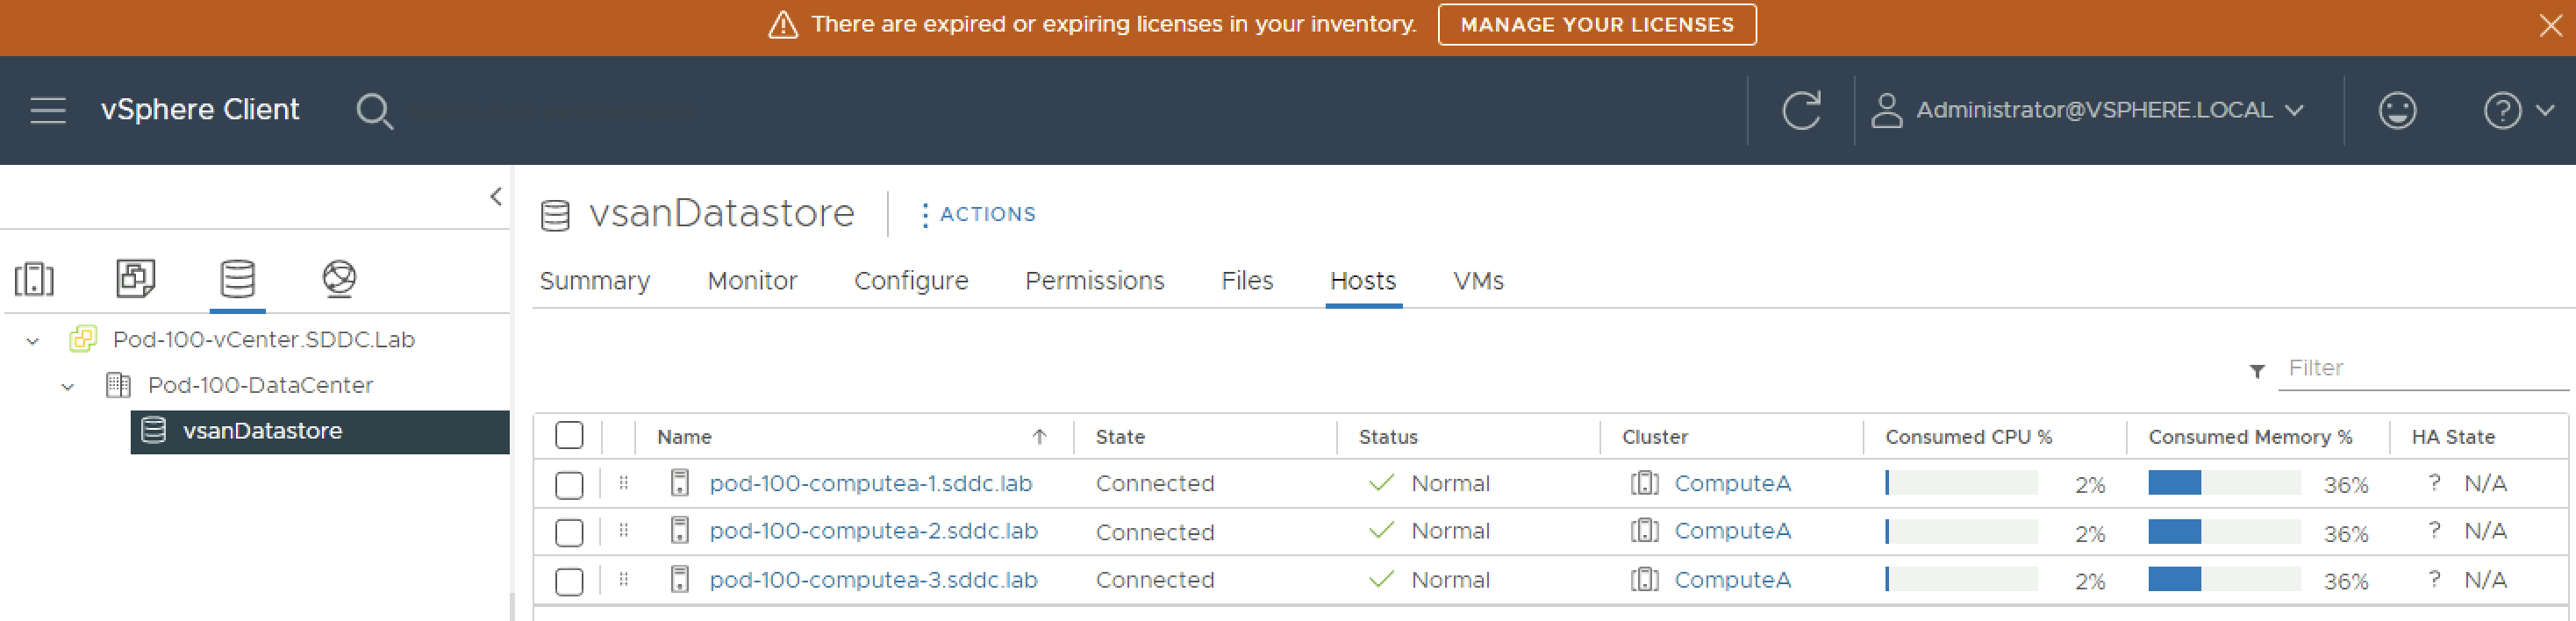
Verify if the vSAN datastore is created:
You can also verify what hosts are part of this vSAN datastore.
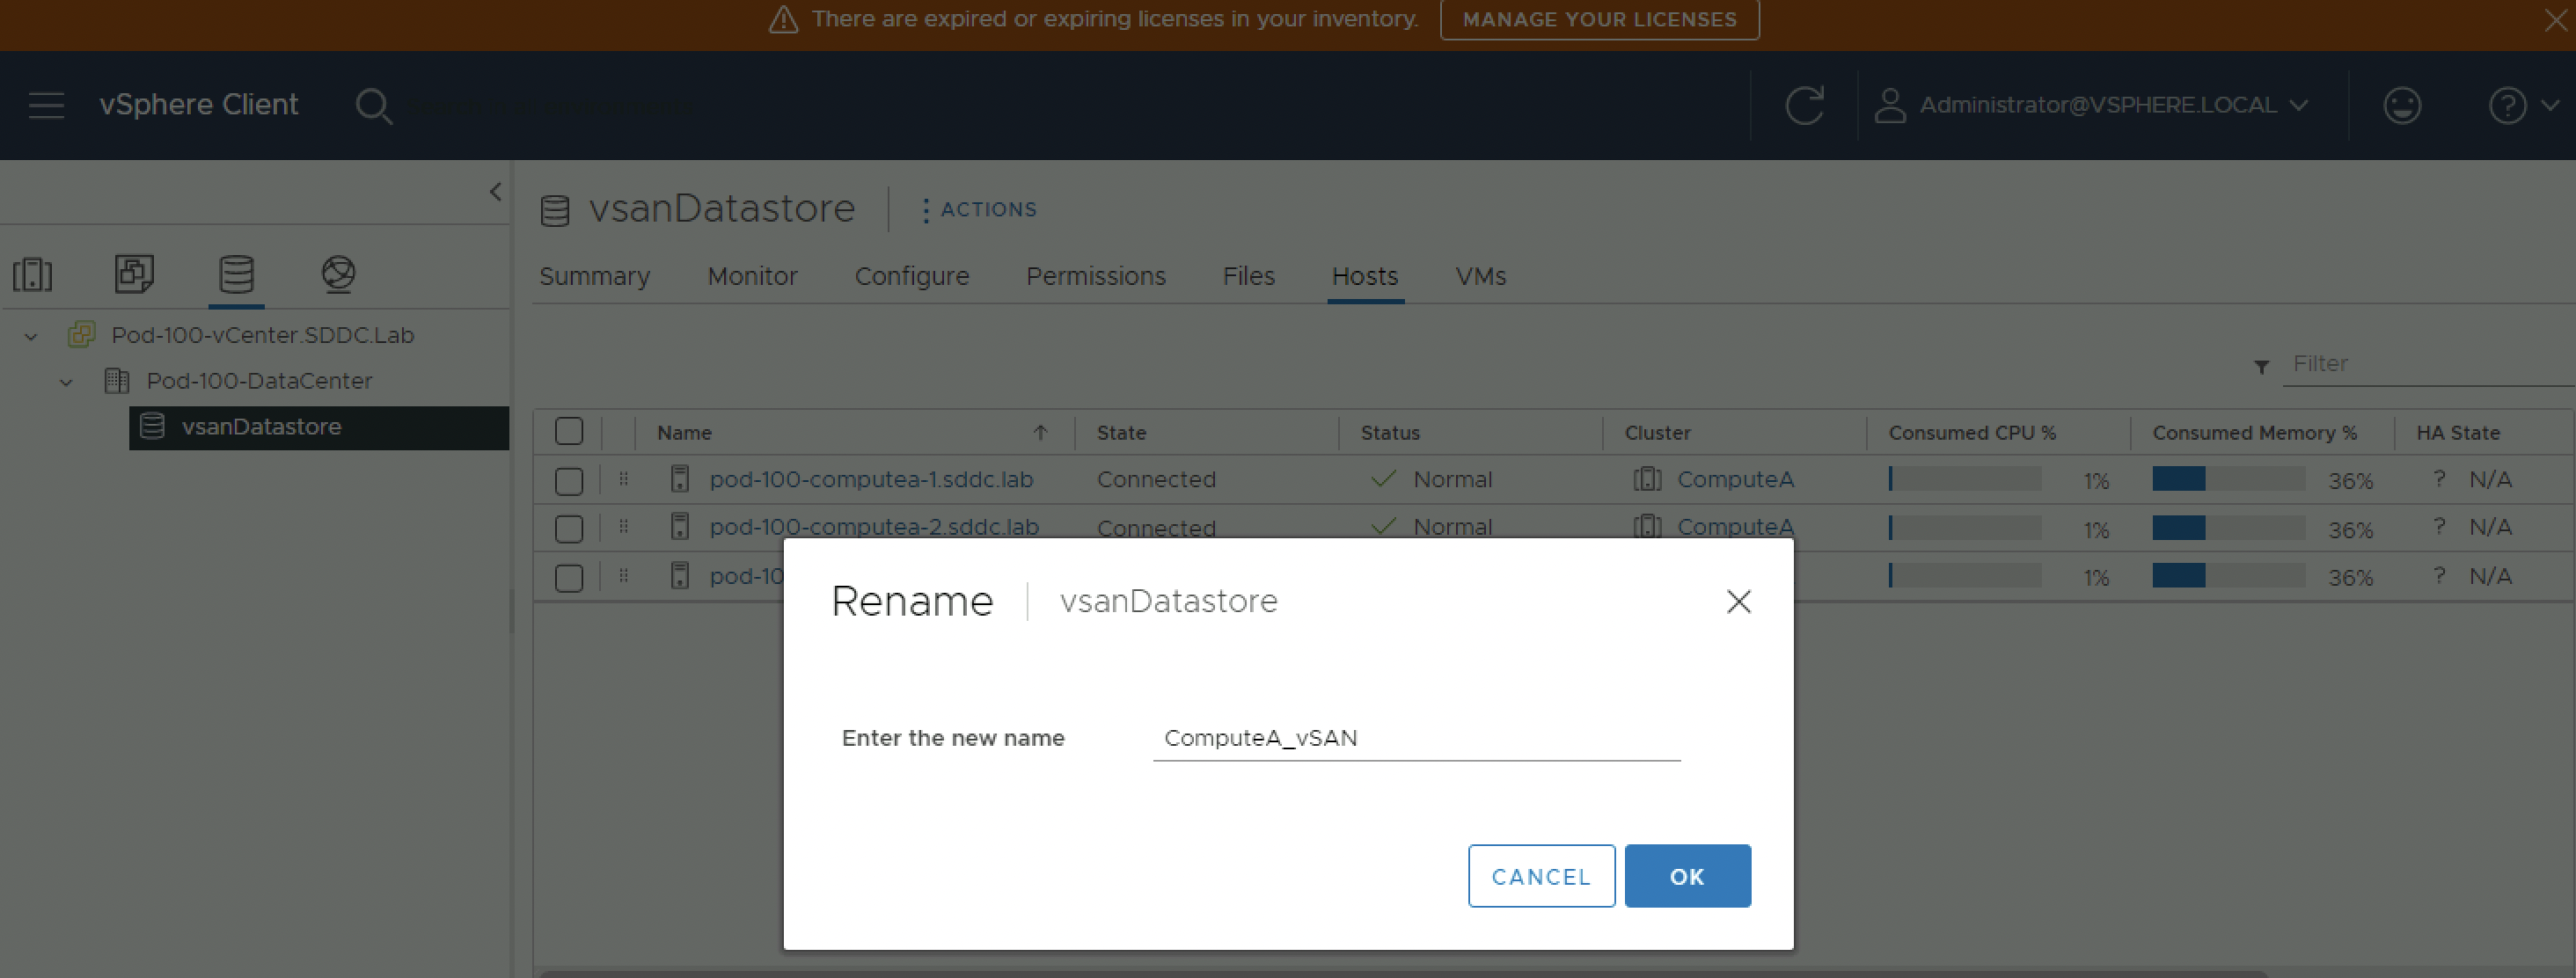
Rename the name of the vSAN datastore.
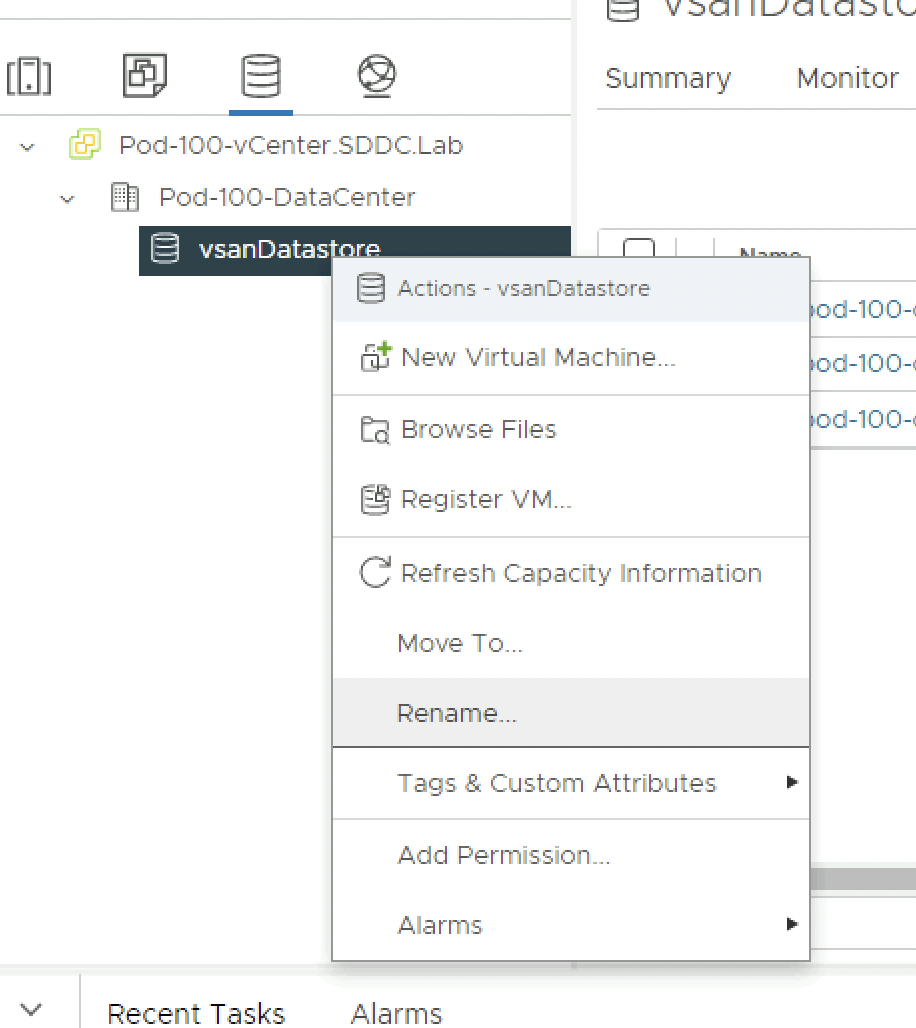
Name it to something that is related to the cluster name:
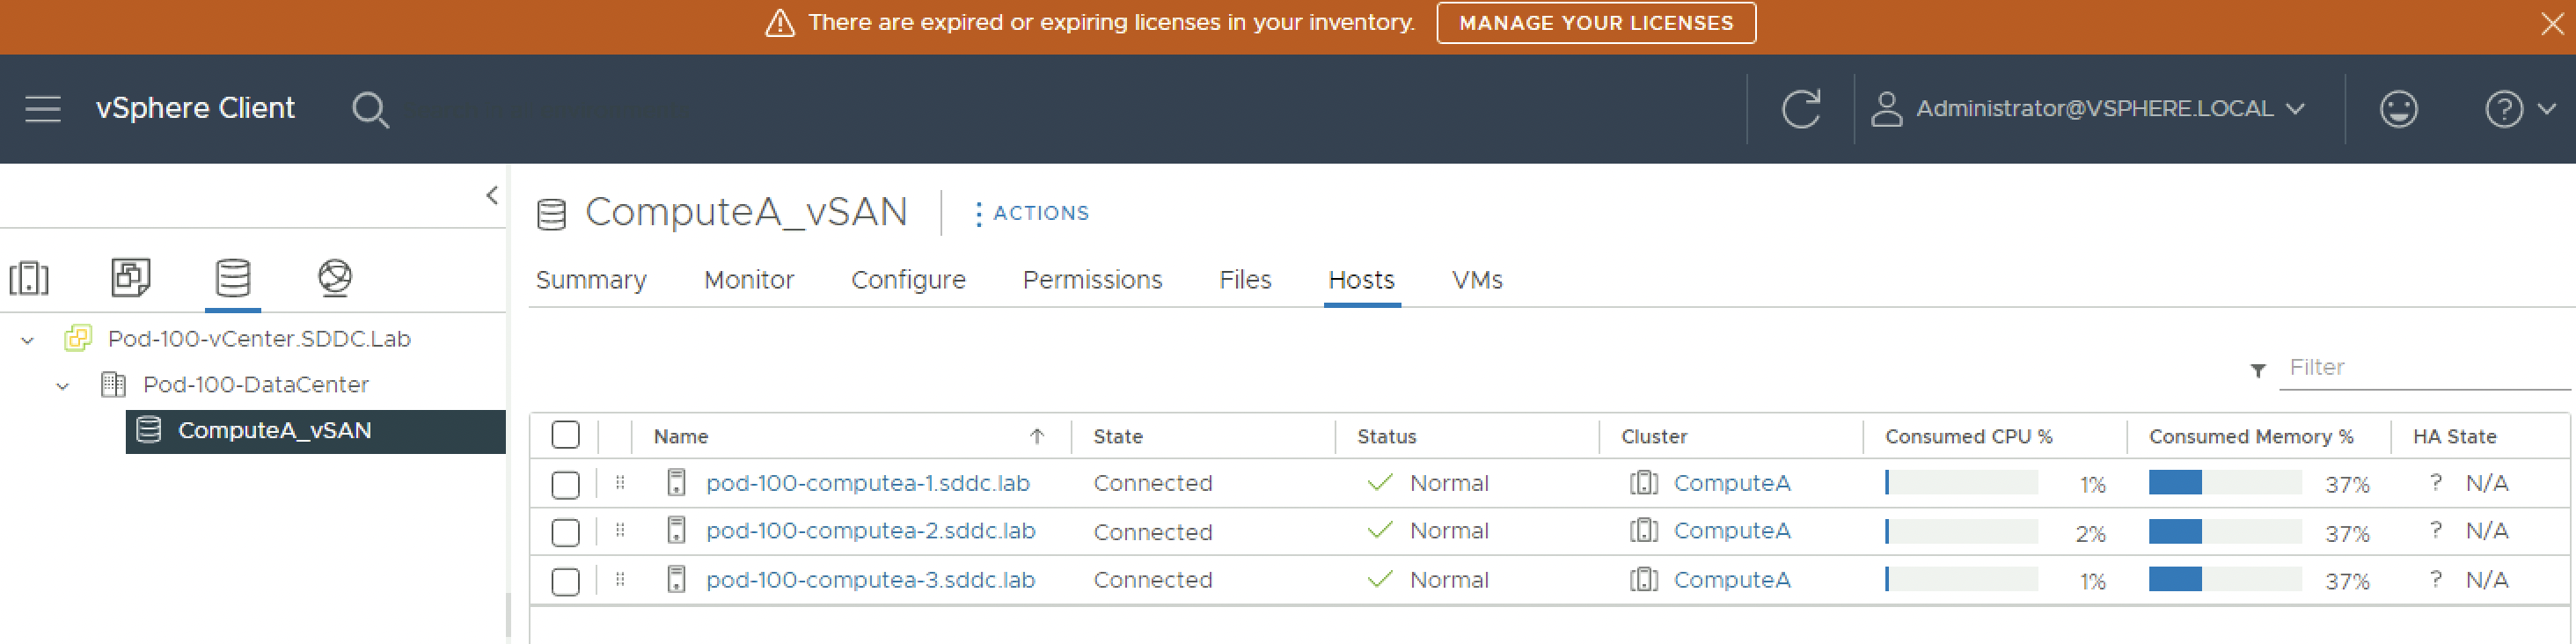
Verify if the name has been changed:
⚠️ Repeat the same steps to enable vSAN on the vSphere Edge Cluster.
When you enabled vSAN on the Compute and Edge vSphere clusters your datastores view will look something like this:
STEP 5» Install the Licenses for the vCenter Server, ESXi Servers and VSAN
You must have noticed the message in the orange bar on the top related to Licenses.
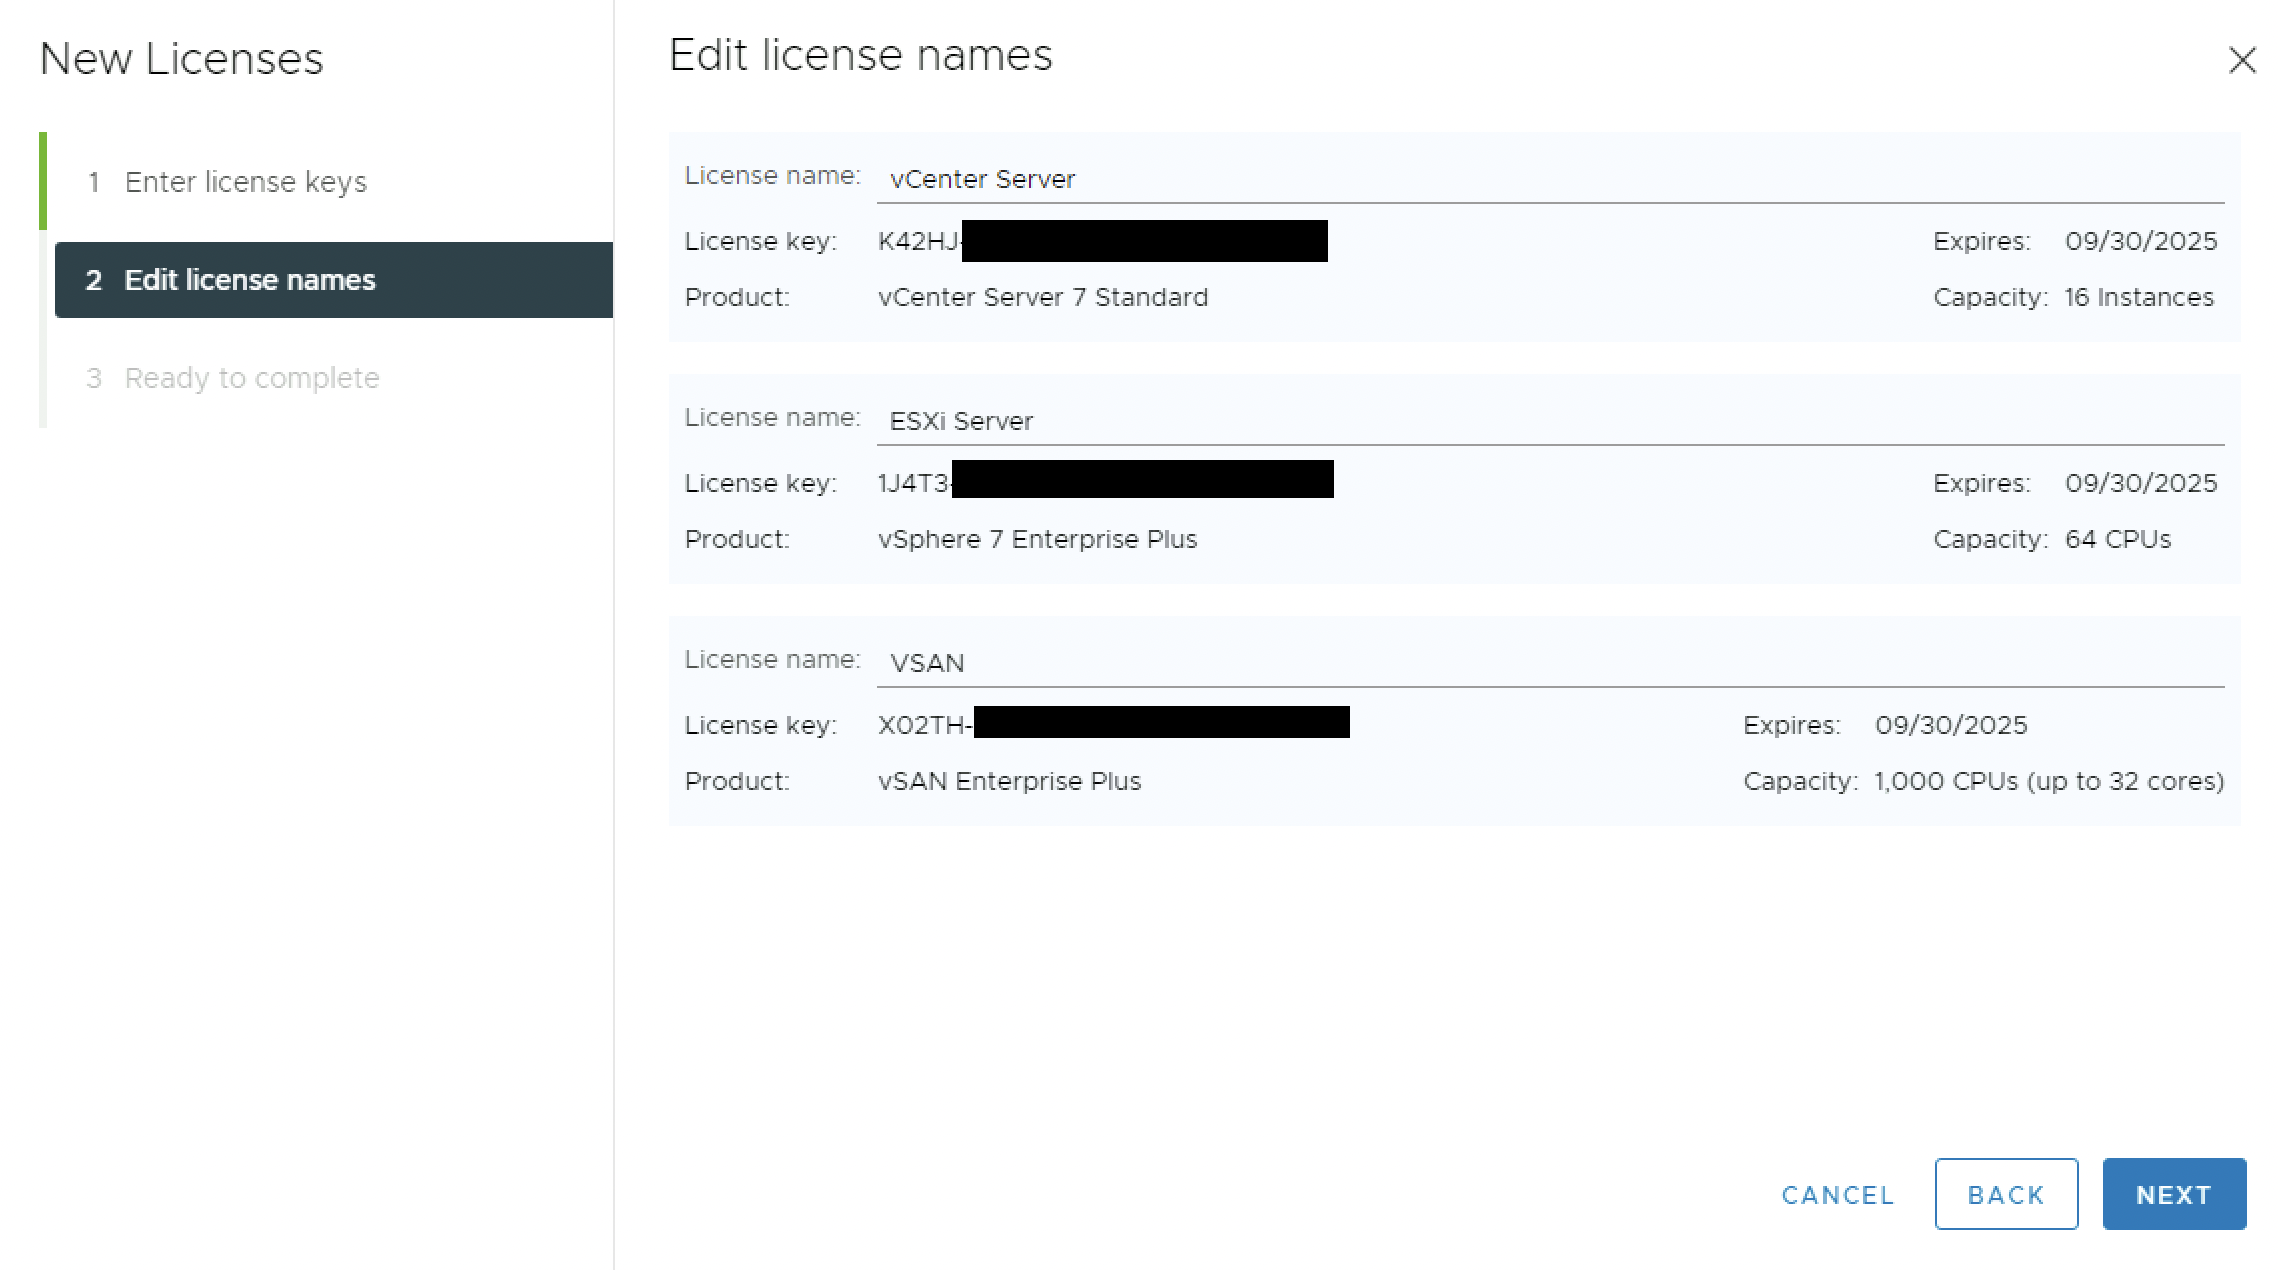
For the products above I will need to have three licences:
| Product | License key |
|---|---|
| vCenter Server License | K42HJ-XXXXX-XXXXX-XXXXX-XXXXX
|
| ESXi Server License | 1J4T3-XXXXX-XXXXX-XXXXX-XXXXX
|
| VSAN License | X02TH-XXXXX-XXXXX-XXXXX-XXXXX
|
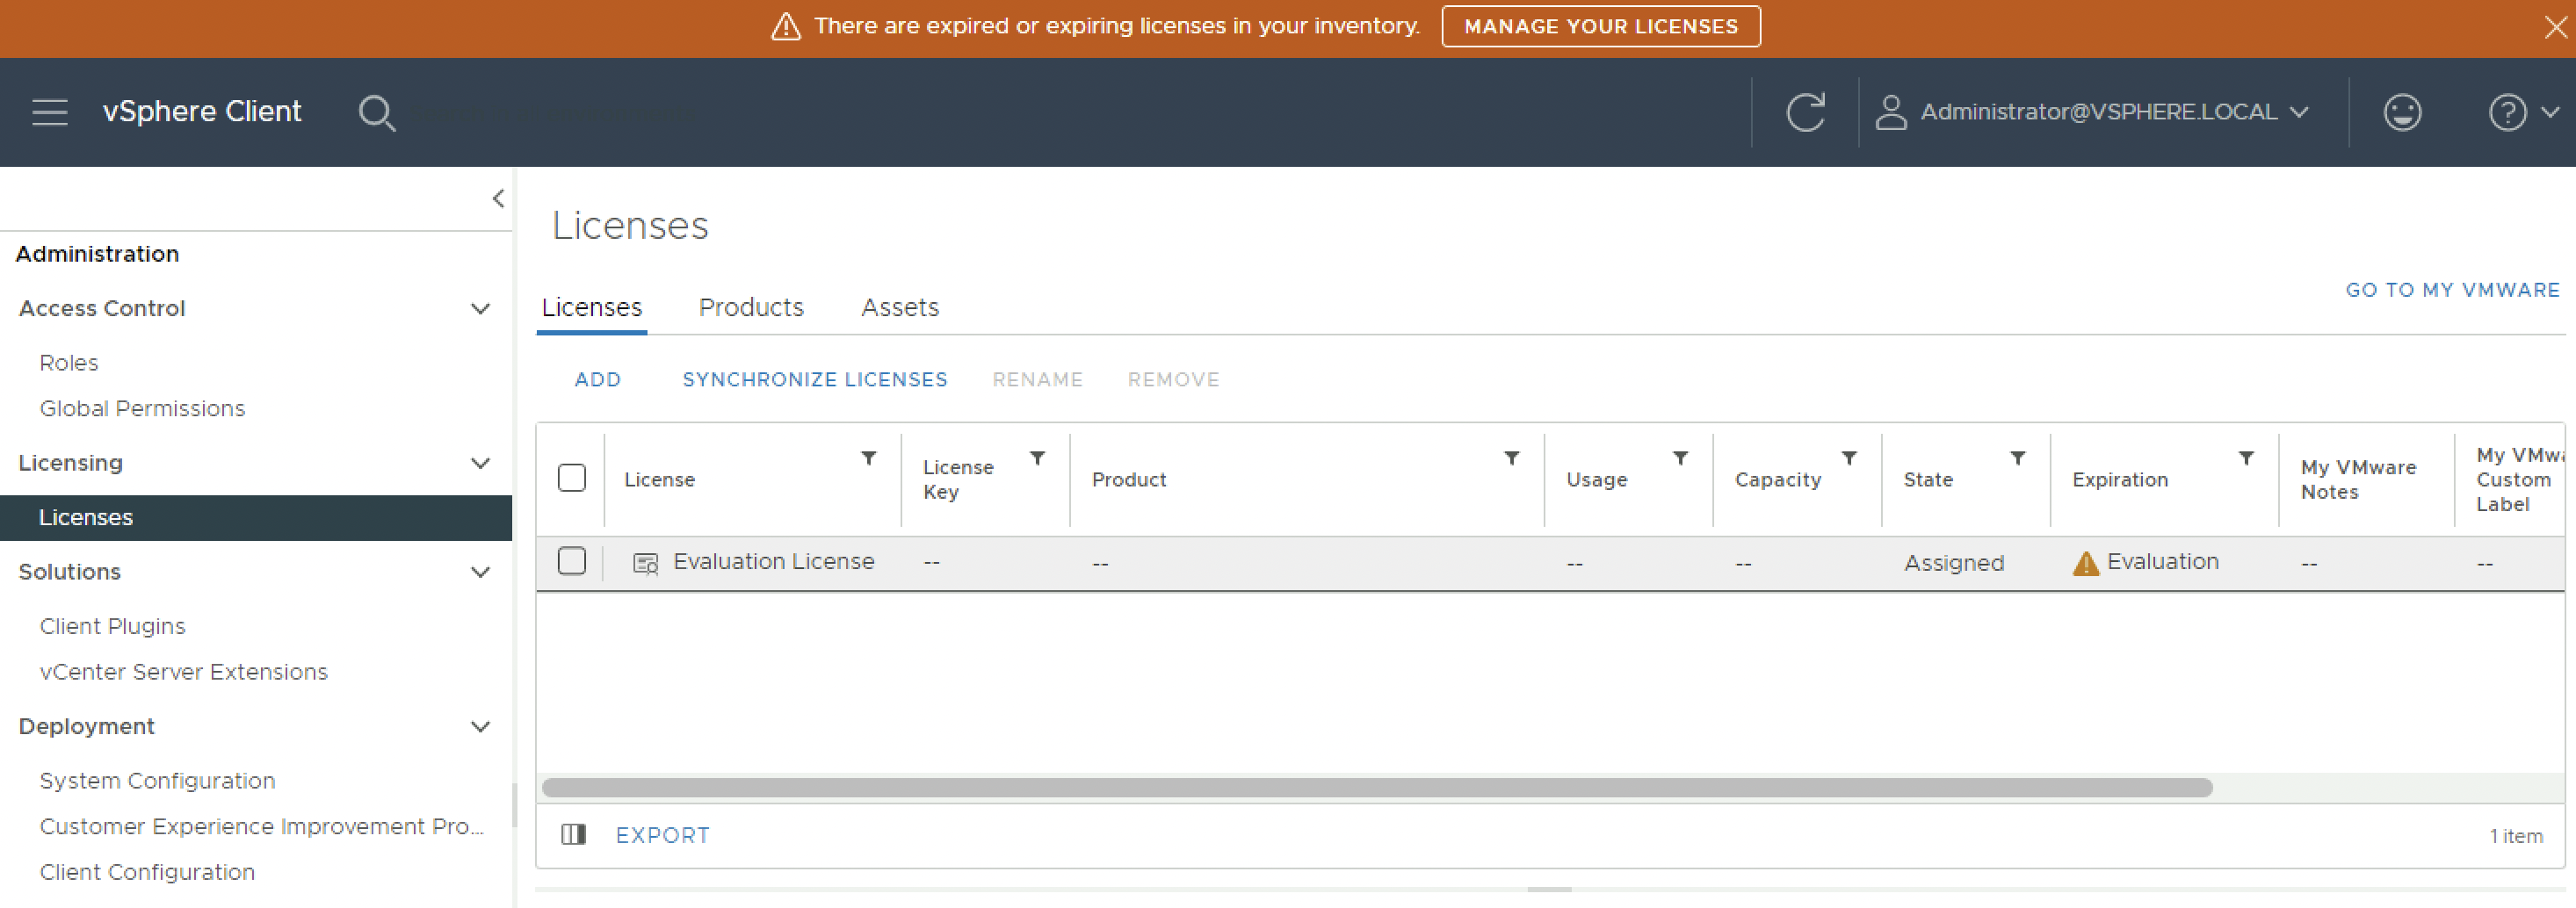
You can add new licenses by either clicking on the button on the top bar, or you can do trough the menu and when you click on “Administration”:
Click on “Licenses”:
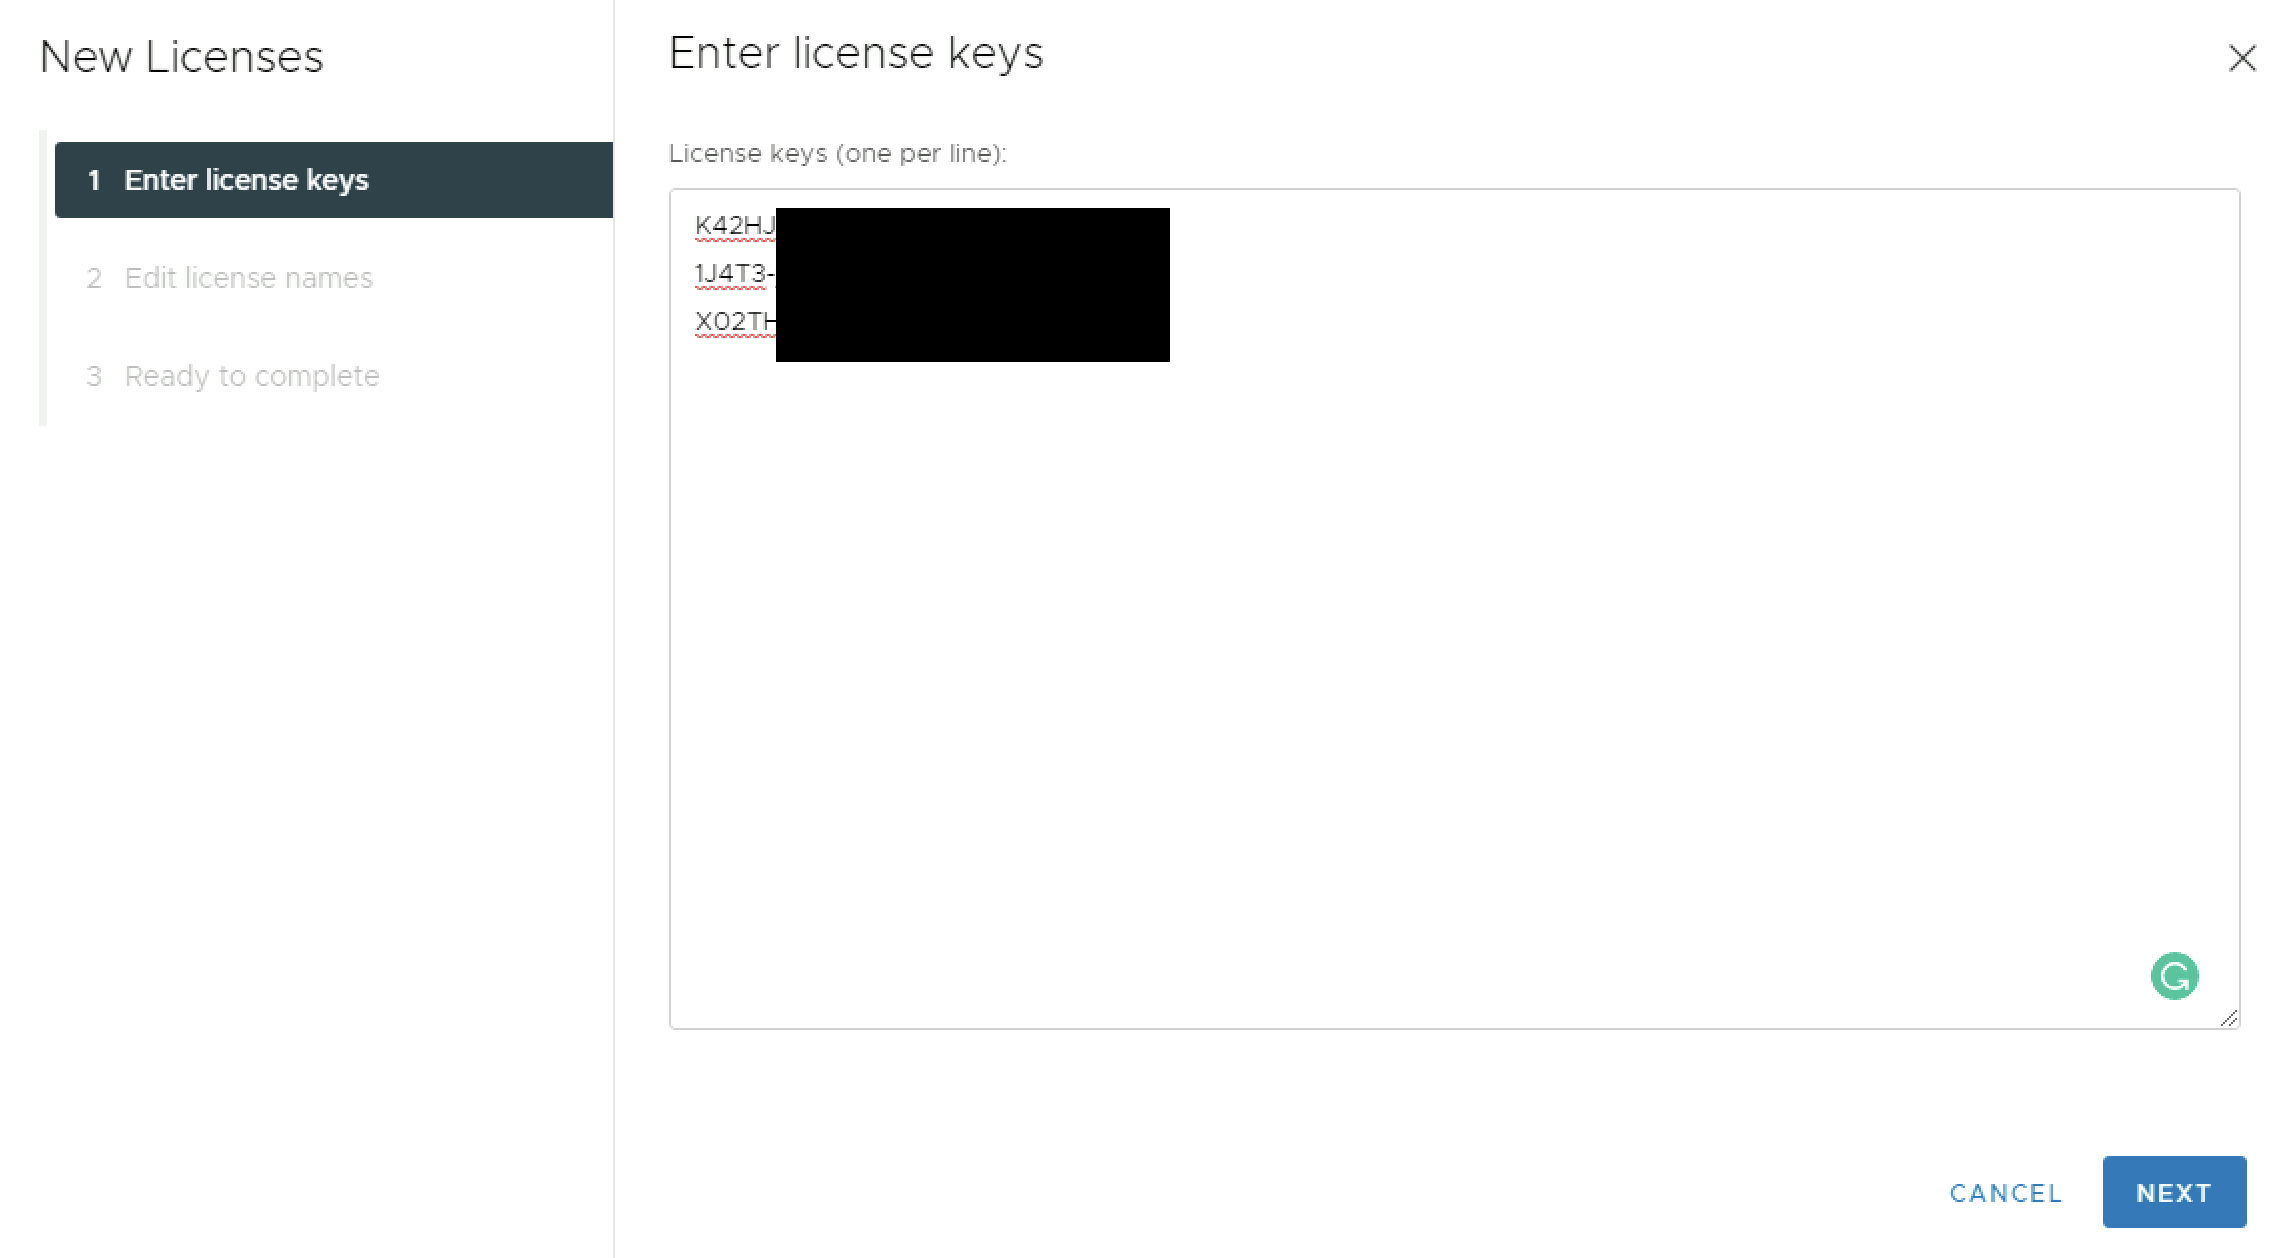
Copy/Paste all the license keys:
Provide a recognisable license name:
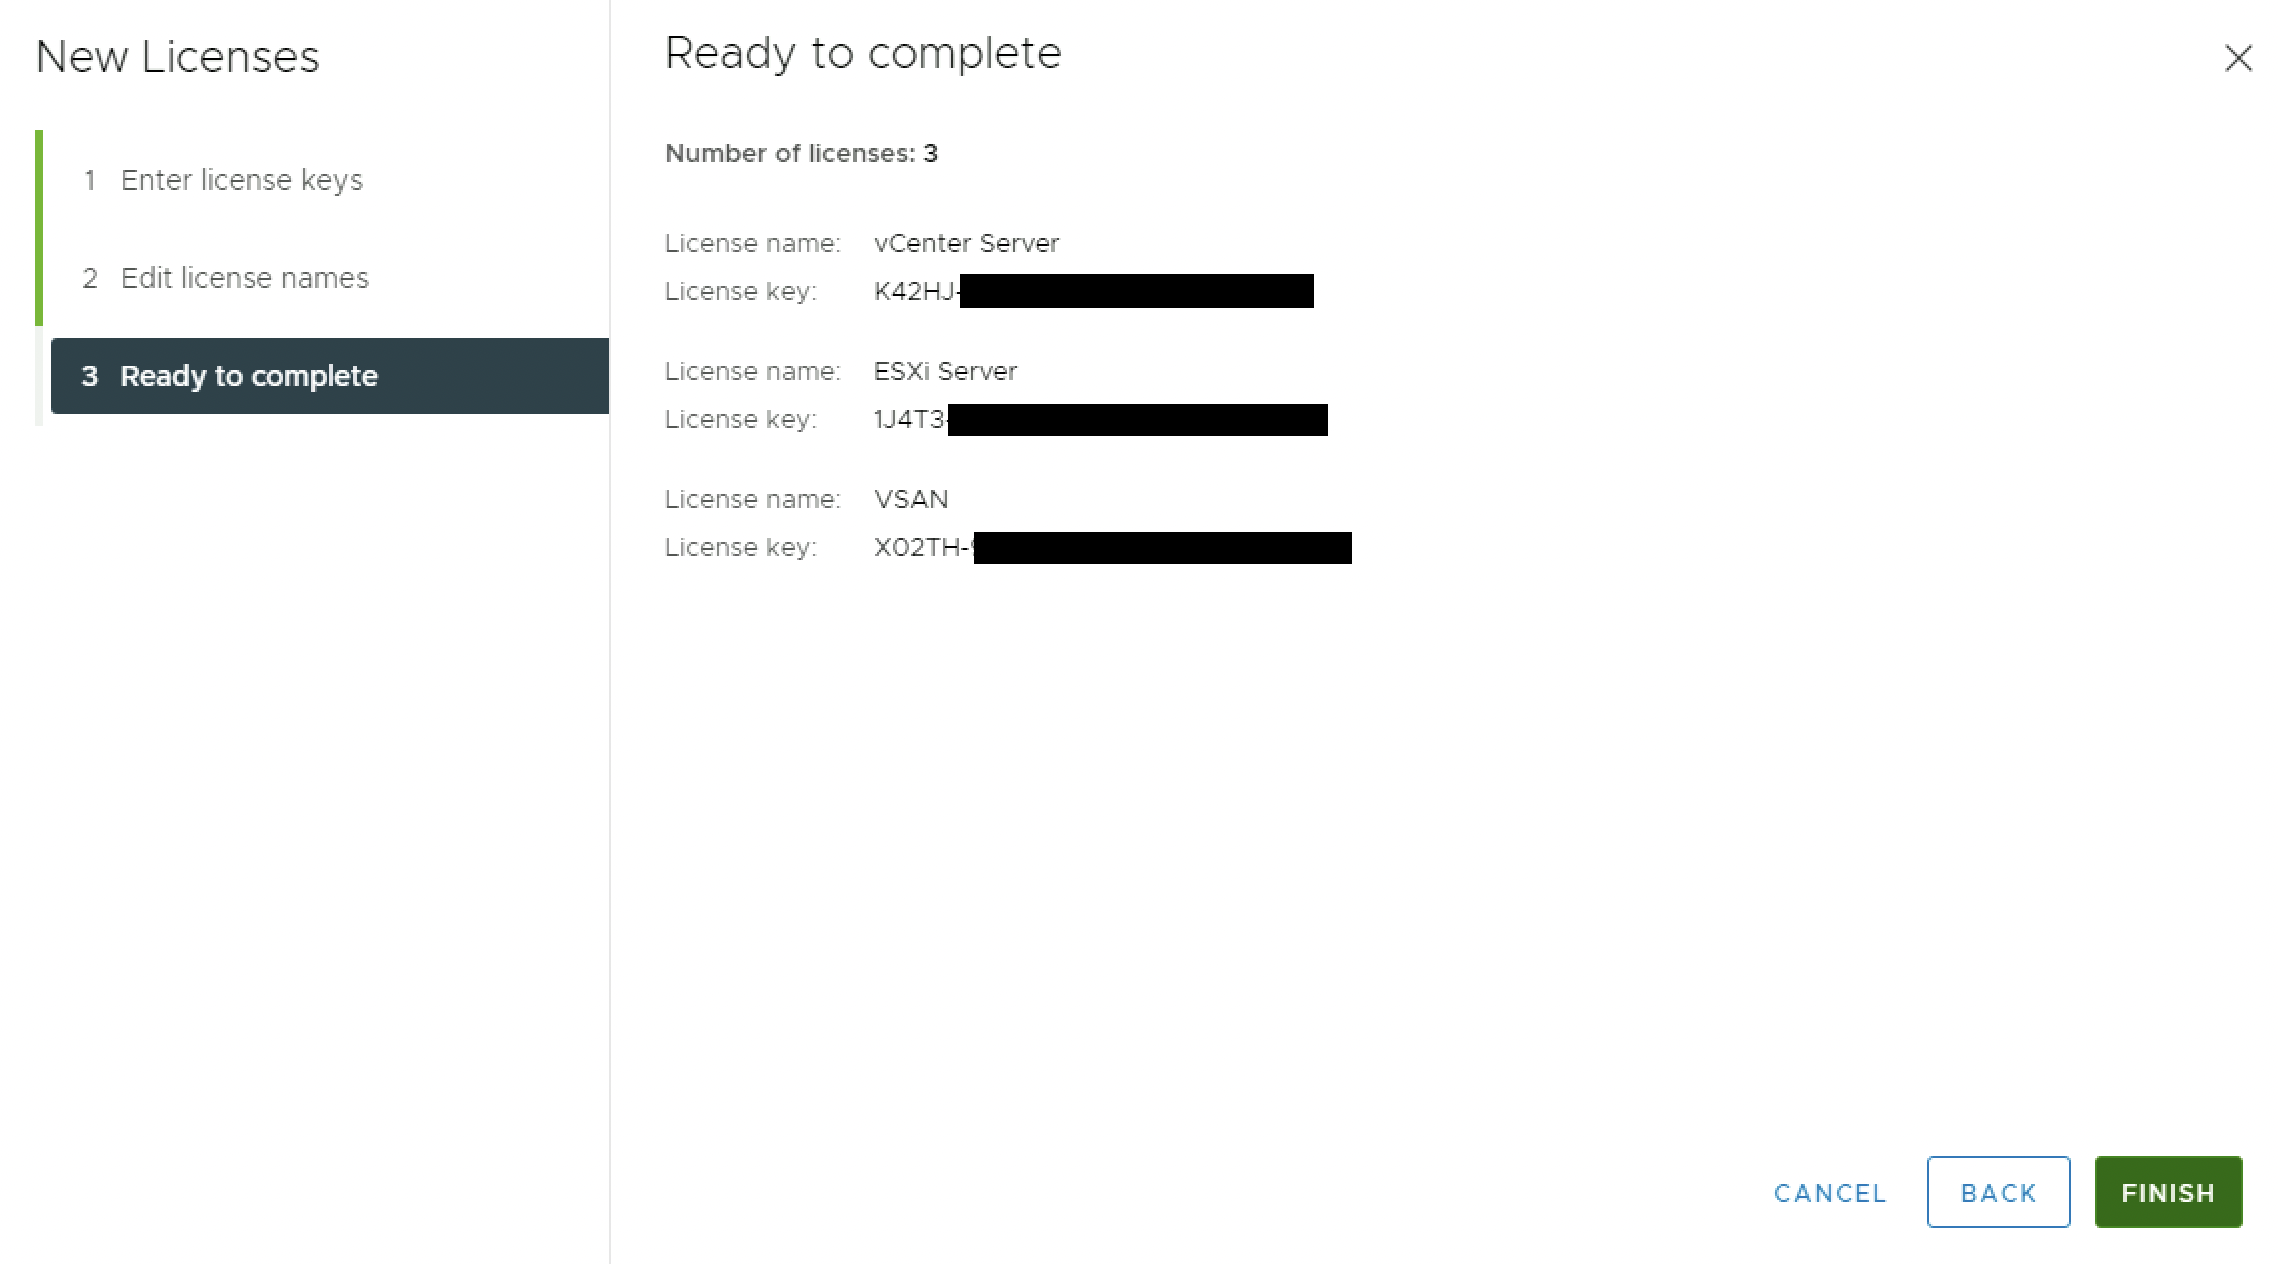
Review the Summary and Finish.
Verify if all the licenses has been added correctly:

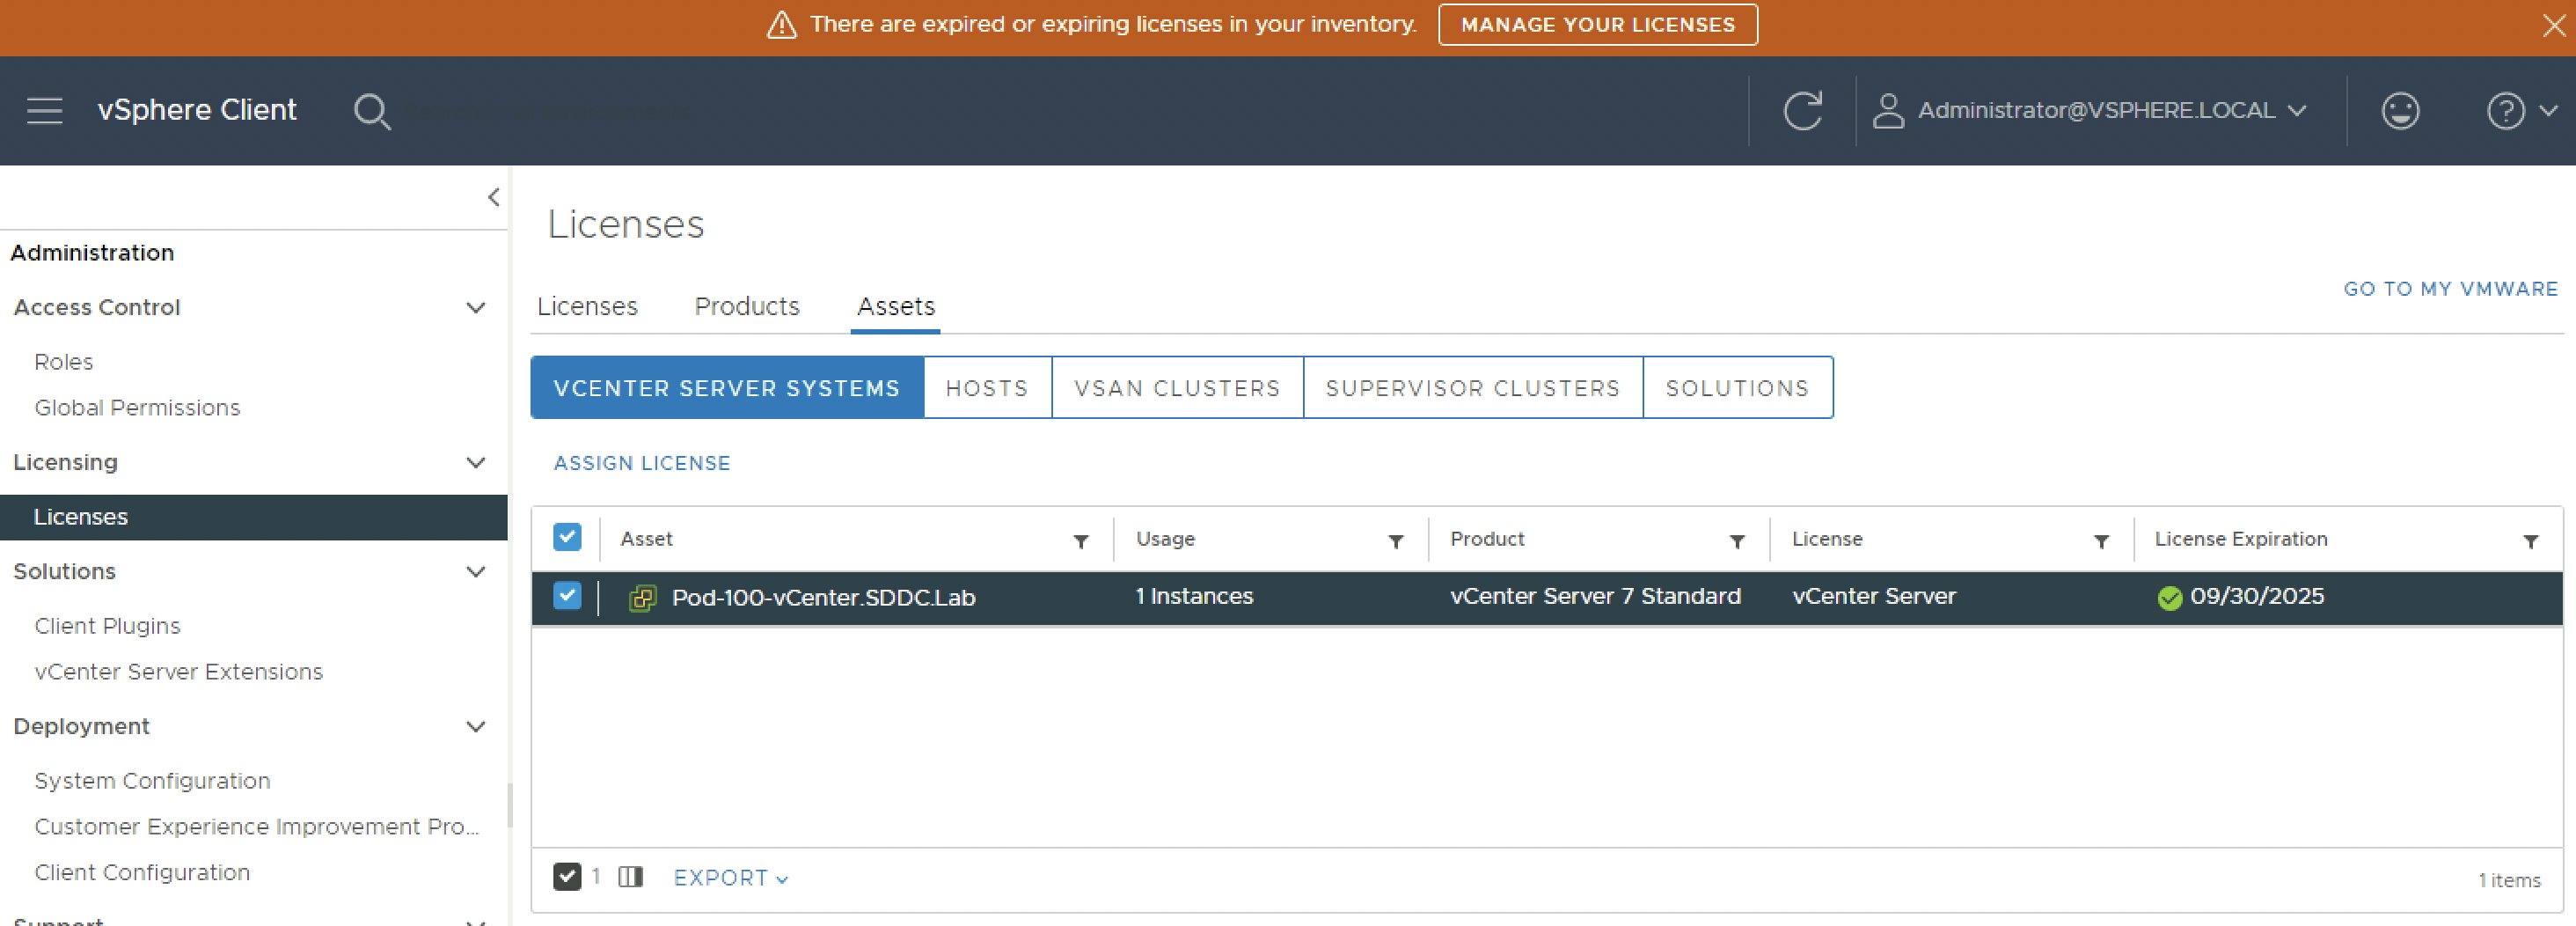
vCenter Server
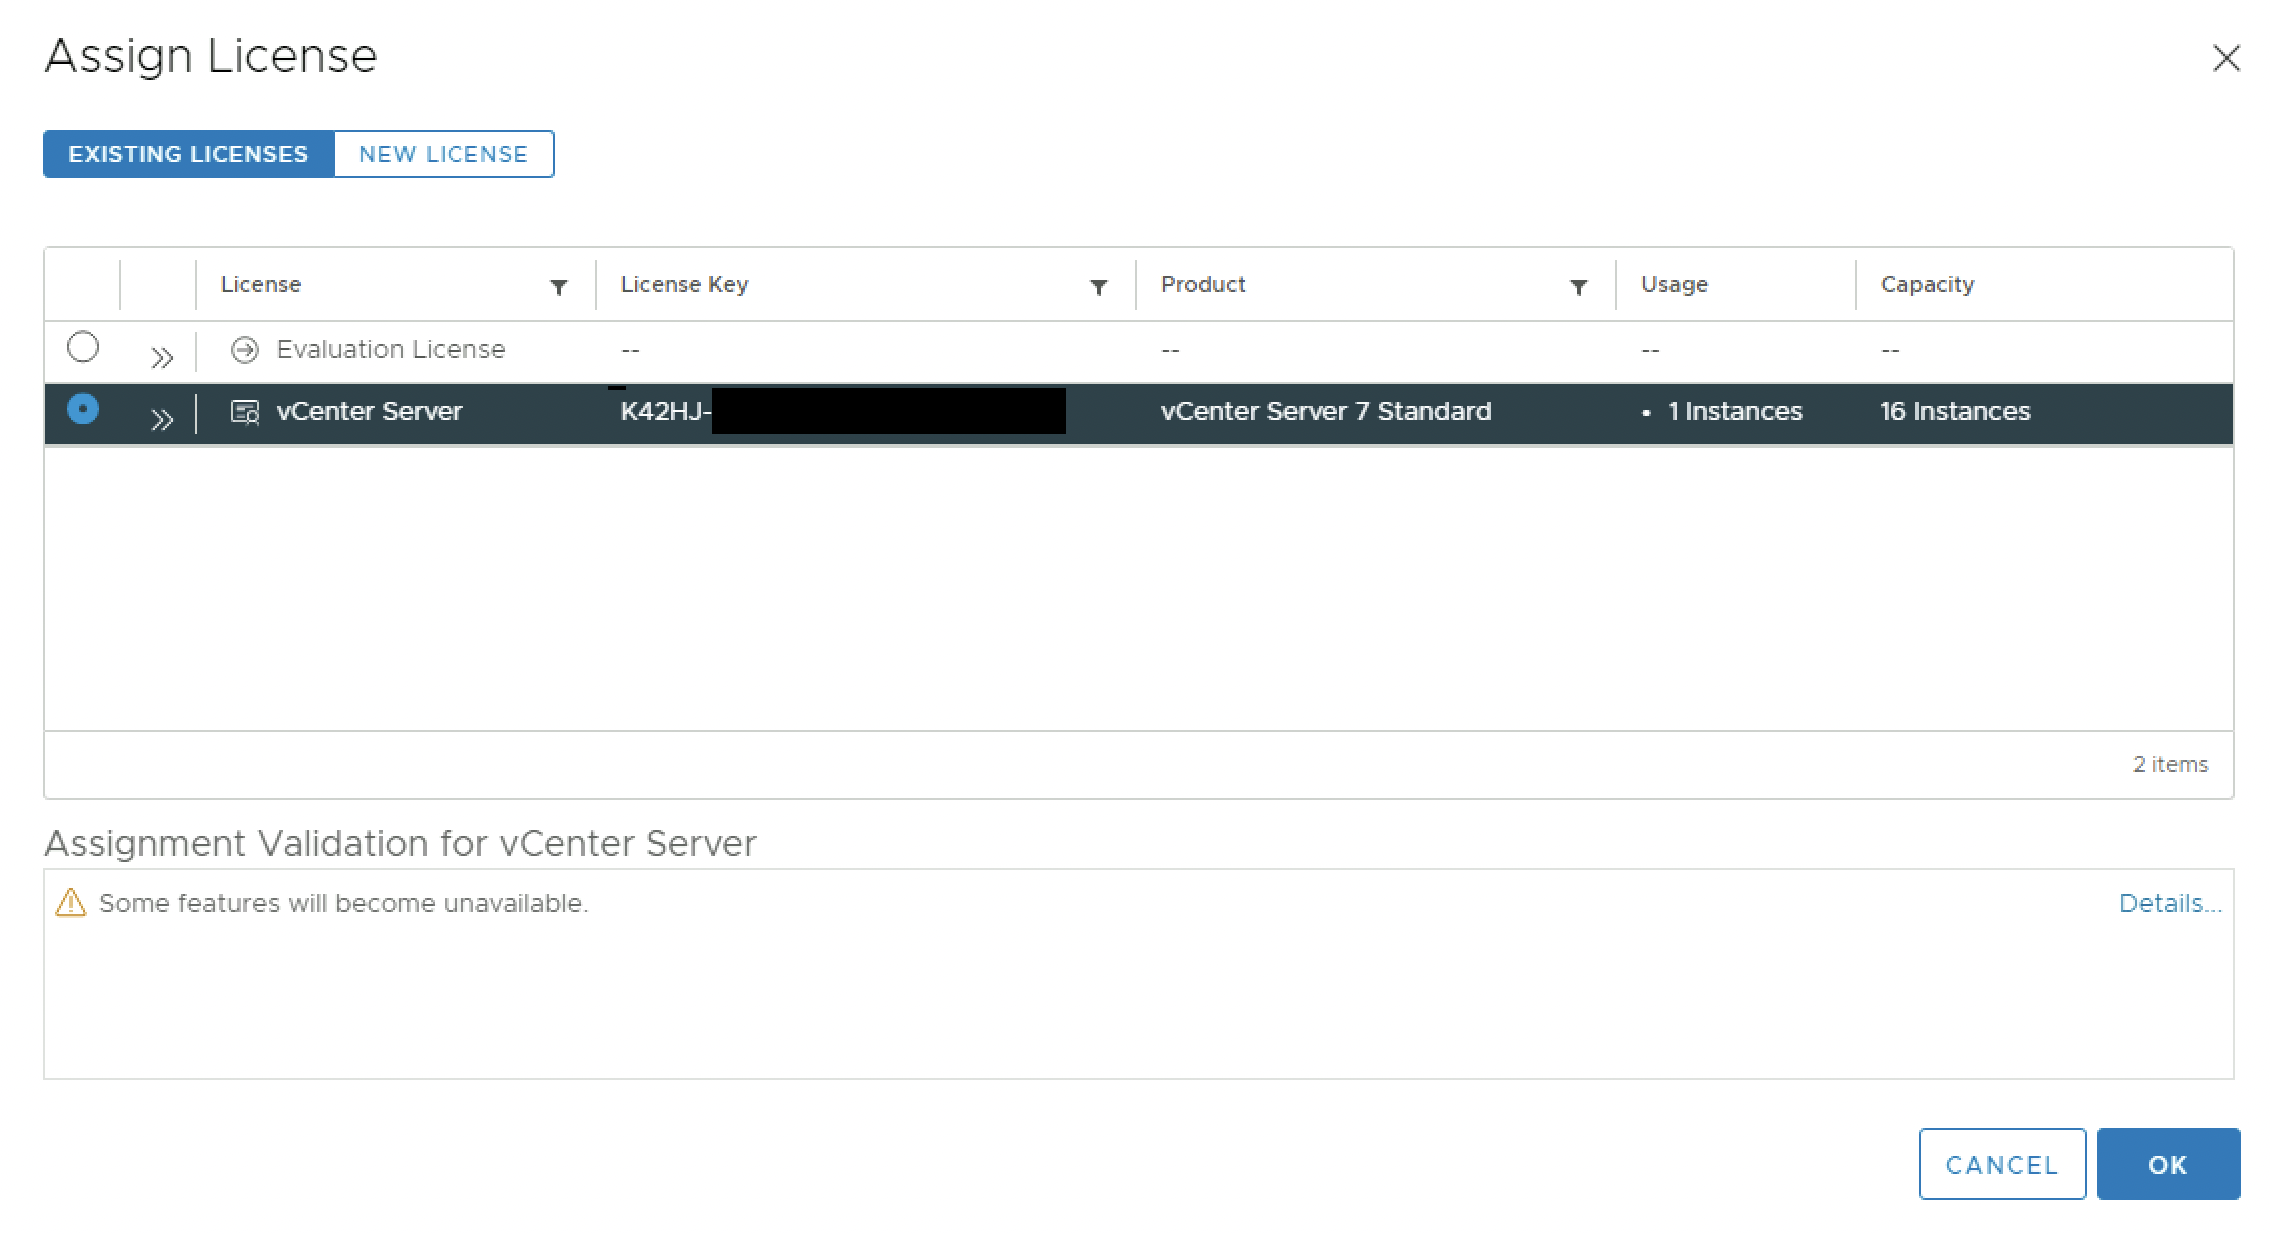
Assign the vCenter Server license:

Assign the vCenter Server license:
Verify if the vCenter Server license is assigned:
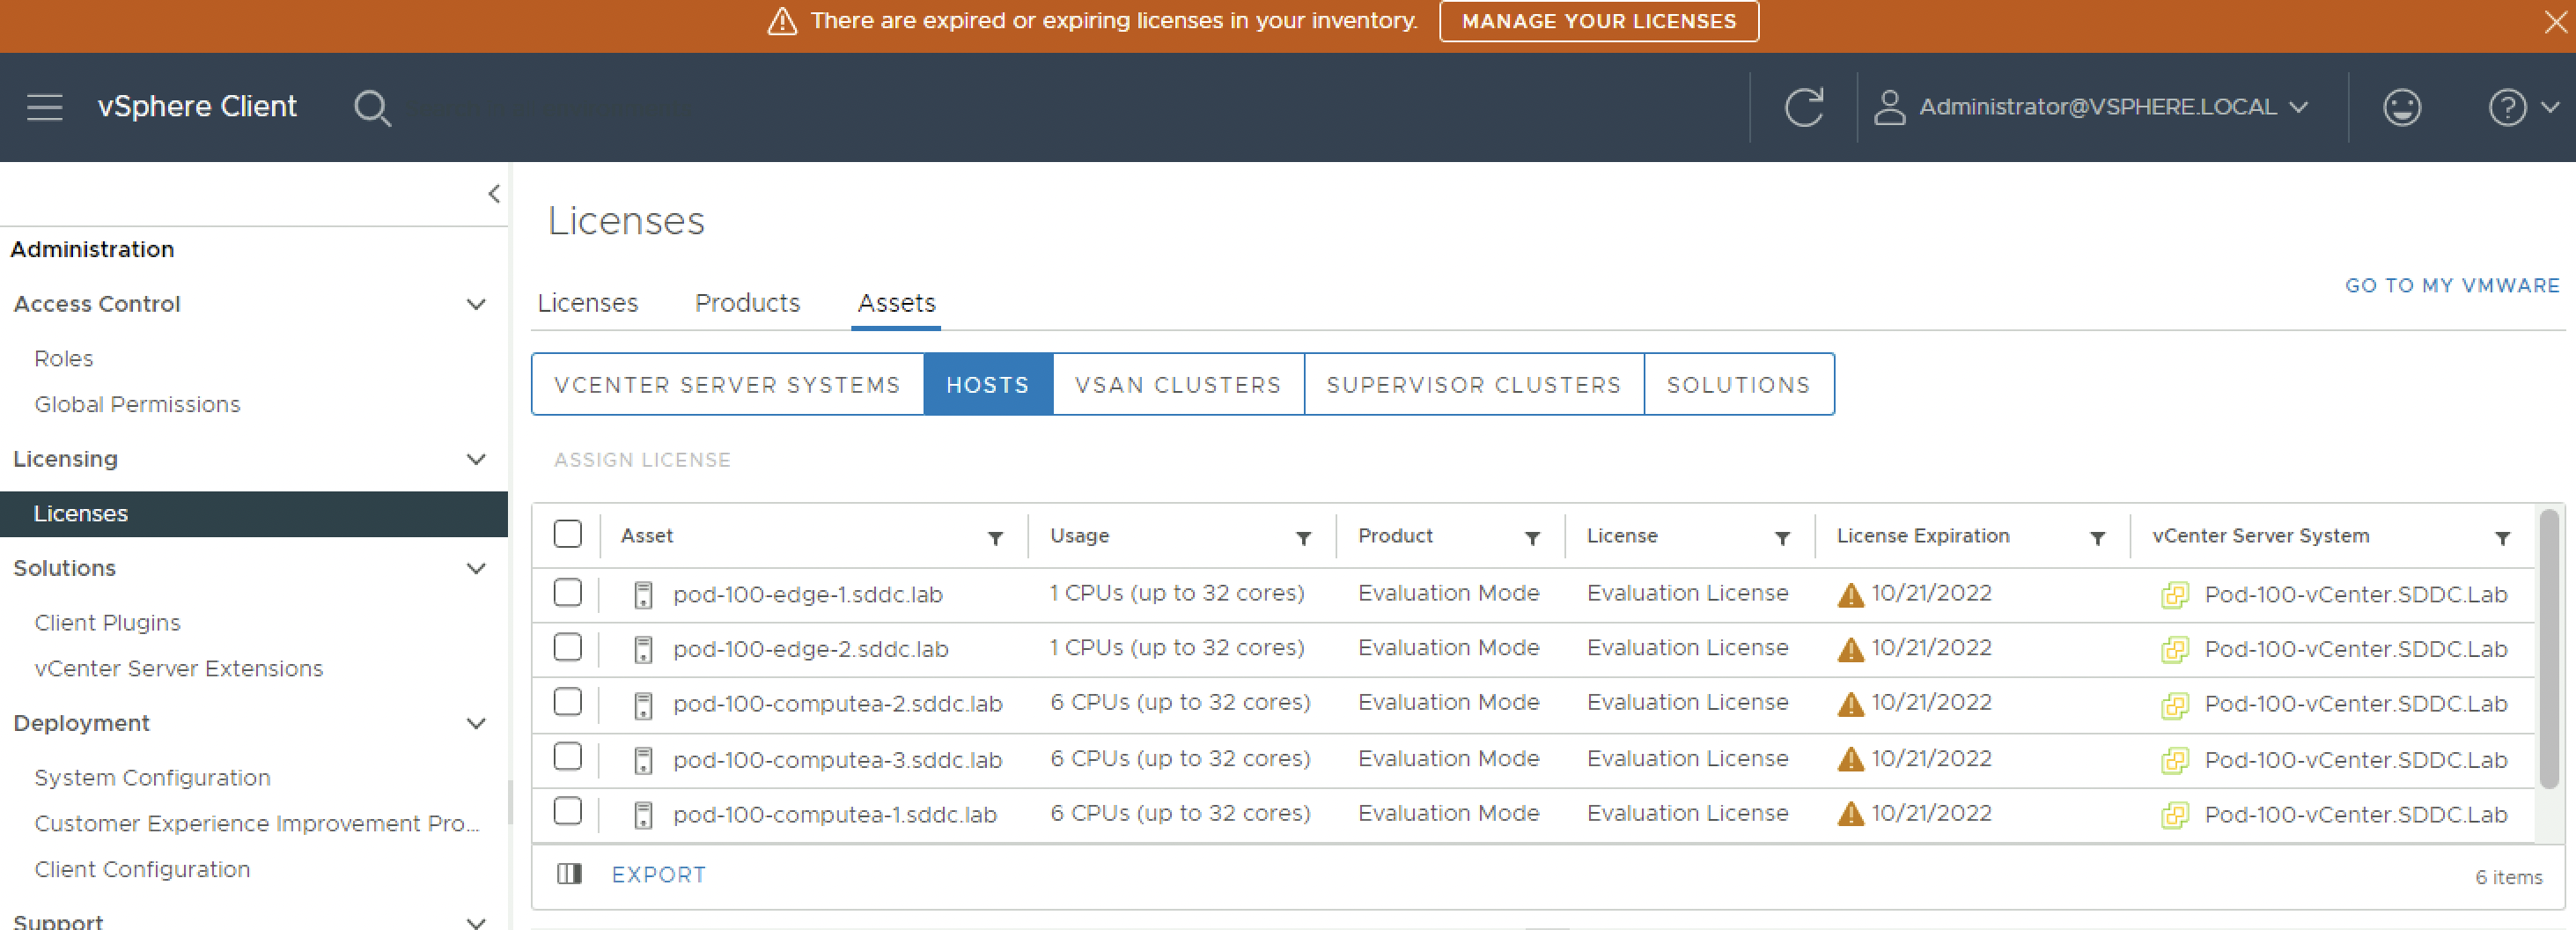
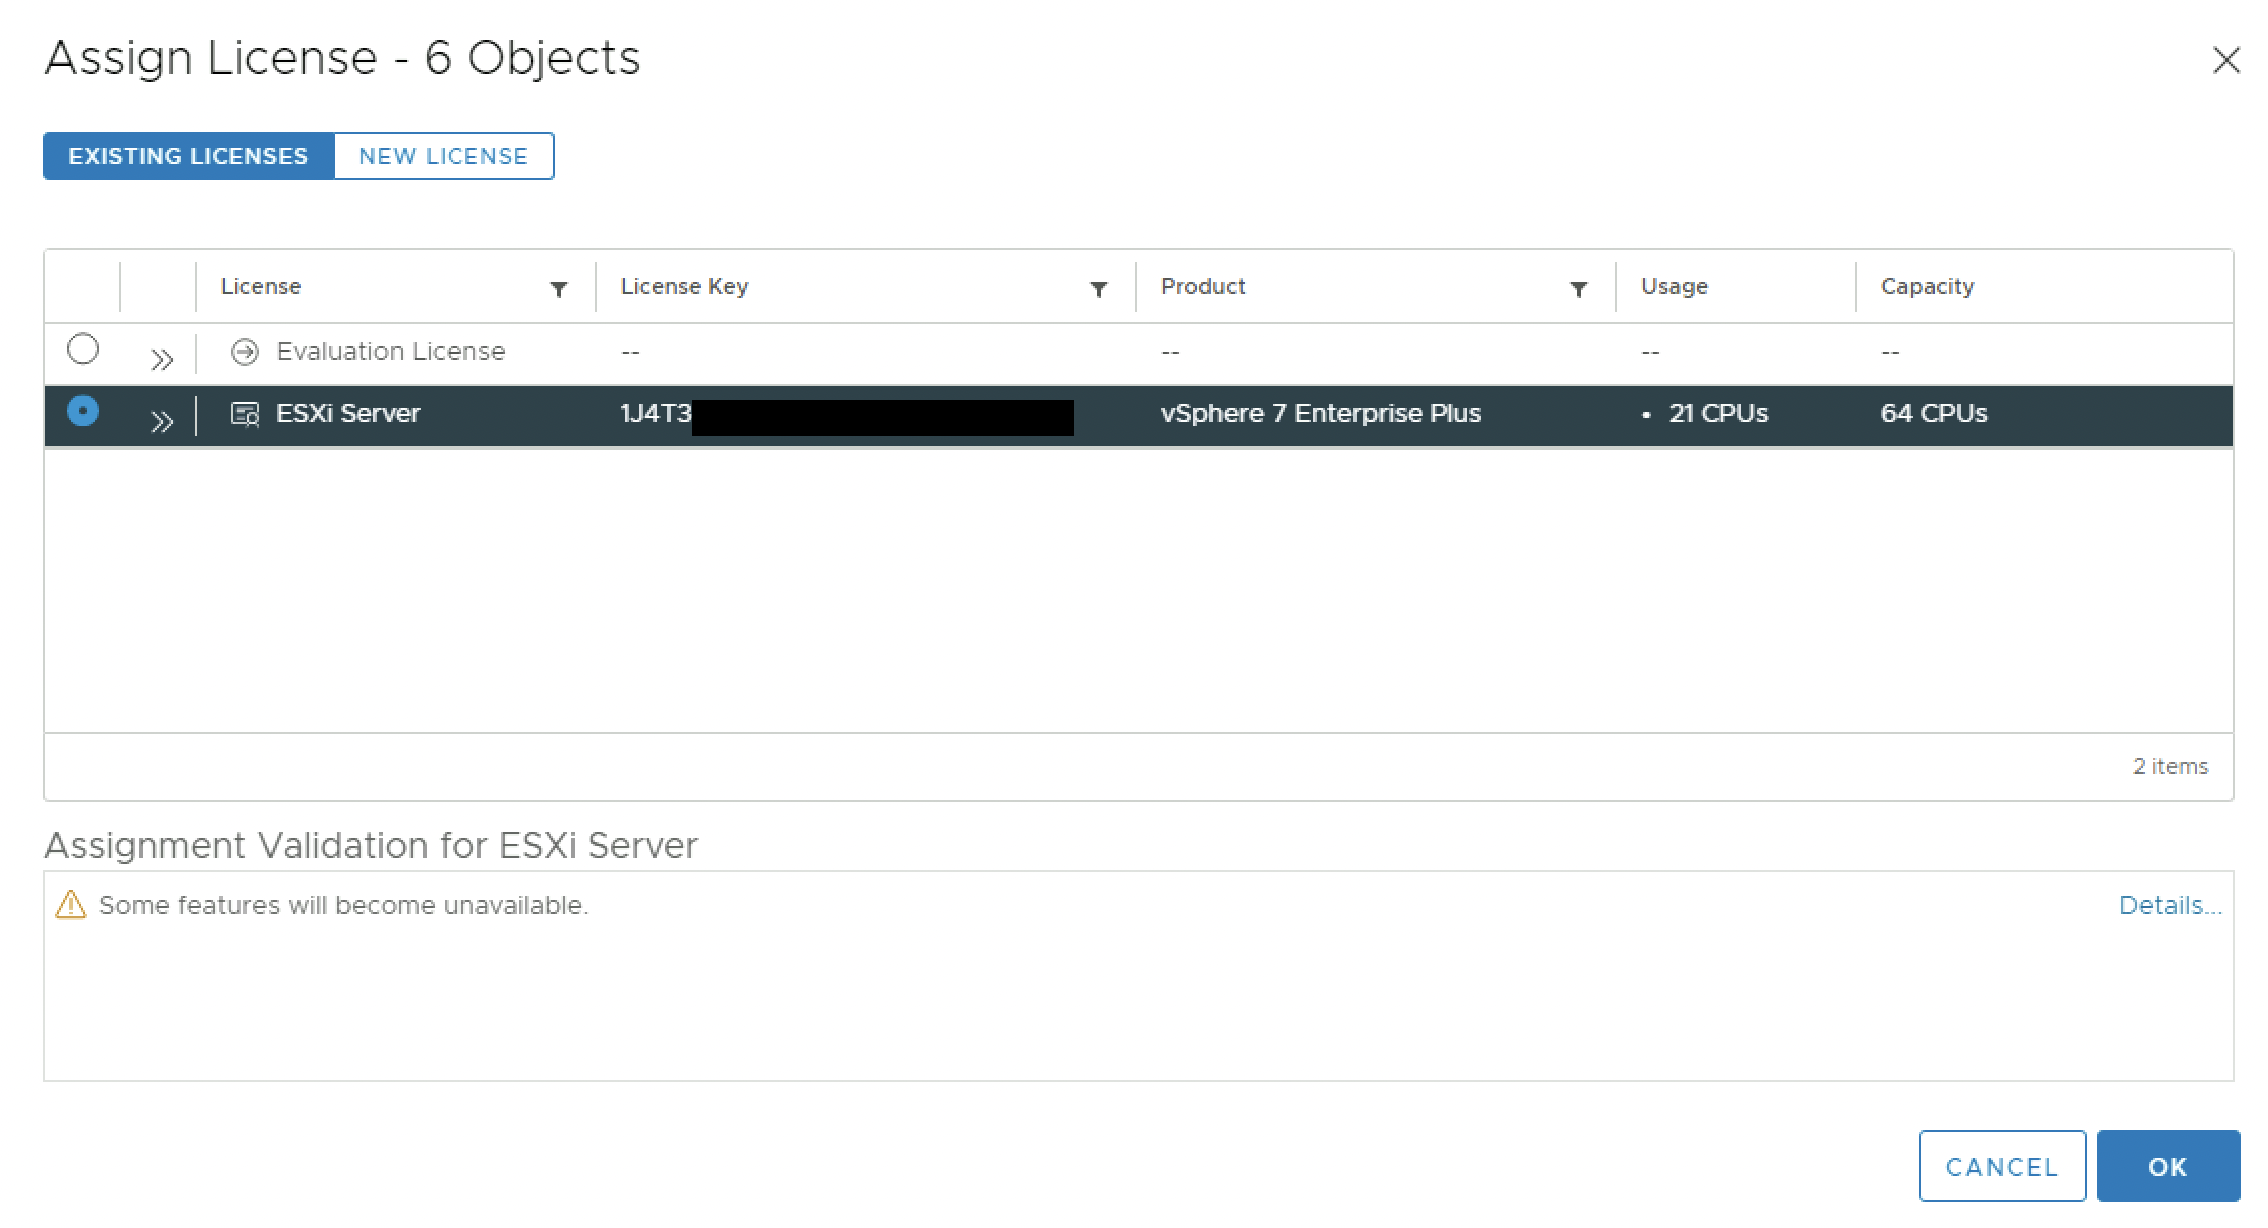
ESXi Server〈s〉
Assign the ESXi Server licenses:
Click yes:

Assign the ESXi Server licenses:
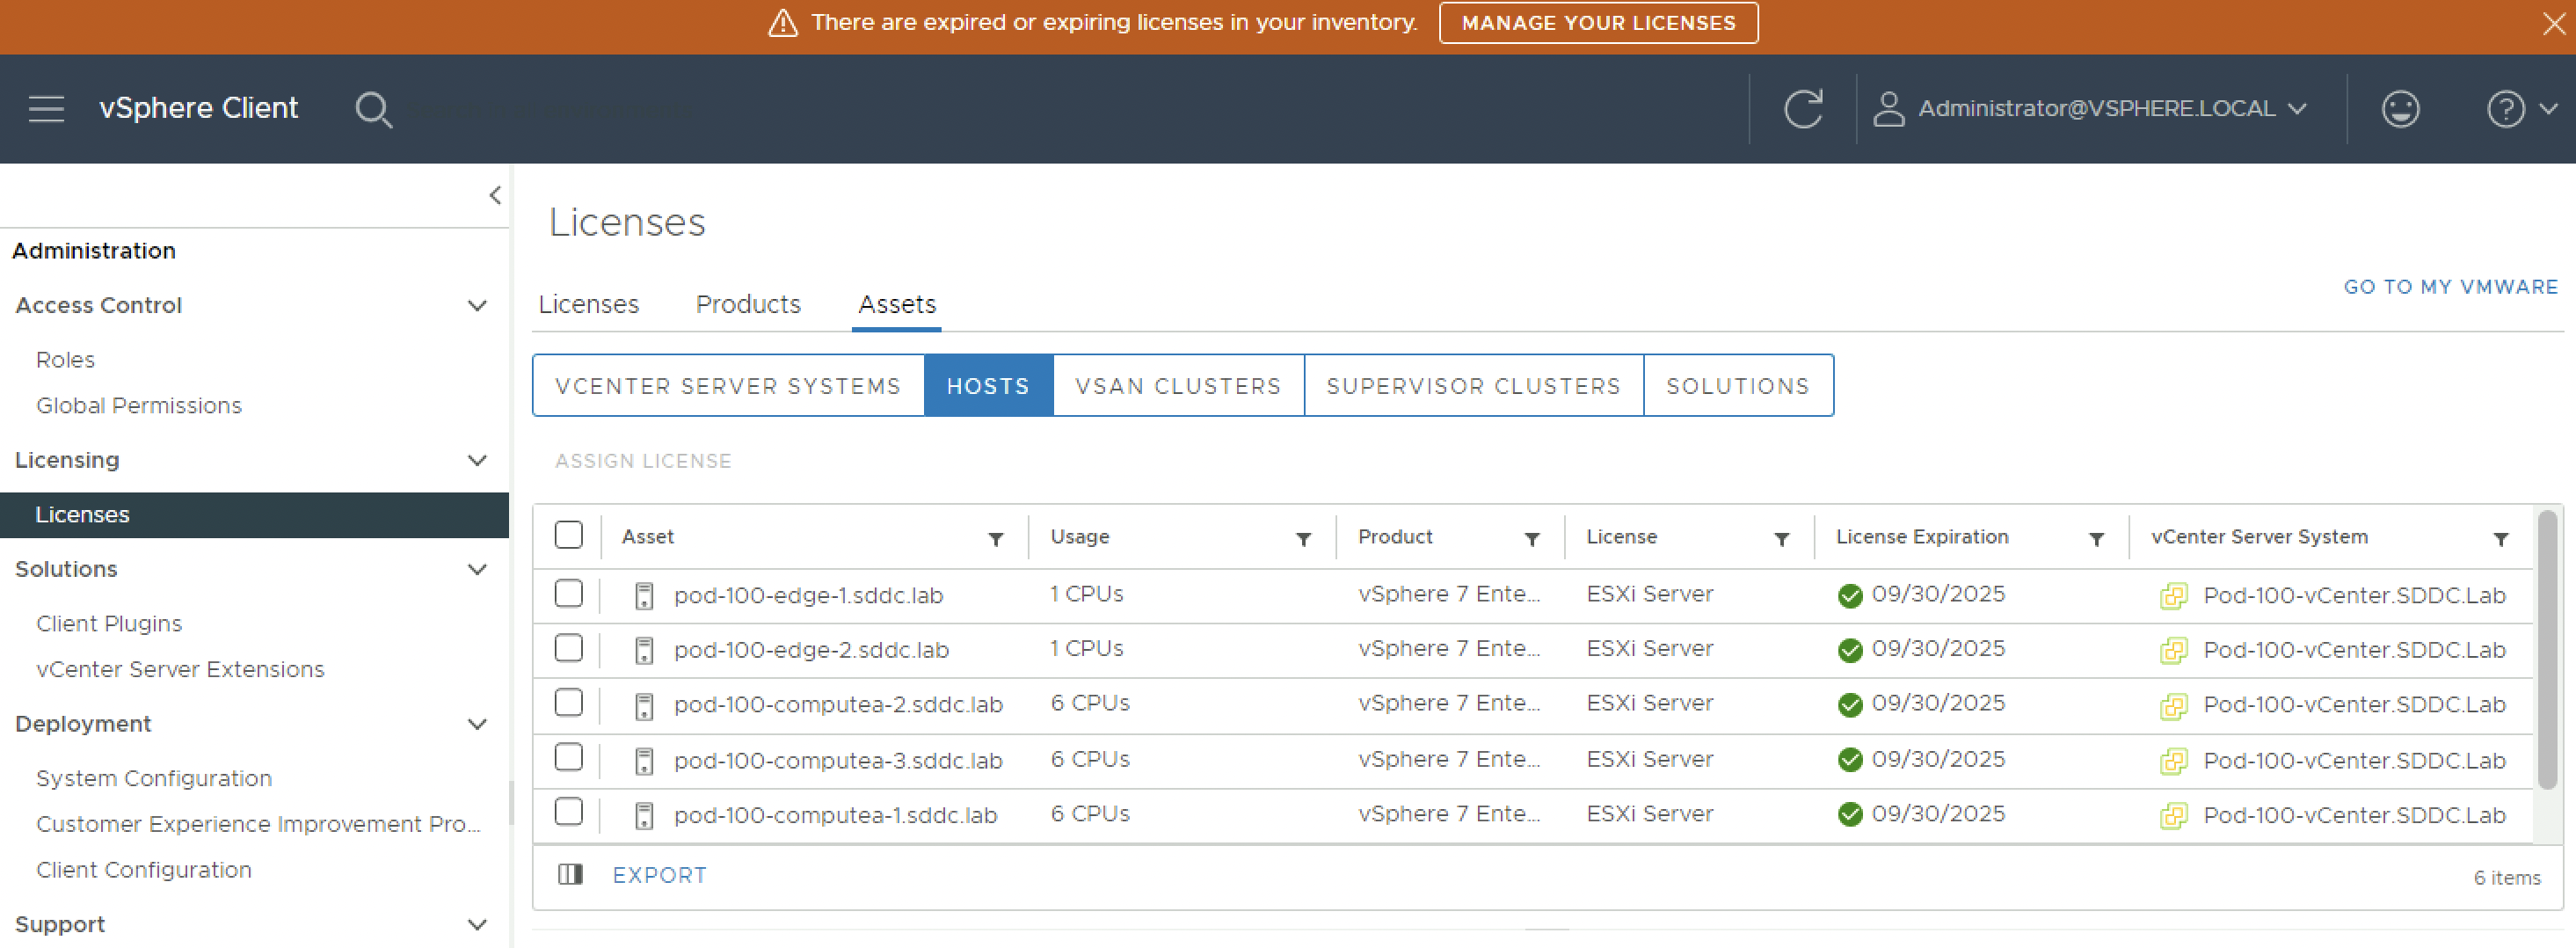
Verify if the ESXi Server licenses are assigned:
vSAN
Assign the vSAN Server licenses:

Click yes:

Assign the vSAN Server licenses:
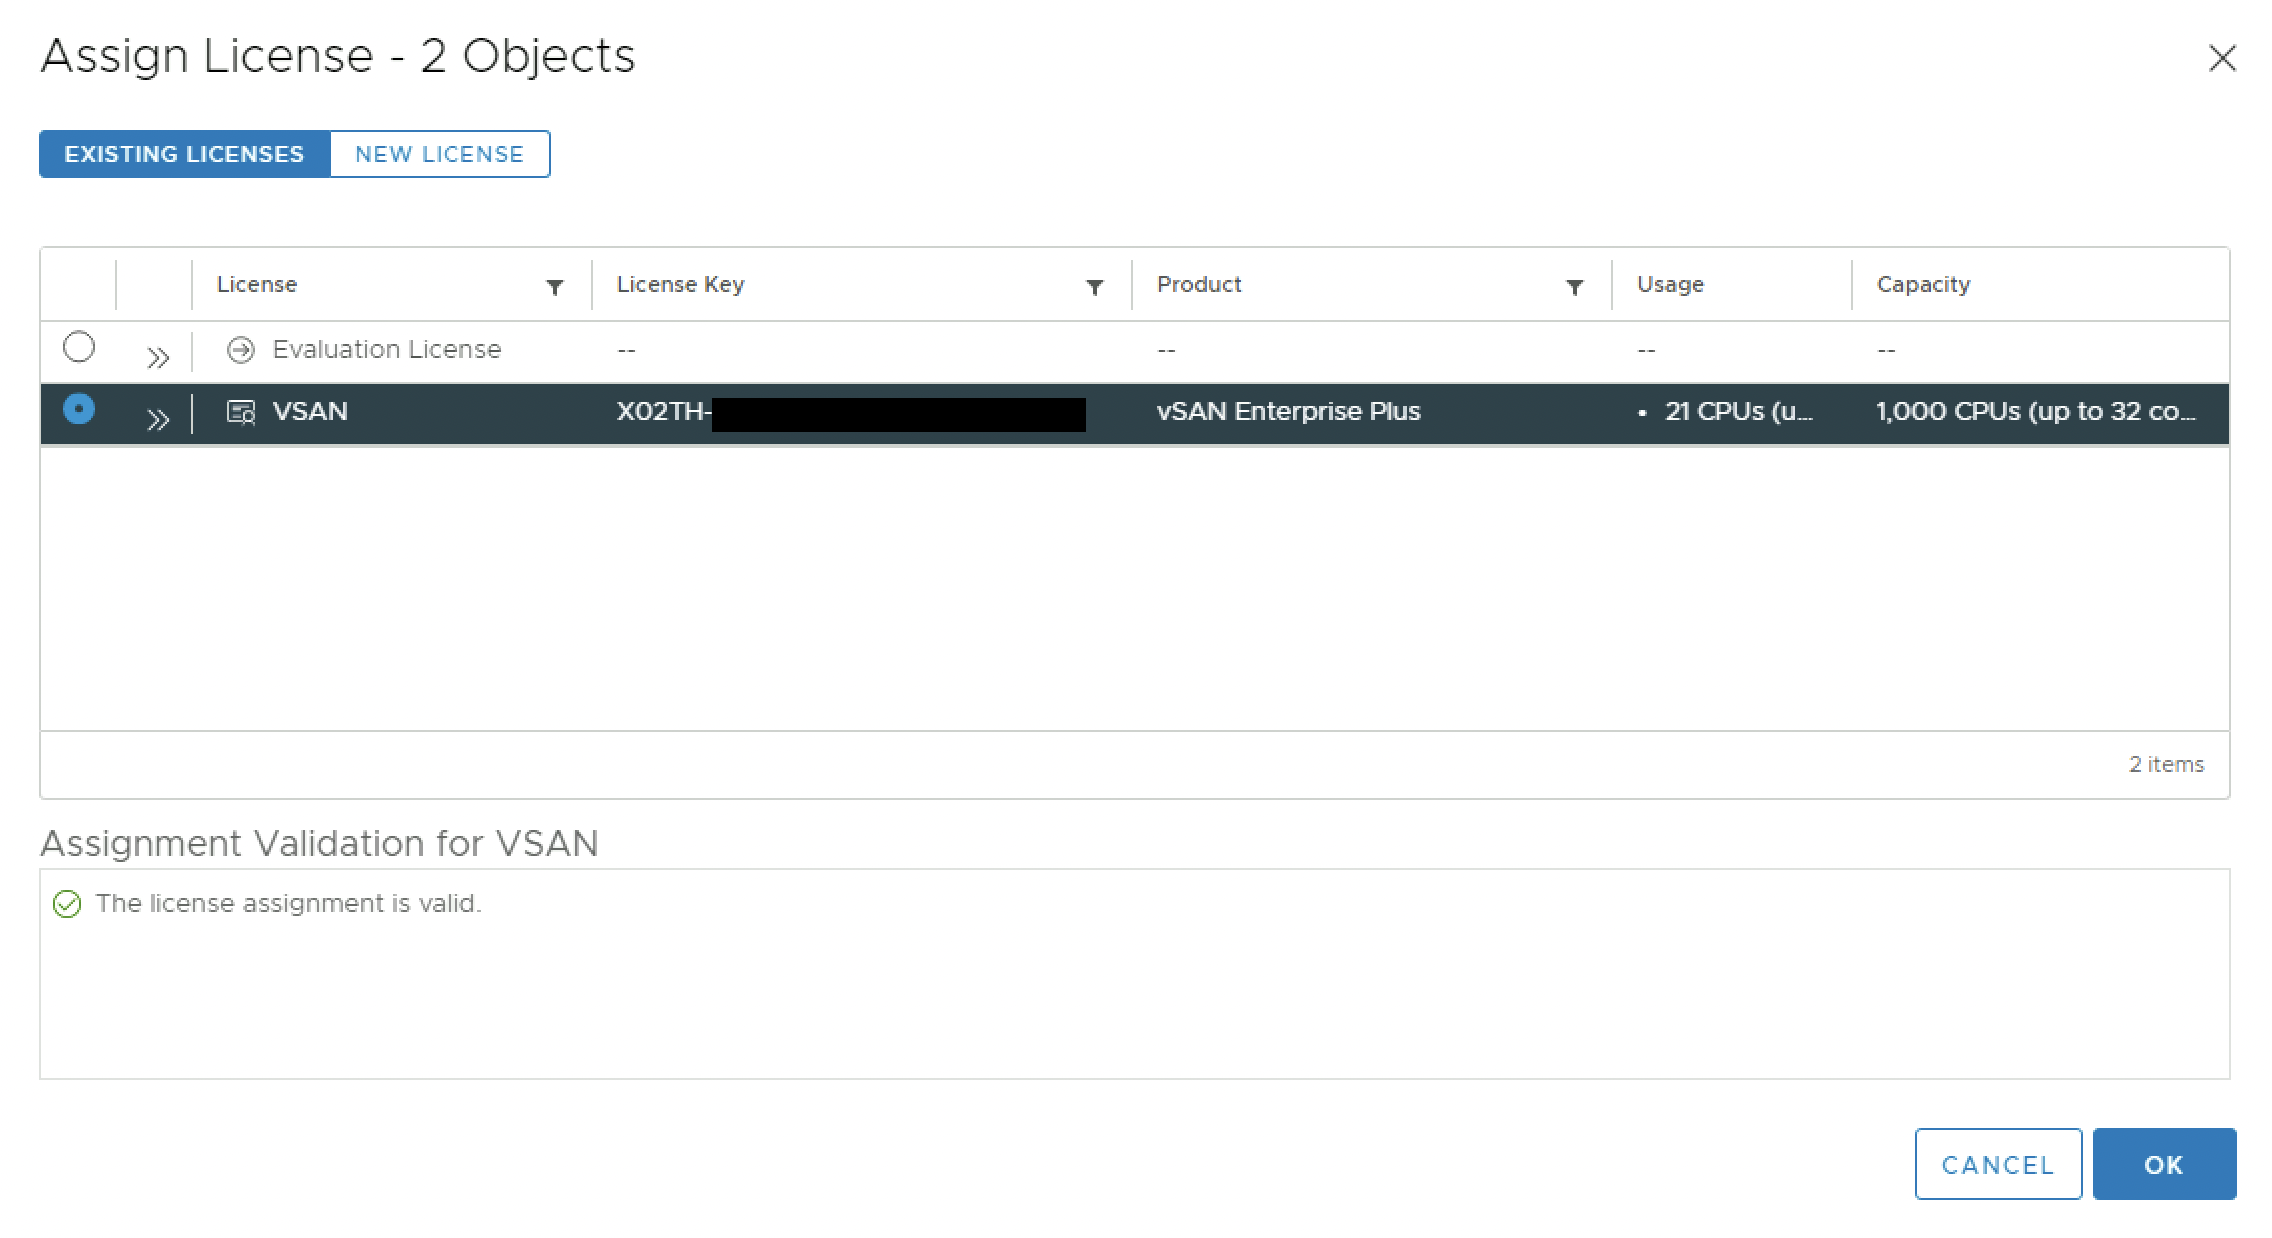
Verify if the vSAN Server licenses are assigned:
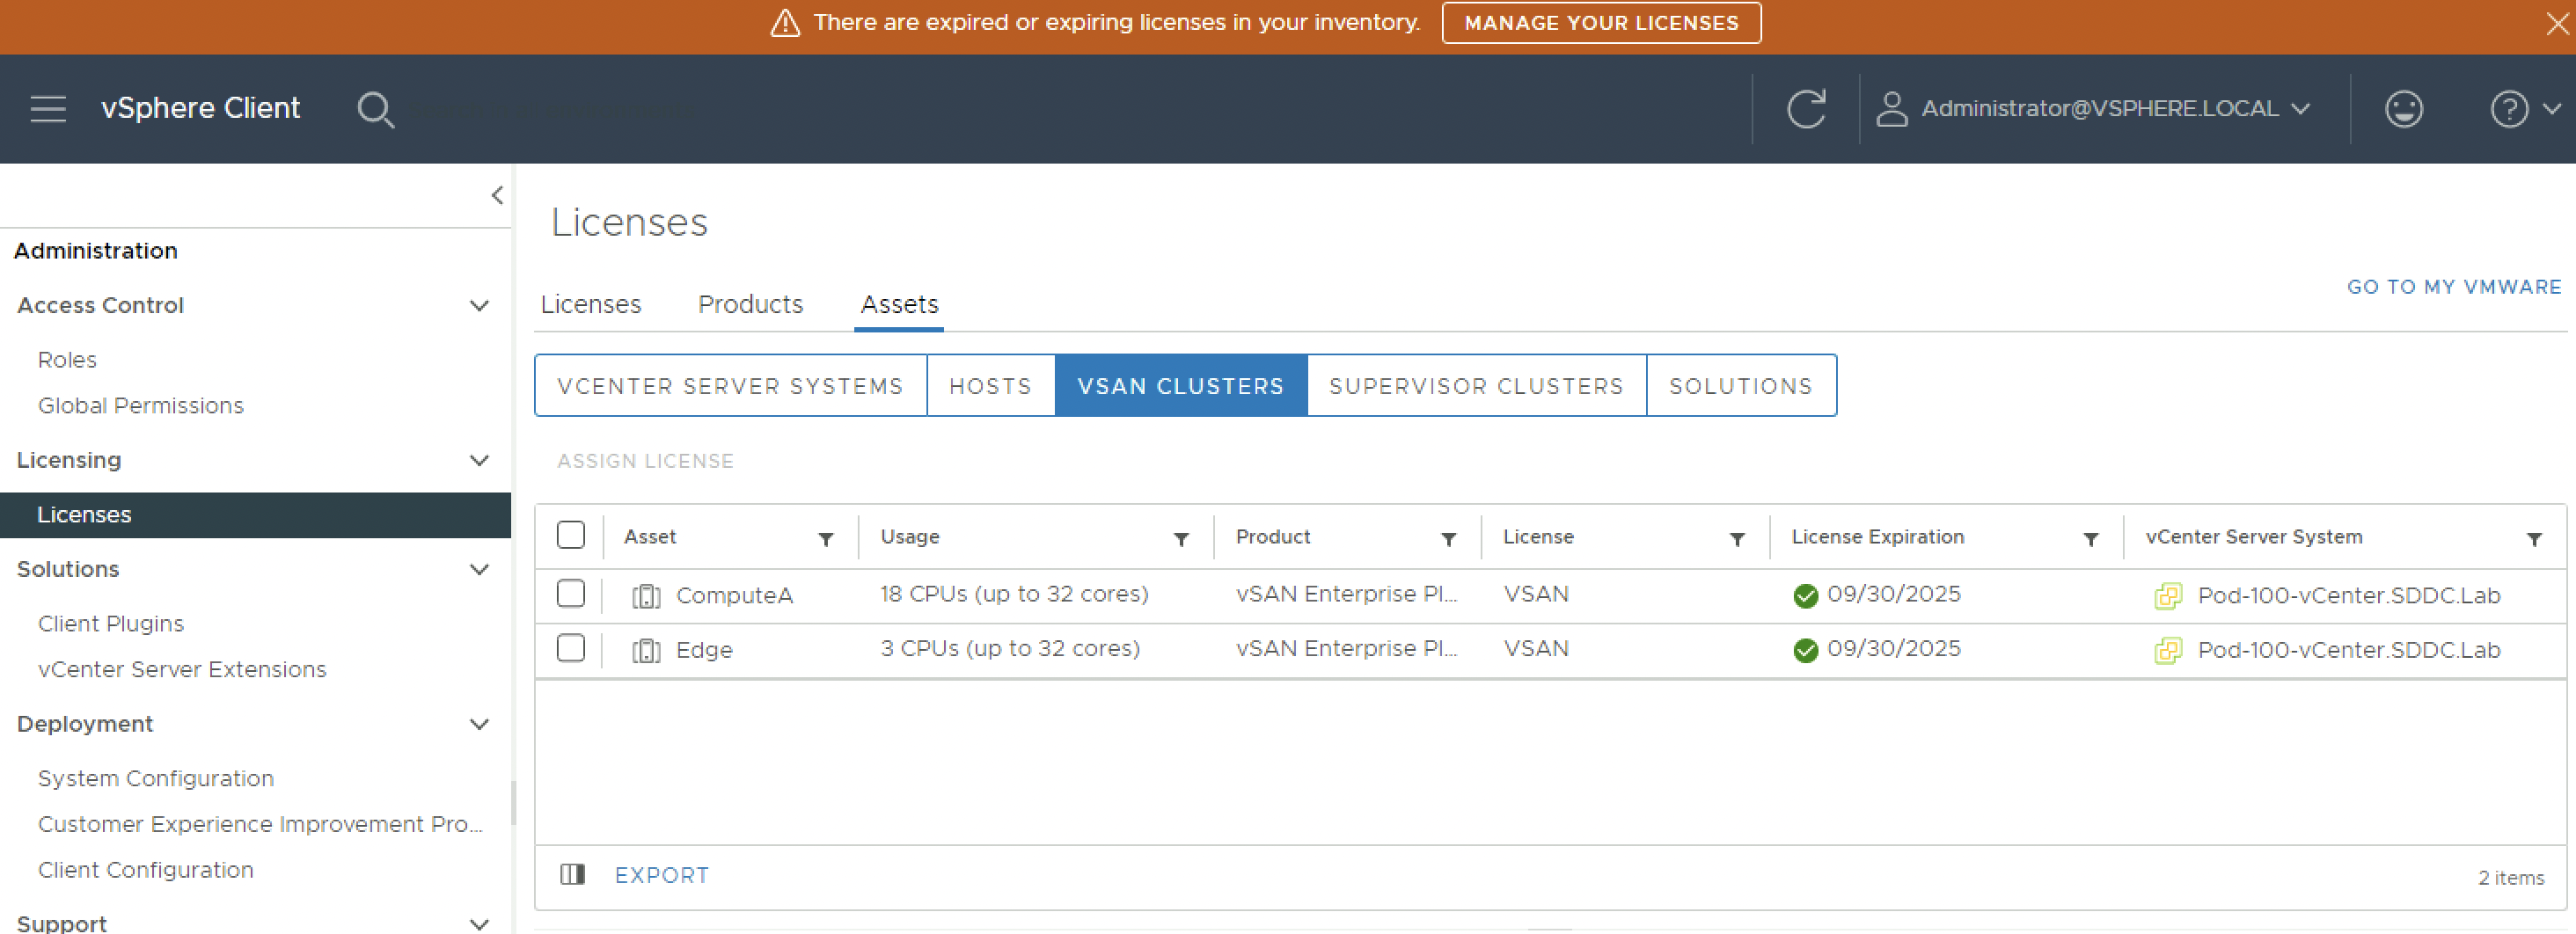
Refresh the screen and notice that the orange bar is gone.

Continue with >> Lab: NSX Manager deployment (Single site)