CA signed certs with NSX-T
This wiki article will guide you through the process of replacing your NSX-T Manager Node self-signed SSL Certificates with your own CA-signed SSL certificates. There are many ways to generate CSR's, set up Certificate Authorities, and sign CSR's. In this article, however, I am explaining how this is done using one of these methods. I will show you a full end-to-end process from setting up your own Microsoft Windows CA Server, generating CSR's and how to use this CA Server to sign your own NSX-T SSL Certificates.
The high–level steps
In this wiki, the high level following steps will be discussed:
- STEP 1: Configuring a Microsoft Server to be a Root Certificate Authority (CA)
- STEP 2: Verification on the Microsoft CA Server
- STEP 3: Preparing the Microsoft CA Server for NSX-T Certificate Signing
- STEP 4: Create Certificate Signing Request (CSR) for the NSX-T FQDNs
- STEP 5: Signing the generated CSRs with the Microsoft Root Certificate Authority (CA)
- STEP 6: Import the CA-signed certificates into the NSX-T Manager Nodes
- STEP 7: Activate uploaded CA-signed certificates with REST API calls
- OPTIONAL: Use one single signed certificate for all NSX-T FQDNs (including the VIP)
STEP 1» Configuring a Microsoft Server to be a Root Certificate Authority 〈CA〉
Before we can start generating CSR's and signing these, we first need to have a CA server to sign the CSRs with. In this step, I am going to show you (one of many ways) how to set up a CA server that is based on Microsoft Windows 2019 Server.
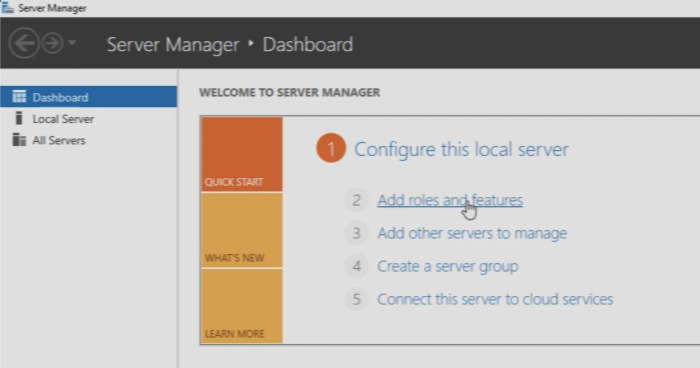
First, we click on “Add roles and features".
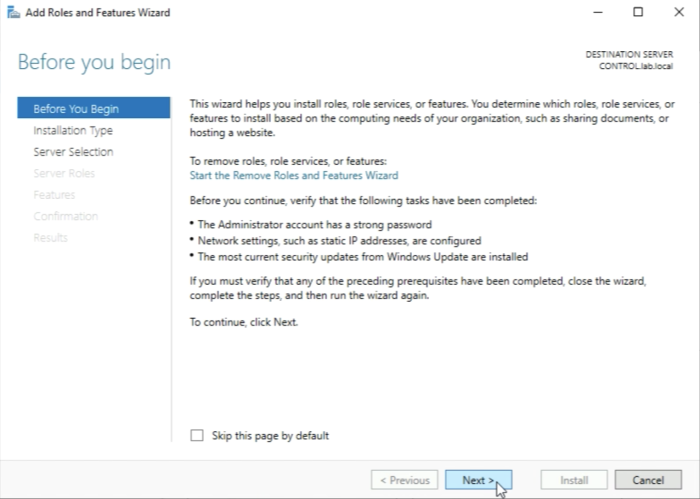
Leave the following settings default and click next.
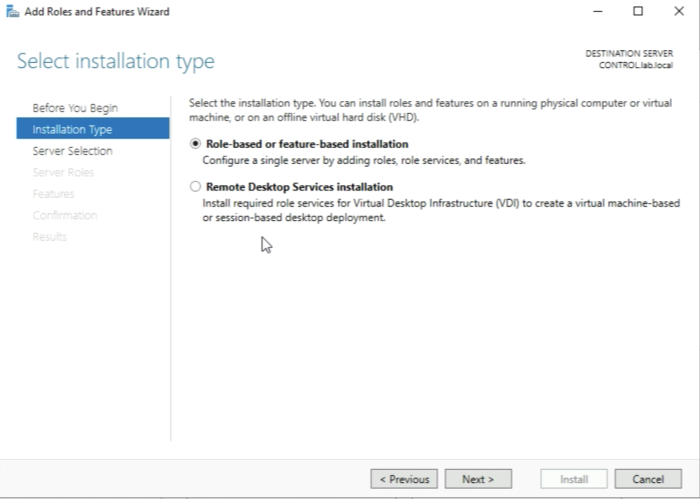
Leave the following settings default and click next.
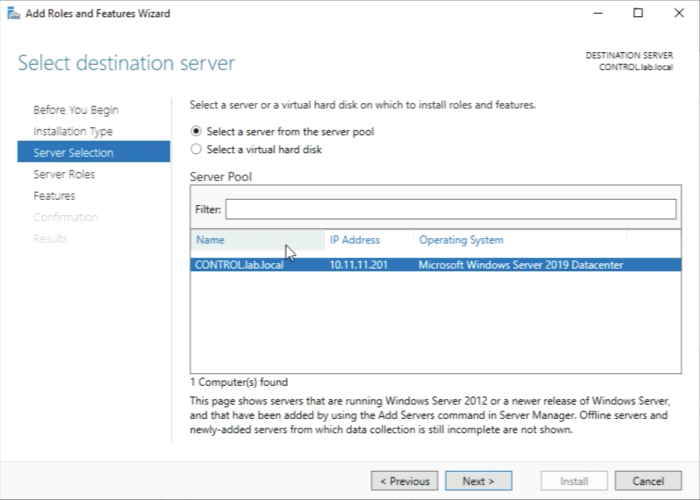
Leave the following settings default and click next.
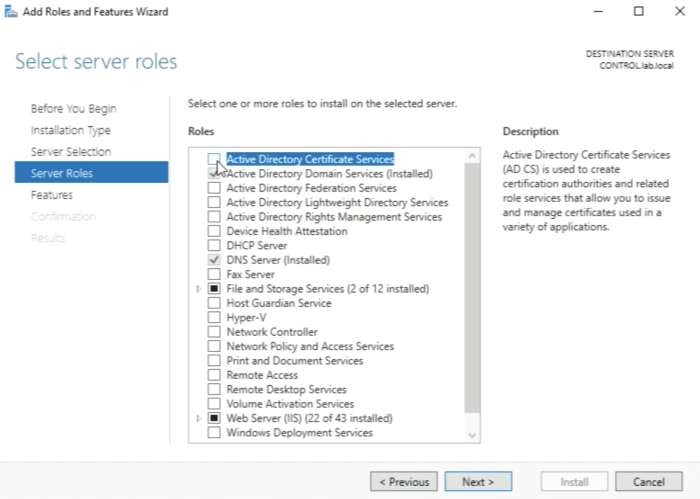
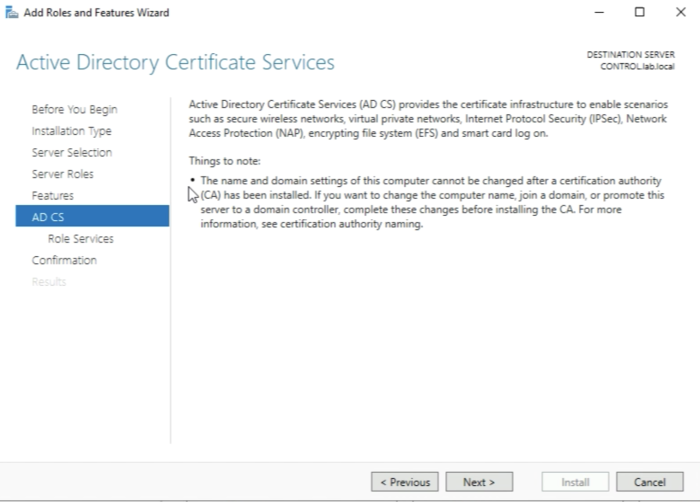
Make sure you select “Active Directory Certificate Services".
This server needs to be configured as an Active Directory Server before you install the “Active Directory Certificate Services"
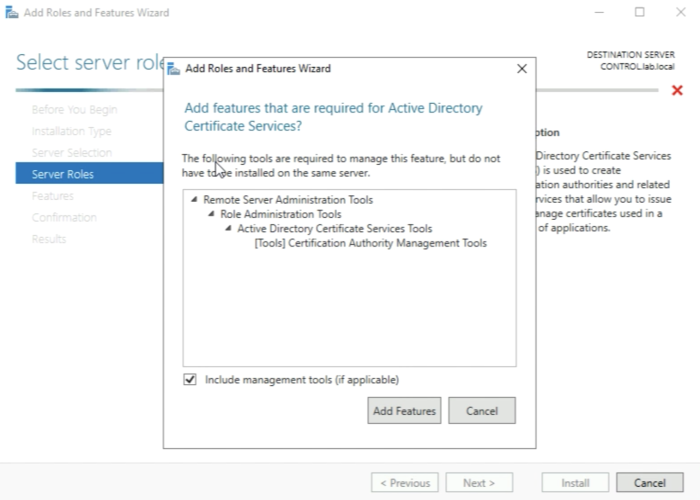
When you have selected the “Active Directory Certificate Services" checkbox the installation will ask you to add some additional tools that are required as a prerequisite. Go ahead and add these features.
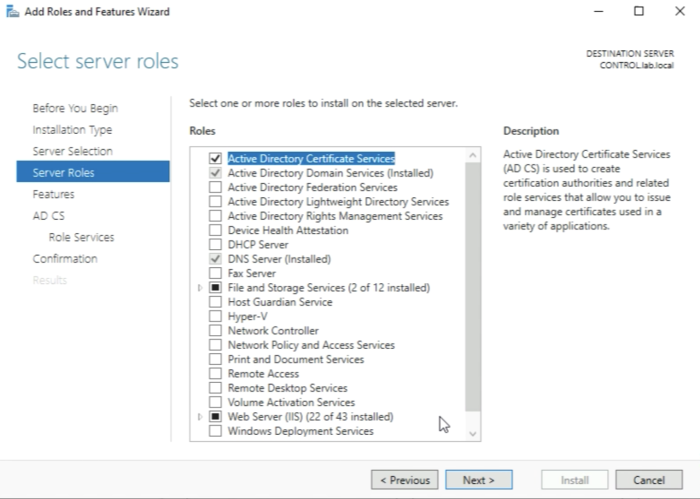
The “Active Directory Certificate Services" role is now selected and you can go ahead and click on next.
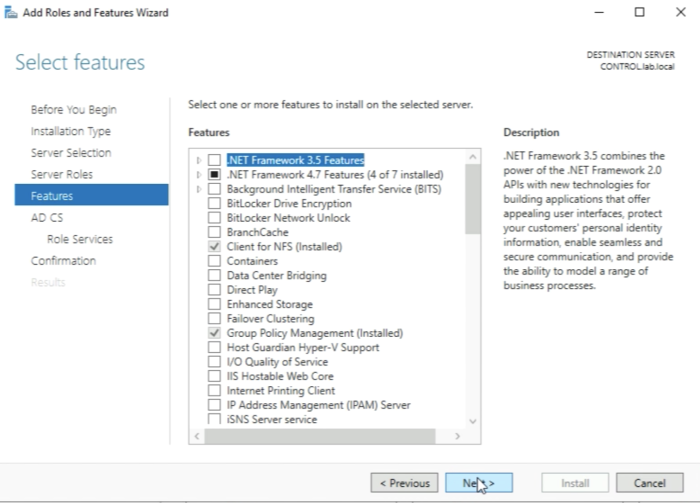
Leave the following settings default and click next.
Leave the following settings default and click next.
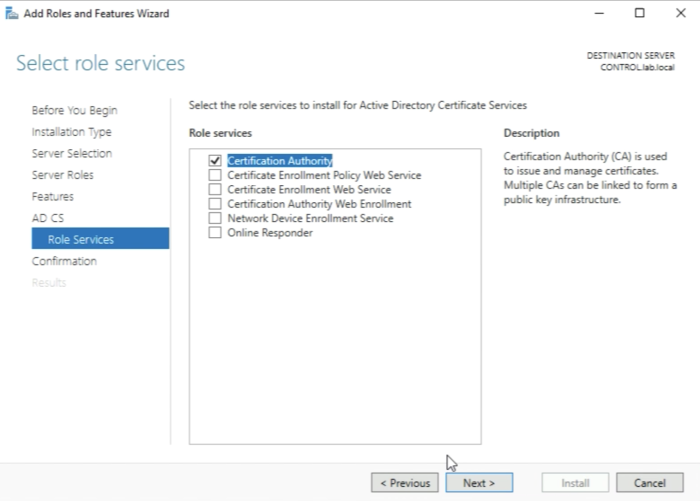
The “Certification Authority” Role will already be selected for you by default, but before you click on next you need to select additional role services.
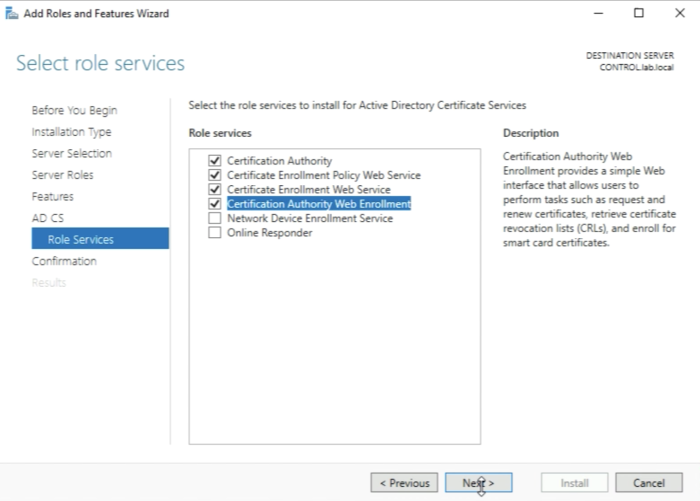
Select the following role services:
- Certificate Enrolment Policy Web Service
- Certificate Enrolment Web Service
- Certification Authority Web Enrollment
And click next
Make sure you have installed the Microsoft IIS web server as a prerequisite.
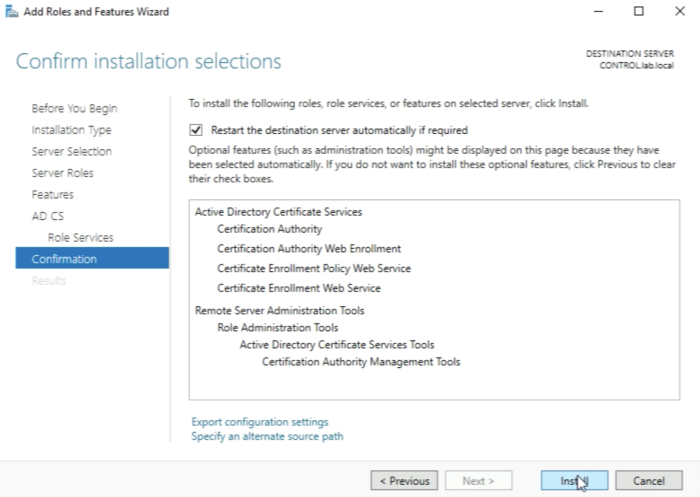
Check the box “Restart the destination server automatically if required" Click on install.
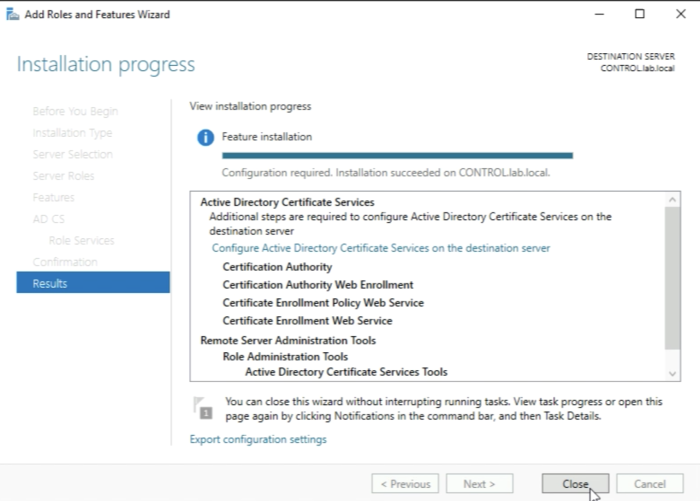
The installation process will start and will finish and then you will be able to close the window.
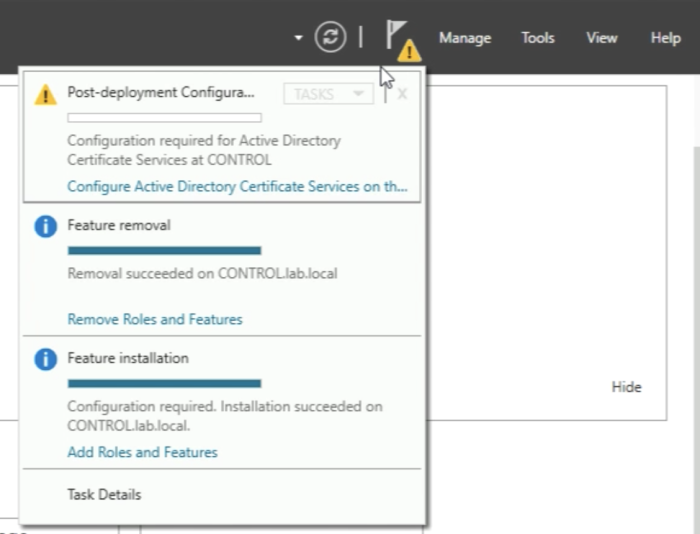
When the installation is done you need to do some additional "Post-deployment Configuration” so you need to look at the yellow exclamation mark in the upper right corner and click on “Configure Active Directory Certificate Services on this server”.
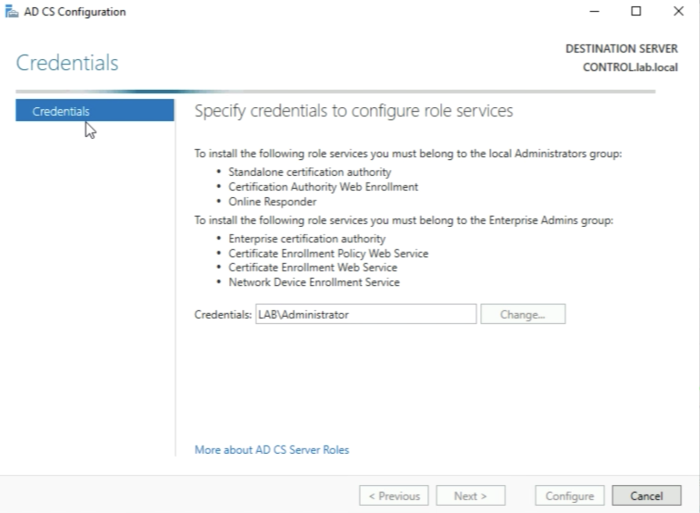
Leave the following settings default and click next.
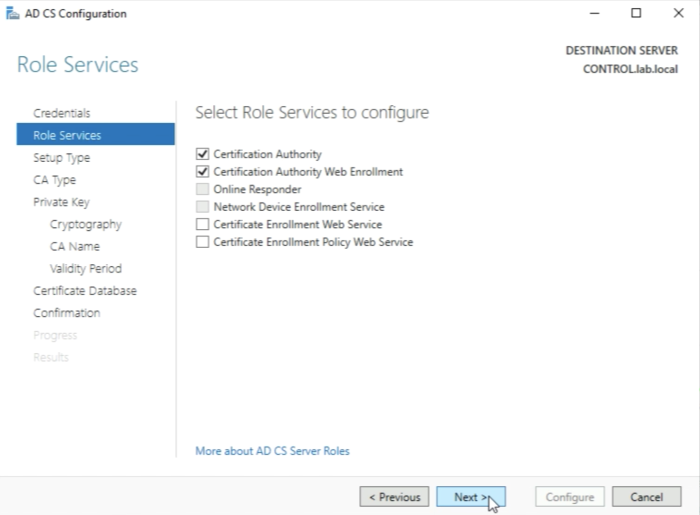
Make sure the “Certification Authority” and "Certification Authority Web-Enrollment” Role Services are selected and click on Next.
These two Role Services needs to be configured first before others can be configured in a later stage.
Leave the following settings default and click next.
Leave the following settings default and click next.
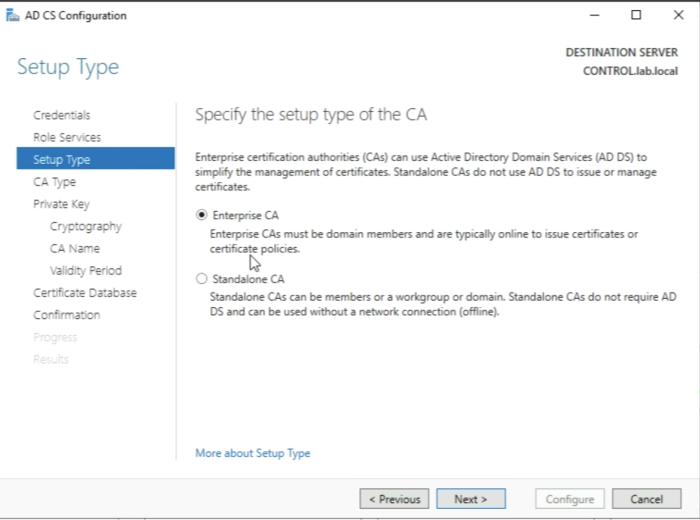
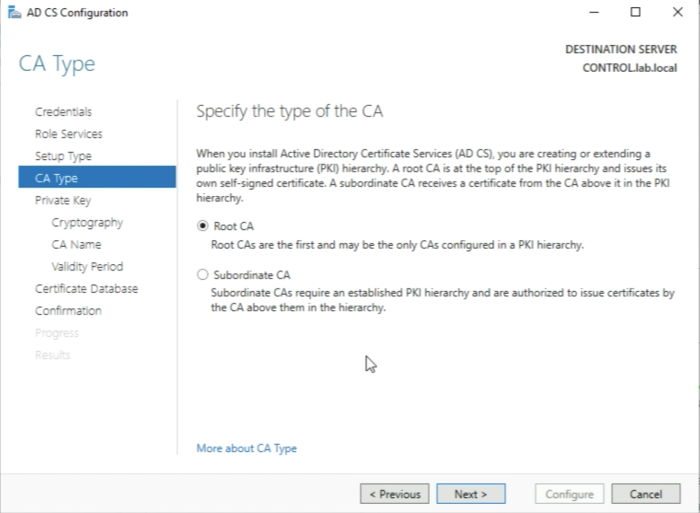
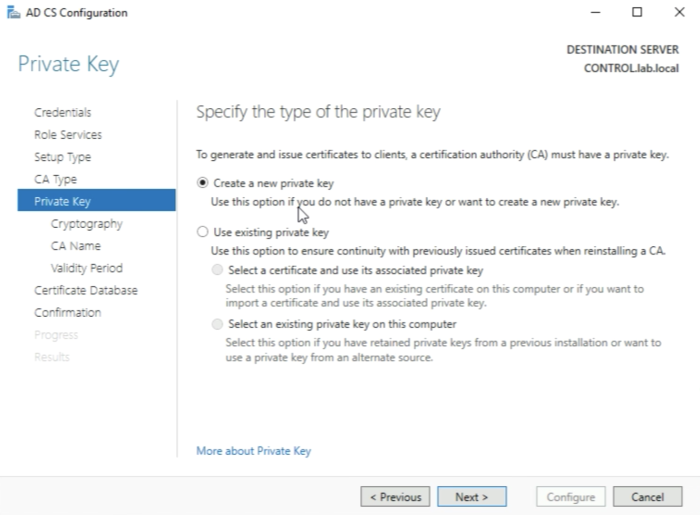
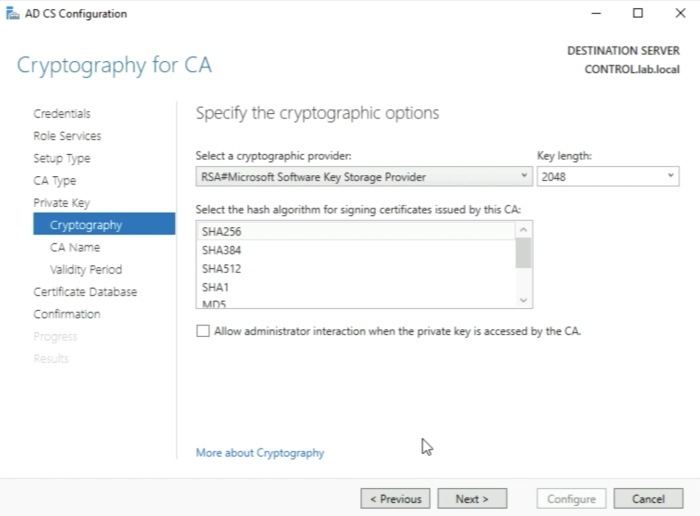
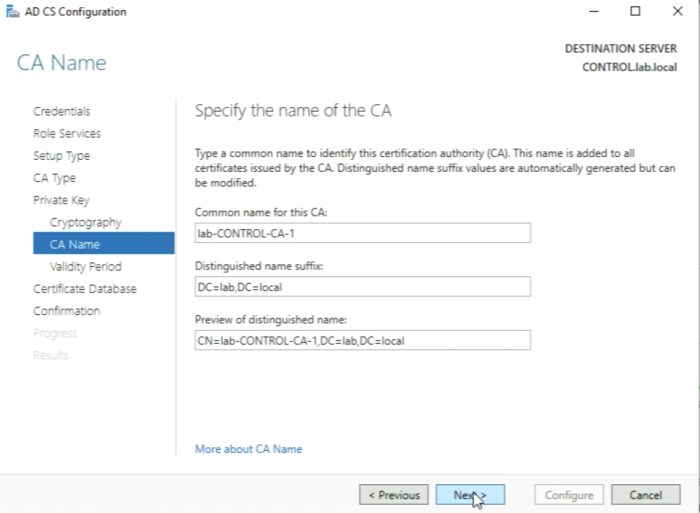
Leave the following settings default and click next. It is important that you create a private key for this new Root Certificate Authority (CA) here.
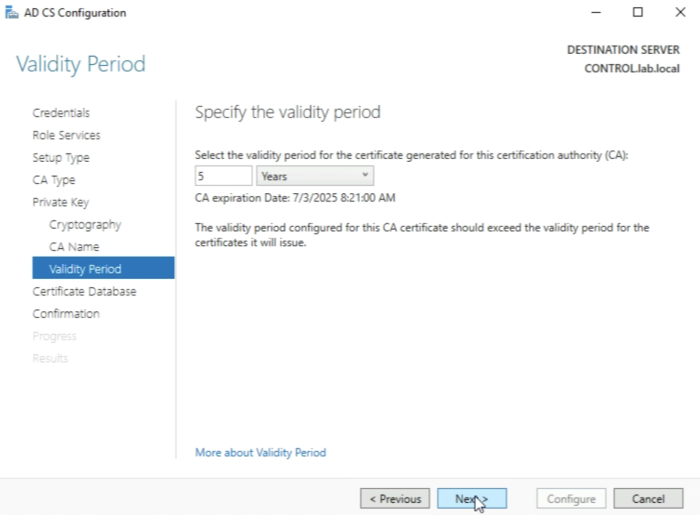
Leave the following settings default and click next.
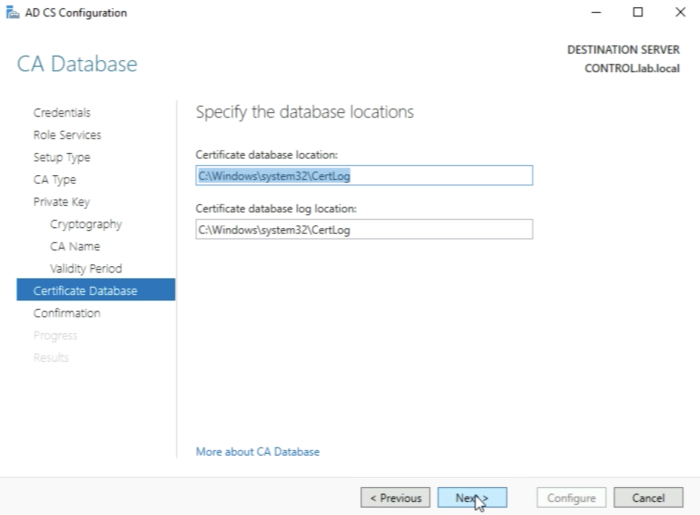
Leave the following settings default and click next.
Leave the following settings default and click next.
Leave the following settings default and click on next.
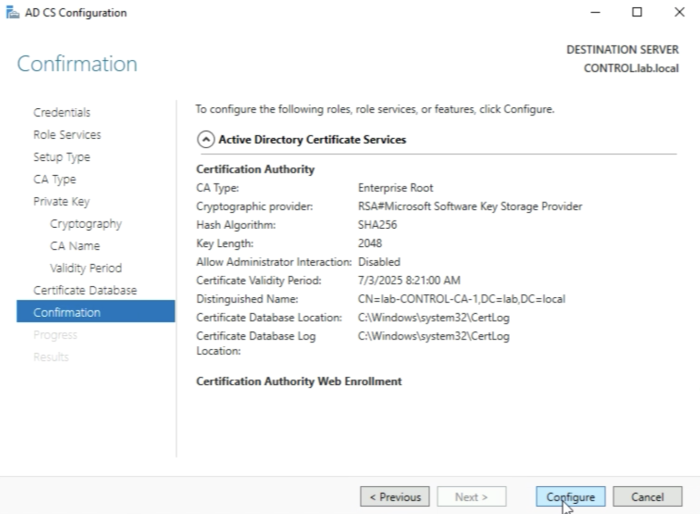
Leave the following settings default and click on Configure.
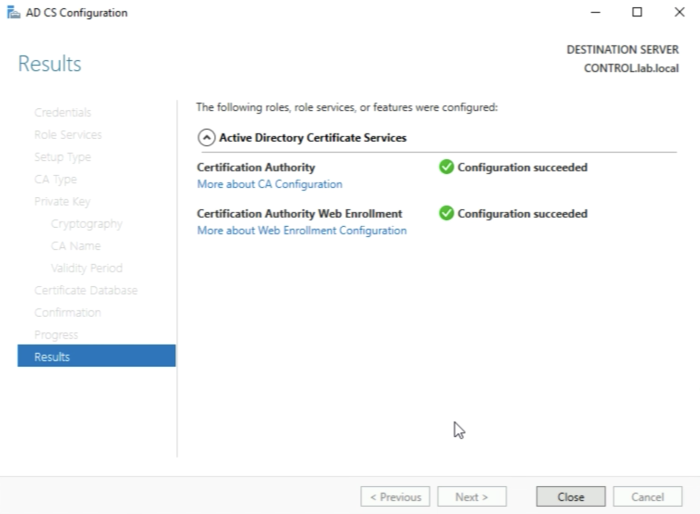
When the selected services are configured and the below messages are displaced that the Configuration is succeeded you can click on Close.
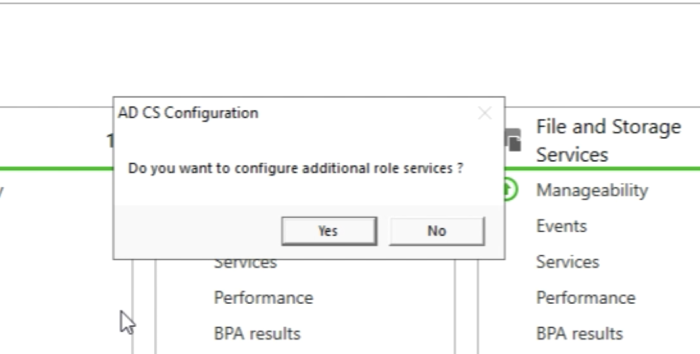
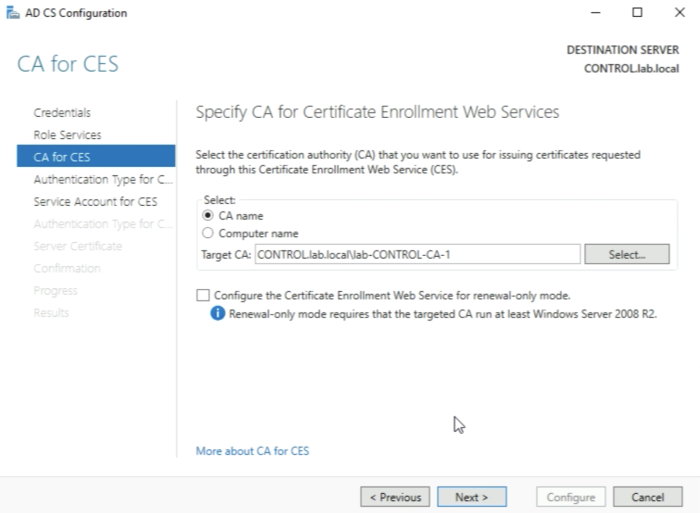
Now it’s time to configure the additional role services. SO click on “Yes” when you get the below question to configure additional role services.
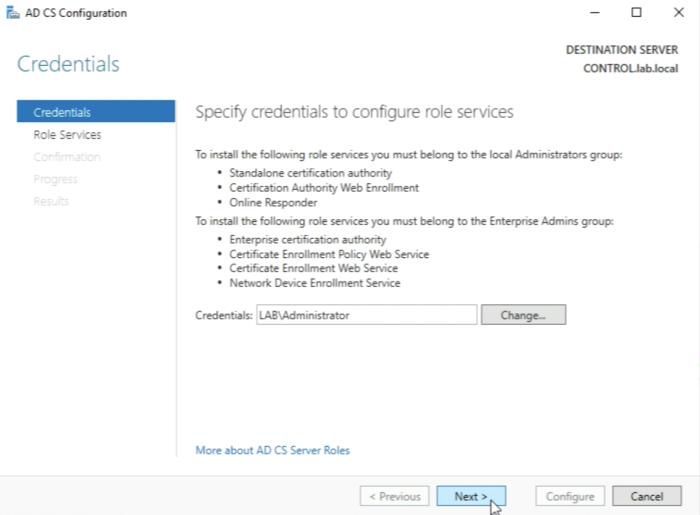
Leave the following settings default and click on Next.
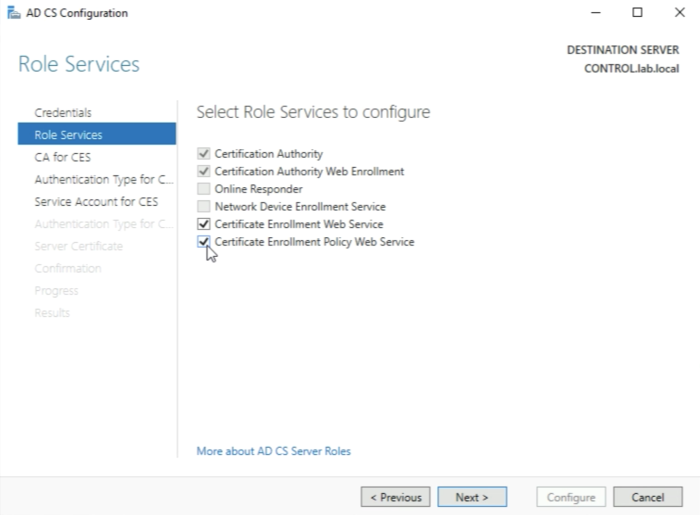
Now select to configure the following additional "Role Services":
- Certificate Enrolment Web Service
- Certificate Enrolment Policy Web Service
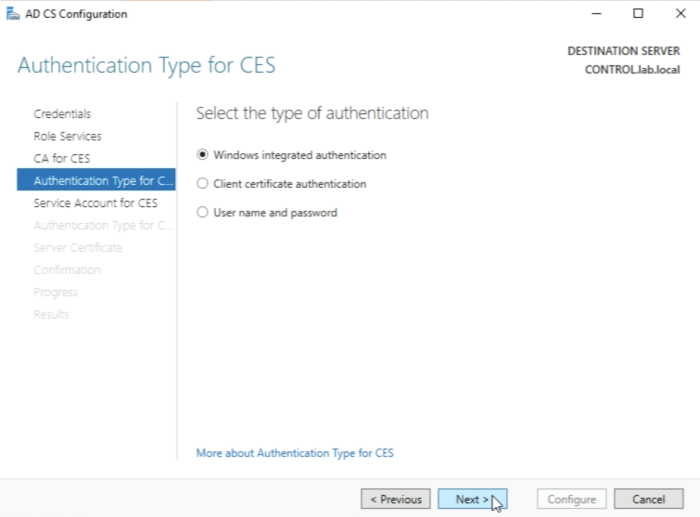
Leave the following settings default and click on Next.
Leave the following settings default and click on Next.
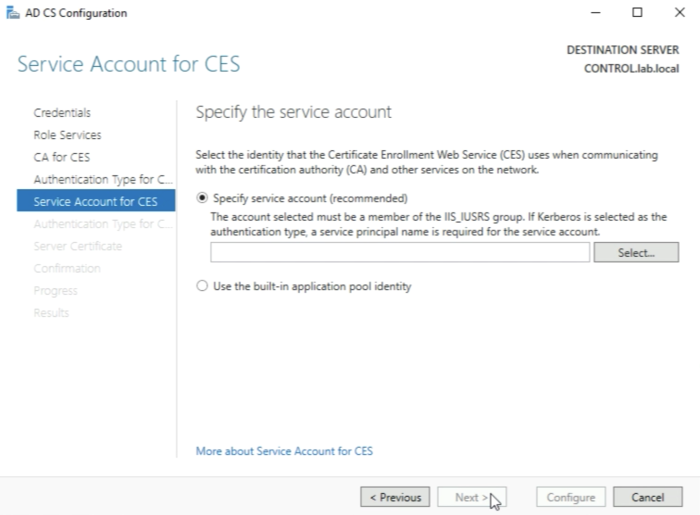
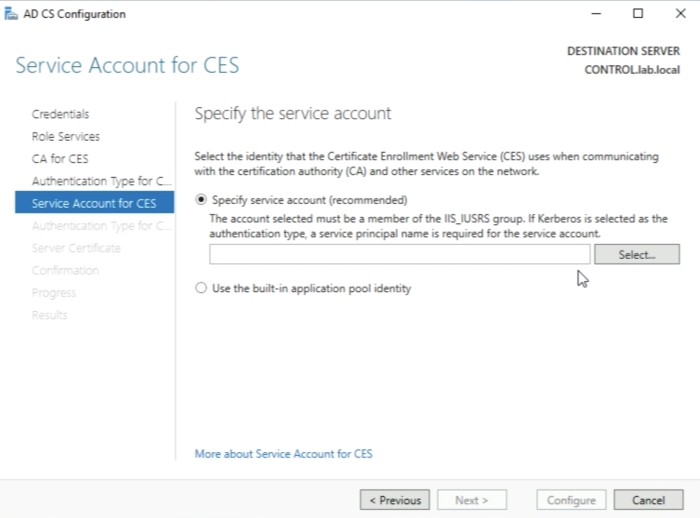
We need to specify a service account here that is a member of the IIS_IUSRS group. I currently have no account (or user) that is part of this group so I need to add this group to an account.
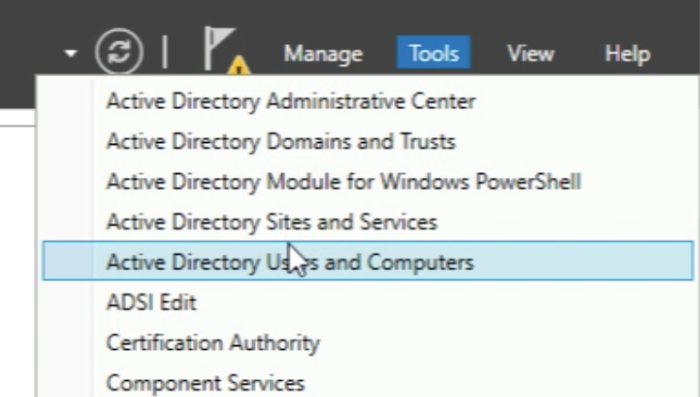
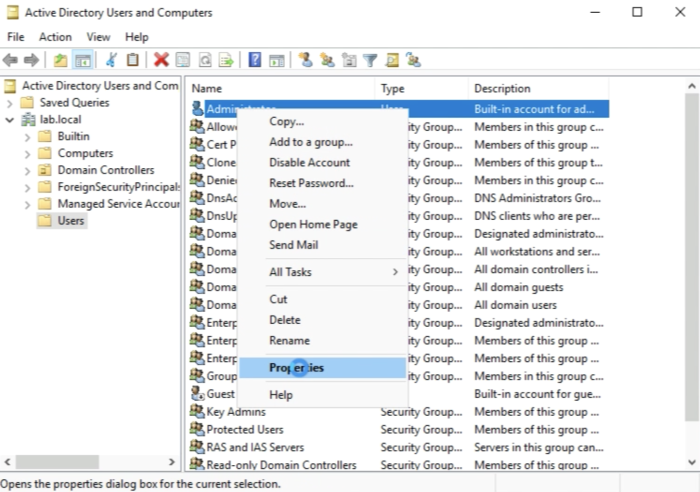
In order to assign the group to the account, You need to open the "Active Directory Users and Computers” Management Console.
You need to select the account you want to use as a service account and go to the properties. In my case, I will select the "Administrator account".
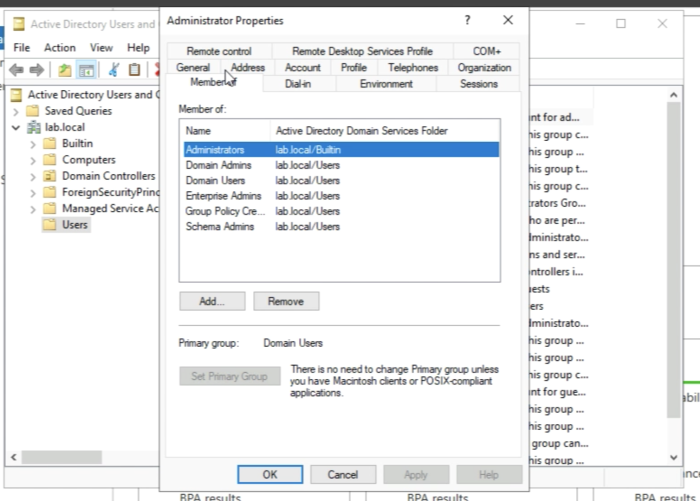
Browse to the “Member of” tab.
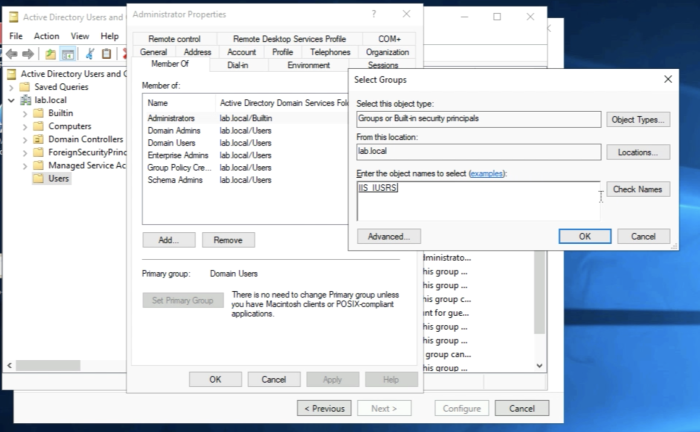
Add the IIS_IUSRS group to the "Administrator" account.
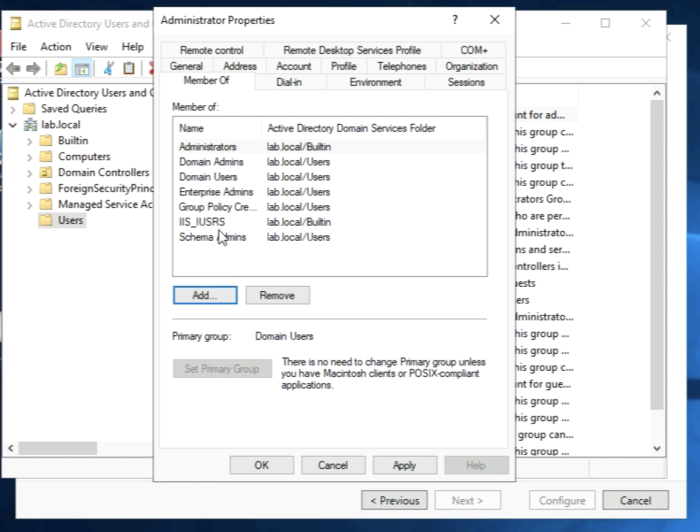
Make sure the IIS_IUSRS is listed in the "Member Of" list of the account.
Now that the account has the proper rights we can click on select.
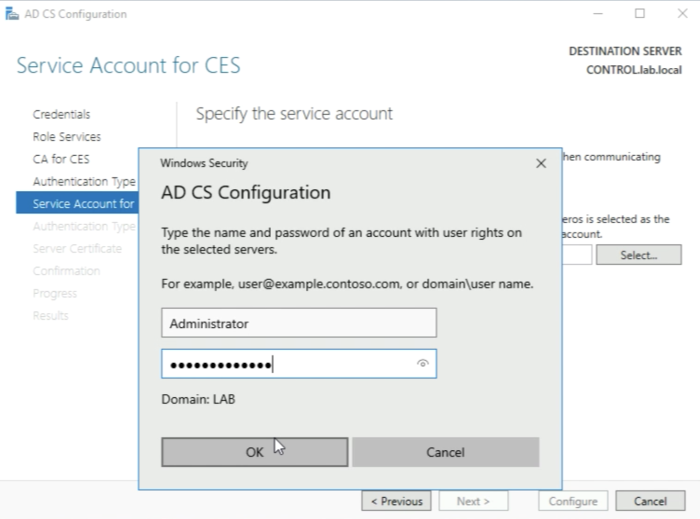
You need to type in the credentials of the service account (in my case the Administrator account) and click on “OK”.
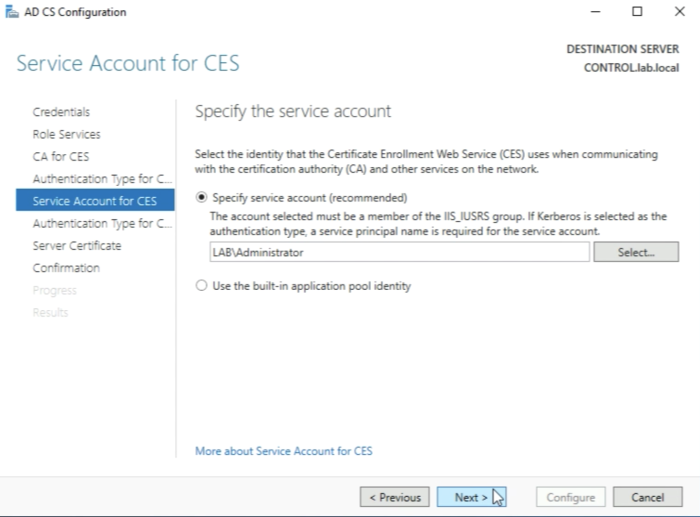
Click on “Next” when the service account is specified.
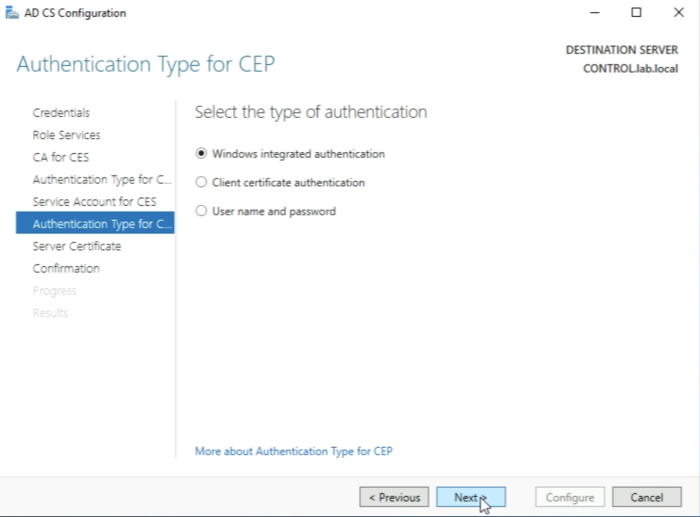
Leave the following settings default and click on Next.
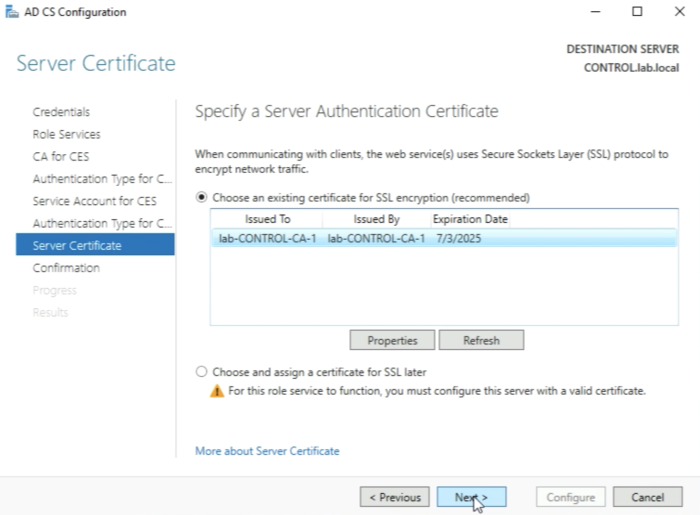
Make sure you select the “certificate" for SSL encryption first before you can click on Next.
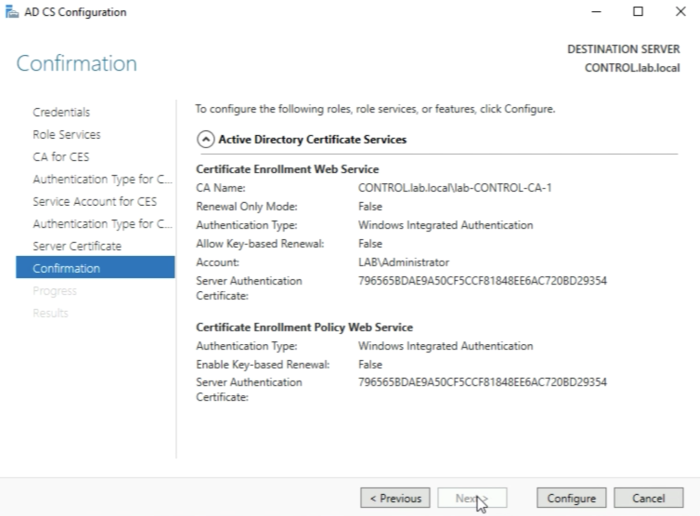
Click on “Configure”.
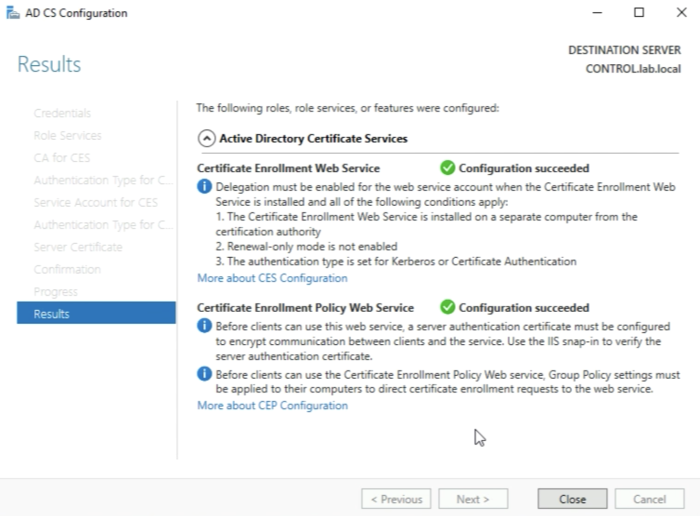
When you see the message “Configuration succeed" click on Close.
Now we have installed on configured the CA Server with its underlying Roles and Services completely.
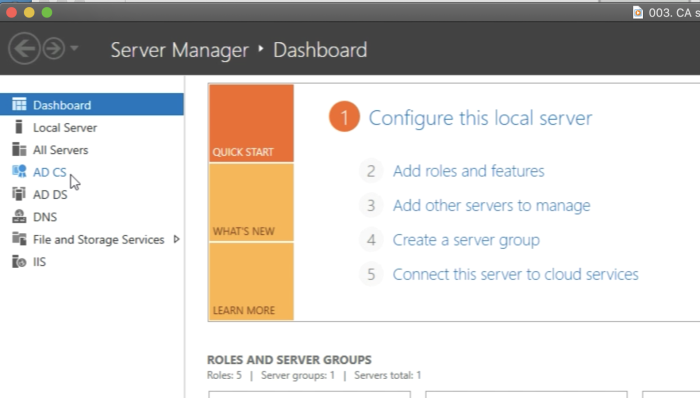
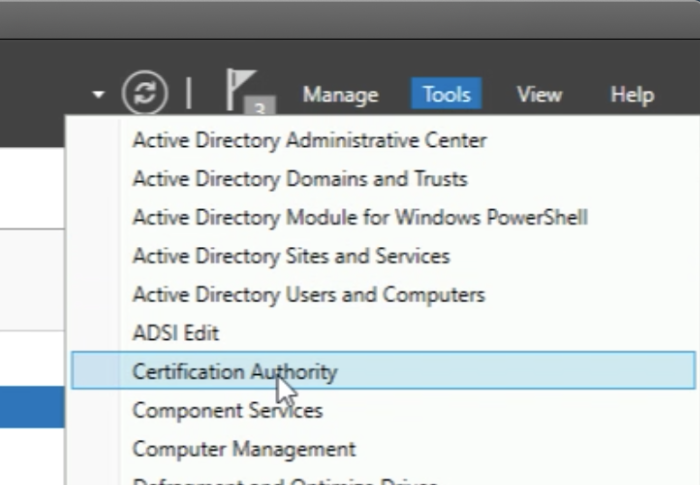
Now we can verify is the “AD CS" option appears in the Server Manager menu. You can click on it.
When you click on it you can see that the AD server is online and activated.
You should also be able to open the "Certification Authority" Management Console. You will need this later to do some additional preparation before we can start signing the CSRs for the NSX-T Manager nodes.
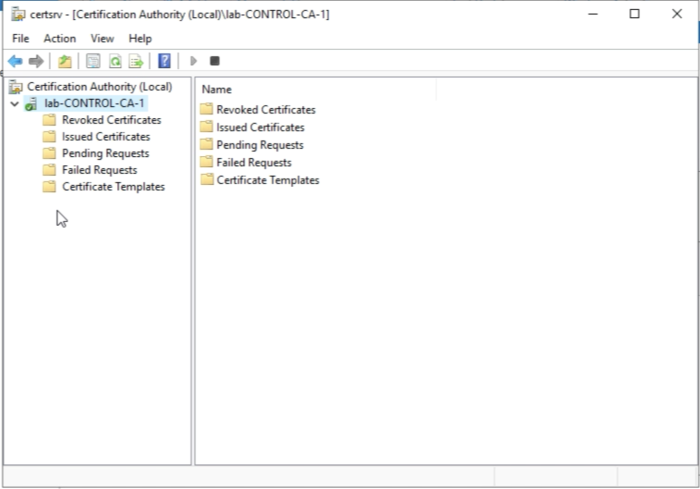
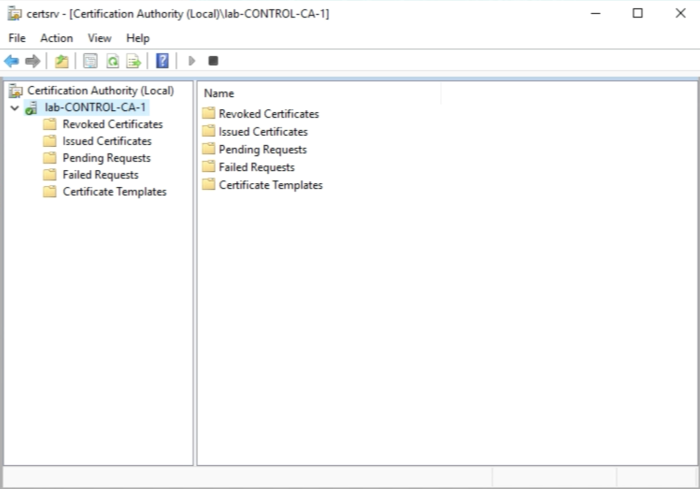
When you have opened the “Certification Authority" Management Console you will see the following screen.
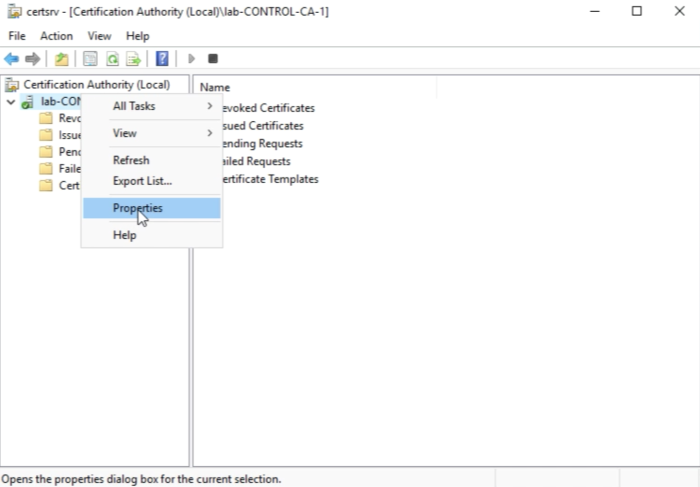
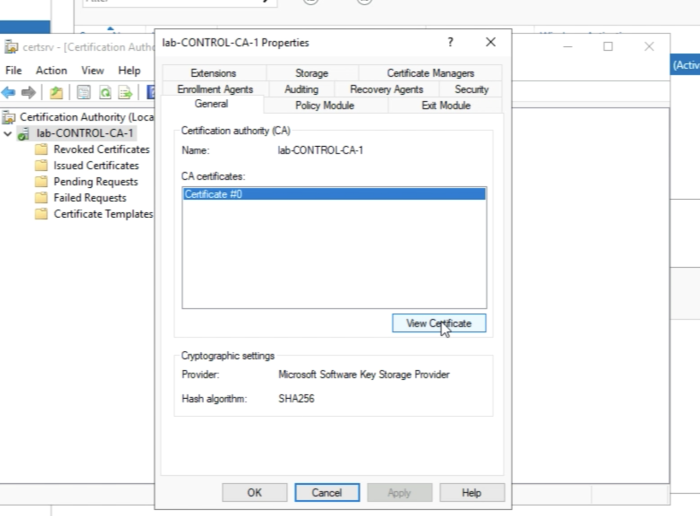
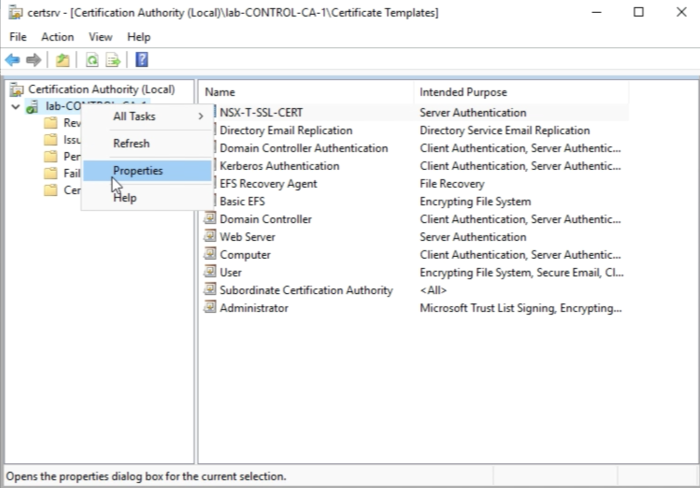
Select the name to right-click and go to the properties.
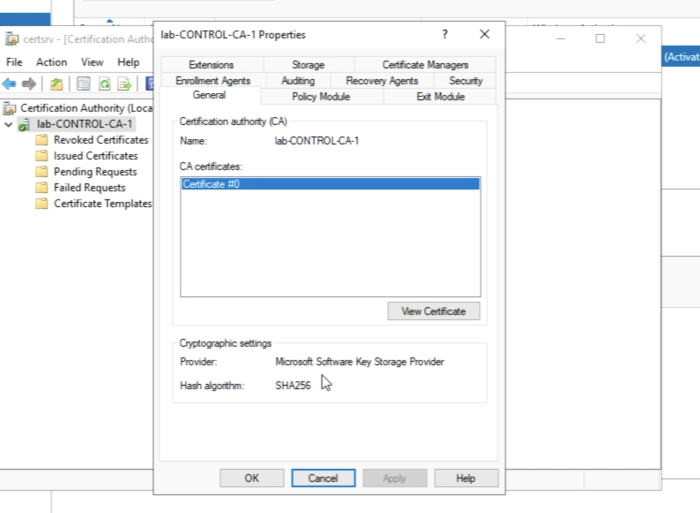
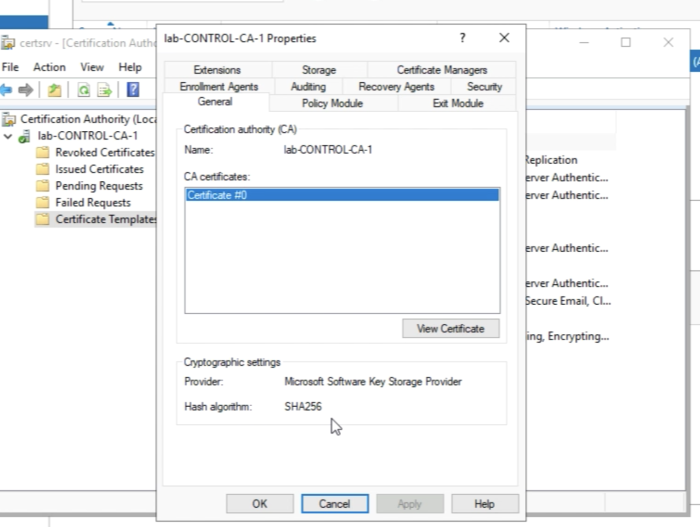
Make sure the hash algorithm is SHA256.
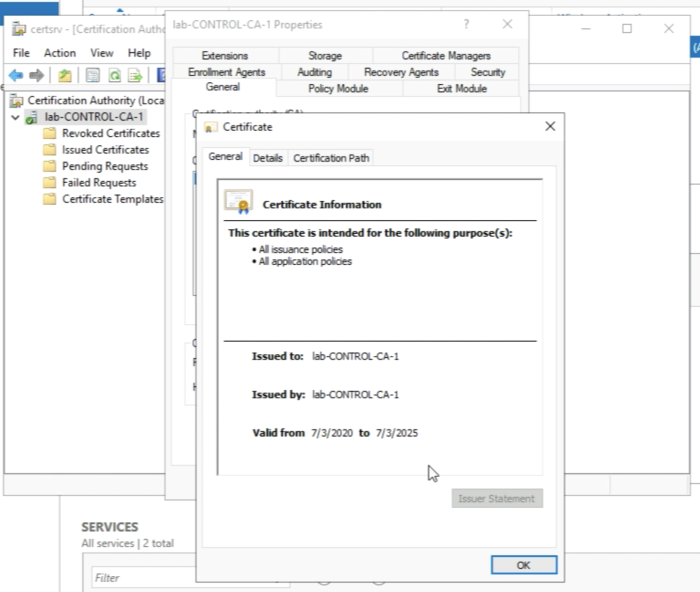
Click on “View Certificate”.
You will see the information on the Root Certificate of this CA Server.
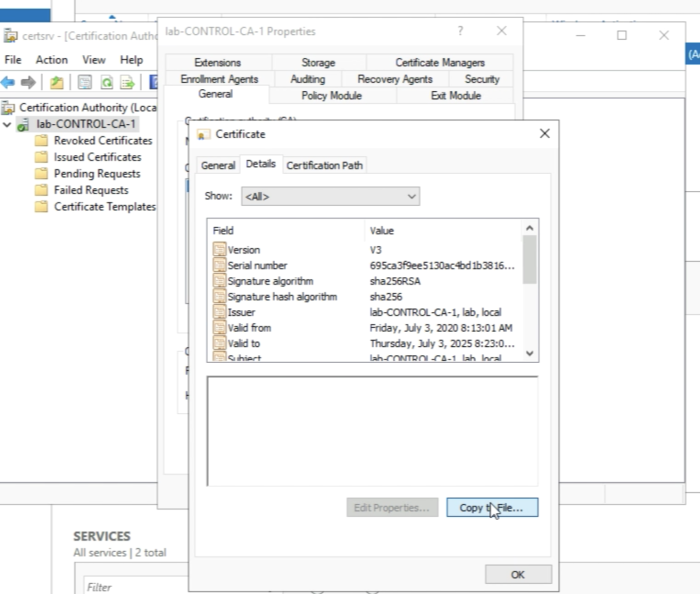
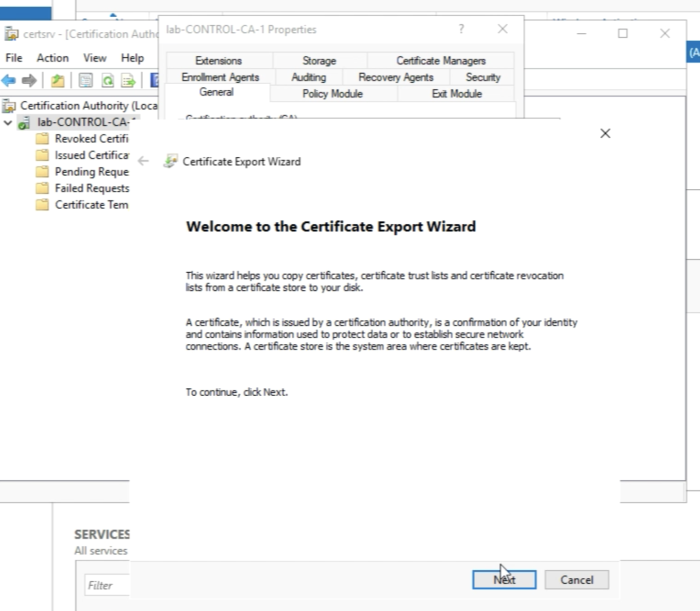
Click on the details. And click on “Copy to File” in order to export the Root Certificate to your Computer. You will need this later when you import the Root CA certificate and the signed NSX-T node certificates in NSX-T.
Click on Next.
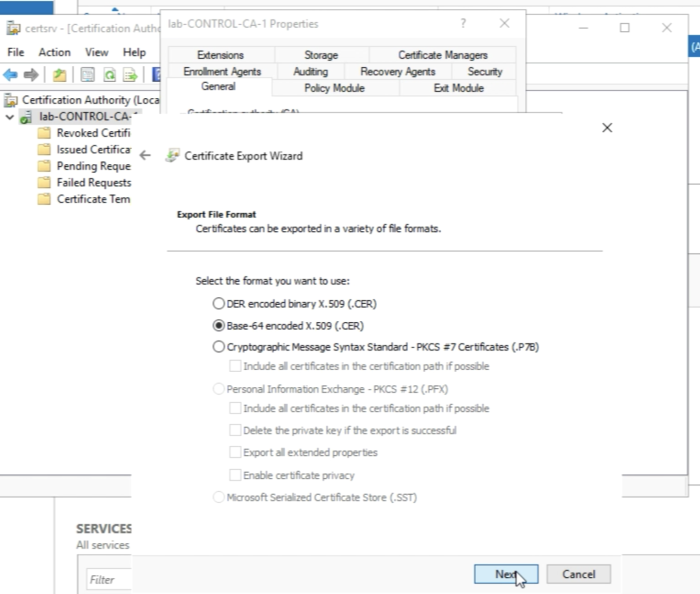
Select the “Base-64 encoded X.509 (.CER)" File Format for the export and click Next”
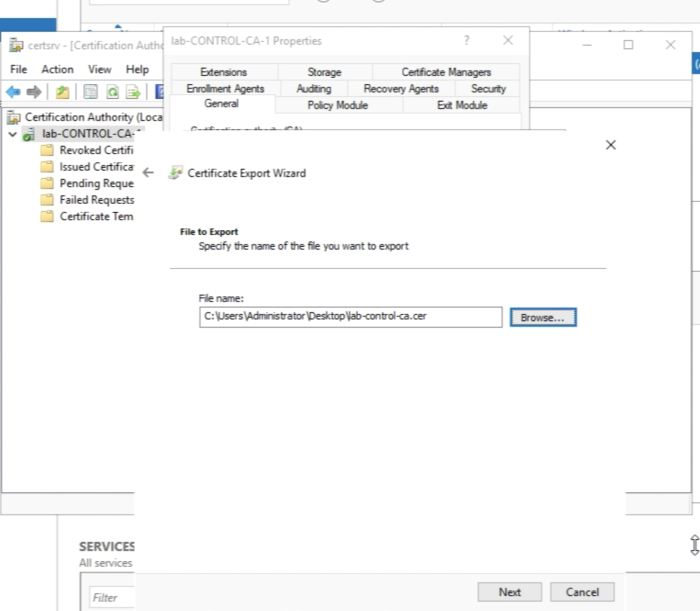
Specify a valid path that you want to export the files to.
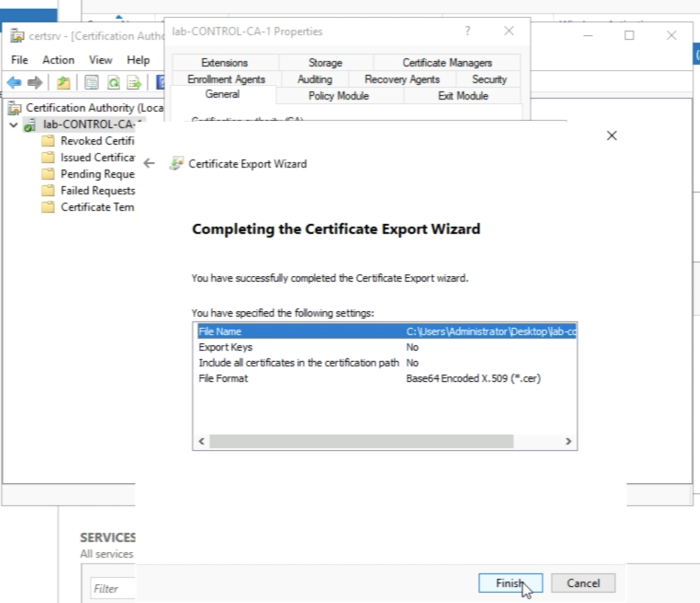
Click on Finish to complete the export of the Root Certificate files.
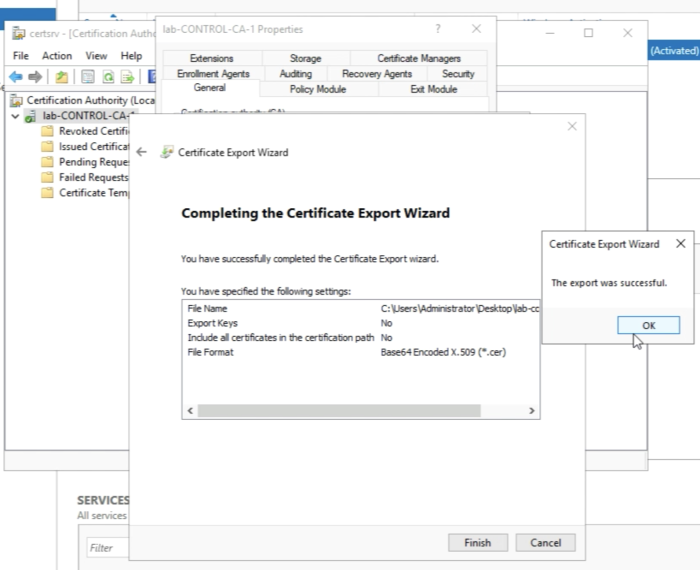
A message should pop up with that the export was successful. Click on OK to clone the message.
It’s always good practice to browse to the file and make sure it is really there.
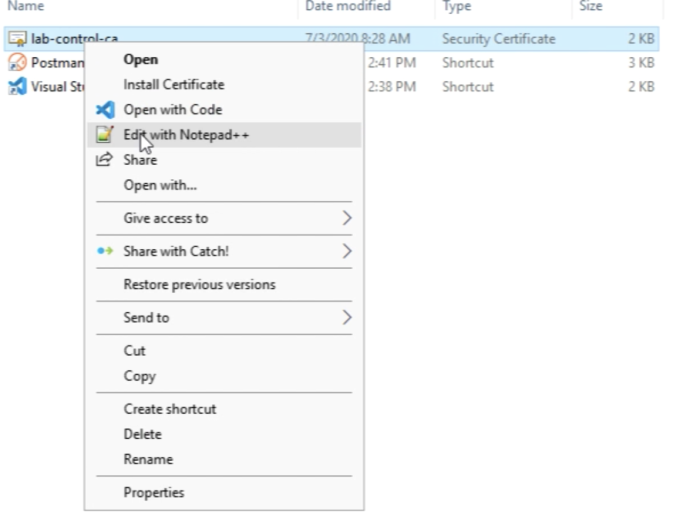
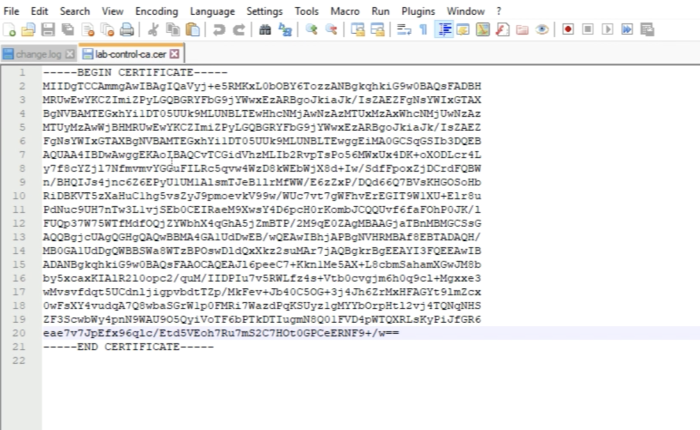
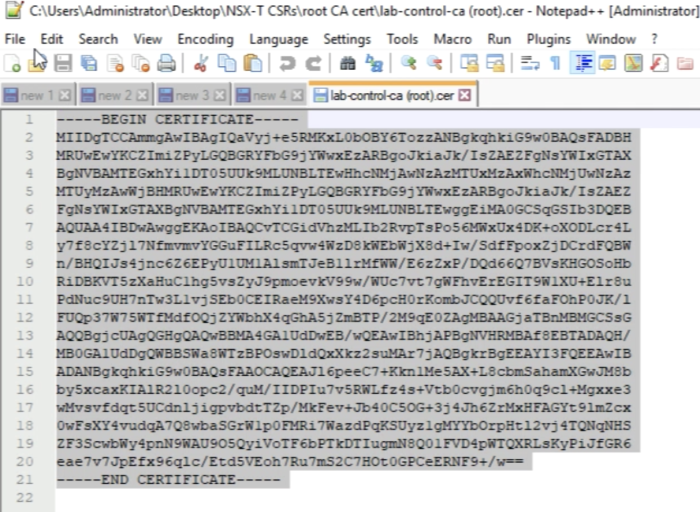
You can view the content as well, as I am doing here with Notepad++.
The content of the root certificate authority certificate is displayed below.
So now we have all the prerequisites in place to start with the next step.
STEP 2» Verification on the Microsoft CA Server
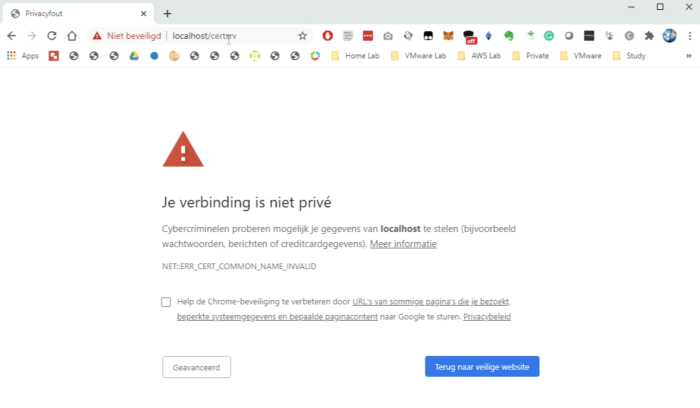
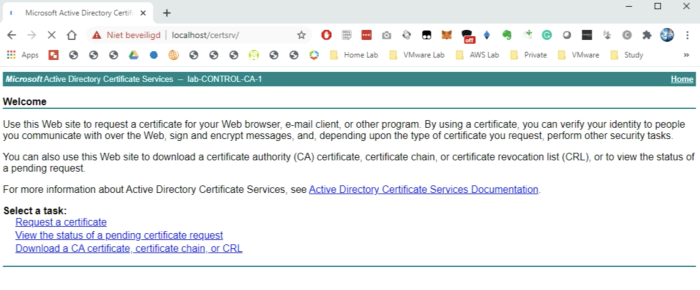
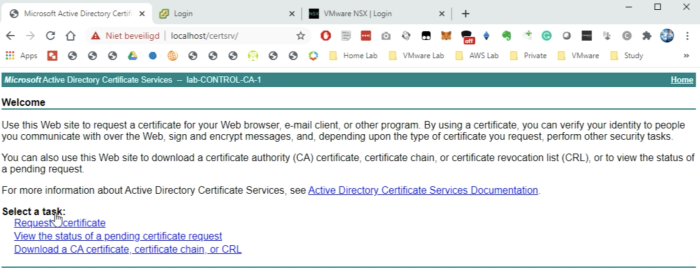
Now that the CA Server and its underlying role services we need to use the web browser and browse to the following URL:
https://localhost//certsrv
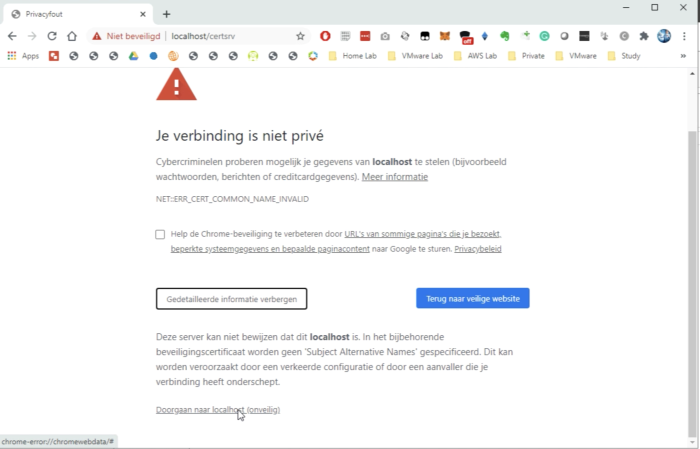
Do the additional actions to access the website, this is browser-specific, I am using Google Chrome as you can see.
This confirms we can use this (web) server to sign our Certificates with.
STEP 3» Preparing the Microsoft CA Server for NSX–T Certificate Signing
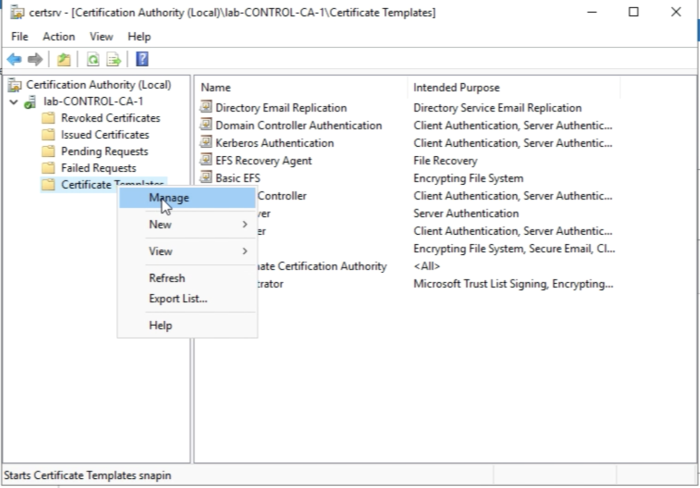
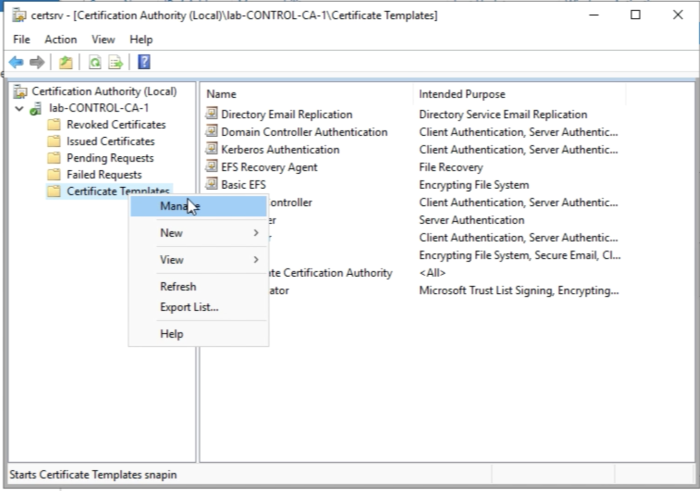
Before we start we need to create a new Certificate Template with some specific settings for the NSX-T Node CA-signed certificates. So let's open the Certification Authority Management Console again. Select Certificate Templates and right-click this and select "Manage".
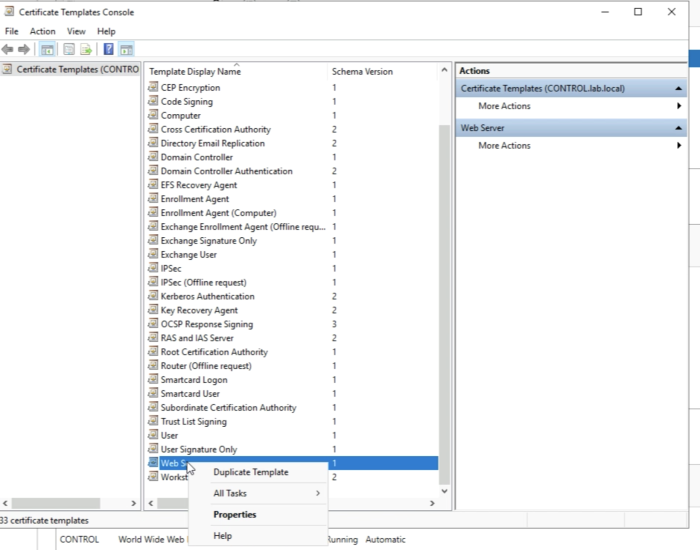
Select the “Web Server” Template and right-click and select "Duplicate Template”.
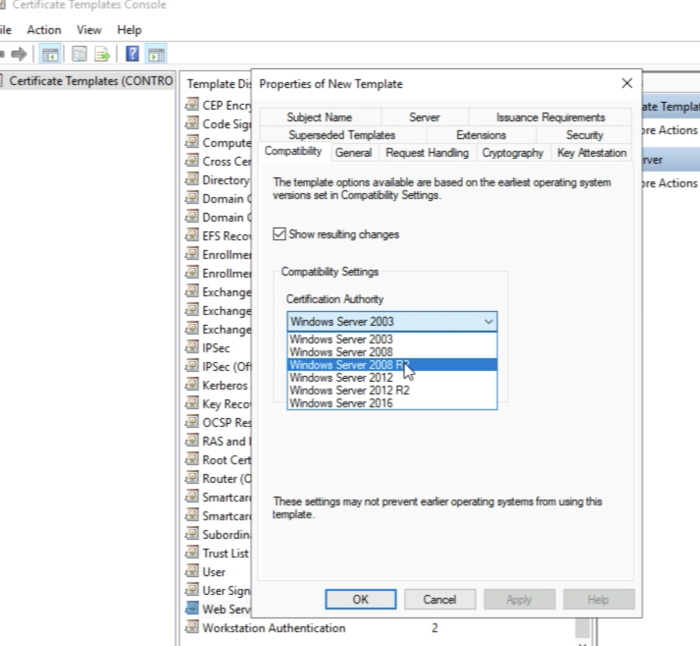
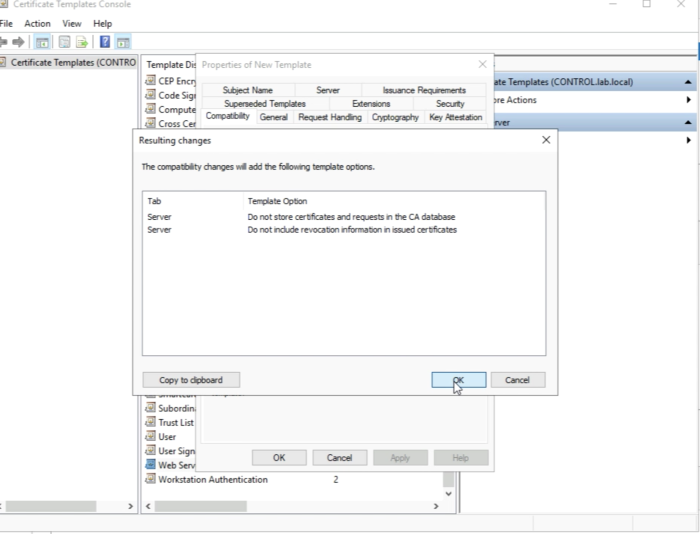
Go to the “Compatibility” tab and select "Windows Server 2008 R2" as the Certificate Authority Compatibility.
Just click ok on the pop-up window.
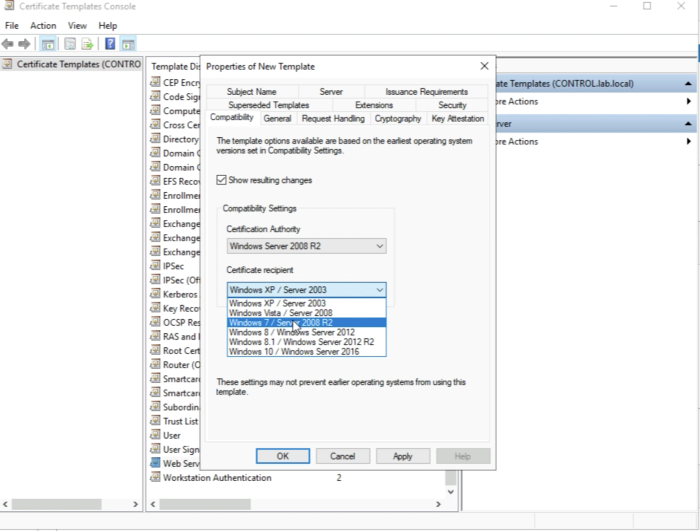
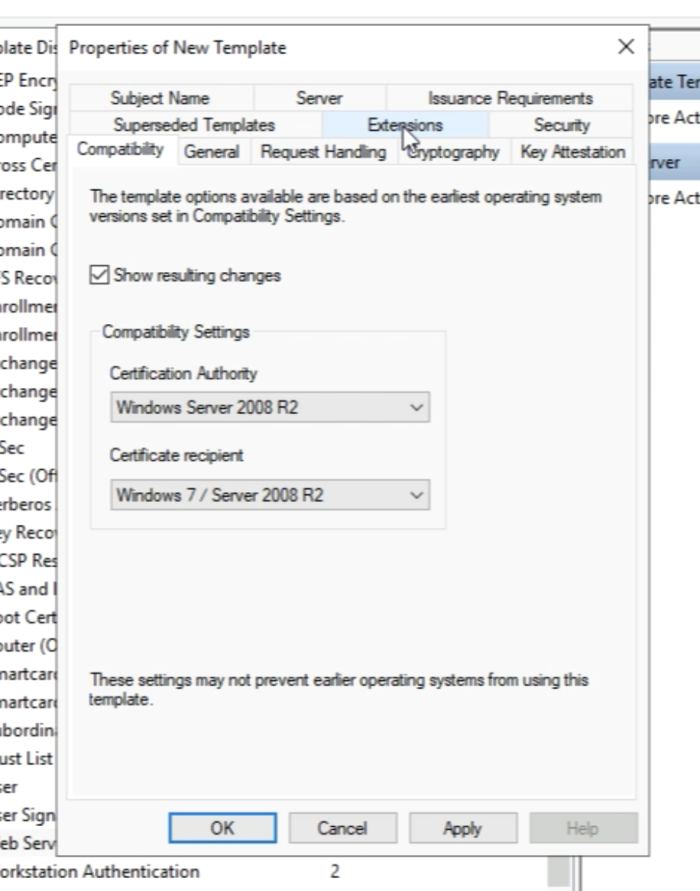
Select “Windows 7/Windows 2008 R2" as the "Certificate Recipient".
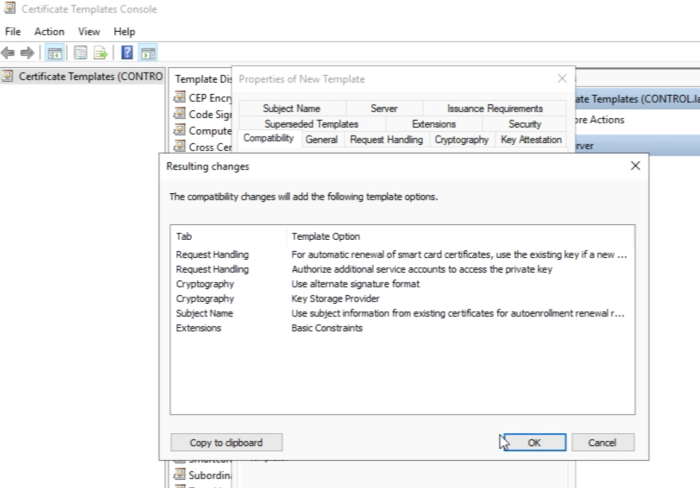
Just click ok on the pop-up window.
Go to the “Extensions” tab.
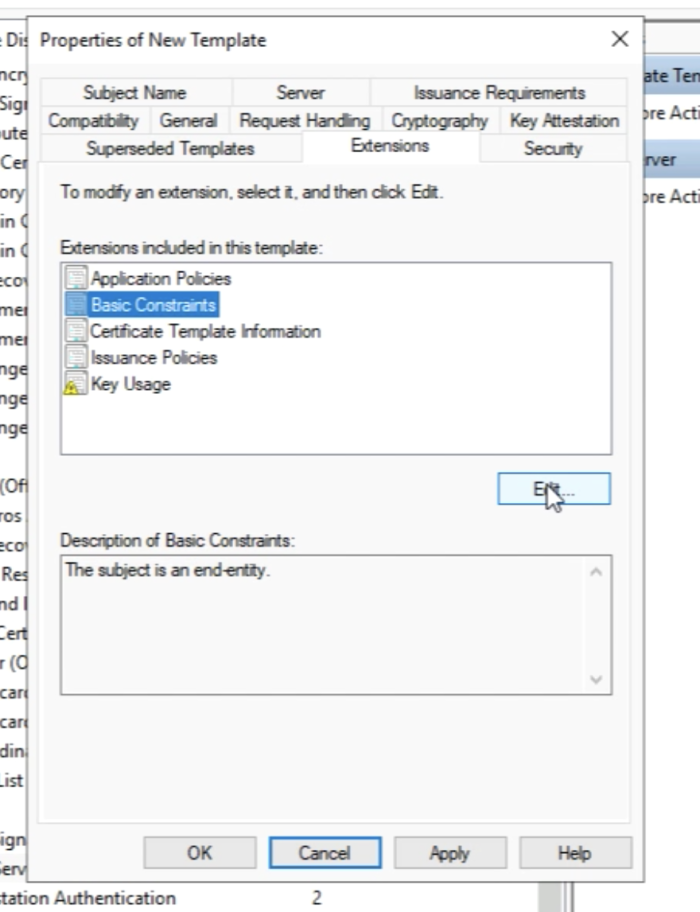
Select “Basic Constraints” and click on "Edit".
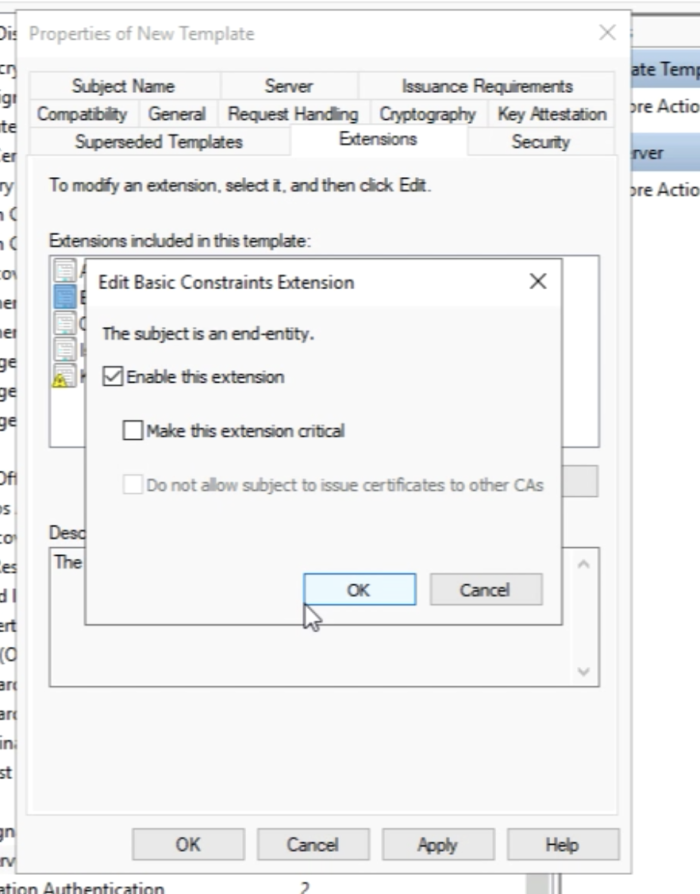
Make sure this extension is enabled by checking the box.
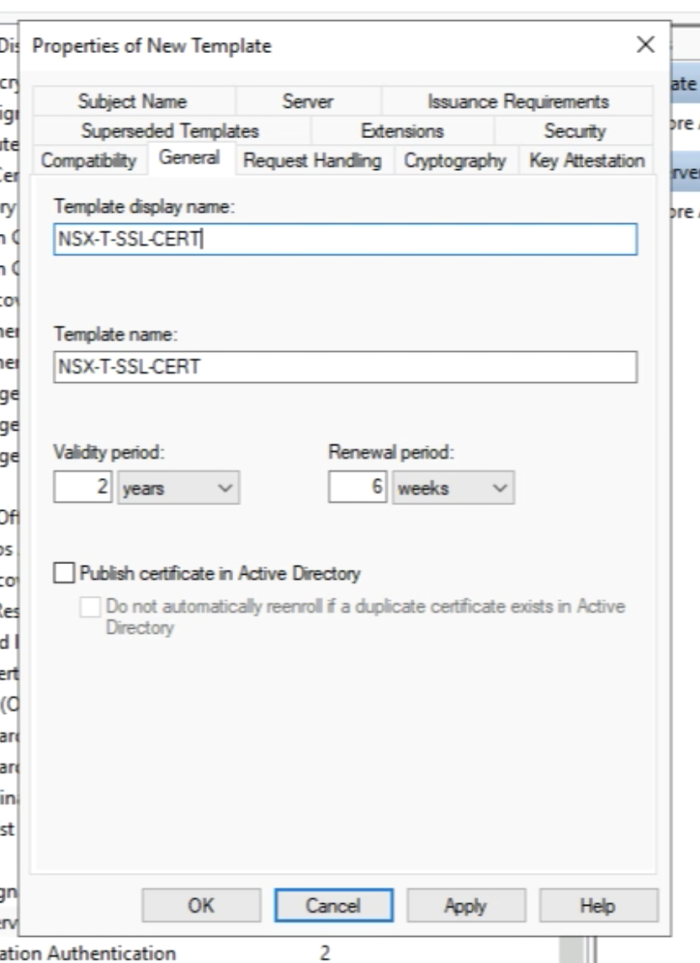
Go to the “General” tab and provide a new name for this cloned template. My name is NSX-T-SSL-CERT. Close the window with “OK”.
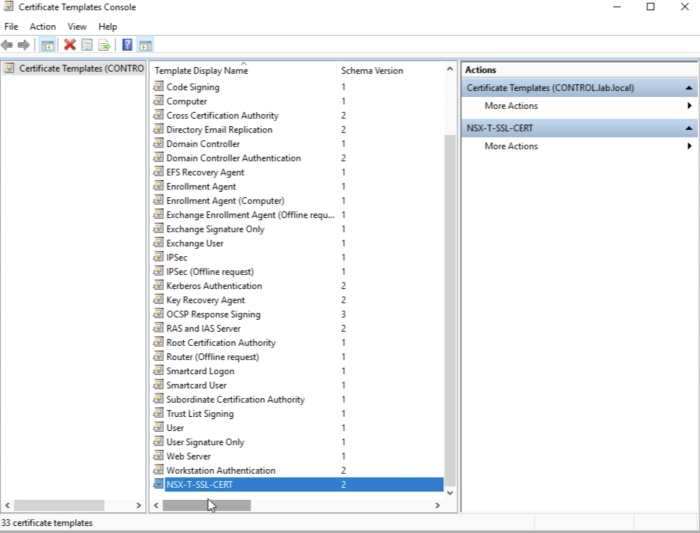
In the list of the Certificates Templates, you now see the new Template.
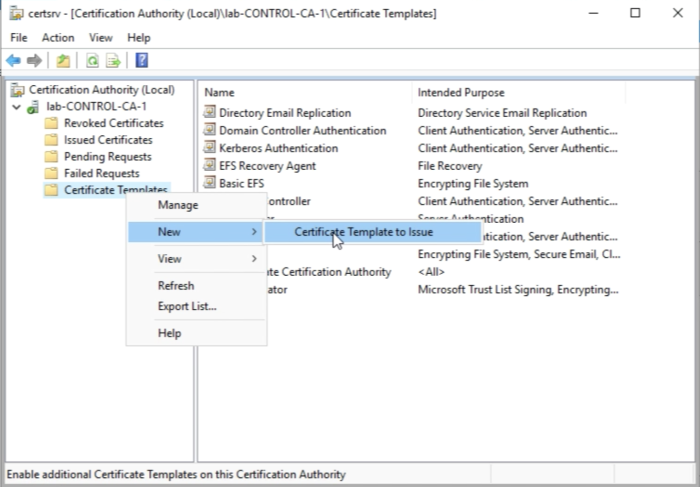
Select the Certificate Templates again and now select "New" and then "Certificate Template to Issue”.
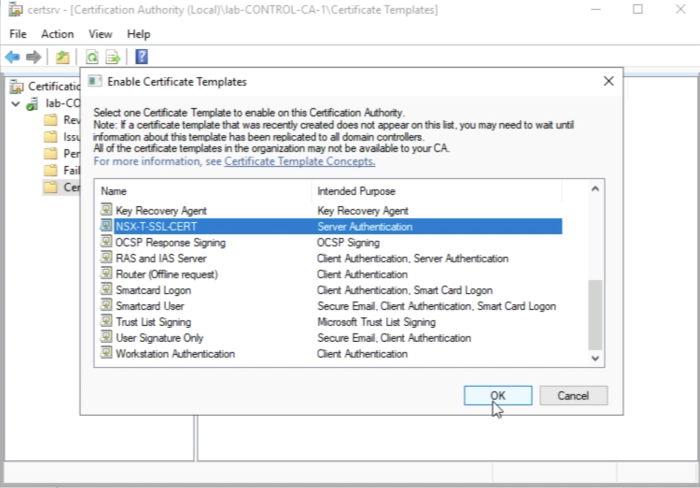
Select the template you just created "NSX-T-SSL-CERT" and click ok "OK".
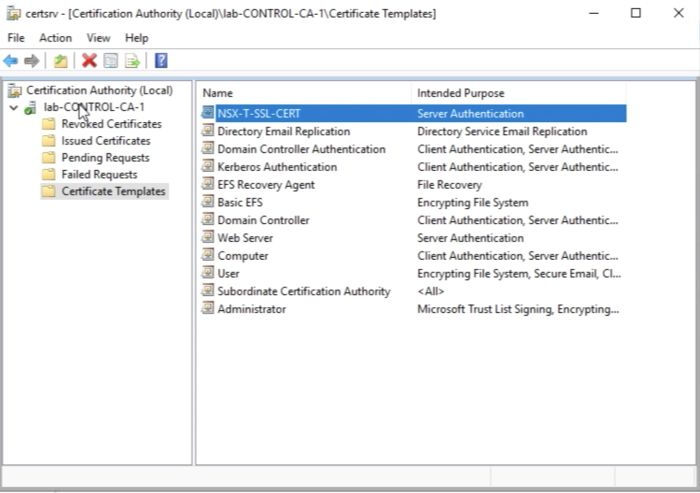
Now you see the new Template listed on the Certificate Templates list.
You need to make sure one more time that the hash algorithm is set to SHA256. Select the CA server and right-click and select "Properties"
Validate that that the hash algorithm is set to SHA256.
Now we have created a Certificate Template with the correct settings that we can use to sign our CSRs.
STEP 4» Create Certificate Signing Request 〈CSR〉 for the NSX–T FQDNs
In this example I am (ab)using me vCenter Server to create Certificate Signing Request for each FQDN we require in NSX-T.
You can also use another tool to generate your CSR's as long as your tool supports Subject Alternative Names (SAN) that is required for the VIP FQDN.
First, you log in to the vCenter Server.
The authenticity of host '10.203.230.5 (10.203.230.5)' can't be established.
ECDSA key fingerprint is SHA256:E076z5ftrnCpDe+S10uQpNPk7SHV4NFfwlVn0jB1zSs.
Are you sure you want to continue connecting (yes/no/[fingerprint])? yes
Warning: Permanently added '10.203.230.5' (ECDSA) to the list of known hosts.

VMware vCenter Server 7.0.0.10400

Type: vCenter Server with an embedded Platform Services Controller

root@10.203.230.5’s password:


Connected to service

    * List APIs: "help api list"
    * List Plugins: "help pi list"
    * Launch BASH: "shell"

Command>
Make sure you launch the BASH shell.
Command> shell
Shell access is granted to root
root@Pod-230-vCenter [ ~ ]#
Start the vCenter Server Certificate Manager.
root@Pod-230-vCenter [ ~ ]# /usr/lib/vmware-vmca/bin/certificate-manager
     _ _ _ _ _ _ _ _ _ _ _ _ _ _ _ _ _ _ _ _ _ _ _ _ _ _ _ _ _ _ _ _ _ _
    *                                                                   *
    *    *** Welcome to the vSphere 6.8 Certificate Manager  ***        *
    *                                                                   *
    *                 -- Select Operation --                            *
    *                                                                   *
    *    1. Replace Machine SSL certificate with Custom Certificate     *
    *                                                                   *
    *    2. Replace VMCA Root certificate with Custom Signing           *
    *       Certificate and replace all Certificates                    *
    *                                                                   *
    *    3. Replace Machine SSL certificate with VMCA Certificate       *
    *                                                                   *
    *    4. Regenerate a new VMCA Root Certificate and                  *
    *       replace all certificates                                    *
    *                                                                   *
    *    5. Replace Solution user certificates with                     *
    *       Custom Certificate                                          *
    *       NOTE: Solution user certs will be deprecated in a future    *
    *       release of vCenter. Refer to release notes for more details.*
    *                                                                   *
    *    6. Replace Solution user certificates with VMCA certificates   *
    *                                                                   *
    *    7. Revert last performed operation by re-publishing old        *
    *       certificates                                                *
    *                                                                   *
    *    8. Reset all Certificates                                      *
    *_ _ _ _ _ _ _ _ _ _ _ _ _ _ _ _ _ _ _ _ _ _ _ _ _ _ _ _ _ _ _ _ _ _*
Note : Use Ctrl-D to exit.
Option[1 to 8]: 1

Please provide valid SSO and VC privileged user credential to perform certificate operations.
Enter username [Administrator@vsphere.local]:
Enter password:
   1. Generate Certificate Signing Request(s) and Key(s) for Machine SSL certificate

   2. Import custom certificate(s) and key(s) to replace existing Machine SSL certificate

Option [1 or 2]: 1

Please provide a directory location to write the CSR(s) and PrivateKey(s) to:
Output directory path: /var/tmp/vmware/pod-230-nsxt-lm

Error in output directory path

Please see  log file at /var/log/vmware/vmcad/certificate-manager.log for more information
Notice that I wanted to generate a CSR to a path that does not exist. In order to keep things clean and structured, I am going to create a separate directory for each FQDN I want to generate a CSR for.
root@Pod-230-vCenter [ ~ ]# cd /var/tmp/vmware/
root@Pod-230-vCenter [ /var/tmp/vmware ]# mkdir pod-230-nsxt-lm1
root@Pod-230-vCenter [ /var/tmp/vmware ]# mkdir pod-230-nsxt-lm2
root@Pod-230-vCenter [ /var/tmp/vmware ]# mkdir pod-230-nsxt-lm3
root@Pod-230-vCenter [ /var/tmp/vmware ]# mkdir pod-230-nsxt-lm-vip
Now let’s start the generation of our first CSR. Use the following details the generate all the CSRs for all the FQDNs you require:
| NSX-T Manager Node | Output directory path | Country | Name | Organization | OrgUnit | State | Locality | IPAddress | Hostname | |
|---|---|---|---|---|---|---|---|---|---|---|
| pod-230-nsxt-lm1 | /var/tmp/vmware/pod-230-nsxt-lm1 | NL | CA | VMware | VMware PSO | Zuid Holland | Rotterdam | 10.203.230.8 | myemail@vmware.com | pod-230-nsxt-lm1.lab.local |
| pod-230-nsxt-lm2 | /var/tmp/vmware/pod-230-nsxt-lm2 | NL | CA | VMware | VMware PSO | Zuid Holland | Rotterdam | 10.203.230.9 | myemail@vmware.com | pod-230-nsxt-lm2.lab.local |
| pod-230-nsxt-lm3 | /var/tmp/vmware/pod-230-nsxt-lm3 | NL | CA | VMware | VMware PSO | Zuid Holland | Rotterdam | 10.203.230.10 | myemail@vmware.com | pod-230-nsxt-lm3.lab.local |
| pod-230-nsxt-lm-vip | /var/tmp/vmware/pod-230-nsxt-lm-vip | NL | CA | VMware | VMware PSO | Zuid Holland | Rotterdam | 10.203.230.7 | myemail@vmware.com | pod-230-nsxt-lm-vip.lab.local pod-230-nsxt-lm1.lab.local pod-230-nsxt-lm2.lab.local pod-230-nsxt-lm3.lab.local |
This is the CSR Generating output for "pod-230-nsxt-lm1.lab.local"
CLICK ON EXPAND ===> ON THE RIGHT ===> TO SEE THE OUTPUT ===> :
root@Pod-230-vCenter [ ~ ]# /usr/lib/vmware-vmca/bin/certificate-manager
     _ _ _ _ _ _ _ _ _ _ _ _ _ _ _ _ _ _ _ _ _ _ _ _ _ _ _ _ _ _ _ _ _ _
    *                                                                   *
    *    *** Welcome to the vSphere 6.8 Certificate Manager  ***        *
    *                                                                   *
    *                 -- Select Operation --                            *
    *                                                                   *
    *    1. Replace Machine SSL certificate with Custom Certificate     *
    *                                                                   *
    *    2. Replace VMCA Root certificate with Custom Signing           *
    *       Certificate and replace all Certificates                    *
    *                                                                   *
    *    3. Replace Machine SSL certificate with VMCA Certificate       *
    *                                                                   *
    *    4. Regenerate a new VMCA Root Certificate and                  *
    *       replace all certificates                                    *
    *                                                                   *
    *    5. Replace Solution user certificates with                     *
    *       Custom Certificate                                          *
    *       NOTE: Solution user certs will be deprecated in a future    *
    *       release of vCenter. Refer to release notes for more details.*
    *                                                                   *
    *    6. Replace Solution user certificates with VMCA certificates   *
    *                                                                   *
    *    7. Revert last performed operation by re-publishing old        *
    *       certificates                                                *
    *                                                                   *
    *    8. Reset all Certificates                                      *
    *_ _ _ _ _ _ _ _ _ _ _ _ _ _ _ _ _ _ _ _ _ _ _ _ _ _ _ _ _ _ _ _ _ _*
Note : Use Ctrl-D to exit.
Option[1 to 8]: 1

Please provide valid SSO and VC privileged user credential to perform certificate operations.
Enter username [Administrator@vsphere.local]:
Enter password:
   1. Generate Certificate Signing Request(s) and Key(s) for Machine SSL certificate

   2. Import custom certificate(s) and key(s) to replace existing Machine SSL certificate

Option [1 or 2]: 1

Please provide a directory location to write the CSR(s) and PrivateKey(s) to:
Output directory path: /var/tmp/vmware/pod-230-nsxt-lm1

Please configure certool.cfg with proper values before proceeding to next step.

Press Enter key to skip optional parameters or use Default value.

Enter proper value for 'Country' [Default value : US] : NL

Enter proper value for 'Name' [Default value : CA] :

Enter proper value for 'Organization' [Default value : VMware] :

Enter proper value for 'OrgUnit' [Default value : VMware Engineering] : VMware PSO

Enter proper value for 'State' [Default value : California] : Zuid Holland

Enter proper value for 'Locality' [Default value : Palo Alto] : Rotterdam

Enter proper value for 'IPAddress' (Provide comma separated values for multiple IP addresses) [optional] : 10.203.230.8

Enter proper value for 'Email' [Default value : email@acme.com] : myemail@vmware.com

Enter proper value for 'Hostname' (Provide comma separated values for multiple Hostname entries) [Enter valid Fully Qualified Domain Name(FQDN), For Example : example.domain.com] : pod-230-nsxt-lm1.lab.local

Enter proper value for VMCA 'Name' :pod-230-nsxt-lm1
2020-08-16T06:05:30.959Z  Running command: ['/usr/lib/vmware-vmca/bin/certool', '--genkey', '--privkey', '/var/tmp/vmware/pod-230-nsxt-lm1/vmca_issued_key.key', '--pubkey', '/tmp/pubkey.pub']
2020-08-16T06:05:31.280Z  Done running command
2020-08-16T06:05:31.282Z  Running command: ['/usr/lib/vmware-vmca/bin/certool', '--gencsr', '--privkey', '/var/tmp/vmware/pod-230-nsxt-lm1/vmca_issued_key.key', '--pubkey', '/tmp/pubkey.pub', '--config', '/var/tmp/vmware/certool.cfg', '--csrfile', '/var/tmp/vmware/pod-230-nsxt-lm1/vmca_issued_csr.csr']
2020-08-16T06:05:32.437Z  Done running command

CSR generated at: /var/tmp/vmware/pod-230-nsxt-lm1/vmca_issued_csr.csr
   1. Continue to importing Custom certificate(s) and key(s) for Machine SSL certificate

   2. Exit certificate-manager

Option [1 or 2]: 2
root@Pod-240-vCenter [ ~ ]#
This is the CSR Generating output for "pod-230-nsxt-lm2.lab.local"
CLICK ON EXPAND ===> ON THE RIGHT ===> TO SEE THE OUTPUT ===> :
root@Pod-230-vCenter [ ~ ]# /usr/lib/vmware-vmca/bin/certificate-manager
     _ _ _ _ _ _ _ _ _ _ _ _ _ _ _ _ _ _ _ _ _ _ _ _ _ _ _ _ _ _ _ _ _ _
    *                                                                   *
    *    *** Welcome to the vSphere 6.8 Certificate Manager  ***        *
    *                                                                   *
    *                 -- Select Operation --                            *
    *                                                                   *
    *    1. Replace Machine SSL certificate with Custom Certificate     *
    *                                                                   *
    *    2. Replace VMCA Root certificate with Custom Signing           *
    *       Certificate and replace all Certificates                    *
    *                                                                   *
    *    3. Replace Machine SSL certificate with VMCA Certificate       *
    *                                                                   *
    *    4. Regenerate a new VMCA Root Certificate and                  *
    *       replace all certificates                                    *
    *                                                                   *
    *    5. Replace Solution user certificates with                     *
    *       Custom Certificate                                          *
    *       NOTE: Solution user certs will be deprecated in a future    *
    *       release of vCenter. Refer to release notes for more details.*
    *                                                                   *
    *    6. Replace Solution user certificates with VMCA certificates   *
    *                                                                   *
    *    7. Revert last performed operation by re-publishing old        *
    *       certificates                                                *
    *                                                                   *
    *    8. Reset all Certificates                                      *
    *_ _ _ _ _ _ _ _ _ _ _ _ _ _ _ _ _ _ _ _ _ _ _ _ _ _ _ _ _ _ _ _ _ _*
Note : Use Ctrl-D to exit.
Option[1 to 8]: 1

Please provide valid SSO and VC privileged user credential to perform certificate operations.
Enter username [Administrator@vsphere.local]:
Enter password:
   1. Generate Certificate Signing Request(s) and Key(s) for Machine SSL certificate

   2. Import custom certificate(s) and key(s) to replace existing Machine SSL certificate

Option [1 or 2]: 1

Please provide a directory location to write the CSR(s) and PrivateKey(s) to:
Output directory path: /var/tmp/vmware/pod-230-nsxt-lm2

Please configure certool.cfg with proper values before proceeding to next step.

Press Enter key to skip optional parameters or use Default value.

Enter proper value for 'Country' [Default value : US] : NL

Enter proper value for 'Name' [Default value : CA] :

Enter proper value for 'Organization' [Default value : VMware] :

Enter proper value for 'OrgUnit' [Default value : VMware Engineering] : VMware PSO

Enter proper value for 'State' [Default value : California] : Zuid Holland

Enter proper value for 'Locality' [Default value : Palo Alto] : Rotterdam

Enter proper value for 'IPAddress' (Provide comma separated values for multiple IP addresses) [optional] : 10.203.230.9

Enter proper value for 'Email' [Default value : email@acme.com] : myemail@vmware.com

Enter proper value for 'Hostname' (Provide comma separated values for multiple Hostname entries) [Enter valid Fully Qualified Domain Name(FQDN), For Example : example.domain.com] : pod-230-nsxt-lm2.lab.local

Enter proper value for VMCA 'Name' :pod-230-nsxt-lm2
2020-08-16T06:05:30.959Z  Running command: ['/usr/lib/vmware-vmca/bin/certool', '--genkey', '--privkey', '/var/tmp/vmware/pod-230-nsxt-lm2/vmca_issued_key.key', '--pubkey', '/tmp/pubkey.pub']
2020-08-16T06:05:31.280Z  Done running command
2020-08-16T06:05:31.282Z  Running command: ['/usr/lib/vmware-vmca/bin/certool', '--gencsr', '--privkey', '/var/tmp/vmware/pod-230-nsxt-lm2/vmca_issued_key.key', '--pubkey', '/tmp/pubkey.pub', '--config', '/var/tmp/vmware/certool.cfg', '--csrfile', '/var/tmp/vmware/pod-230-nsxt-lm2/vmca_issued_csr.csr']
2020-08-16T06:05:32.437Z  Done running command

CSR generated at: /var/tmp/vmware/pod-230-nsxt-lm2/vmca_issued_csr.csr
   1. Continue to importing Custom certificate(s) and key(s) for Machine SSL certificate

   2. Exit certificate-manager

Option [1 or 2]: 2
root@Pod-240-vCenter [ ~ ]#
This is the CSR Generating output for "pod-230-nsxt-lm3.lab.local"
CLICK ON EXPAND ===> ON THE RIGHT ===> TO SEE THE OUTPUT ===> :
root@Pod-230-vCenter [ ~ ]# /usr/lib/vmware-vmca/bin/certificate-manager
     _ _ _ _ _ _ _ _ _ _ _ _ _ _ _ _ _ _ _ _ _ _ _ _ _ _ _ _ _ _ _ _ _ _
    *                                                                   *
    *    *** Welcome to the vSphere 6.8 Certificate Manager  ***        *
    *                                                                   *
    *                 -- Select Operation --                            *
    *                                                                   *
    *    1. Replace Machine SSL certificate with Custom Certificate     *
    *                                                                   *
    *    2. Replace VMCA Root certificate with Custom Signing           *
    *       Certificate and replace all Certificates                    *
    *                                                                   *
    *    3. Replace Machine SSL certificate with VMCA Certificate       *
    *                                                                   *
    *    4. Regenerate a new VMCA Root Certificate and                  *
    *       replace all certificates                                    *
    *                                                                   *
    *    5. Replace Solution user certificates with                     *
    *       Custom Certificate                                          *
    *       NOTE: Solution user certs will be deprecated in a future    *
    *       release of vCenter. Refer to release notes for more details.*
    *                                                                   *
    *    6. Replace Solution user certificates with VMCA certificates   *
    *                                                                   *
    *    7. Revert last performed operation by re-publishing old        *
    *       certificates                                                *
    *                                                                   *
    *    8. Reset all Certificates                                      *
    *_ _ _ _ _ _ _ _ _ _ _ _ _ _ _ _ _ _ _ _ _ _ _ _ _ _ _ _ _ _ _ _ _ _*
Note : Use Ctrl-D to exit.
Option[1 to 8]: 1

Please provide valid SSO and VC privileged user credential to perform certificate operations.
Enter username [Administrator@vsphere.local]:
Enter password:
   1. Generate Certificate Signing Request(s) and Key(s) for Machine SSL certificate

   2. Import custom certificate(s) and key(s) to replace existing Machine SSL certificate

Option [1 or 2]: 1

Please provide a directory location to write the CSR(s) and PrivateKey(s) to:
Output directory path: /var/tmp/vmware/pod-230-nsxt-lm3

Please configure certool.cfg with proper values before proceeding to next step.

Press Enter key to skip optional parameters or use Default value.

Enter proper value for 'Country' [Default value : US] : NL

Enter proper value for 'Name' [Default value : CA] :

Enter proper value for 'Organization' [Default value : VMware] :

Enter proper value for 'OrgUnit' [Default value : VMware Engineering] : VMware PSO

Enter proper value for 'State' [Default value : California] : Zuid Holland

Enter proper value for 'Locality' [Default value : Palo Alto] : Rotterdam

Enter proper value for 'IPAddress' (Provide comma separated values for multiple IP addresses) [optional] : 10.203.230.10

Enter proper value for 'Email' [Default value : email@acme.com] : myemail@vmware.com

Enter proper value for 'Hostname' (Provide comma separated values for multiple Hostname entries) [Enter valid Fully Qualified Domain Name(FQDN), For Example : example.domain.com] : pod-230-nsxt-lm3.lab.local

Enter proper value for VMCA 'Name' :pod-230-nsxt-lm3
2020-08-16T06:05:30.959Z  Running command: ['/usr/lib/vmware-vmca/bin/certool', '--genkey', '--privkey', '/var/tmp/vmware/pod-230-nsxt-lm3/vmca_issued_key.key', '--pubkey', '/tmp/pubkey.pub']
2020-08-16T06:05:31.280Z  Done running command
2020-08-16T06:05:31.282Z  Running command: ['/usr/lib/vmware-vmca/bin/certool', '--gencsr', '--privkey', '/var/tmp/vmware/pod-230-nsxt-lm3/vmca_issued_key.key', '--pubkey', '/tmp/pubkey.pub', '--config', '/var/tmp/vmware/certool.cfg', '--csrfile', '/var/tmp/vmware/pod-230-nsxt-lm3/vmca_issued_csr.csr']
2020-08-16T06:05:32.437Z  Done running command

CSR generated at: /var/tmp/vmware/pod-230-nsxt-lm3/vmca_issued_csr.csr
   1. Continue to importing Custom certificate(s) and key(s) for Machine SSL certificate

   2. Exit certificate-manager

Option [1 or 2]: 2
root@Pod-240-vCenter [ ~ ]#
This is the CSR Generating output for "pod-230-nsxt-lm-vip.lab.local"
The VIP FQDN CSR uses Subject Alternative Names (SAN) and this is different to the previously generated CSRs
CLICK ON EXPAND ===> ON THE RIGHT ===> TO SEE THE OUTPUT ===> :
root@Pod-230-vCenter [ ~ ]# /usr/lib/vmware-vmca/bin/certificate-manager
     _ _ _ _ _ _ _ _ _ _ _ _ _ _ _ _ _ _ _ _ _ _ _ _ _ _ _ _ _ _ _ _ _ _
    *                                                                   *
    *    *** Welcome to the vSphere 6.8 Certificate Manager  ***        *
    *                                                                   *
    *                 -- Select Operation --                            *
    *                                                                   *
    *    1. Replace Machine SSL certificate with Custom Certificate     *
    *                                                                   *
    *    2. Replace VMCA Root certificate with Custom Signing           *
    *       Certificate and replace all Certificates                    *
    *                                                                   *
    *    3. Replace Machine SSL certificate with VMCA Certificate       *
    *                                                                   *
    *    4. Regenerate a new VMCA Root Certificate and                  *
    *       replace all certificates                                    *
    *                                                                   *
    *    5. Replace Solution user certificates with                     *
    *       Custom Certificate                                          *
    *       NOTE: Solution user certs will be deprecated in a future    *
    *       release of vCenter. Refer to release notes for more details.*
    *                                                                   *
    *    6. Replace Solution user certificates with VMCA certificates   *
    *                                                                   *
    *    7. Revert last performed operation by re-publishing old        *
    *       certificates                                                *
    *                                                                   *
    *    8. Reset all Certificates                                      *
    *_ _ _ _ _ _ _ _ _ _ _ _ _ _ _ _ _ _ _ _ _ _ _ _ _ _ _ _ _ _ _ _ _ _*
Note : Use Ctrl-D to exit.
Option[1 to 8]: 1

Please provide valid SSO and VC privileged user credential to perform certificate operations.
Enter username [Administrator@vsphere.local]:
Enter password:
   1. Generate Certificate Signing Request(s) and Key(s) for Machine SSL certificate

   2. Import custom certificate(s) and key(s) to replace existing Machine SSL certificate

Option [1 or 2]: 1

Please provide a directory location to write the CSR(s) and PrivateKey(s) to:
Output directory path: /var/tmp/vmware/pod-230-nsxt-lm-vip

Please configure certool.cfg with proper values before proceeding to next step.

Press Enter key to skip optional parameters or use Default value.

Enter proper value for 'Country' [Default value : US] : NL

Enter proper value for 'Name' [Default value : CA] :

Enter proper value for 'Organization' [Default value : VMware] :

Enter proper value for 'OrgUnit' [Default value : VMware Engineering] : VMware PSO

Enter proper value for 'State' [Default value : California] : Zuid Holland

Enter proper value for 'Locality' [Default value : Palo Alto] : Rotterdam

Enter proper value for 'IPAddress' (Provide comma separated values for multiple IP addresses) [optional] : 10.203.230.7

Enter proper value for 'Email' [Default value : email@acme.com] : myemail@vmware.com

Enter proper value for 'Hostname' (Provide comma separated values for multiple Hostname entries) [Enter valid Fully Qualified Domain Name(FQDN), For Example : example.domain.com] : pod-230-nsxt-lm-vip.lab.local pod-230-nsxt-lm1.lab.local pod-230-nsxt-lm2.lab.local pod-230-nsxt-lm3.lab.local

Enter proper value for VMCA 'Name' :pod-230-nsxt-lm-vip
2020-08-16T06:05:30.959Z  Running command: ['/usr/lib/vmware-vmca/bin/certool', '--genkey', '--privkey', '/var/tmp/vmware/pod-230-nsxt-lm-vip/vmca_issued_key.key', '--pubkey', '/tmp/pubkey.pub']
2020-08-16T06:05:31.280Z  Done running command
2020-08-16T06:05:31.282Z  Running command: ['/usr/lib/vmware-vmca/bin/certool', '--gencsr', '--privkey', '/var/tmp/vmware/pod-230-nsxt-lm-vip/vmca_issued_key.key', '--pubkey', '/tmp/pubkey.pub', '--config', '/var/tmp/vmware/certool.cfg', '--csrfile', '/var/tmp/vmware/pod-230-nsxt-lm-vip/vmca_issued_csr.csr']
2020-08-16T06:05:32.437Z  Done running command

CSR generated at: /var/tmp/vmware/pod-230-nsxt-lm-vip/vmca_issued_csr.csr
   1. Continue to importing Custom certificate(s) and key(s) for Machine SSL certificate

   2. Exit certificate-manager

Option [1 or 2]: 2
root@Pod-240-vCenter [ ~ ]#
Now that all the CSRs are generated lets to a quick check if they are really there.
root@Pod-240-vCenter [ ~ ]# cd /var/tmp/vmware/
root@Pod-240-vCenter [ /var/tmp/vmware ]# ls -l
total 100
drwxr-xr-x 3 root root 4096 Aug  6 22:51 analytics
-rw-r--r-- 1 root root  203 Aug 16 06:05 certool.cfg
drwxr-xr-x 3 root root 4096 Aug  6 22:51 cis-license
drwxr-xr-x 3 eam  root 4096 Aug  6 22:55 eam
-rw-r--r-- 1 root root  241 Aug 16 06:05 hvc.cfg
-rw-r--r-- 1 root root  245 Aug 16 06:05 machine.cfg
-rw-r--r-- 1 root root  225 Aug 16 06:05 MACHINE_SSL_CERT.cfg
-rw------- 1 root root 1473 Aug 16 06:00 old_machine_ssl.crt
drwxr-xr-x 2 root root 4096 Aug 16 06:05 pod-230-nsxt-lm1
drwxr-xr-x 2 root root 4096 Aug 16 05:59 pod-230-nsxt-lm2
drwxr-xr-x 2 root root 4096 Aug 16 05:59 pod-230-nsxt-lm3
-rw-r--r-- 1 root root  104 Aug 16 06:05 root.cfg
-rw-r--r-- 1 root root 1506 Aug  6 22:55 tmp24v6efrh
-rw------- 1 root root 1506 Aug  6 22:55 tmp755um1mj
-rw------- 1 root root 1473 Aug  6 22:55 tmpa4vd8mkx
-rw------- 1 root root 1595 Aug  6 22:59 tmpny4hffel
-rw------- 1 root root 1595 Aug  6 22:55 tmpsieshzoz
-rw------- 1 root root 1705 Aug  6 22:59 tmpsqul8kjb
-rw------- 1 root root 1595 Aug  6 22:58 tmpsxbh6427
-rw------- 1 root root 1705 Aug  6 22:58 tmpveqb1z4q
-rw------- 1 root root 1705 Aug  6 22:55 tmpy_74bryf
-rw-r--r-- 1 root root  242 Aug 16 06:05 vpxd.cfg
-rw-r--r-- 1 root root  252 Aug 16 06:05 vpxd-extension.cfg
-rw-r--r-- 1 root root  255 Aug 16 06:05 vsphere-webclient.cfg
-rw-r--r-- 1 root root  203 Aug 16 06:05 wcp.cfg
root@Pod-240-vCenter [ /var/tmp/vmware ]# cd pod-230-nsxt-lm1pod-230-nsxt-lm1
bash: cd: pod-230-nsxt-lm1pod-230-nsxt-lm1: No such file or directory
root@Pod-240-vCenter [ /var/tmp/vmware ]# cd pod-230-nsxt-lm1
root@Pod-240-vCenter [ /var/tmp/vmware/pod-230-nsxt-lm1 ]# ls -l
total 8
-rw-r--r-- 1 root root 1166 Aug 16 06:05 vmca_issued_csr.csr
-rw-r--r-- 1 root root 1703 Aug 16 06:05 vmca_issued_key.key
root@Pod-240-vCenter [ /var/tmp/vmware/pod-230-nsxt-lm1 ]#
You now need to transfer the CSRs to your Computer in order to import them the proper way to NSX-T. I am using WinSCP for file transfers.
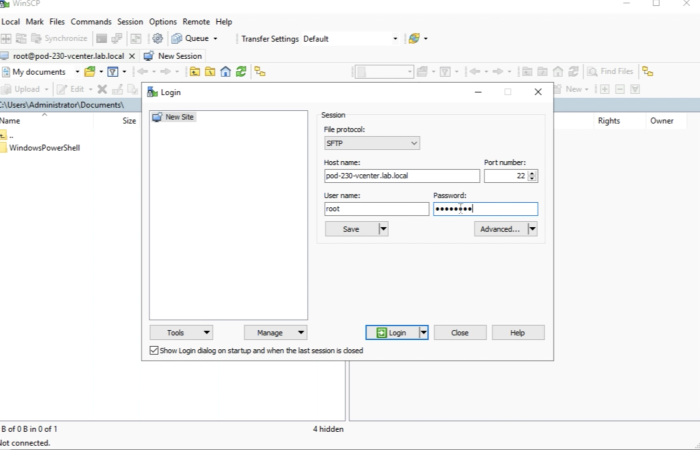
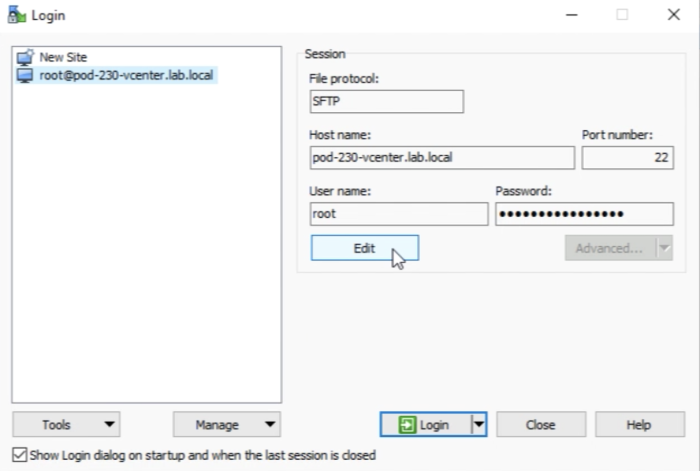
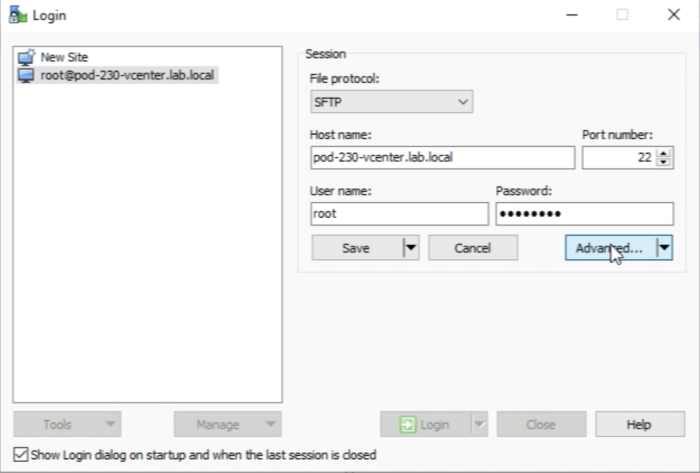
Before we can log in to the vCenter Server with WinSCP we first need to edit a few advanced settings in WinSCP.
Go to the Advanced settings of this session you just saved.
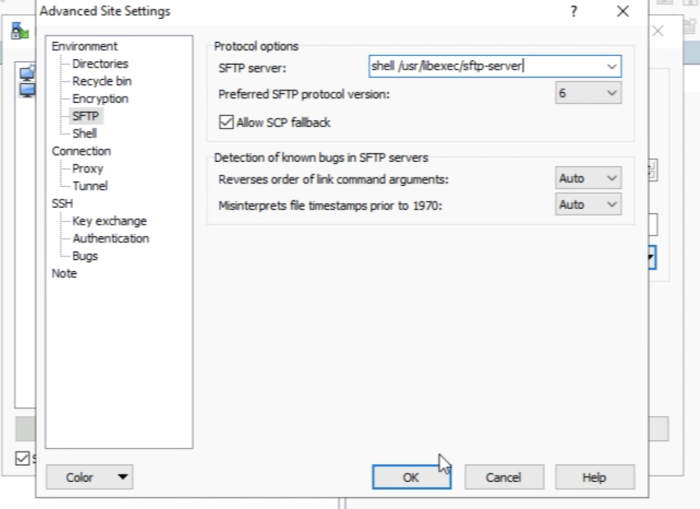
Select “SFTP” in the Environment menu tree. And populate the “SFTP server” field with "shell _usr_libexec/sftp-server Click on “OK”
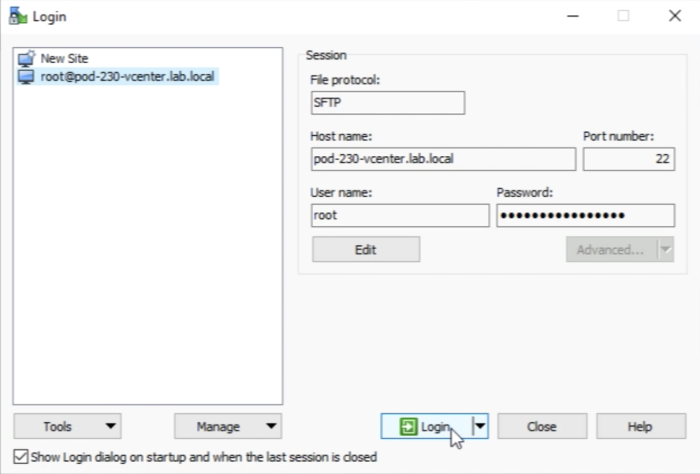
Click on “Login”.
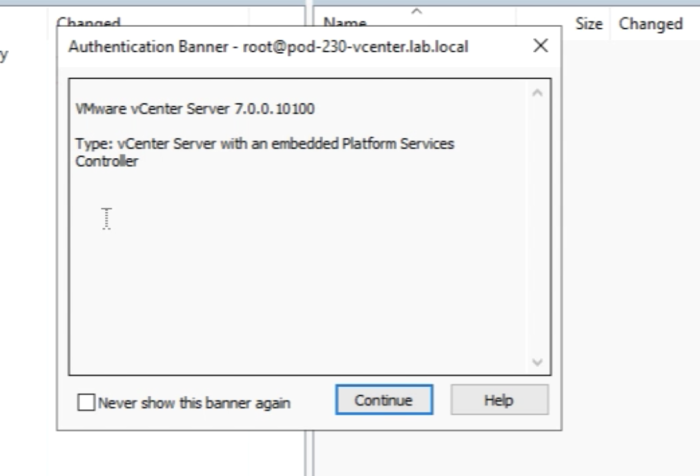
You will get a message and you can click on "continue".
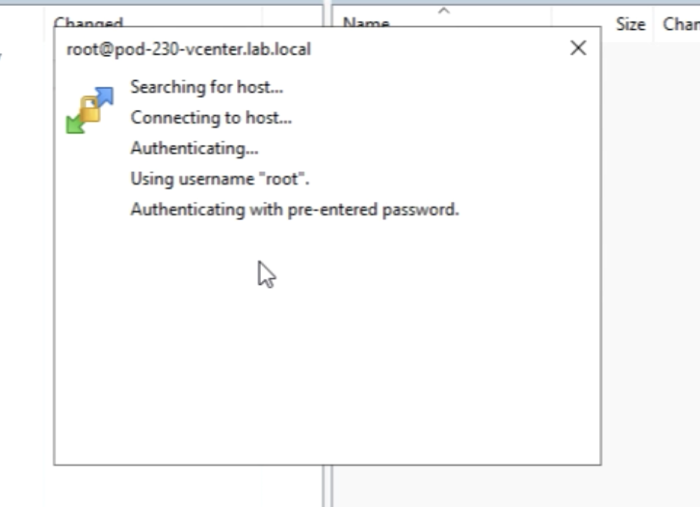
You are authenticated.
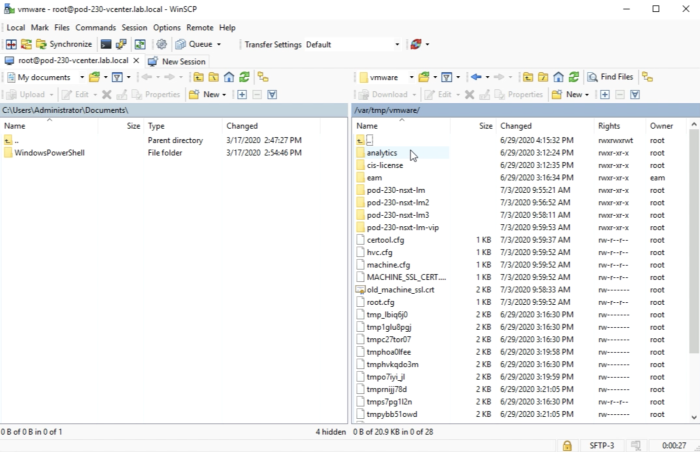
And you are in …
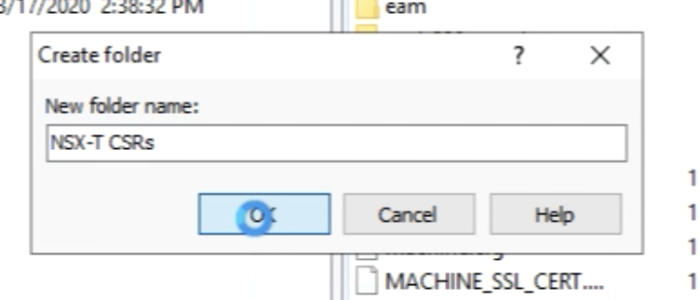
Now to keep things Clean on my computer I am going to create a separate directory for the CSRs I am going to transfer from the vCenter Server to my computer.
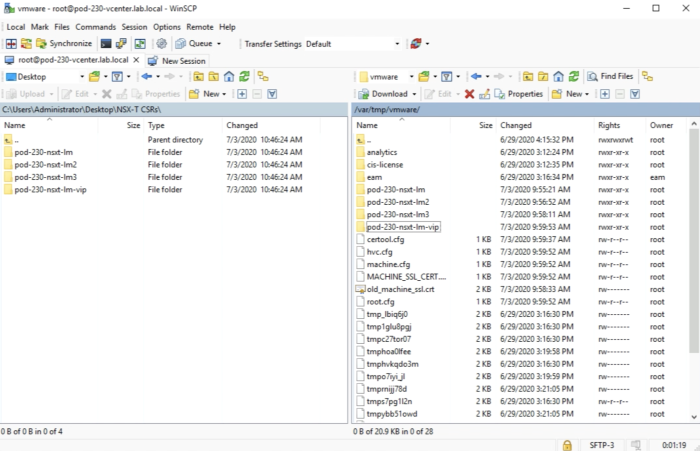
After the fire transfer is done it should look like this inside WinSCP.
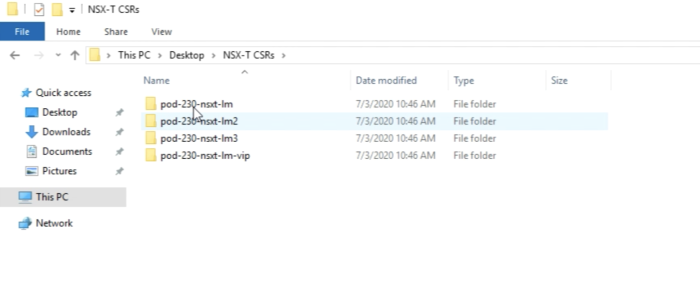
After the fire transfer is done it should look like this inside your computer.
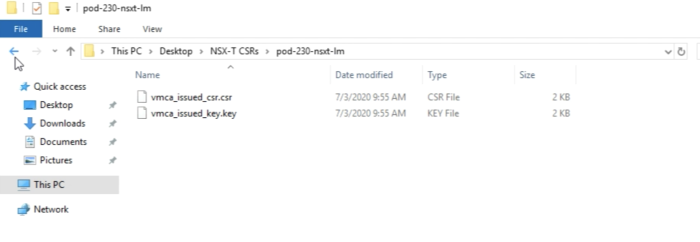
Now you can verify if all the required files are there. You should see the following files inside each directory.
STEP 5» Signing the generated CSRs with the Microsoft Root Certificate Authority 〈CA〉
Now you are ready to sign the CSRs with your brand new Microsoft CA Server.
Browse to the website:
https://localhost/certsrv
Do this on your CA Server.
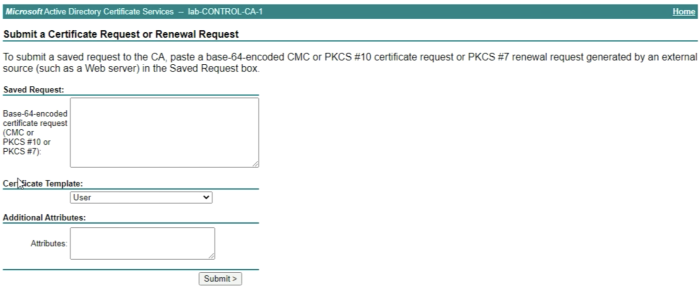
Click on Submit an“advanced certificate request".
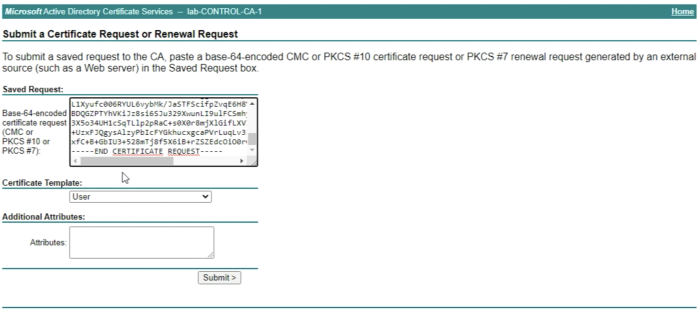
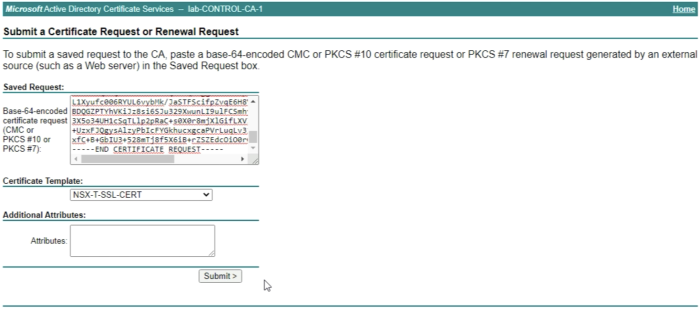
In the “Saved Request” field we need to copy the content of the CSR that we generated on the vCenter Server inside this textbox.
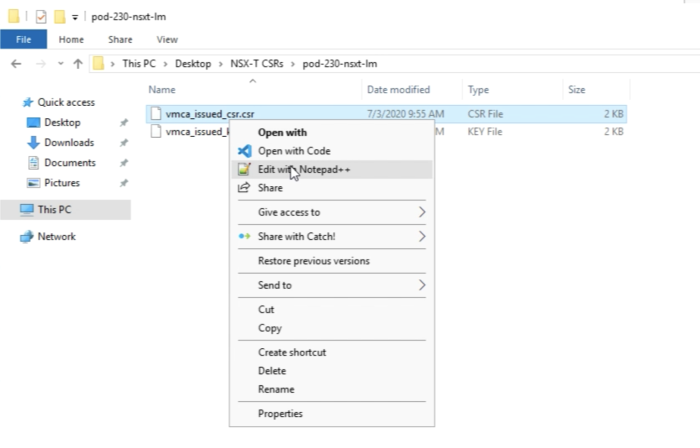
Make sure you open the .csr file in a text editor.
This is the signing for the first FQDN: pod-230-nsxt-lm1, but the other CSR signing will be done using the same process.
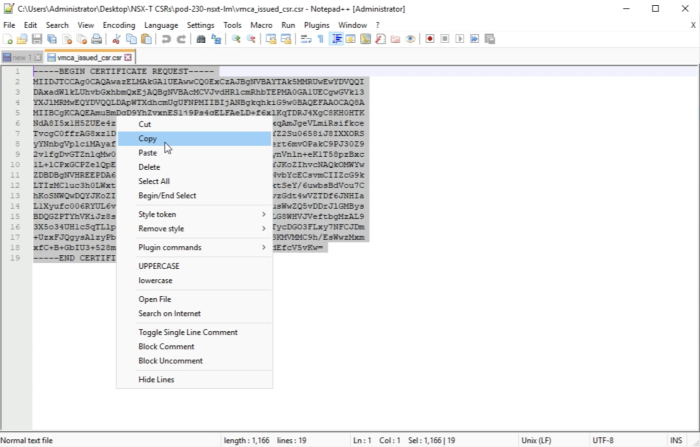
'Copy the content of the .csr file
Paste the content of the .csr file in the textbox.
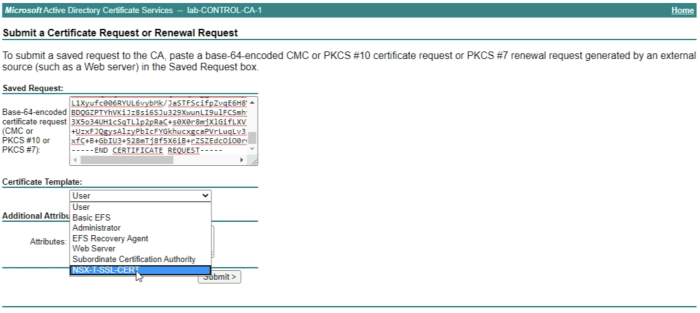
Select the Certificate Template you created in a previous step, NSX-T-SSL-CERT.
And click on “Next”.
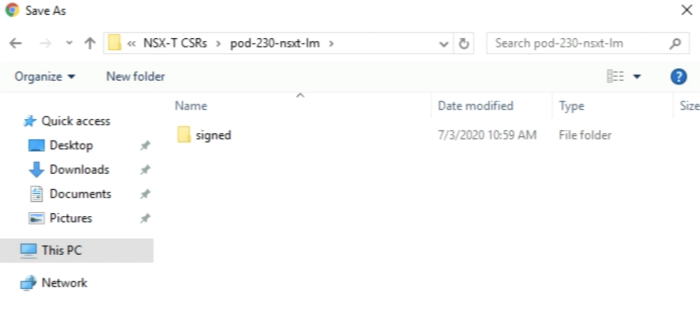
I have created a separate folder to download the "signed" certificates to on the computer, to use for the import later on the NSX-T Manager Nodes.
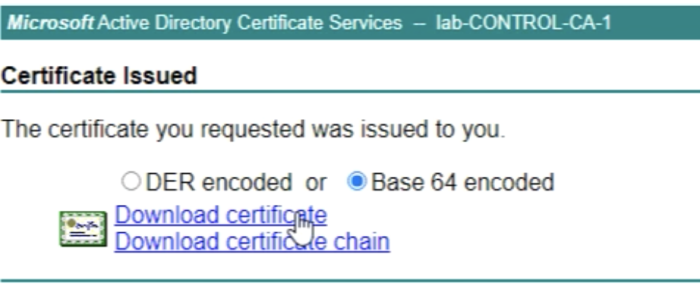
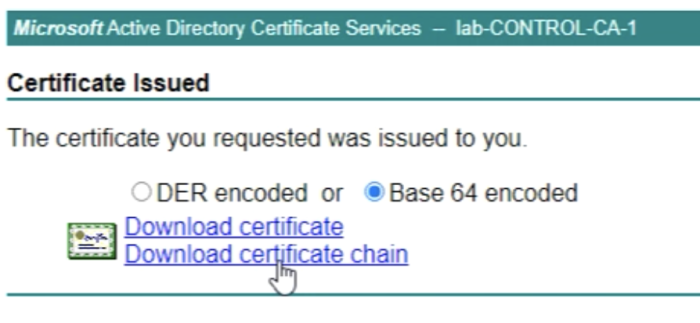
When you clicked on “Submit” you will be able to "Download the certificate" and you need to do this in the “Base 64 encoded” format.
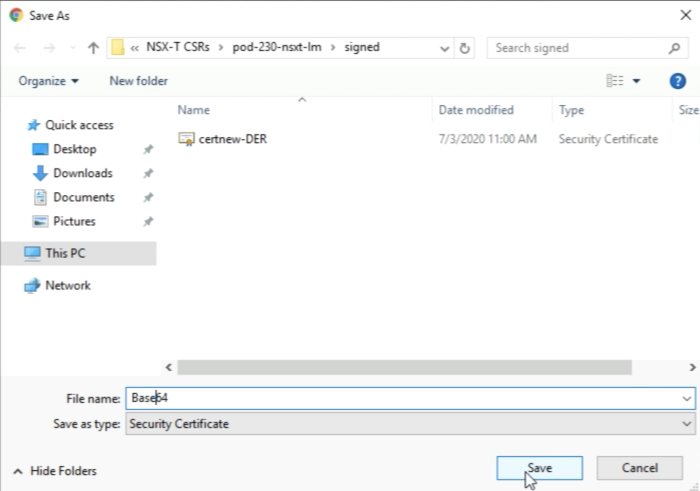
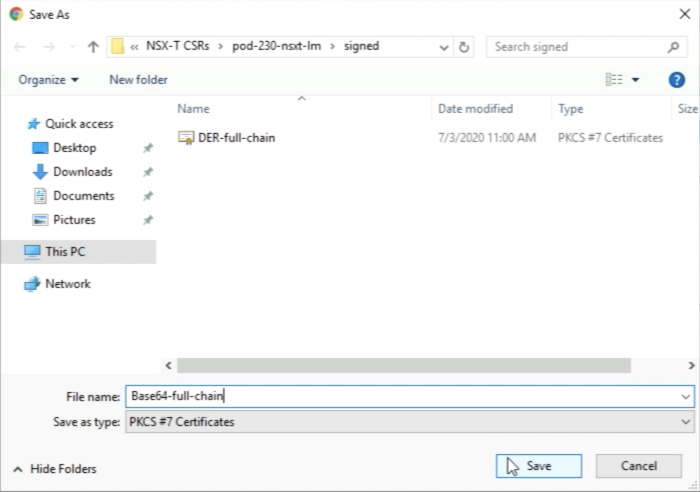
Give your certificate a name and save this in the right directory.
Also save the “certificate chain" by downloading it in the "Base 64 encoded" format.
Give your certificate a name and save this in the right directory.
When you are finished with the first FQDN you can click on home.
Now you can restart the process again for the remaining FQDN CSRs.
You can do a verification when you open the Certificate Authority Management Console.
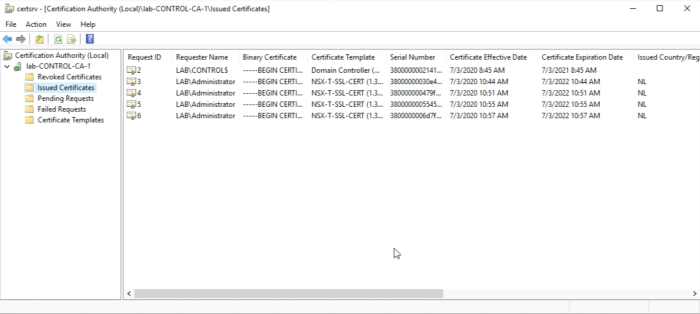
Select the “Issued Certificates" on the right menu to verify all your signed certificates.
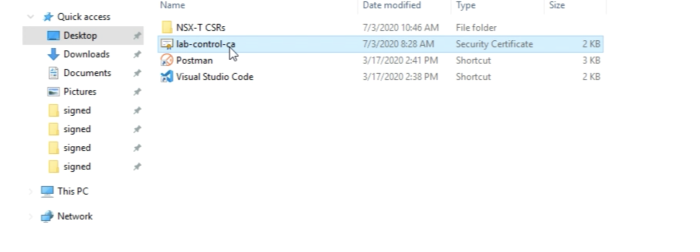
A good practice is to look up the "root" certificate on your computer.
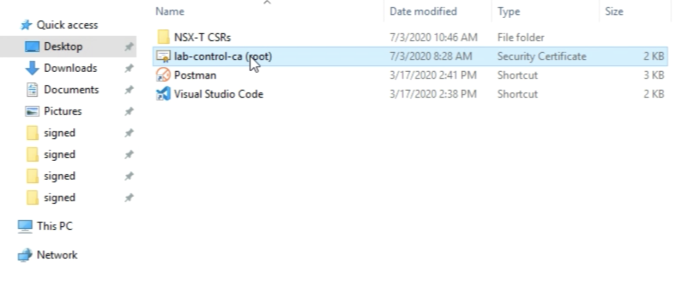
And rename it so it is clear that this is the "root" CA Certificate.
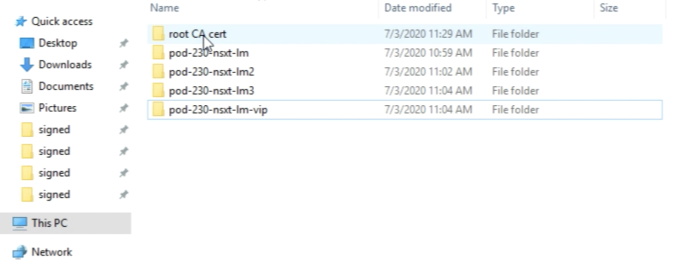
Also, create a separate folder for the root certificate and place the root certificate in there.
At this point, you should have a clean folder structure with all your CSRs, the signed CSRs, and the Root Certificate of your Certificate Authority.
STEP 6» Import the CA–signed certificates into the NSX–T Manager Nodes
You can import all certificates by browsing to the VIP FQDN of your NSX-T Manager Cluster. In my case this is
https://pod-230-nsxt-lm-vip.lab.local
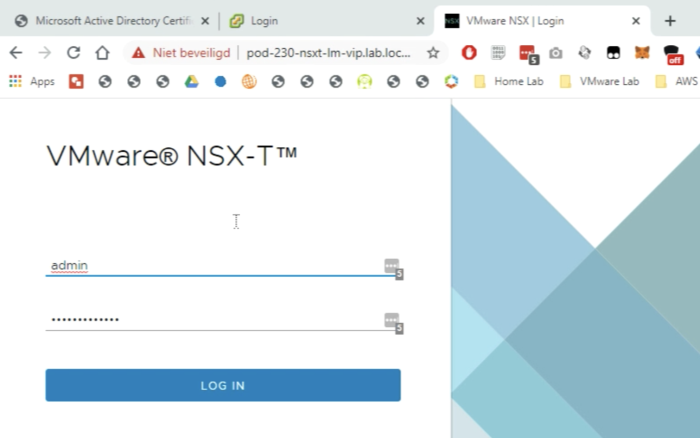
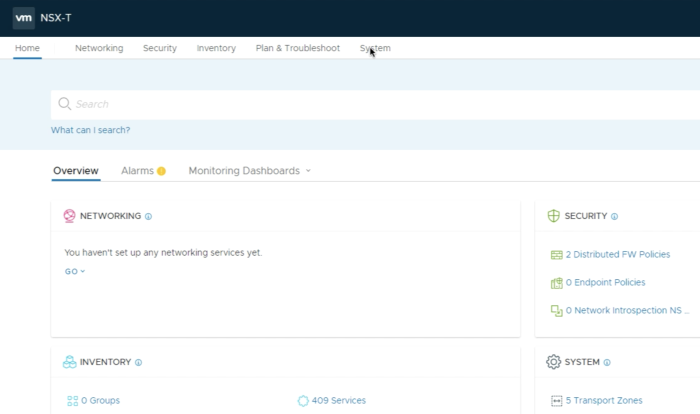
Log in to the NSX-T Manager.
Browse to “System”.
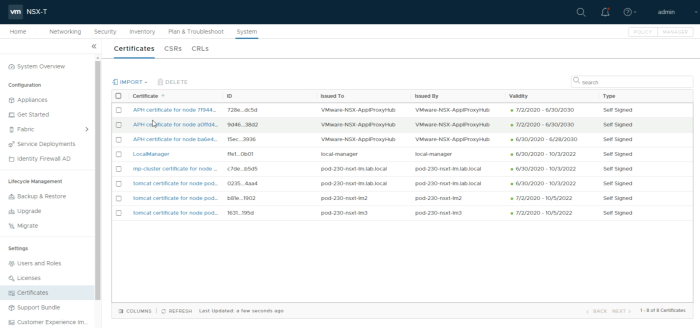
Go to Settings => Certificates.
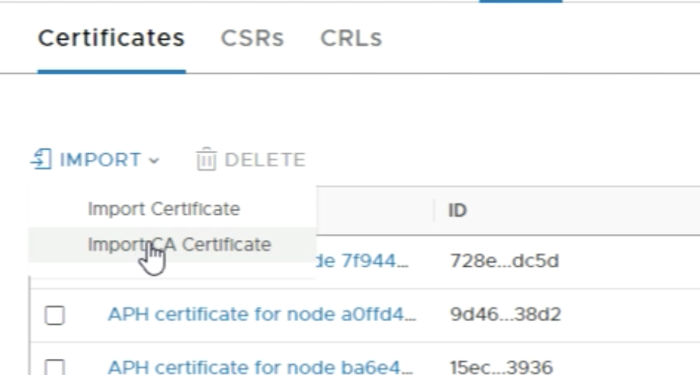
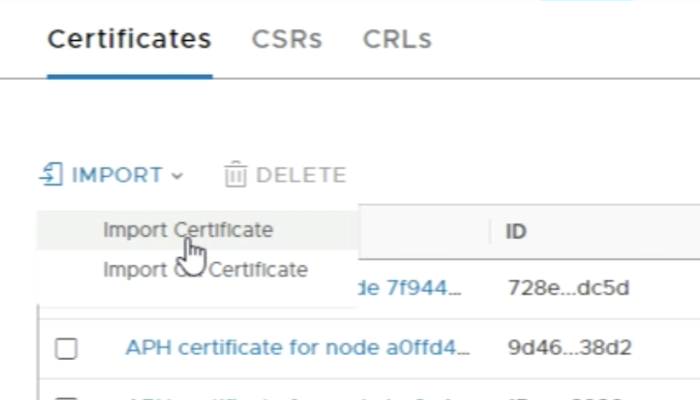
First you need to import the root certificate of out Microsoft Certificate Authority Server.
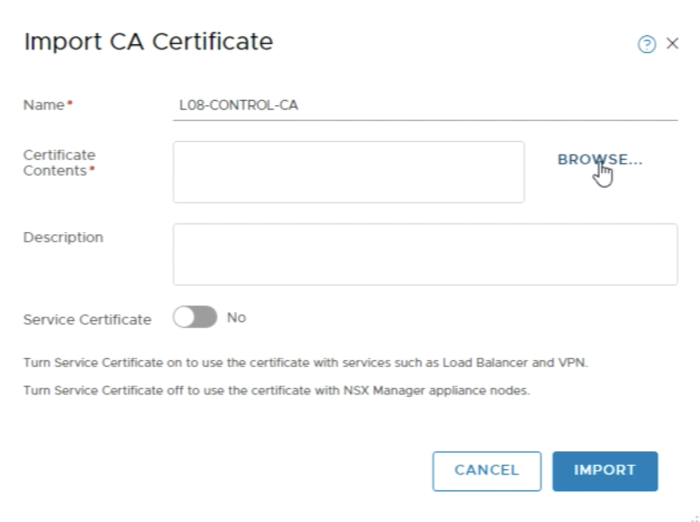
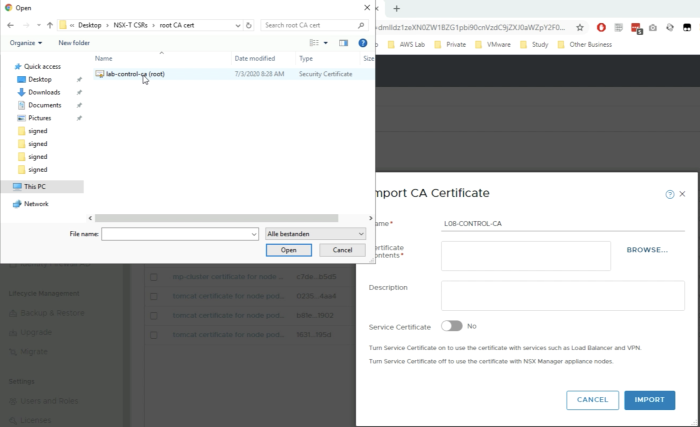
You can import the root certificate using the browse button.
And you select the root certificate file.
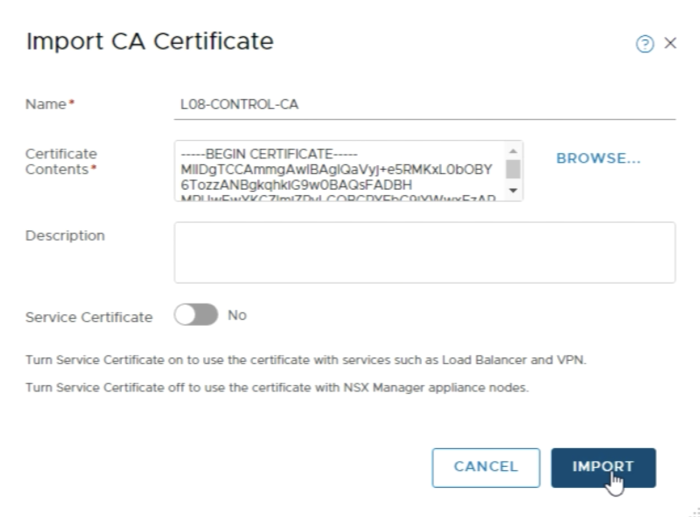
Make sure the “Service Certificate" is set to "No". And click “Import”.
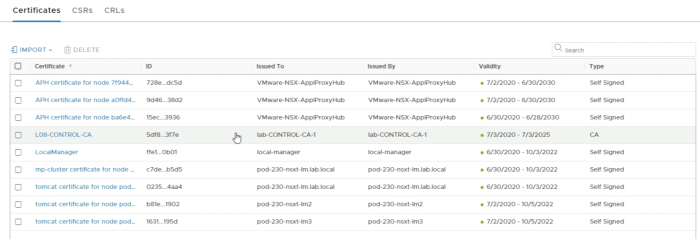
In the overview, you see that the CA certificate is now imported.
Now we are going to import the FQDN signed Certificates.
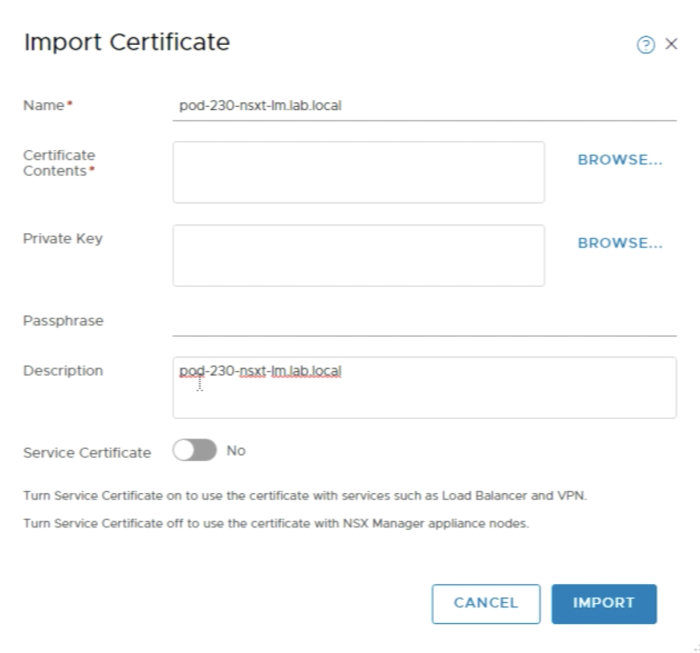
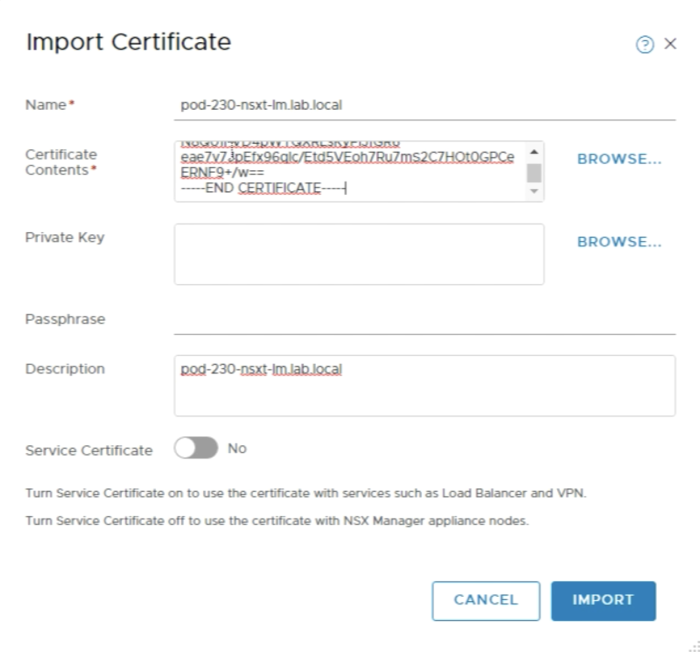
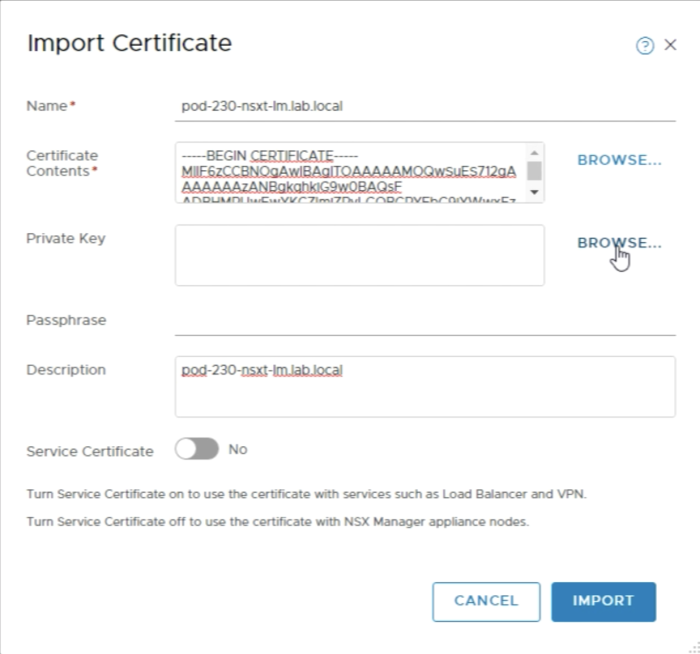
Specify the “name”. I used the first part of the full FQDN. Also, type in the same name in the description field,. This is optional. Make sure the “Service Certificate" is set to "No".
The certificate Contents need to be imported using the full chain. So we start with the Signed Certificate and we end with the Root Certificate.
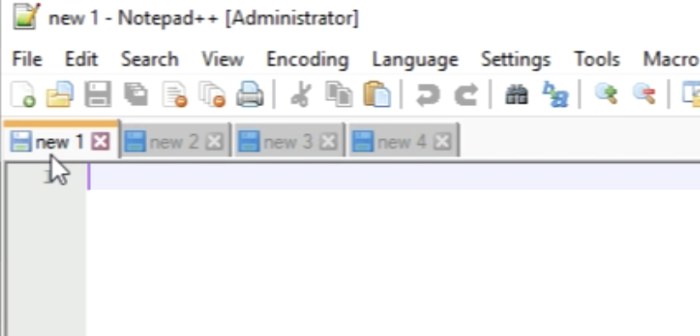
The best way is to open a blank notepad for all signed certificates.
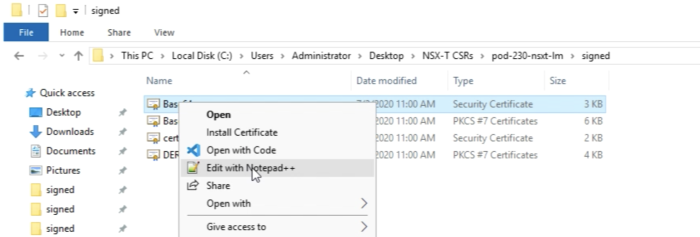
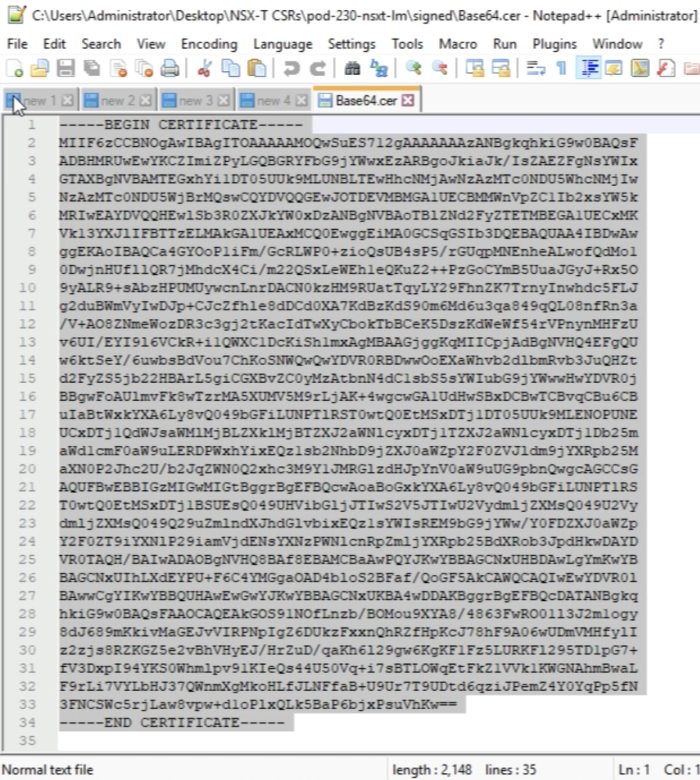
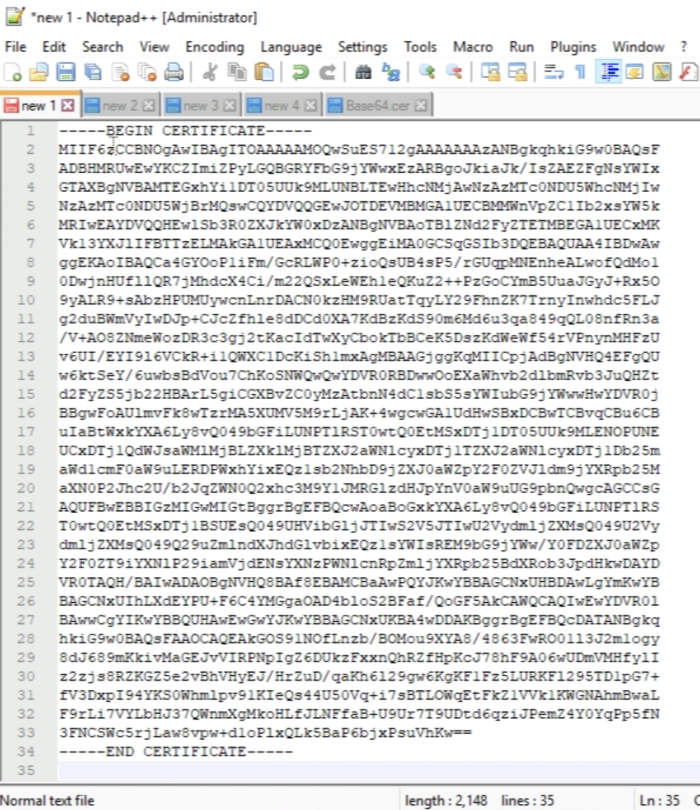
Open the Base64 Certificate with Notepad++.
'Copy the output of the Certificate.
Paste the Certificate into a blank text file.
Open the root certificate into Notepad++.
'Copy the content of the root certificate.
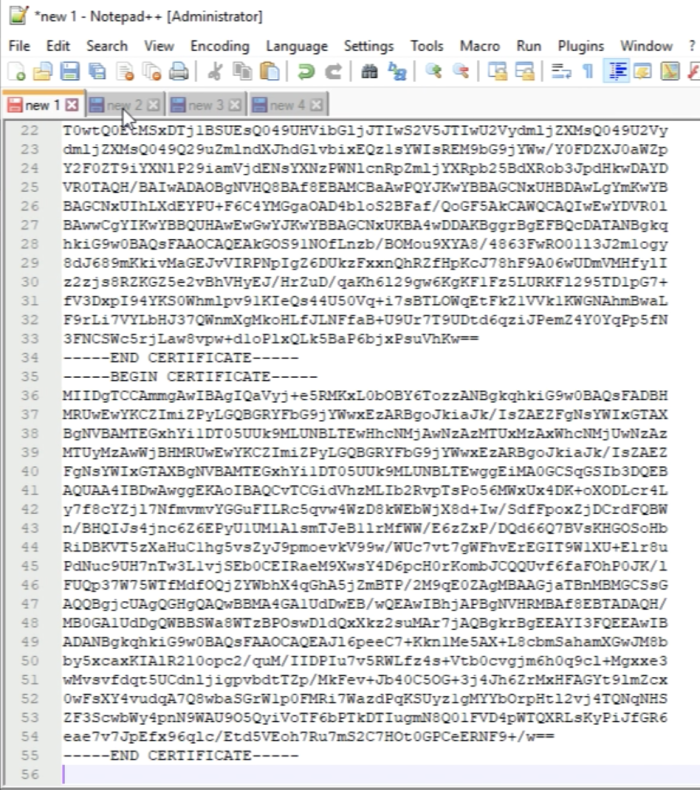
And paste this behind the content of the signed FQDN Certificate.
The order of the certificates is important as you need BOTH certificates imported for the FQDN certificate imports.
—–BEGIN CERTIFICATE—–
NSX-T FQDN Node Certificate
—–END CERTIFICATE—–
—–BEGIN CERTIFICATE—–
CA Root Certificate
—–END CERTIFICATE—–
If you have a subordinate CA:
—–BEGIN CERTIFICATE—–
NSX-T FQDN Node Certificate
—–END CERTIFICATE—–
—–BEGIN CERTIFICATE—–
Subordinate CA Certificate
—–END CERTIFICATE—–
—–BEGIN CERTIFICATE—–
CA Root Certificate
—–END CERTIFICATE—–
An example of this is given in the figure below.
Paste in the content of the signed certificate including the root certificate into the Certificate Contents field.
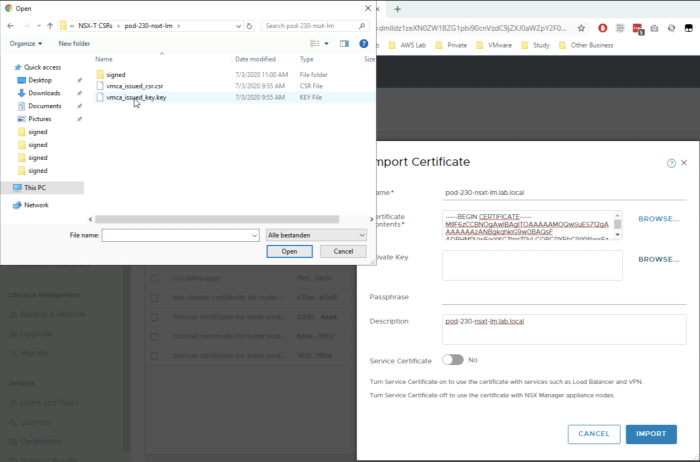
Click browse to import the “Private Key" that belongs to the signed certificate file.
Select the .key file.
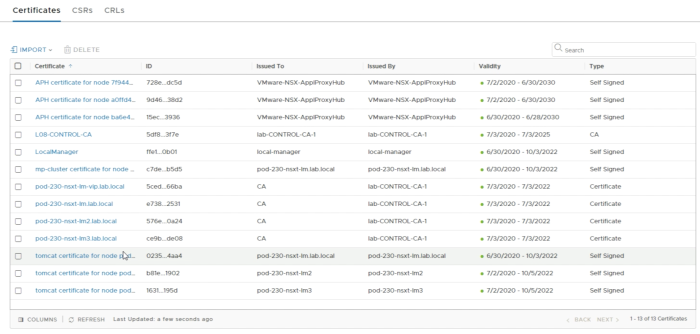
Make sure you repeat this with all FQDNs so it will be easy to paste the content in the “Certificate Contents” field for the import of the remaining FQDNs. Eventually, you will have all the signed certificates imported for all FQDNs.
Now all the signed certificates for all FQDNs and the Root Certificate should be imported.
STEP 7» Activate uploaded CA–signed certificates with REST API calls
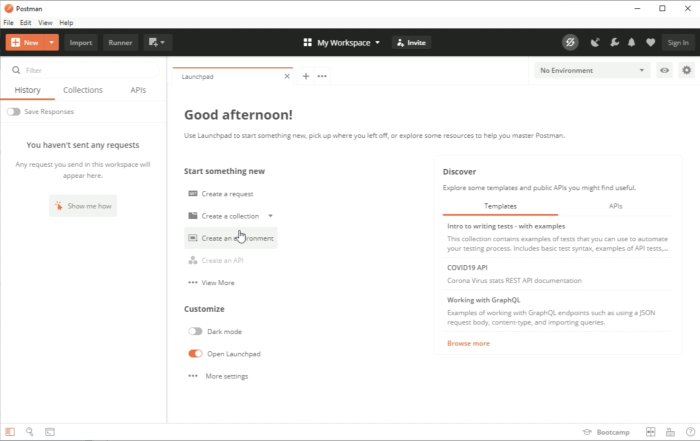
In order to “activate” the uploaded certificates, you need to do this with REST API calls. I used the Postman application to do this.
My good friend Rutger Blom has written a very good blog article using PostMan with NSX-T here.
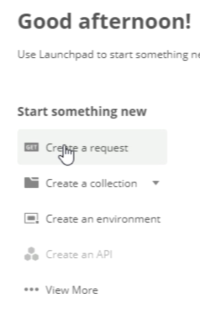
In order to start, we need to create a new request.
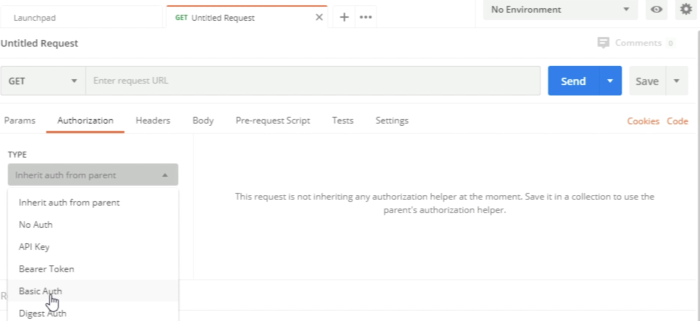
Configure the authorization by choosing "Basic Auth".
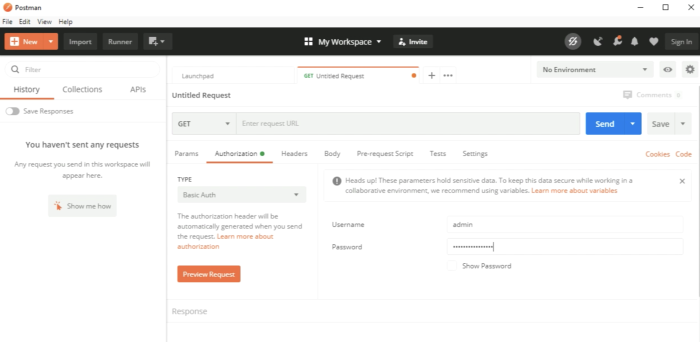
Type in the NSX-T credentials.
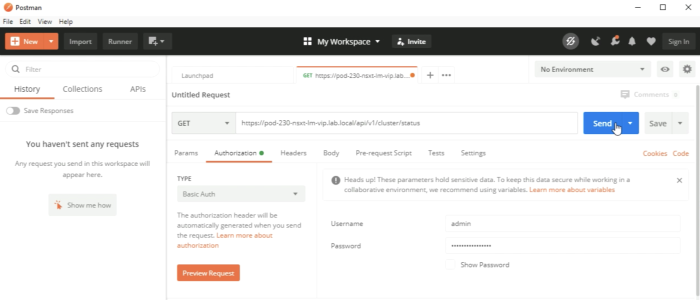
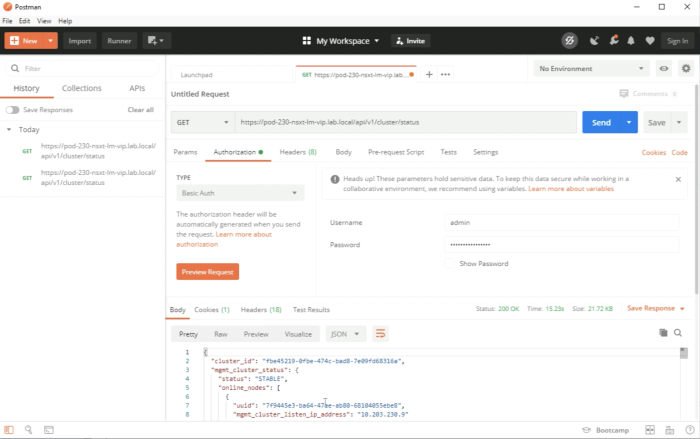
In order to juicily test if the REST API calls are working properly I used the following call:
'GET
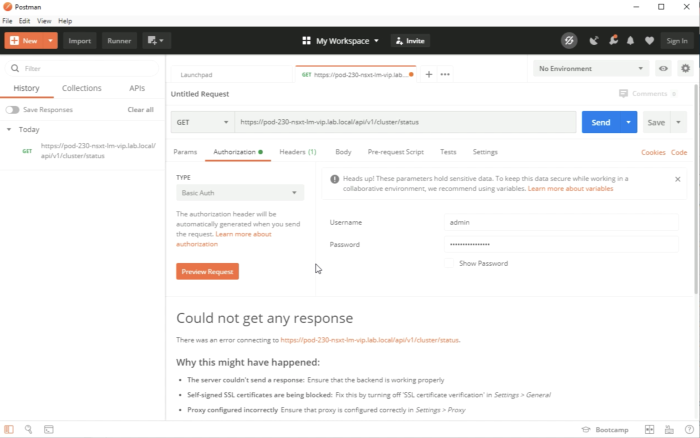
https://pod-230-nsxt-lm-vip>/api/v1/cluster/status
We can see that the GET request wat not successful and it gives you a hint that the SSL certificates are being blocked.
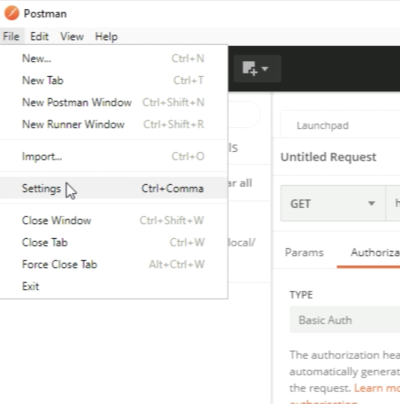
Go to File and select Settings in the menu of the Postman application.
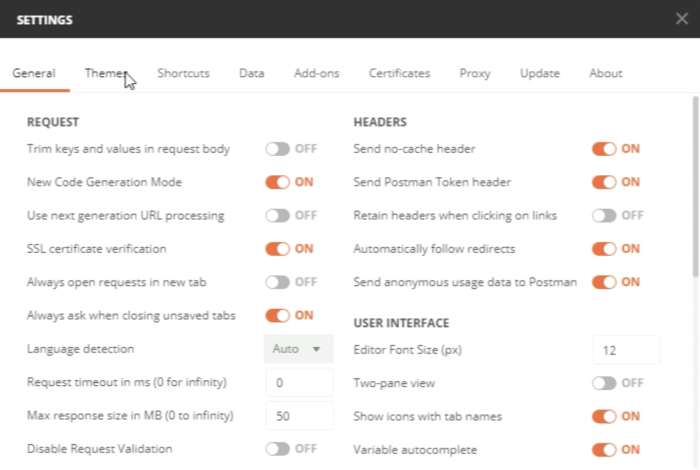
You can see that by default the "SSL certificate verification" is set to "ON".
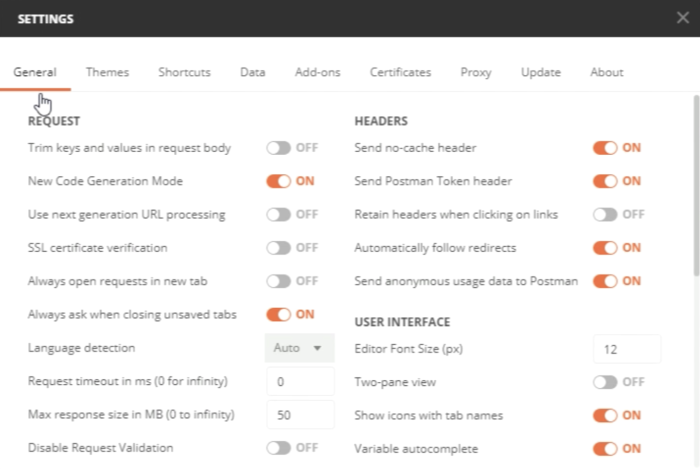
Make sure the "SSL certificate verification" is set to "OFF".
Now when we execute out test REST API call again we can see a STATUS: 200 OK, and some JSON code with information about the NSX-T Cluster.
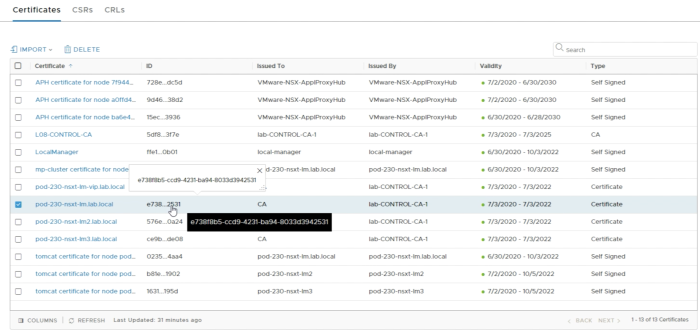
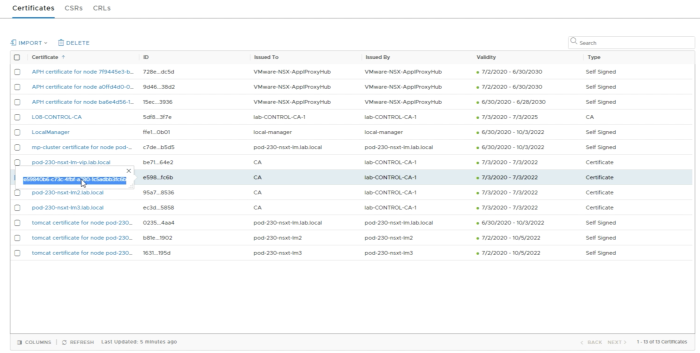
In order to “activate” the new certificates, we need to collect the certificate ID’s from the GUI as these are required to refer to the certificates during the activation process.
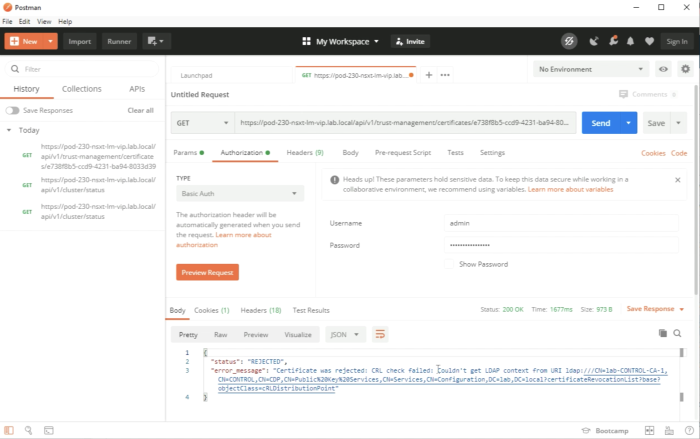
Before we are going to do the actual activation we are going to test the quality of the certificate first. We do this by executing the following REST API call:
'GET
https://pod-230-nsxt-lmX/api/v1/trust-management/certificates/<certificate-id>?action=validate
An example of this is given in the figure below. You can see that you will get an error.
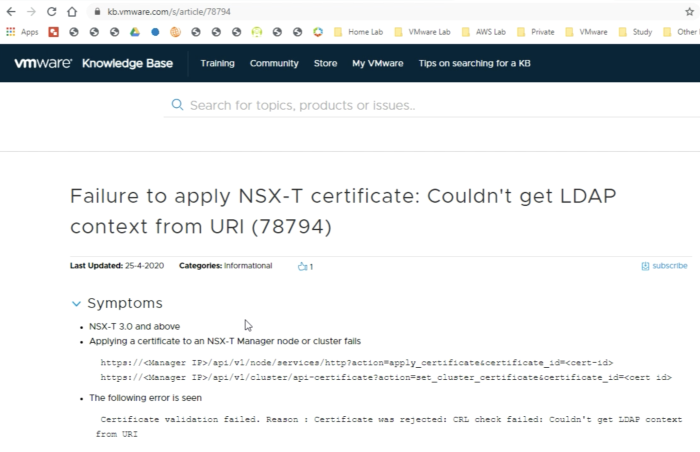
NSX-T 3.0 added Certificate Revocation List (CRL) checking when applying a certificate to a Manager node/cluster. If the CRL check cannot be performed, the certificate cannot be applied to a Manager node or cluster.
You can turn this off by following the content of this VMware KB (78794).
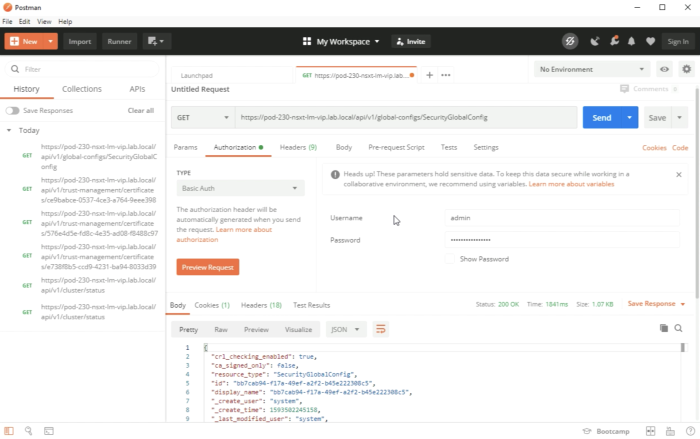
First, we need to execute the following TEST API call to get the existing configuration setting around the CRL checking.
'GET
https://pod-230-nsxt-lm-vip>/api/v1/global-configs/SecurityGlobalConfig
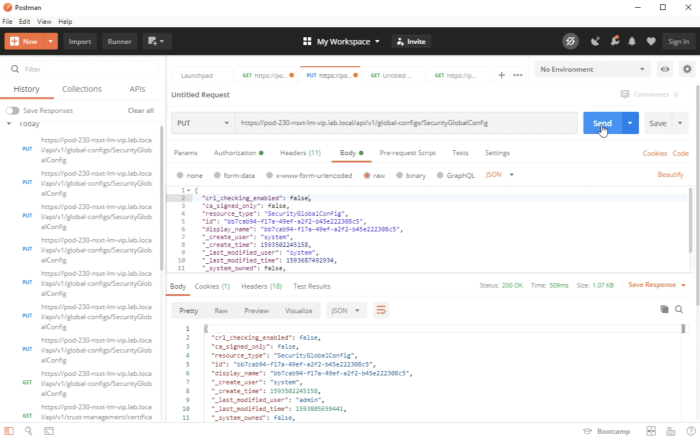
When you take the JSON config and change the following line:
crl_checking_enabled” : true,
To
crl_checking_enabled” : false,
Make sure you use the full JSON code output and only change "true" to "false”.
Execute the REST API call.
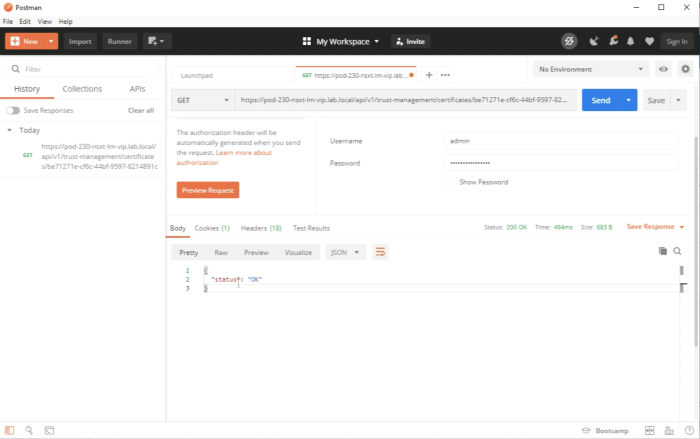
Restart the validation of the Certificate again.
You should get a “status” : “OK" back from the call and a Status: 200 OK.
Repeat this process for all certificates for all FQDNs.
Now that all the certificates are validated and are "OK" we can start the process of the actual activation of these certificates. We do this with the following REST API calls:
| FQDN | Action | API call | NSX-T Manager node | Certificate ID |
|---|---|---|---|---|
| pod-230-nsxt-lm1.lab.local | POST | https://pod-230-nsxt-lm1/api/v1/node/services/http?action=apply_certificate&certificate_id=<certificate-id> |
pod-230-nsxt-lm1 | Get from NSX-T GUI |
| pod-230-nsxt-lm2.lab.local | POST | https://pod-230-nsxt-lm2/api/v1/node/services/http?action=apply_certificate&certificate_id=<certificate-id> |
pod-230-nsxt-lm2 | Get from NSX-T GUI |
| pod-230-nsxt-lm3.lab.local | POST | https://pod-230-nsxt-lm3/api/v1/node/services/http?action=apply_certificate&certificate_id=<certificate-id> |
pod-230-nsxt-lm3 | Get from NSX-T GUI |
| pod-230-nsxt-lm-vip.lab.local | POST | https://pod-230-nsxt-lm-vip/api/v1/cluster/api-certificate?action=set_cluster_certificate&certificate_id=<certificate-id |
pod-230-nsxt-lm-vip | Get from NSX-T GUI |
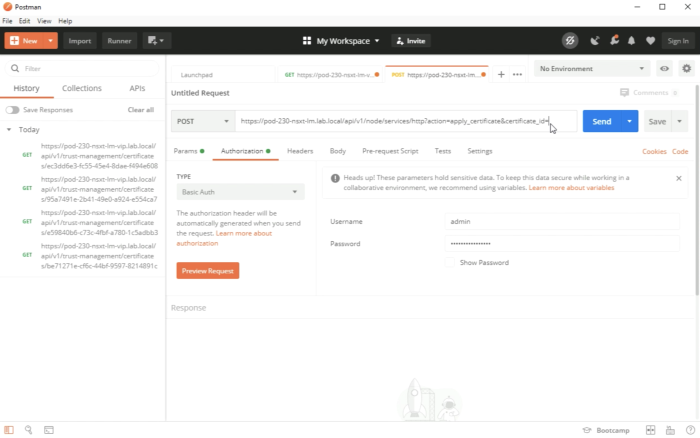
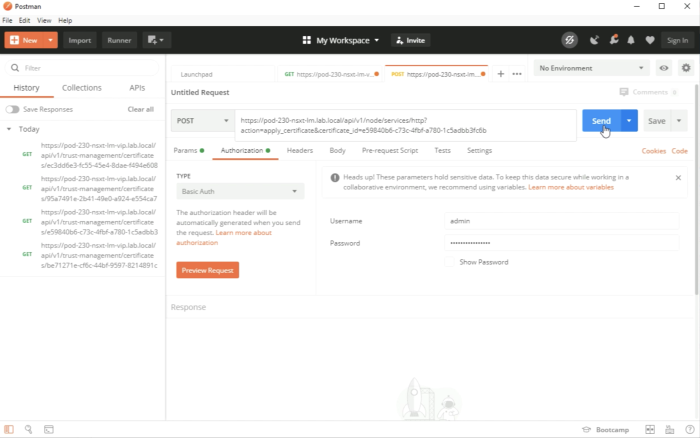
An example of the first manager is shown in the figure below.
Make sure you 'copy the certificate ID that is retrieved fomr the NSX-T GUI.
Complete the full REST API URL and click on Send.
Repeat this process for all certificates for all FQDNs, except for the VIP FQDN.
Make sure you use the corresponding FQDN of the NSX-T Manager is used in the REST API call for what the certificate is activated for.
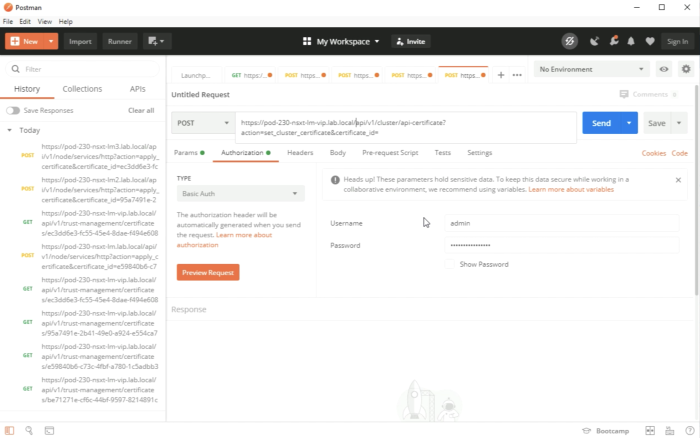
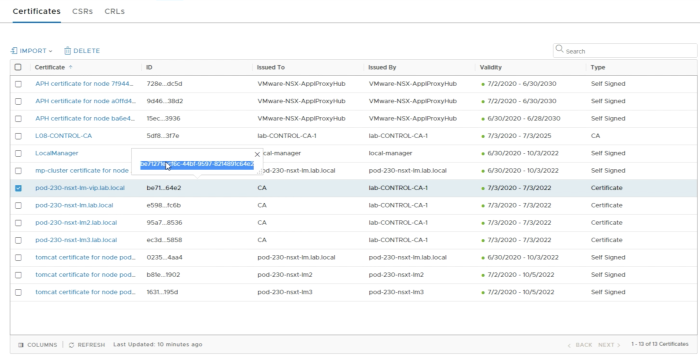
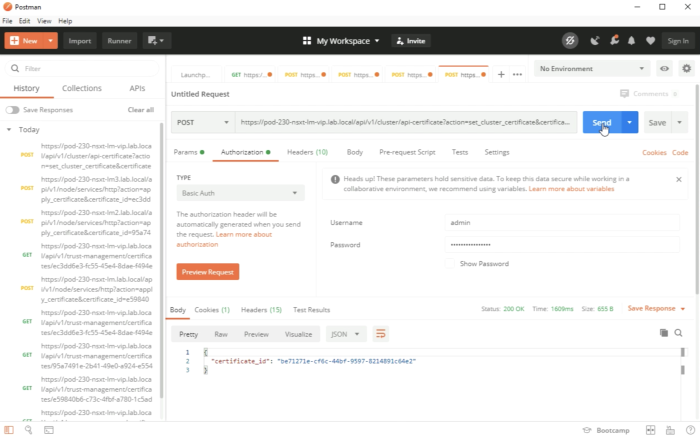
For the VIP cert, the REST API call is a little bit different like I mentioned in the table above. An example of this is given in the figure below.
Make sure you 'copy the Certificate ID from the NSX-T GUI for the VIP FQDN.
Execute the REST API call.
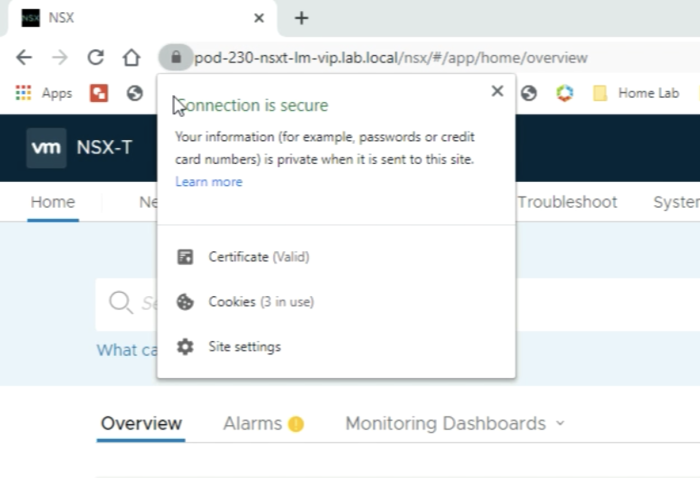
Now that the certificates are all activated you can use a browser to browse to the URL using the FQDN that was used the CSR. Notice age little lock in front of the URL.
When you click on the lock you can see the message that the connection is secure and that the certificate is valid for the VIP FQDN.
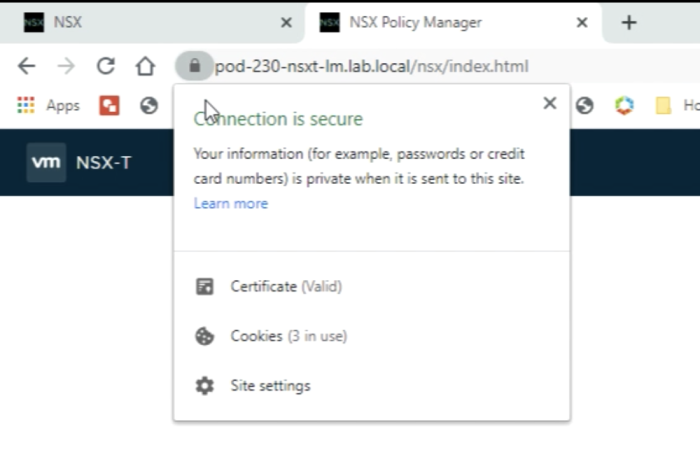
You will get the same result when you go to the URL of one of the NSX-T Manager nodes directly.
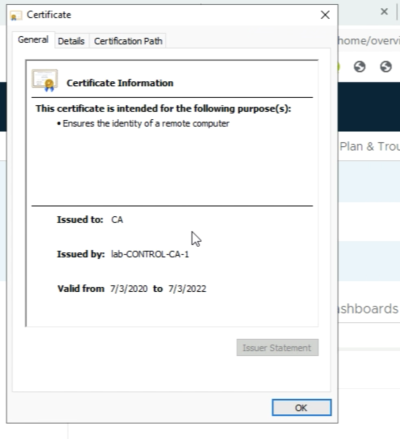
When you click on the Certificate you can look at other certificate details in the General Tab where you can see the Root CA that signed the certificate.
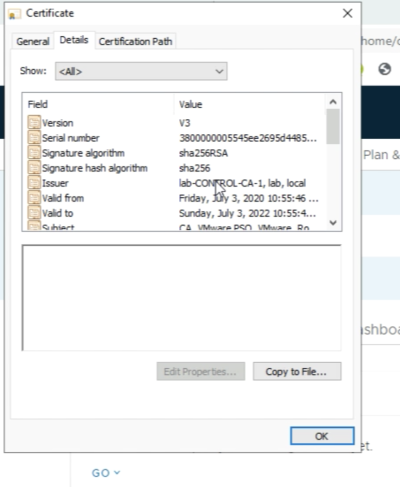
When you click on the “Details" tab you can see more details about the certificate.
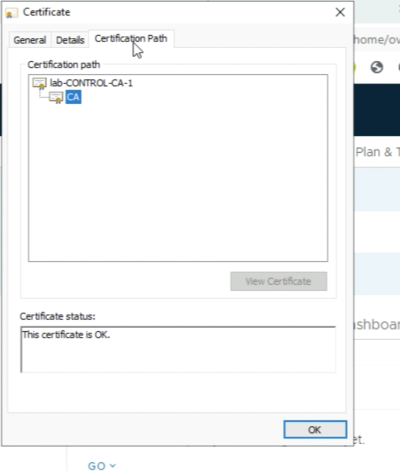
And finally, you can view the "Certification Path" by going to the "Certification Path” tab.
You have reached the end of this article, and I know it was a long one, but I hope you have learned something so that you can replicate this in your test of the production environment.
OPTIONAL» Use one single signed certificate for all NSX-T FQDNs - including the VIP
In the steps above I have shown you how to generate CSRs for all separate FQDNs of all separate NSX-T Manager Nodes and the NSX-T VIP address.
One of my US-based colleagues (Michael (Cobi) Fye) asked me the question if he could also use ONE SINGLE CSR only with all the Subject Alternative Names (SANs) and get this CSR signed by the (root) Certificate Authority (CA) and use this single-signed Certificate for all of the Manager Nodes including the NSX-T VIP address.
I did not test this, but fortunately, he did. The steps are summarized below that Michael did:
- Generate the CSR (only using Subject Alternative Names)(with OpenSSL
- The output is provided in an example below
- Get the CSR signed by the (root) Certificate Authority (CA)
- Import the (root) Certificate into the NSX-T Manager(s)
- Import the CA-signed certificates into the NSX-T Manager Nodes
- Like I am doing in Step 6
- Activate uploaded CA-signed certificates with REST API calls
- Like I am doing in Step 7
- Only now you are only using one single certificate with the same Certificate ID using 4 different API calls (3 x for the NSX-T Manager Nodes, and 1 x for the VIP address)
After performing these steps Michael confirmed this was working. Below you will see the request Michael used to generate the CSR for this single-cert-solution.
Using OpenSSL to generate a single CSR
The commands used to generate the CSR using OpenSSL:
set remotehost=pod-230-nsxt-lm-vip
cd x:\certs\%remotehost%
openssl req -new -nodes -out %remotehost%.csr -keyout %remotehost%-orig.key -config %remotehost%.cfg
openssl rsa -in %remotehost%-orig.key -out %remotehost%.key
The config file that was used to generate the CSR using OpenSSL:
[ req ]
default_bits = 2048
default_keyfile = rui.key
distinguished_name = req_distinguished_name
encrypt_key = no
prompt = no
string_mask = nombstr
req_extensions = v3_req
[ v3_req ]
basicConstraints = CA:TRUE
keyUsage = digitalSignature, keyEncipherment, dataEncipherment
extendedKeyUsage = serverAuth, clientAuth
subjectAltName = DNS:pod-230-nsxt-lm-vip, DNS:pod-230-nsxt-lm-vip.lab.local, DNS:pod-230-nsxt-lm1, DNS:pod-230-nsxt-lm1.lab.local, DNS:pod-230-nsxt-lm2, DNS:pod-230-nsxt-lm2.lab.local, DNS:pod-230-nsxt-lm3, DNS:pod-230-nsxt-lm3.lab.local
[ req_distinguished_name ]
countryName = NL
stateOrProvinceName = Zuid Holland
localityName = Washington
0.organizationName = CA
organizationalUnitName = VMware PSO
commonName = pod-230-nsxt-lm-vip.lab.local
The verification when the CSR was imported into the Certificate Authority for signing:
I have used my own values in order to reflect the same parameters that I used in this article, just to keep everything in line and easier to understand.
CSR Information:
Common Name: pod-230-nsxt-lm-vip.lab.local
Subject Alternative Names: pod-230-nsxt-lm-vip, pod-230-nsxt-lm-vip.lab.local, pod-230-nsxt-lm1, pod-230-nsxt-lm1.lab.local, pod-230-nsxt-lm2, pod-230-nsxt-lm2.lab.local, pod-230-nsxt-lm3, pod-230-nsxt-lm3.lab.local
Organization: CA
Organization Unit: VMware PSO
Locality: Washington
State: Zuid Holland
Country: NL
YouTube Video
In the video below I will show you how to perform all the steps to replace your self-signed certificates for CA-signed certificates taking the same steps described in this wiki article.
Technical Reviews
This article was technically reviewed by the following SME's:
| Name | LinkedIn Profile |
|---|---|
| Bode Fatona | Link |
I am always trying to improve the quality of my articles so if you see any errors, mistakes in this article or you have suggestions for improvement, please contact me and I will fix this.
